Mastering the Powerplay: The Aggressive Field Setting Play
Learn how to dictate terms during the crucial first 6 overs with an attacking field that creates pressure and forces early breakthroughs.

Equipment Needed
1. Overview
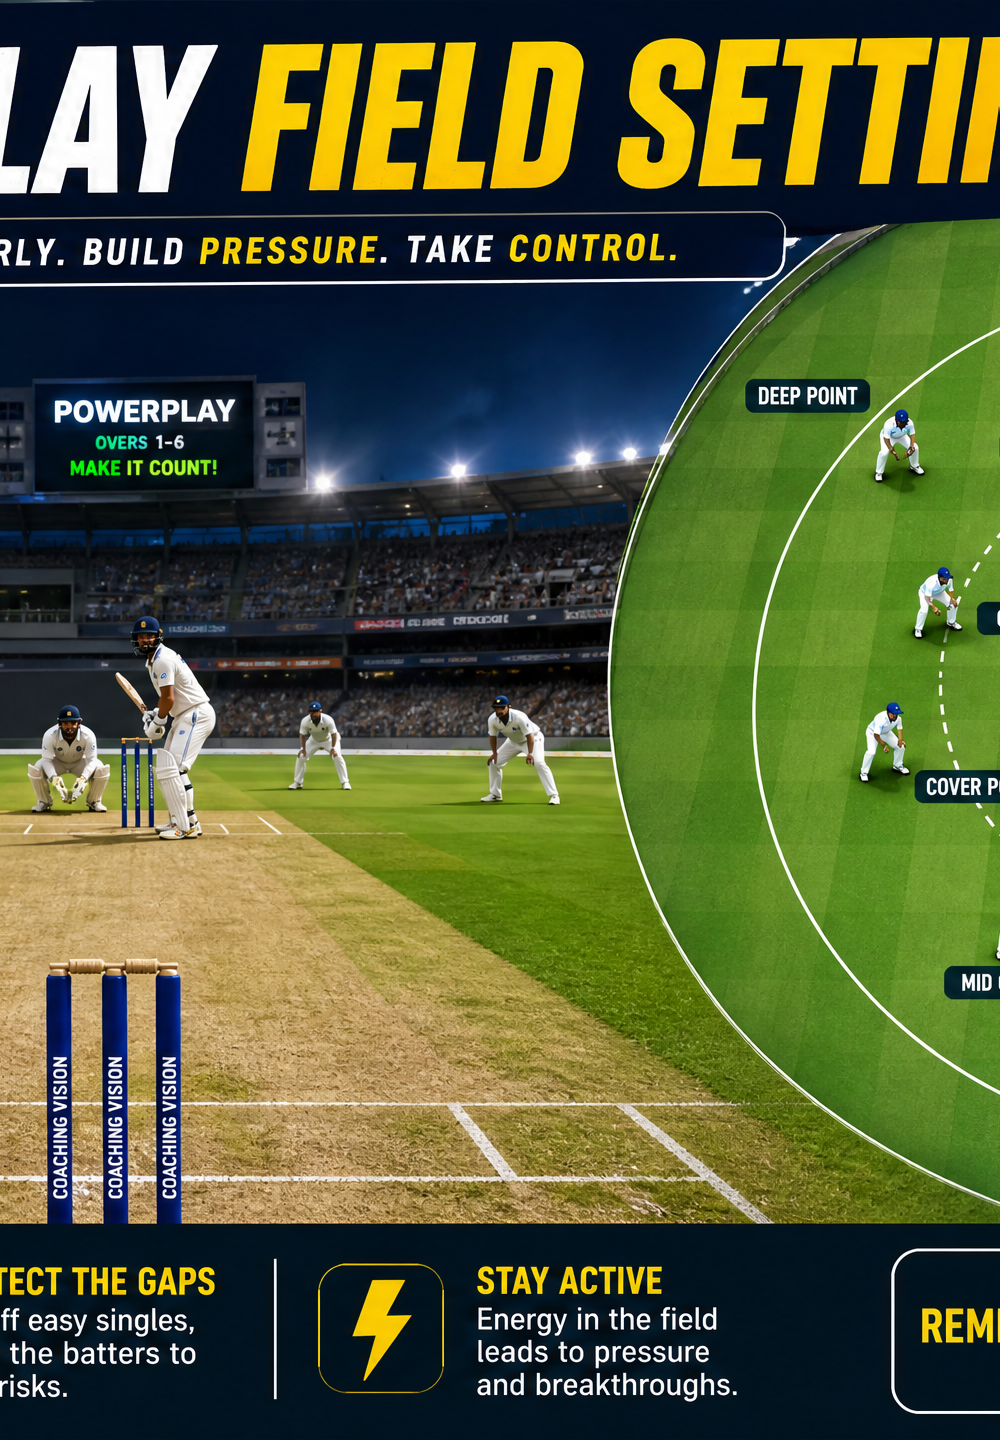
The Powerplay (overs 1-6 in T20s, 1-10 in ODIs) sets the tone for the entire innings. While many teams use these overs defensively to restrict boundaries, elite teams use them as an attacking weapon. This set play focuses on an aggressive, wicket-taking field setup designed to exploit the hard new ball, create doubt in the batter's mind, and force early mistakes.
By keeping fielders in catching positions and protecting the high-value scoring zones, this play forces batters to take high-risk options if they want to score quickly.
2. Setup
Equipment Needed:
- New cricket ball
- Full set of stumps and bails
- Marker cones (for training scenarios to highlight zones)
Pitch & Field Setup:
Standard 22-yard pitch on a full oval ground. The 30-yard fielding restriction circle must be clearly marked.
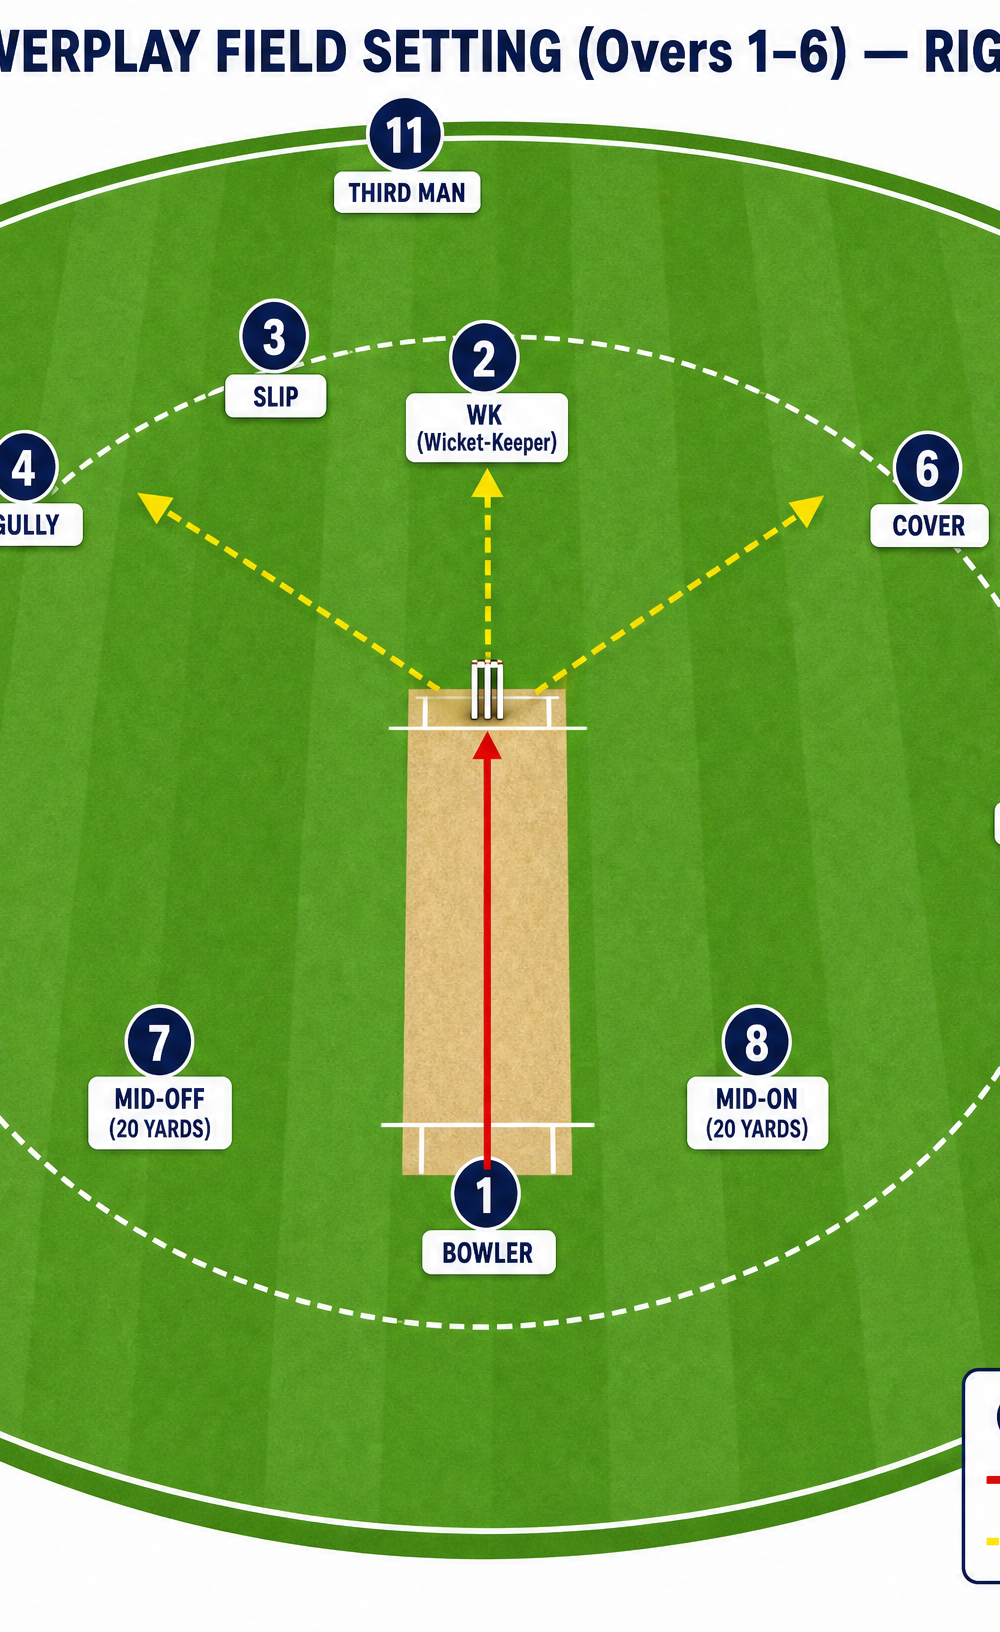
Player Positions (Right-Hand Batter):
- Bowler: Operating primarily over the wicket.
- Wicket-Keeper (WK): Standing back to the quicks, positioned to take the outside edge.
- Slip: 1st slip, staggered slightly deeper than the keeper.
- Gully: Positioned to cut off the square drive and catch the thick edge.
- Point: Square of the wicket, on the edge of the 30-yard circle.
- Cover: Patrolling the key driving zone, on the 30-yard circle.
- Mid-Off: Inside the circle (approx. 20 yards), ready to stop the straight drive.
- Mid-On: Inside the circle (approx. 20 yards), mirroring mid-off.
- Square Leg: Inside the circle, saving the single on the leg side.
- Fine Leg: On the boundary (one of two allowed outside the circle).
- Third Man: On the boundary (the second fielder allowed outside the circle).
3. Step-by-Step Instructions
- Set the Trap: Deploy the field exactly as shown in Diagram 1. Ensure the slip and gully are engaged and vocal.
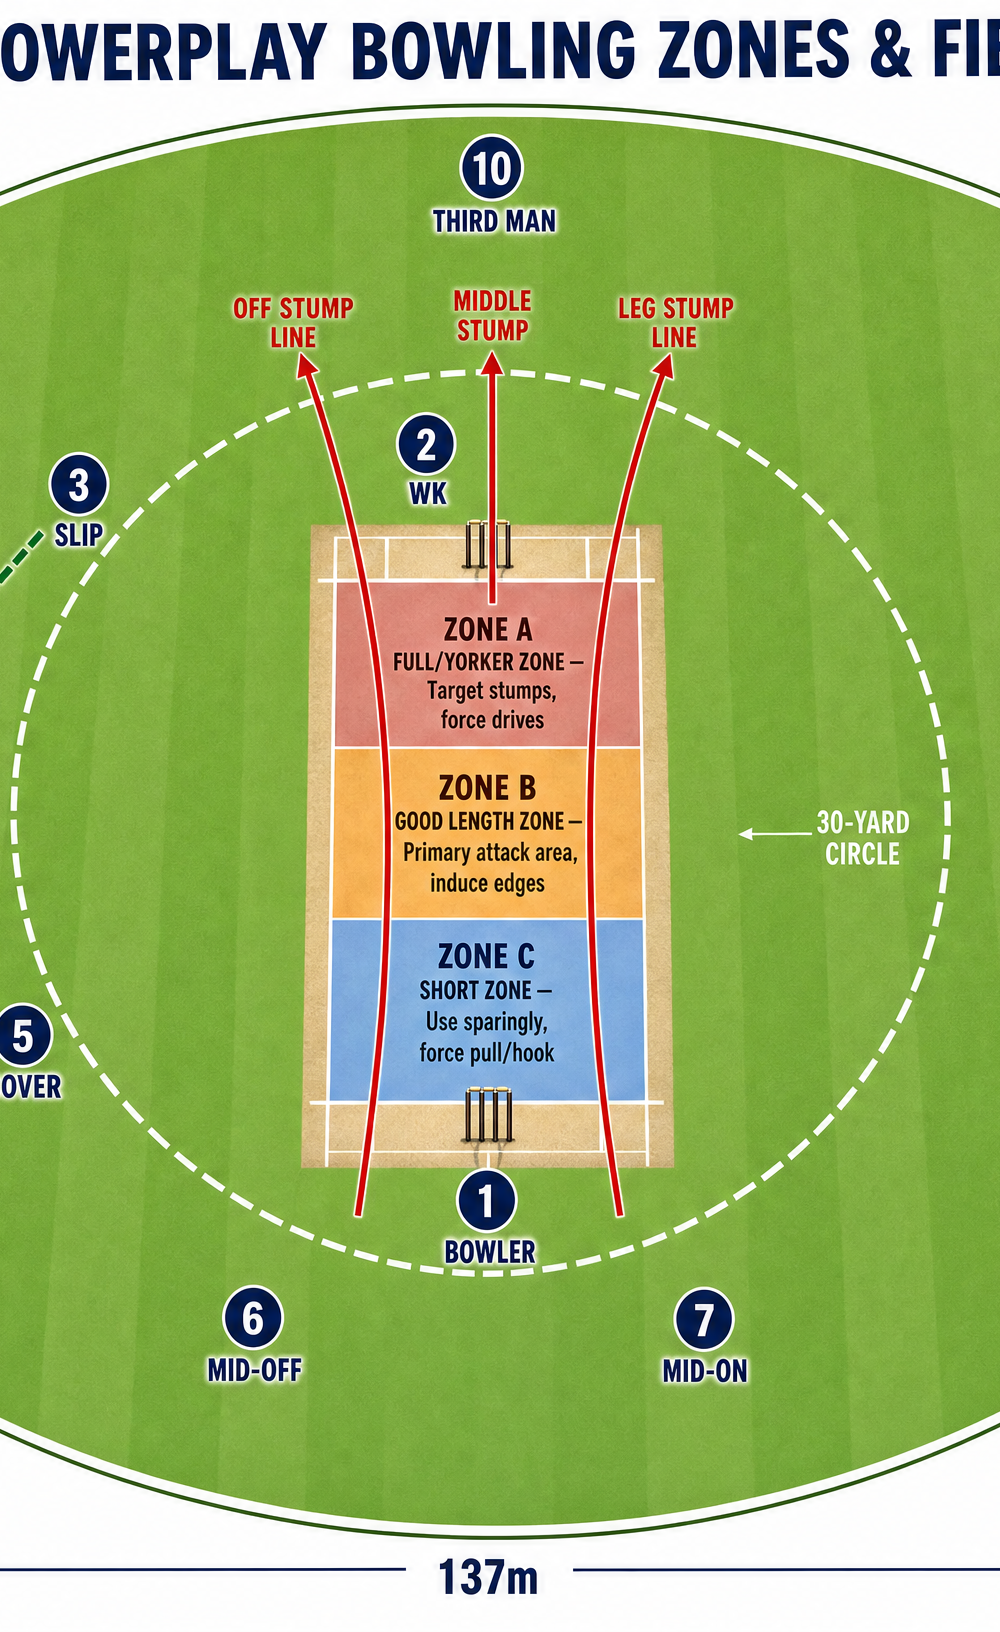
- The First Over: The bowler must hit a hard, good length (Zone B in Diagram 2) on an off-stump line. The goal is to make the batter play every ball.
- Assess the Batter: Watch the batter's initial movements. Are they staying leg-side of the ball to open up the off-side? Are they looking to charge?
- Execute the Plan: The primary delivery should be top of off-stump. If the batter drives, the cover and mid-off fielders must attack the ball aggressively to stop the single.
- The Squeeze: If the batter plays two dot balls, the field must physically walk in together as the bowler runs in, increasing the perceived pressure.
- The Change-Up: On the 5th or 6th ball of the over, if the batter is frustrated, bowl a slightly fuller delivery (Zone A) to tempt the expansive drive, bringing the slip and gully into play.
4. Bowling Zones & Triggers
To make this field work, the bowler must hit the right areas. Diagram 2 outlines the key bowling zones and how the field should react to specific batter movements.
5. Key Coaching Points
- Length is King: The field is irrelevant if the bowler bowls too short or too full. Hitting the 'good length' (top of off-stump) is non-negotiable.
- Energy in the Ring: The fielders inside the 30-yard circle must be dynamic. Walking in with the bowler and attacking the ball creates immense pressure.
- Protect the Single: The goal is to bowl dot balls. Fielders at cover, point, and square leg must prioritize stopping the quick single over saving the boundary.
- Communication: The wicket-keeper and captain must constantly communicate with the bowler, confirming the plan and adjusting to the batter's movements.
- Patience: Wickets often fall in the 3rd or 4th over of the Powerplay after pressure has been built. Don't panic if the first over goes for a few runs.
6. Common Mistakes
- Bowling Too Straight: Drifting onto the leg stump allows the batter to easily work the ball away for singles, releasing the pressure.
- Static Fielding: Fielders standing flat-footed in the ring. This allows the batter to easily judge the quick single.
- Abandoning the Plan Too Early: Changing the field after one boundary. Trust the aggressive setup and force the batter to take another risk.
- Keeper Standing Too Close: If the keeper is too close to the stumps for a quick bowler, they will struggle to take the nick and won't be able to cover the slip region effectively.
7. Variations & Progressions
- The 'In-Out' Field: If the batter is scoring heavily through the off-side, drop the cover fielder to deep point and bring the third man inside the circle to short third man. This protects the boundary while keeping the slip in place.
- The Spin Option: If introducing a spinner in the Powerplay, remove the slip and add a short mid-wicket to stop the leg-side working single.
- The Slower Ball Bouncer: Use the short zone (Zone C) as a surprise tactic, especially if the batter is consistently advancing down the pitch.
8. Age Adaptations
- Under 10 / Under 12: Focus purely on the bowler hitting the stumps. Remove the slip and place an extra fielder at mid-wicket. Emphasize stopping the ball in the inner ring.
- Under 14: Introduce the concept of bowling to a field. Have the bowler actively look at the field placement before bowling. Introduce the slip fielder for the new ball.
- Under 16 & Open: Full implementation of the tactical plan. Players should be able to adjust their own field based on the batter's triggers (as shown in Diagram 2).

