Mastering the 2-3-1 Zone Defence
Learn how to disrupt the opposition's attacking flow, force errors, and create interception opportunities with a structured 2-3-1 zone defence.
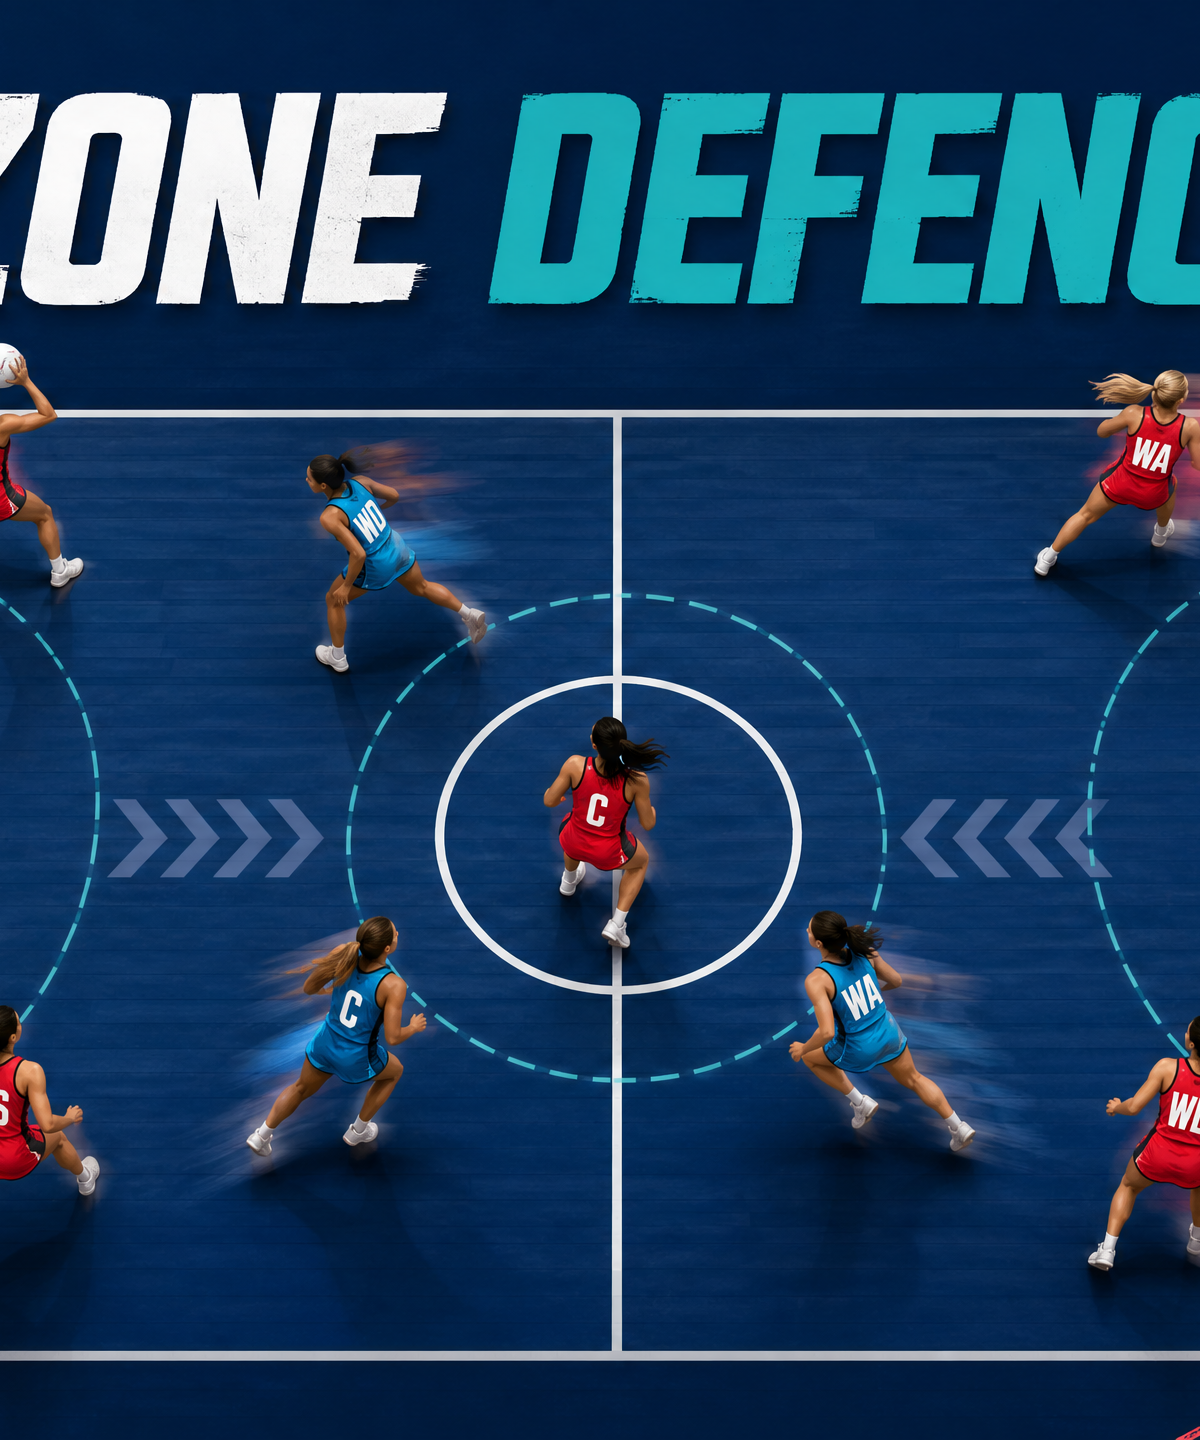
Equipment Needed
1. Overview
The 2-3-1 Zone Defence is a powerful tactical structure designed to dictate the opposition's ball movement, deny easy access to the goal circle edge, and create high-percentage interception opportunities. Unlike traditional one-on-one (man-to-man) defence, where players track their direct opponent, a zone defence requires players to guard specific areas of the court and shift as a cohesive unit relative to the ball's position.
This set play is particularly effective against teams with a dominant holding shooter or a fast, direct attacking style. By clogging the middle channel and forcing the ball wide, the defence can slow down the attacking tempo, build pressure, and force the opposition into making risky cross-court passes or looping feeds into the circle.
2. Setup
Court Area: Full defensive half (Defensive Third and Centre Third).
Players Required: 6 (GK, GD, WD, C, WA, and one forward acting as the top of the zone).
Equipment: 1 netball, bibs (two contrasting colours).
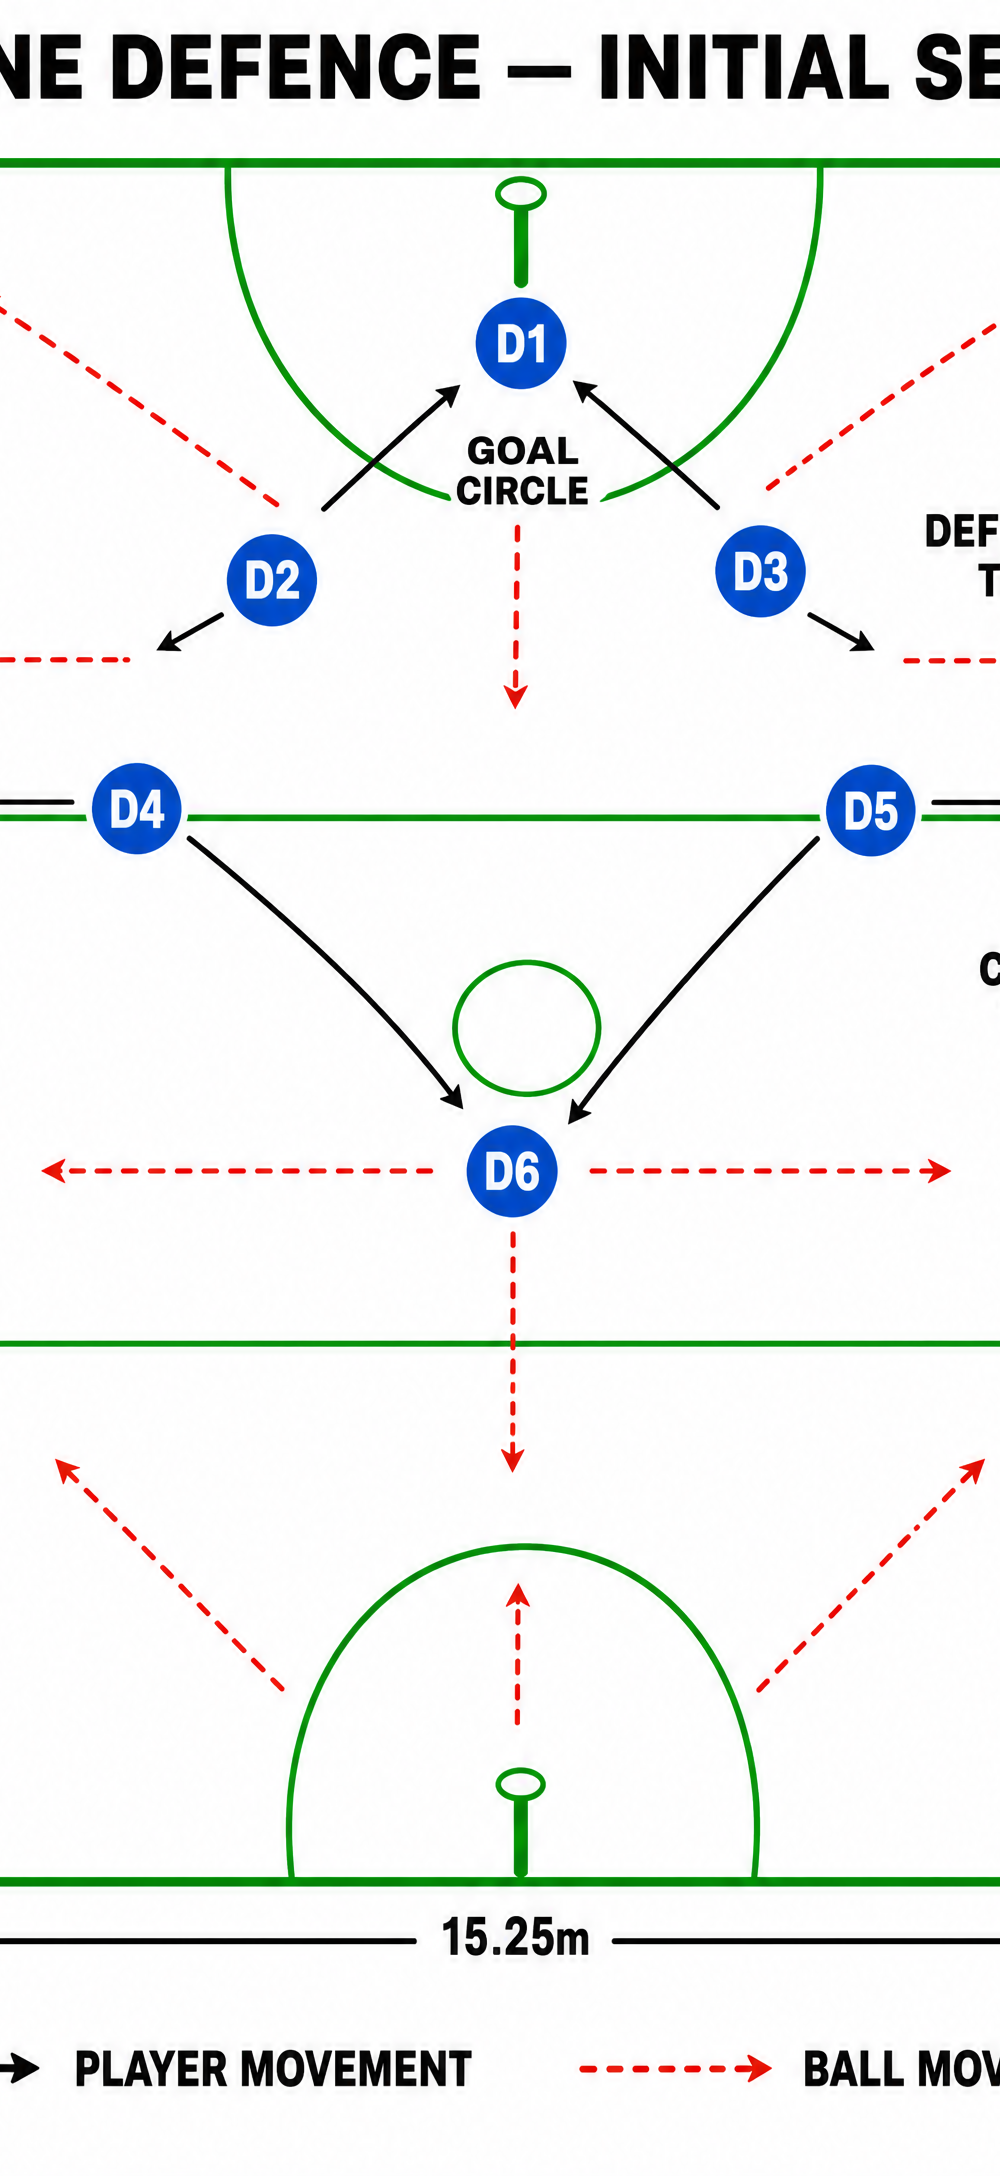
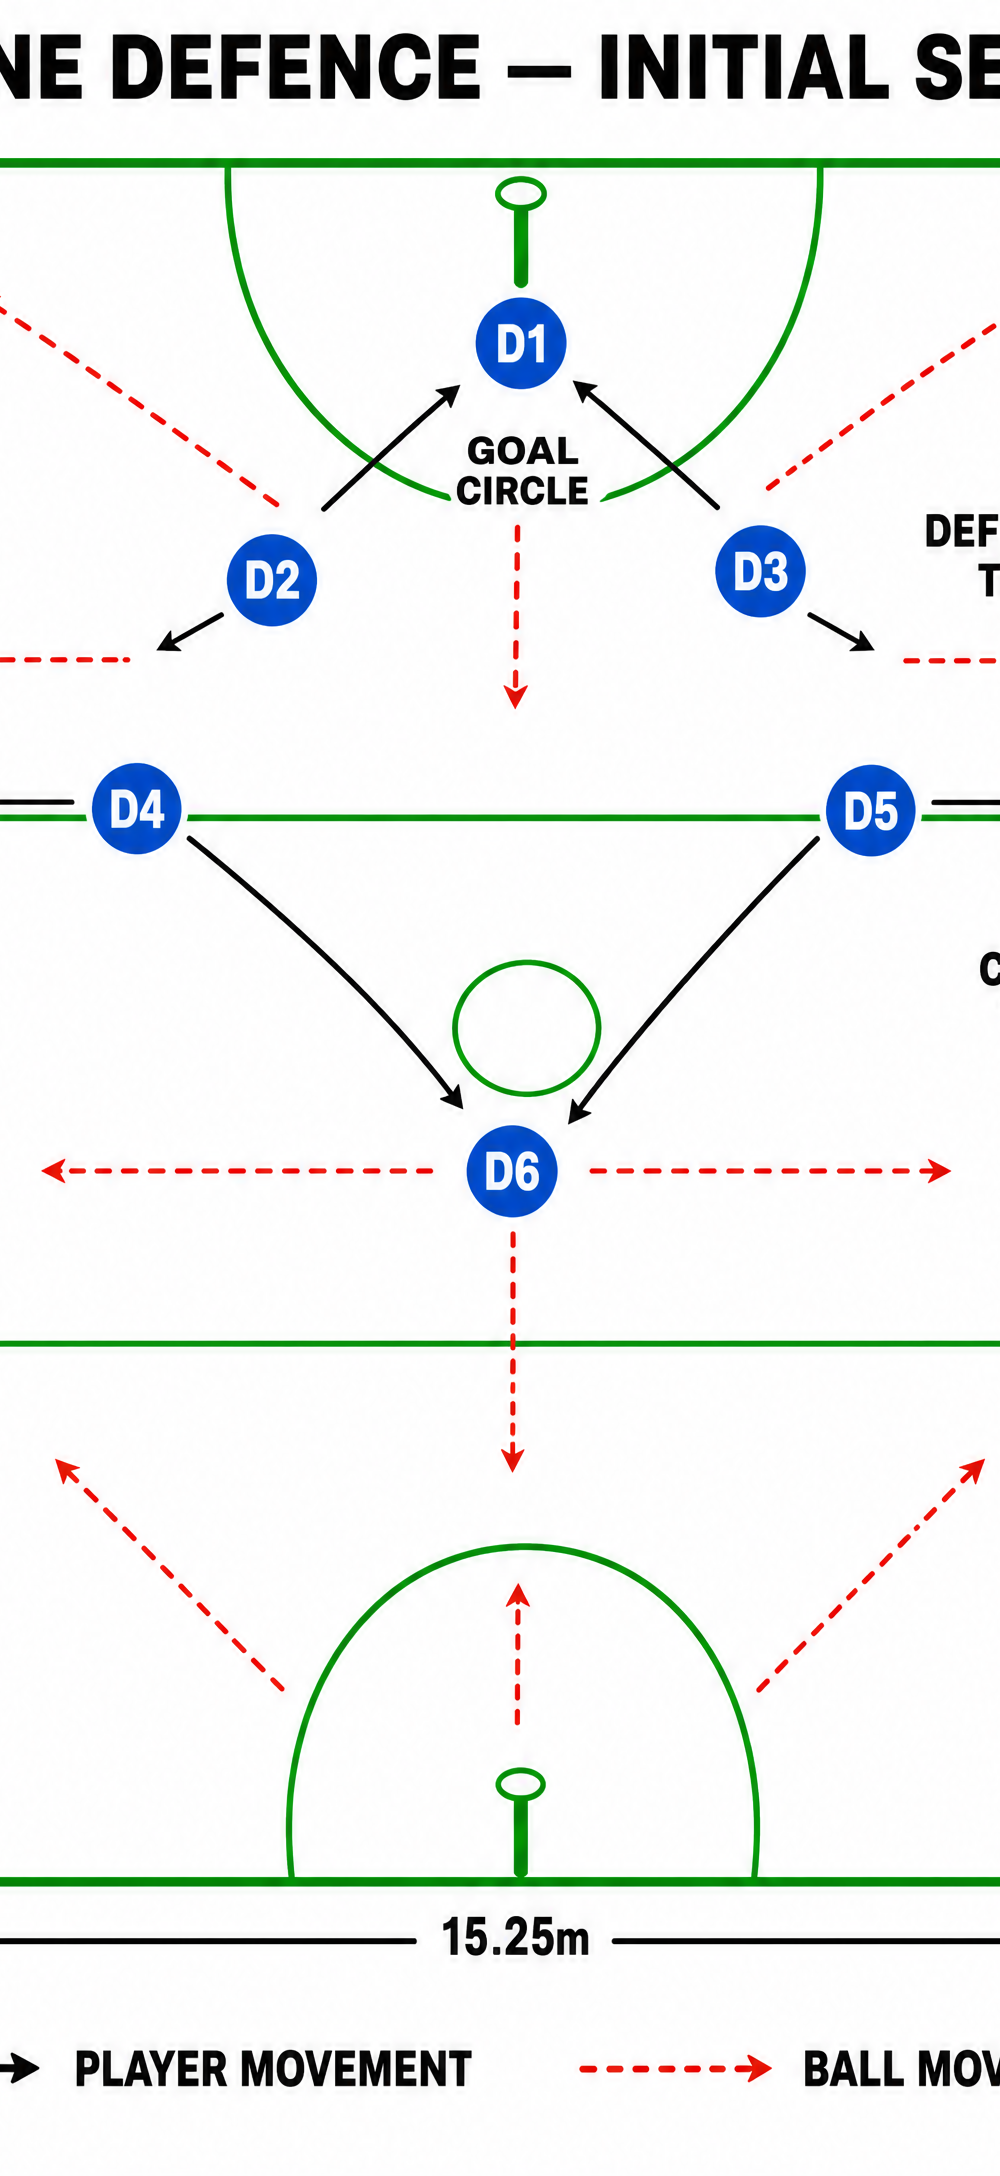
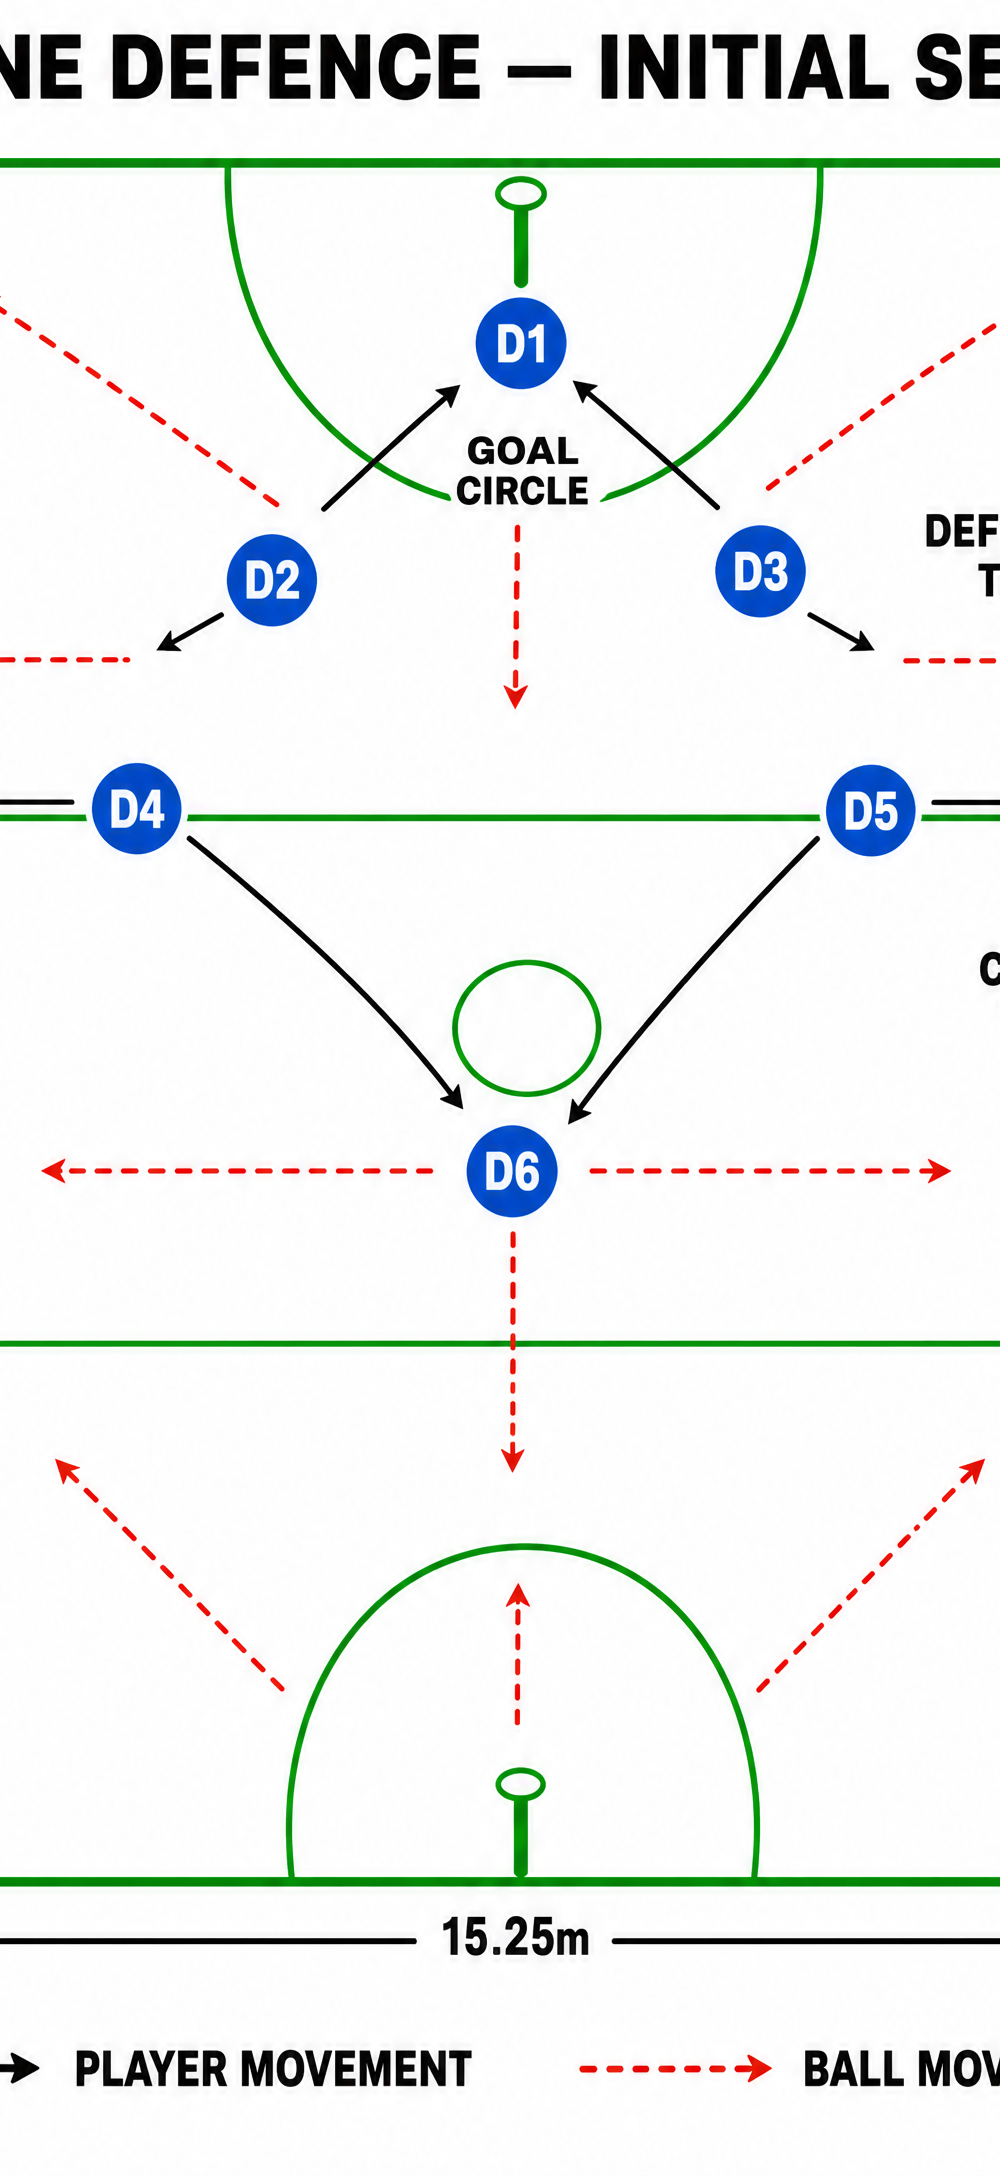
Initial Formation (2-3-1)
The setup begins as the opposition brings the ball out of defence or from a centre pass. The players are positioned as follows:
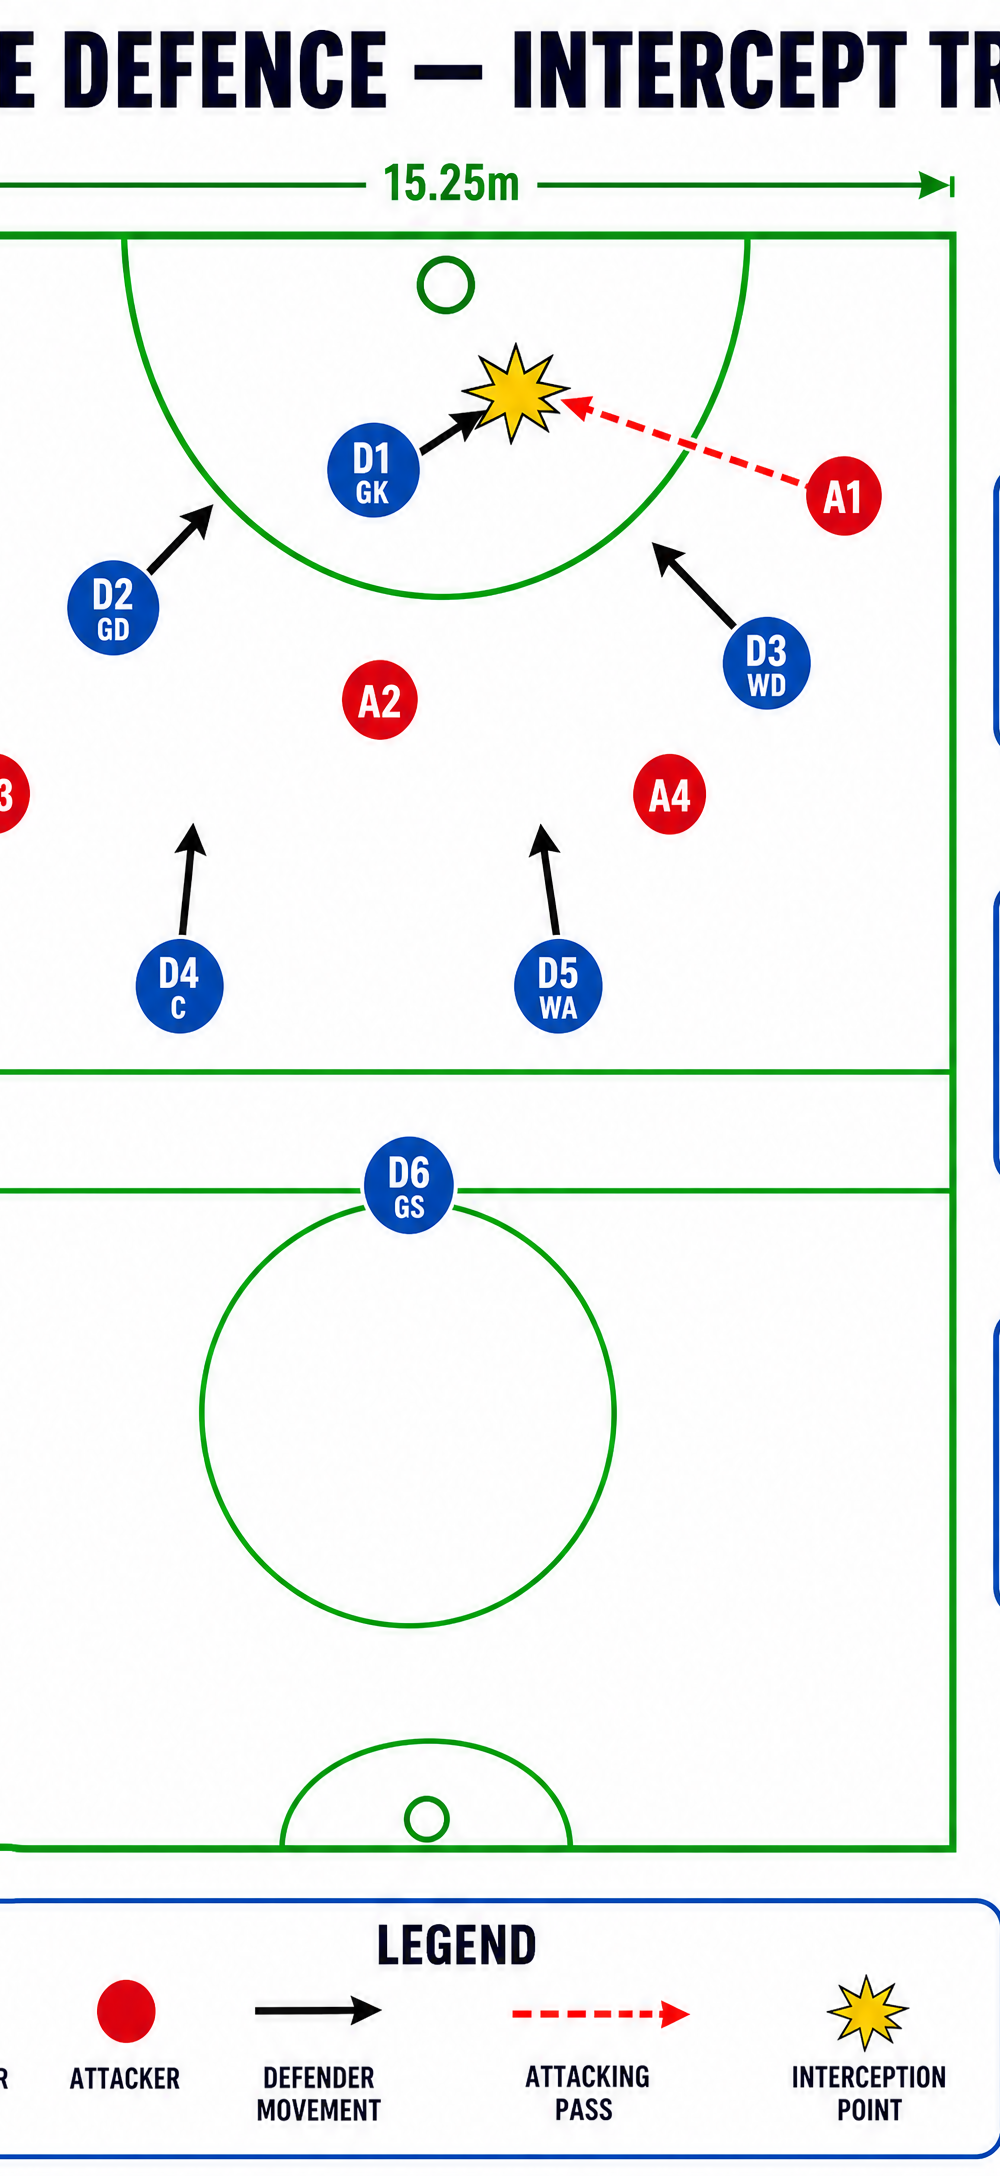
- The '2' (Back Line): Goal Keeper (GK) and Goal Defence (GD) are positioned inside or just outside the goal circle, ready to cover the primary shooting space and any deep drives.
- The '3' (Mid Line): Wing Defence (WD), Centre (C), and Wing Attack (WA) form a wall across the transverse line. They are evenly spaced to cover the width of the court (15.25m), denying easy entry into the defensive third.
- The '1' (Top Point): A forward player drops back into the centre third to act as the point of the zone, putting initial pressure on the ball carrier and forcing the first pass wide.
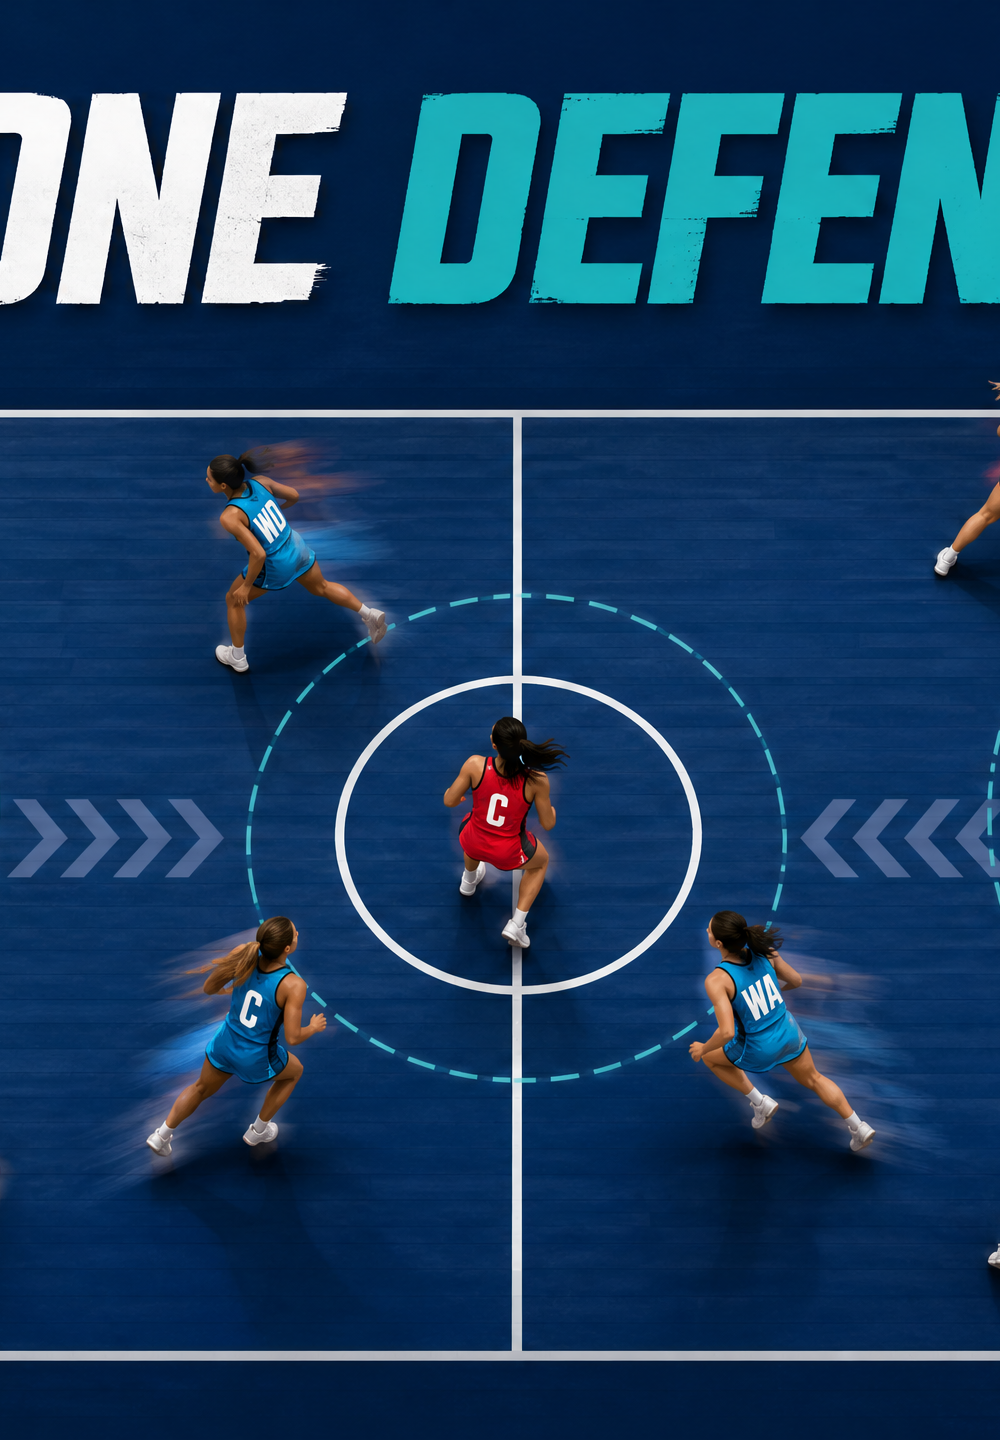
3. Step-by-Step Instructions
Executing the zone effectively requires communication, discipline, and synchronized movement.
Step 1: Establish the Structure. As the opposition gains possession, quickly drop back and establish the 2-3-1 formation. The top point player must immediately pressure the ball carrier to delay the forward pass.
Step 2: Force the Ball Wide. The primary objective of the mid-line is to deny any straight, flat passes down the middle corridor. Angle your bodies to invite the pass out to the sidelines.
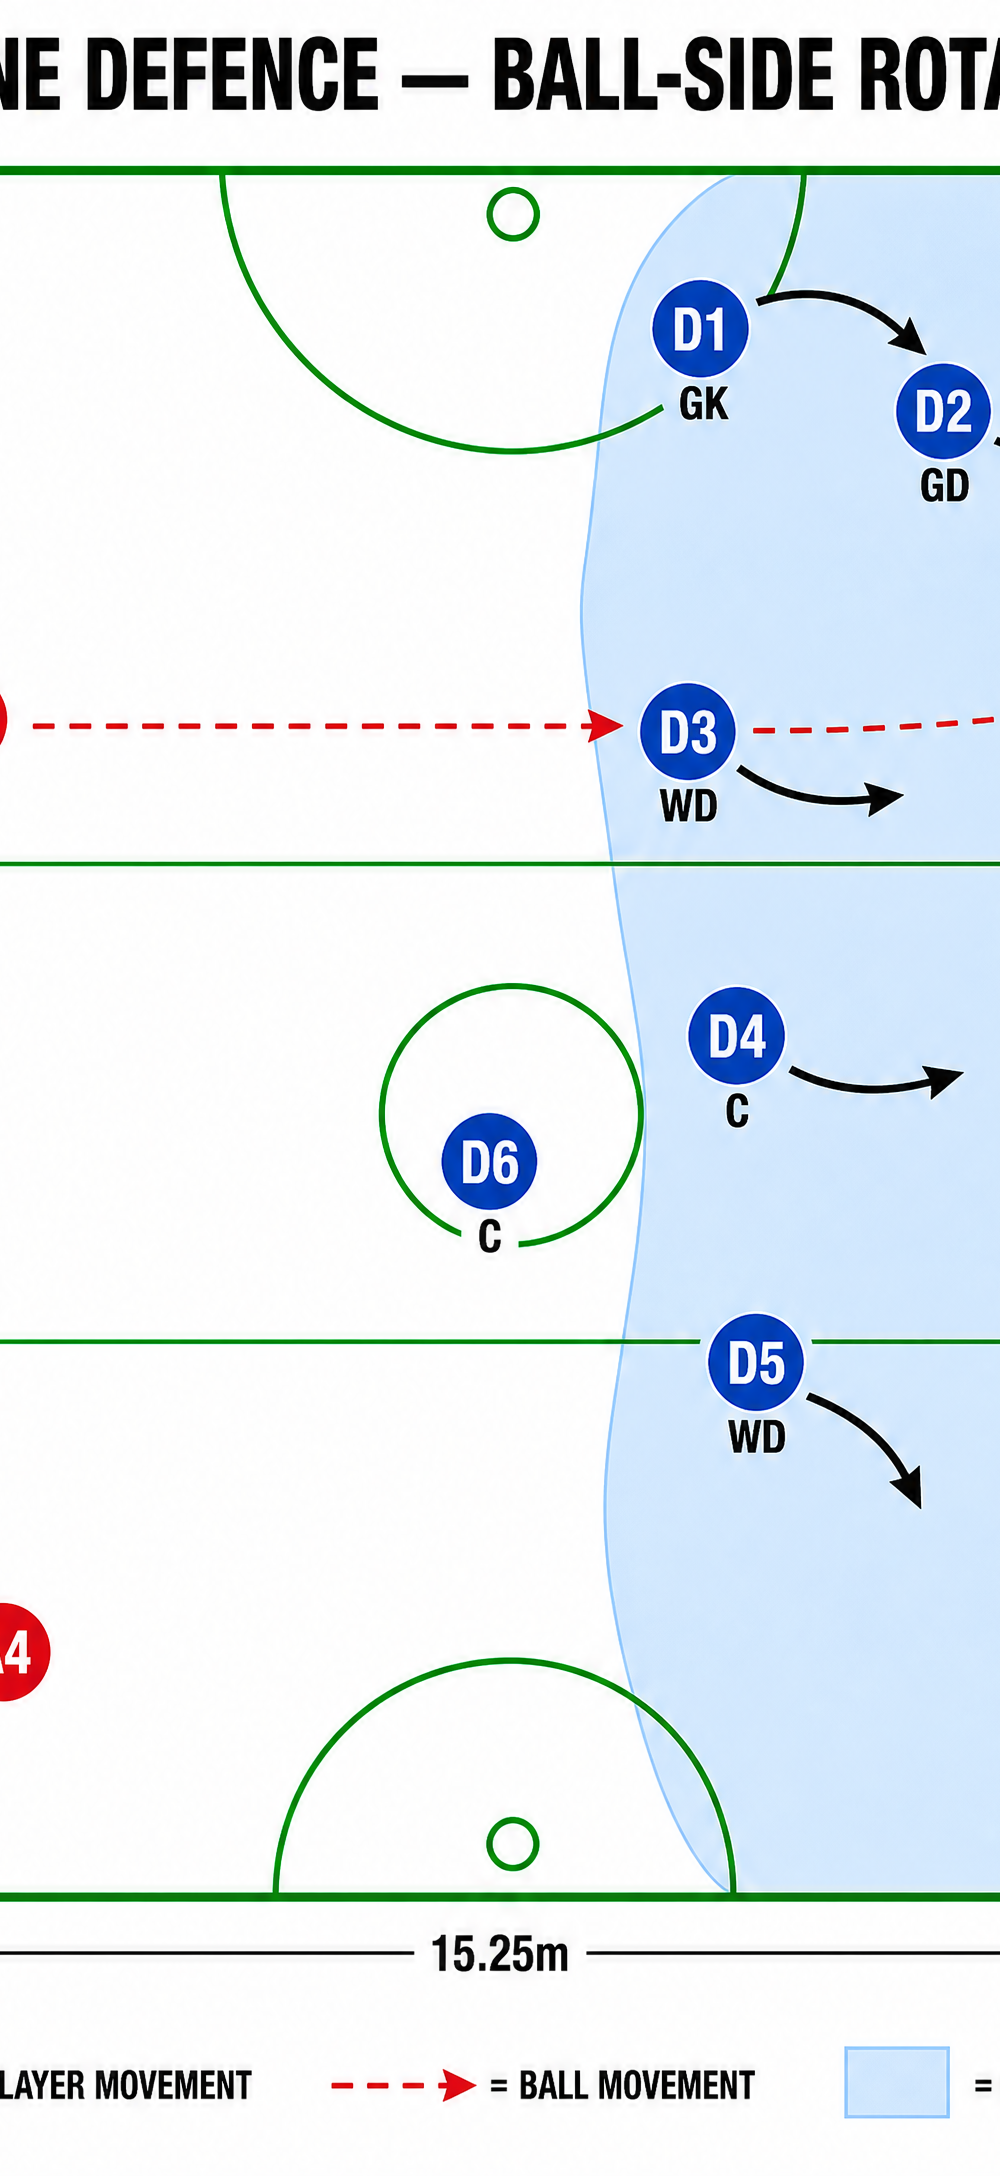
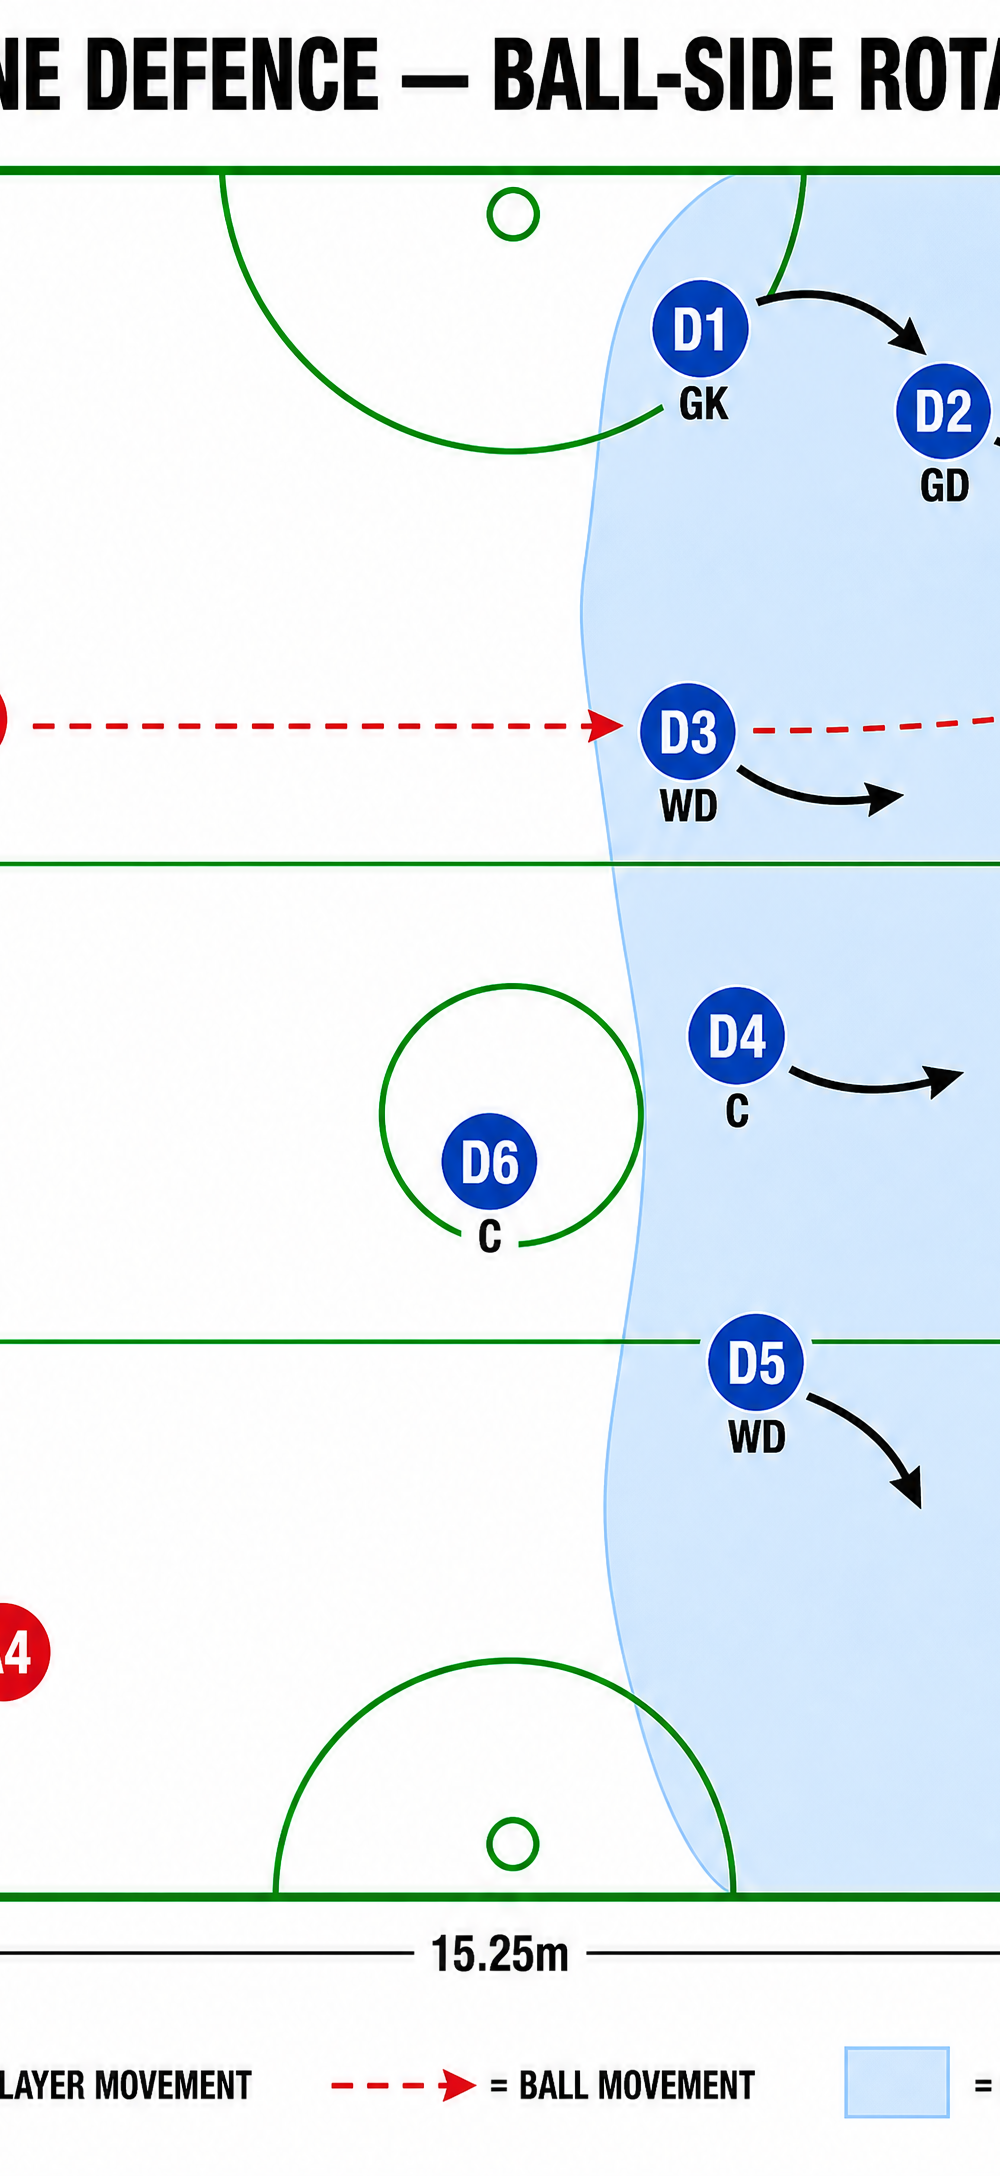
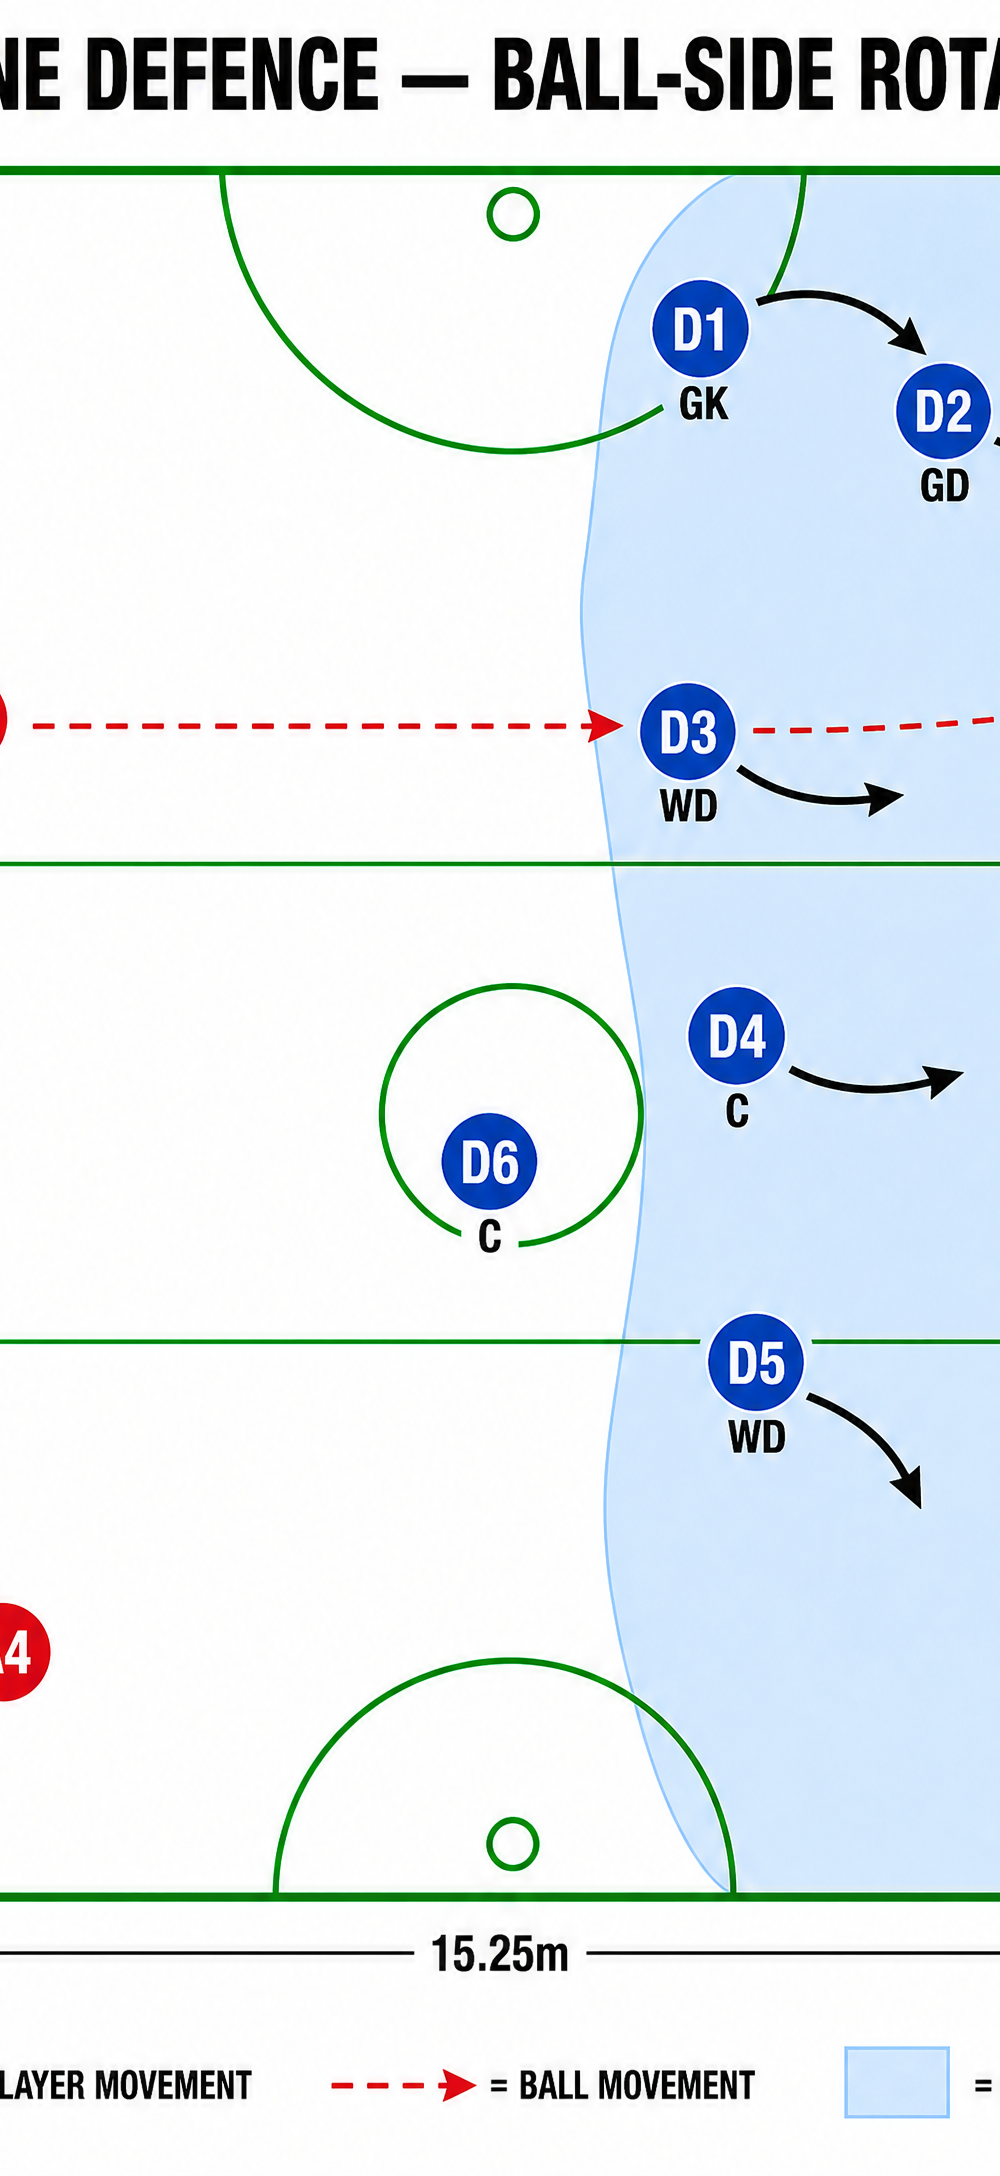
Step 3: Ball-Side Rotation (The Shift). As the ball is passed to the wing, the entire zone must shift toward the ball side. The ball-side mid-court player steps up to pressure the new ball carrier. The Centre shifts across to cover the middle. The off-side mid-court player drops slightly to cover the diagonal switch pass. The back line (GK, GD) shifts across, ensuring the ball-side post is covered while maintaining vision of the off-side attackers.
Step 4: Create the Trap (The Pocket). By forcing the ball down the sideline, you create a 'pocket' near the transverse line or goal circle edge. The attackers will run out of space. Defenders must close the gaps, maintaining a 3-foot distance but keeping their arms up to block passing vision.
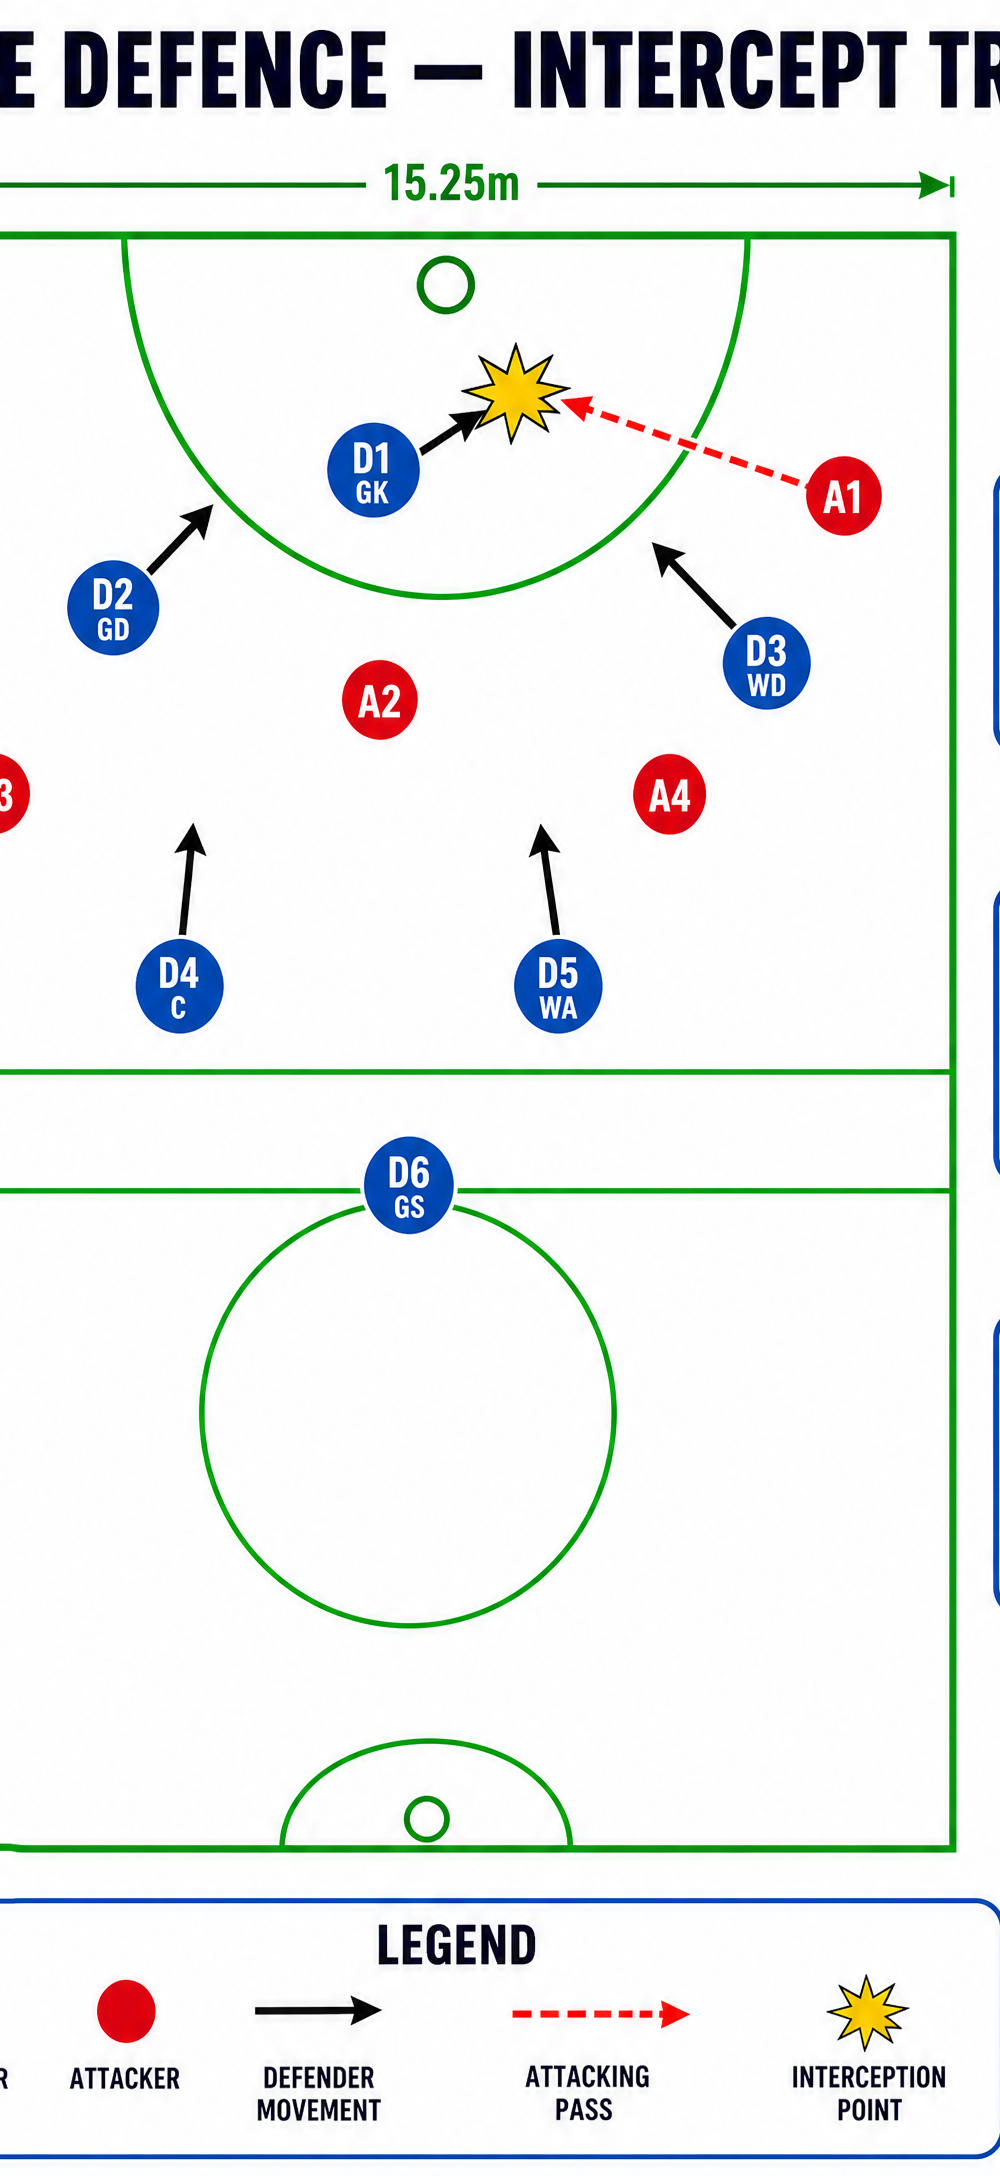
Step 5: The Intercept Trigger. The trap is set. The attackers, under pressure and out of options, will be forced to make a predictable pass — often a reset pass backward or a forced feed into the circle. This is the trigger. The designated interceptor (often the GD or an off-side mid-courter) reads the cue, steps out of their zone, and attacks the ball at full speed.
4. Key Coaching Points
- Vision is Critical: Players must position their bodies to see both the ball and the attackers entering their zone. Use peripheral vision; never turn your back on the ball.
- Move as a Unit: The zone is only as strong as its weakest link. If one player shifts late, a gap opens. Imagine the players are connected by an invisible string — when the ball moves, everyone moves.
- Communication: Constant talking is non-negotiable. Players must call out attackers entering and leaving their zones (e.g., "WA entering right!", "Holding middle!").
- Dictate, Don't React: A good zone dictates where the attack must go. Use body angles to close off preferred passing lanes and leave the difficult options seemingly 'open'.
- Patience: Do not hunt for the intercept too early. Build the pressure, force the error, and wait for the obvious trigger pass before committing.
5. Common Mistakes
- Ball Watching: Players get fixated on the ball and lose track of attackers sneaking in behind them or overloading a zone. Correct by calling "heads up" and demanding eyes on the attacker nearest to their zone.
- Breaking Structure Early: A player gets impatient and lunges for a low-percentage intercept, breaking the wall and leaving a massive hole for the attack to exploit. Reinforce the principle: "Wait for the trigger."
- Flat Footing: Players stand flat-footed in their zones. Defenders must be on their toes, constantly making micro-adjustments and ready to explode onto the intercept.
- Poor Spacing: The mid-line gets too bunched up, allowing easy passes down the outside channels. Use cones at 5m intervals to reinforce correct spacing across the 15.25m width.
6. Variations & Progressions
- The 3-2-1 Zone: Shift the formation to have three players on the back line (GK, GD, WD) and two in the mid-court. This is highly effective against teams that rely heavily on feeding a tall holding shooter from deep.
- Half-Court Press to Zone: Start with a tight man-to-man press in the centre third, and as the ball crosses the transverse line, seamlessly drop back into the structured zone. This is a high-energy option best used in short bursts.
- Targeted Trapping: Designate a specific opposition player (e.g., a weaker ball handler) as the 'trap target'. When they receive the ball, two defenders immediately double-team to force a held ball or wild pass.
7. Age Adaptations
- Under 10s/12s: Focus on the concept of 'guarding space' rather than a player. Introduce a simple 'box' zone (4 players) in the goal third to teach the basics of shifting with the ball and maintaining vision. Keep the language simple: "Stay in your box, move with the ball."
- Under 14s: Introduce the full 2-3-1 structure. Emphasize communication and the 'shift' mechanism. Keep it simple: "When the ball goes left, we all take two steps left." Use walk-through drills before adding live attackers.
- Under 16s/Open: Focus on the nuances — dictating the pass, setting traps, and identifying intercept triggers. Introduce complex variations like transitioning from man-to-man to zone mid-play, and challenge players to read the game and self-organise without coach prompts.

