Mastering the Offload: The 'Contact & Connect' Drill Sequence
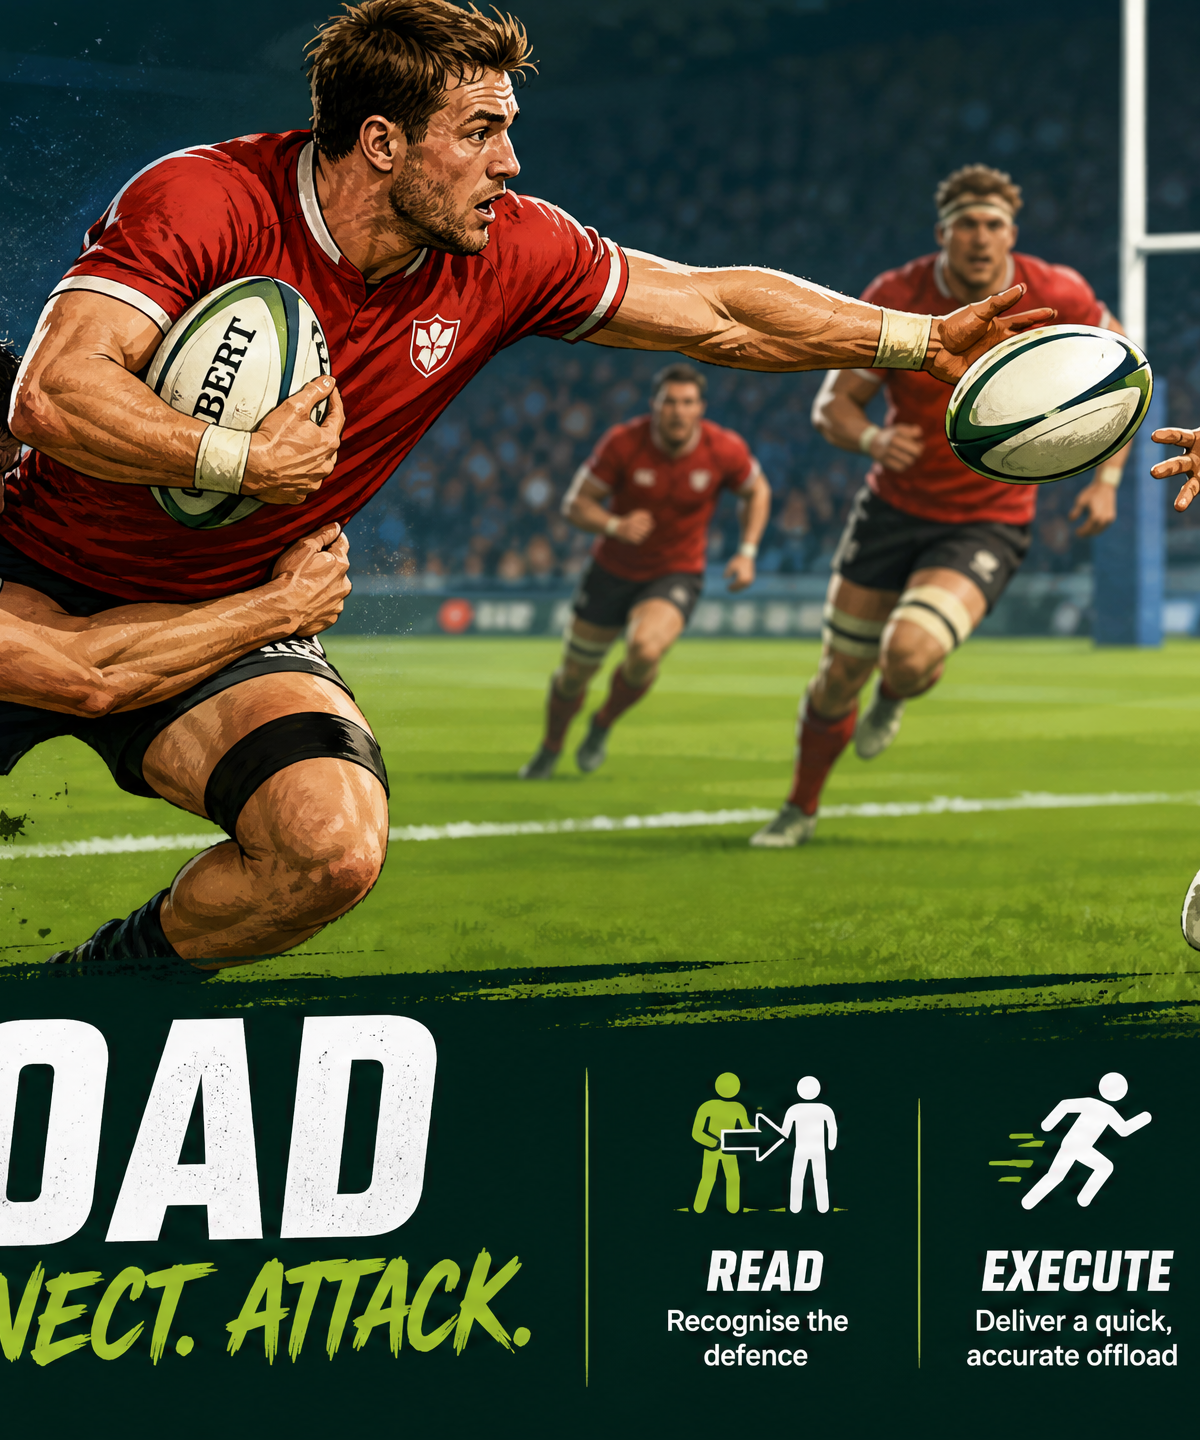
Equip your players with the technical skills and decision-making ability to execute high-impact offloads through contact, keeping the ball alive and defensive lines scrambling.
Equipment Needed
1. Overview
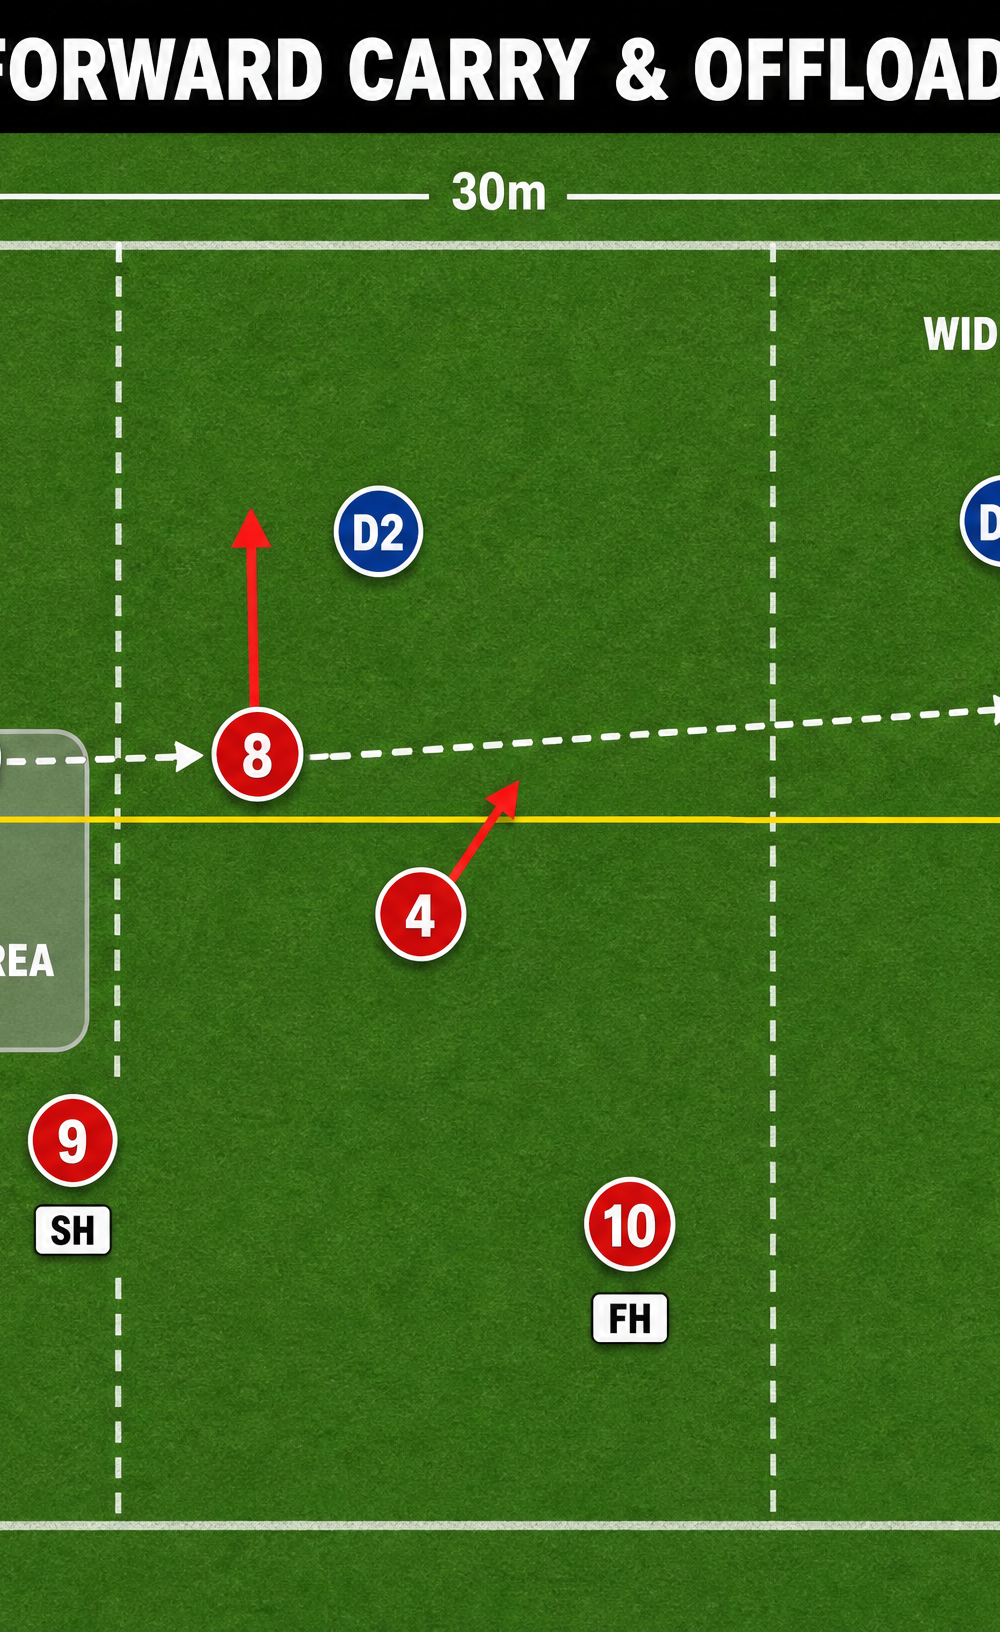
The ability to keep the ball alive through contact is one of the most devastating weapons in modern rugby. A successful offload bypasses the tackler, accelerates the attack, and forces the defense to react while retreating. The 'Contact & Connect' drill sequence is designed to teach players not just the mechanics of the offload, but the crucial decision-making required to execute it effectively. It emphasizes winning the collision first, maintaining body control, and delivering a sympathetic pass to a support runner arriving at pace.
This resource is structured progressively. We start with the fundamental mechanics in a controlled environment before moving into dynamic, game-like scenarios that challenge both the ball carrier and the support runners.
2. Setup
Equipment Needed:
- 10-12 Cones (preferably two different colors to mark attacking and defensive lines)
- 3-4 Rugby Balls
- Tackle Shields (optional for the initial progression)
- Bibs (to distinguish attackers from defenders)
Pitch Setup:
Set up a grid that is 20m wide by 15m long. This provides enough space for players to build momentum but keeps the action concentrated to force the contact situation. As you progress, you will expand this grid.
3. Step-by-Step Instructions
Phase 1: The Basic Offload Gate (2v1)
This phase focuses on the ball carrier winning the initial contact and the support runner identifying the correct line.
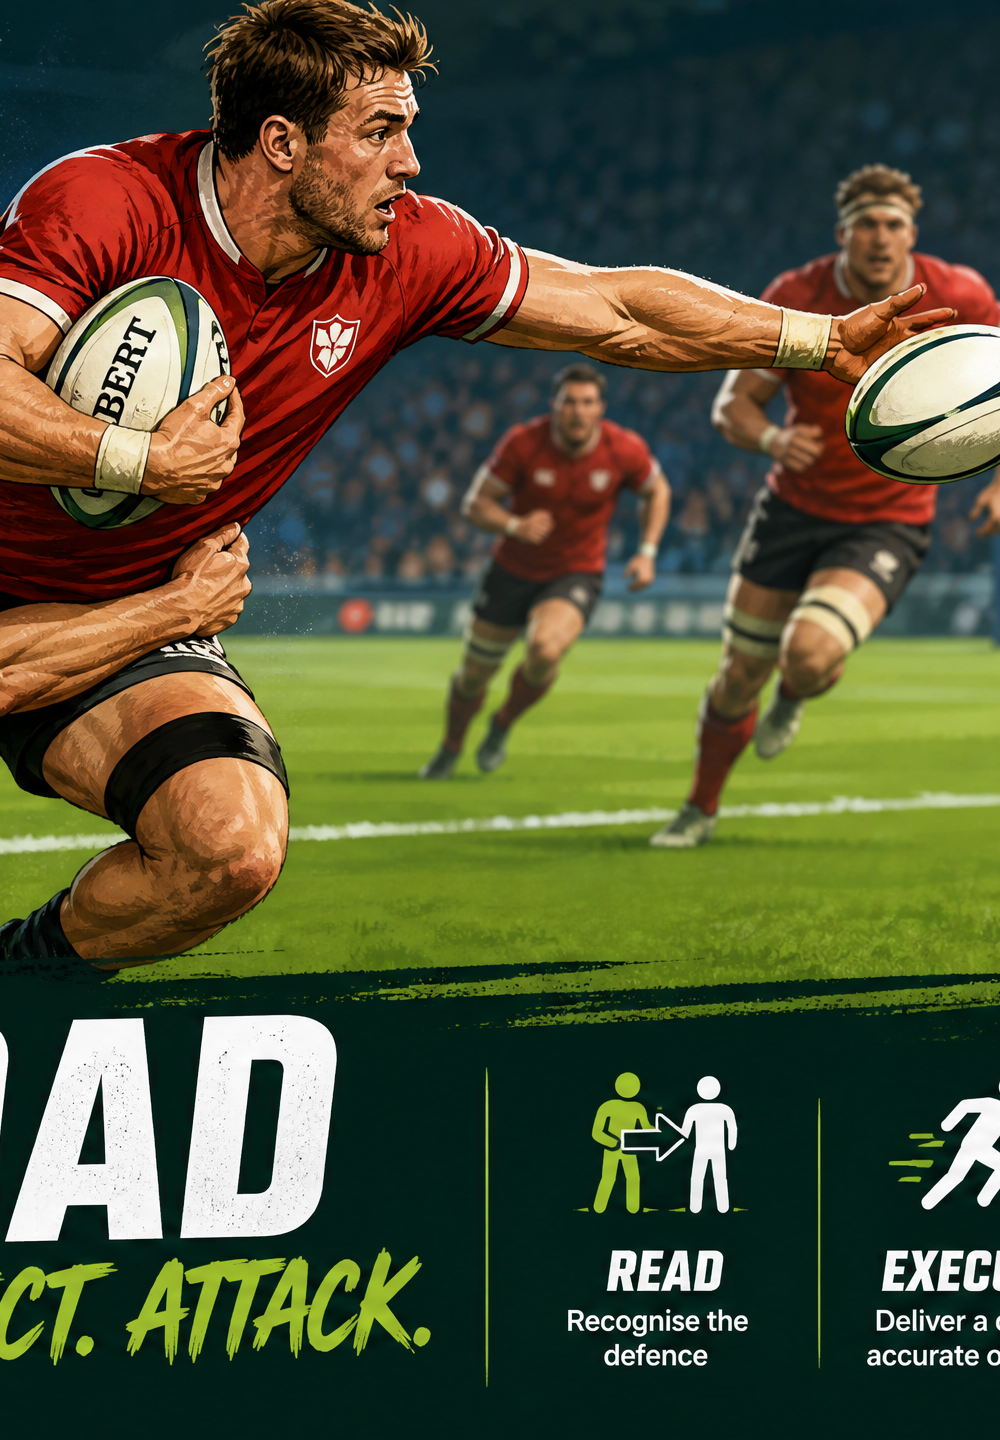
- Starting Positions: Place one defender (D1) in the middle of the 20m x 15m grid. Two attackers (e.g., a 12 and a 13) start at one end. The ball carrier (12) should be central, with the support runner (13) positioned 2m to their right and slightly behind.
- The Approach: On the coach's whistle, the ball carrier attacks the defender directly, aiming to step slightly just before contact to attack a weak shoulder.
- The Collision: The ball carrier must drive into the contact zone (marked by the yellow star), staying square and fighting to keep their arms free from the tackle.
- The Support Line: As the contact occurs, the support runner (13) accelerates, reading the body position of the ball carrier. They must communicate early (e.g., "With you left!" or "Pop!").
- The Execution: The ball carrier delivers a soft, accurate offload (the dashed white arrow) into the path of the support runner, who bursts through the line.
- Reset and Rotate: Rotate players so everyone experiences both attacking roles and the defensive role.
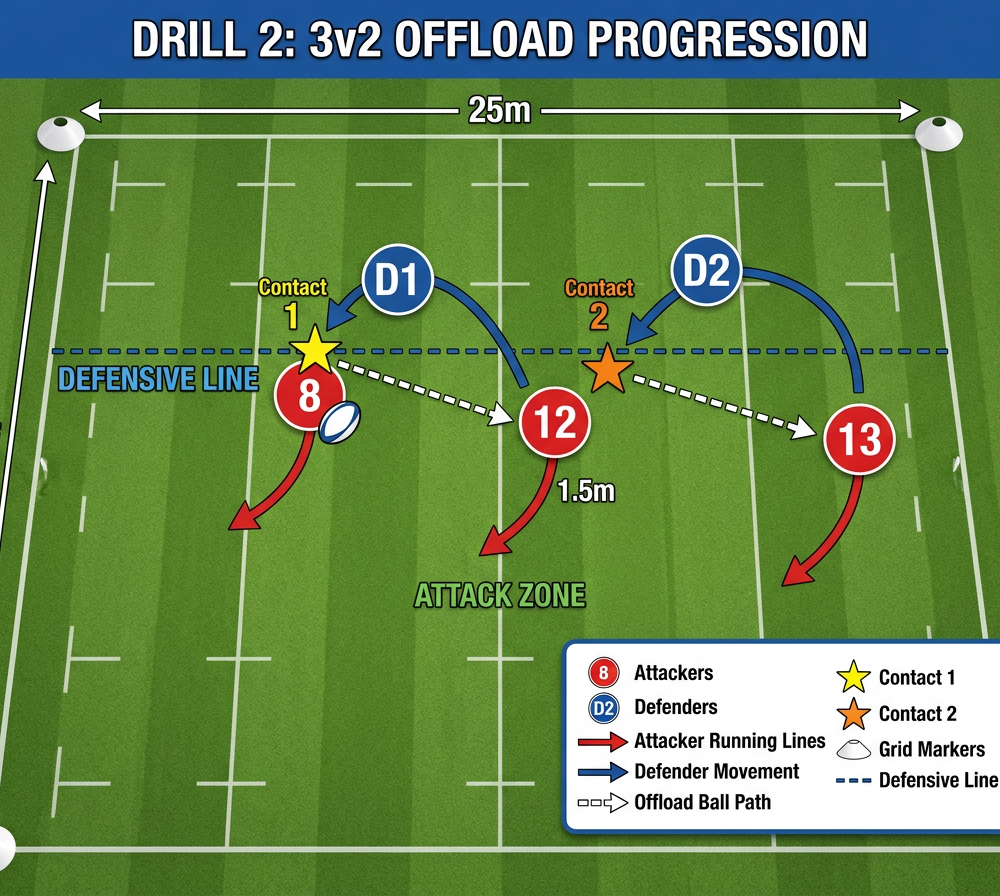
Phase 2: 3v2 Offload Progression
Now we introduce a second defender and a wider support option, increasing the cognitive load on the attackers.
- Grid Expansion: Expand the grid to 25m x 20m.
- Starting Positions: Three attackers (e.g., 8, 12, 13) face two defenders (D1, D2). The primary ball carrier (8) attacks the line, with 12 in close support and 13 holding a wider channel.
- Engaging the Line: The ball carrier (8) engages D1. The goal is to commit D1 fully to the tackle.
- The First Decision: As 8 takes contact (Contact 1), they must assess the situation. If D2 stays wide to cover 13, 8 offloads to the close support (12).
- The Second Phase: If 12 receives the ball, they immediately attack the space. D2 must now make a decision. If D2 steps in to tackle 12, 12 must execute a second offload (Contact 2) to the wide support runner (13).
- Continuous Flow: The emphasis here is on continuous movement and reading the defenders' hips. If a defender turns their shoulders in, the ball must go wide.
Phase 3: Forward Carry & Offload Sequence
This final phase simulates a realistic game scenario, integrating forwards and backs.
- Game-Scenario Grid: Use a larger 30m x 25m grid, simulating a section of the pitch near the gain line.
- The Setup: A forward (e.g., 6) acts as the primary ball carrier, supported by another forward (8). A backline pod (12) is positioned wider. A scrum-half (9) feeds the ball to initiate the play.
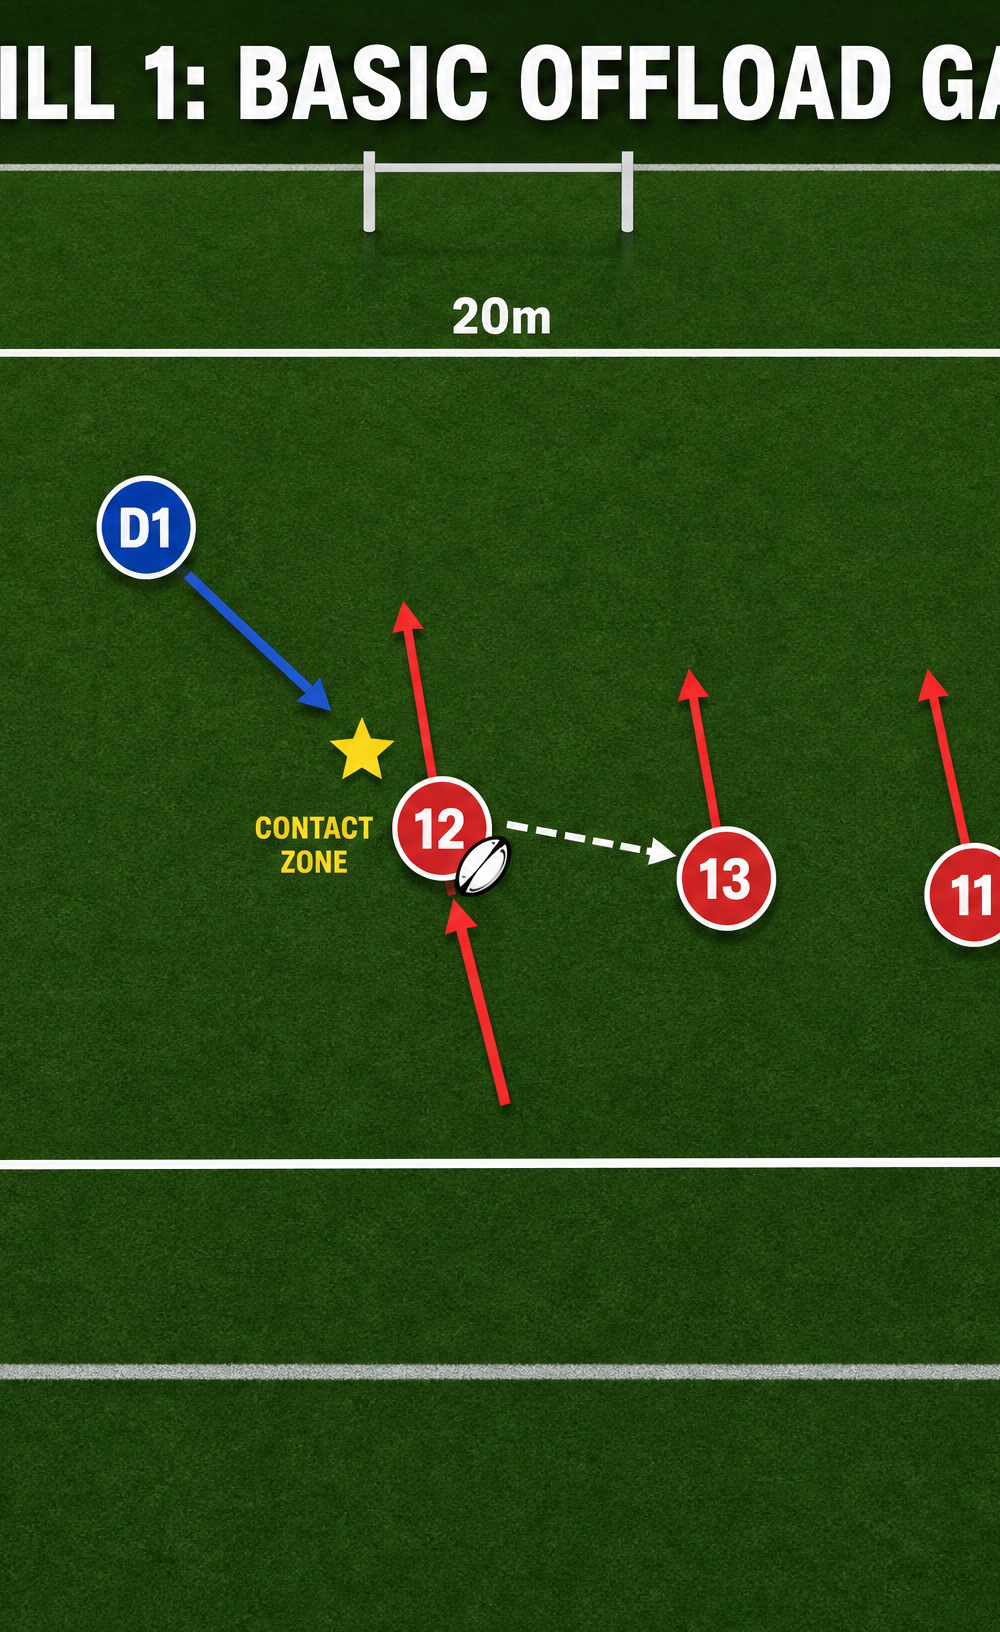
- The Hard Carry: Player 6 receives the ball and carries hard into the defensive line (D1), aiming to dominate the collision and cross the gain line (yellow line).
- The 'Tip' Pass or Offload: Player 8 is tracking on the inside shoulder. If 6 can keep their arms free, they execute a short offload to 8.
- Connecting the Backs: Player 8 now bursts through the line. D2 and D3 must react. If D3 bites in on 8, 8 executes a longer offload to the wide support (12), who should be arriving at pace.
- Ruck Alternative: If the initial offload isn't on, 6 must go to ground cleanly in the designated 'Ruck Area' (grey box), presenting the ball quickly for the 9 to clear.
4. Key Coaching Points
- Win the Collision First: An offload is only effective if you have momentum. Players must focus on aggressive leg drive and staying square into contact before looking for the pass.
- Ball Presentation: The ball carrier must fight to keep the ball away from the defender's chest. Use a strong two-handed grip until the moment of the offload.
- Support Timing and Depth: Support runners must not overrun the ball carrier. They need to hold their depth, read the tackle, and accelerate onto the ball, not wait for it.
- Communication: Loud, clear, and early communication from the support runner is non-negotiable. The ball carrier needs to know exactly where their options are without looking.
- The 'Sympathetic' Pass: The offload shouldn't be a bullet pass. It needs to be a soft 'pop' or a guided placement into the space the support runner is attacking.
5. Common Mistakes
- Forcing the Offload: Players trying to offload when they are dominated in the tackle or when no support is available. Correction: Emphasize that taking the tackle and setting a clean ruck is always better than a turnover.
- Support Runners Too Flat: Support players arriving at the same time as the ball carrier takes contact, leaving them no time to react to the offload. Correction: Reinforce holding depth and accelerating late.
- Turning the Back: The ball carrier turning their back to the defense before contact, losing momentum and vision. Correction: Coach players to stay square and attack a weak shoulder.
6. Variations & Progressions
- The 'No-Look' Constraint (Advanced): To heighten awareness, require the ball carrier to offload without looking directly at the support runner, relying entirely on peripheral vision and verbal cues.
- Tackle Shields to Live Contact: Start the drill with defenders holding tackle shields to build confidence in the mechanics, then progress to full live tackling to test the skill under true pressure.
- Time Limits: Introduce a 3-second rule from the moment the ball is played to when the final offload must occur, increasing the speed of decision-making.
7. Age Adaptations
- Under 8s - Under 10s: Focus entirely on the concept of passing before being tagged/tackled. Use larger, softer balls if necessary. Emphasize running into space rather than contact.
- Under 12s - Under 14s: Introduce the mechanics of fending and keeping the ball alive in the tackle. Use tackle bags initially. Focus heavily on the support runner's communication.
- Under 16s - Open: Full contact scenarios. Introduce complex decision-making (e.g., 3v2s, reading the second defender). Demand high-speed execution and perfect ball placement.

