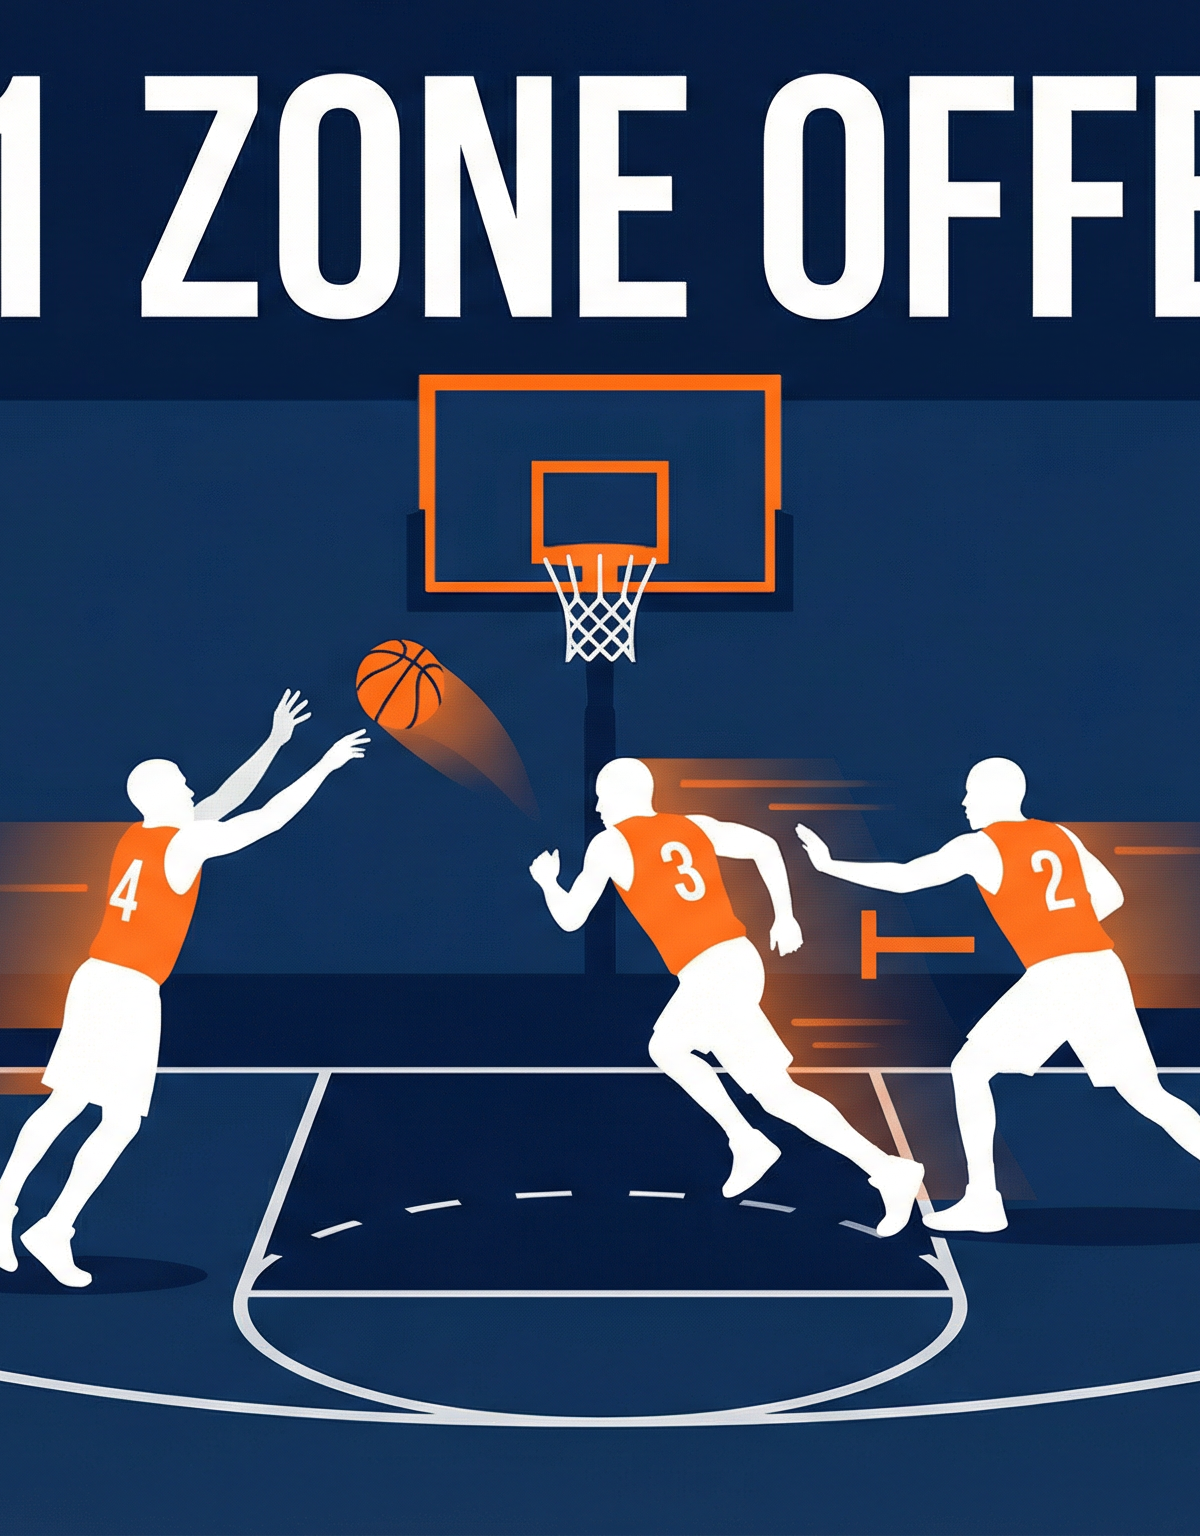
Mastering the 1-3-1 Zone Offense: Overload and Attack
Learn how to systematically dismantle a 1-3-1 zone defense using overload principles, baseline attacks, and high-post facilitation to create high-percentage scoring opportunities.
Equipment Needed
1. Overview
The 1-3-1 zone defense is designed to pressure the ball handler, disrupt passing lanes, and force turnovers by trapping in the corners and on the wings. To counter this aggressive defensive scheme, coaches must implement an offense that exploits the inherent weaknesses of the 1-3-1 alignment: the baseline and the weak-side rebounding positions.
This 1-3-1 zone offense set play focuses on creating an overload on one side of the floor, forcing the defense to shift, and then utilizing quick ball reversals and high-post entry passes to attack the gaps. By placing a skilled playmaker at the high post and a strong finisher on the baseline, this offense forces the defense into impossible closeout situations, consistently generating open perimeter shots, high-post jump shots, and uncontested layups.
Best used when: Your opponent runs a 1-3-1 zone defense, when you need to slow the game down and work for high-percentage shots, or when you want to exploit a weaker baseline defender.
2. Setup

Court: Standard FIBA half-court (14m x 15m attacking half of a 28m x 15m full court). All positions are referenced from the offensive half.
Equipment needed: 1 basketball, cones (optional for marking positions in practice), whiteboard or clipboard for initial walkthrough.
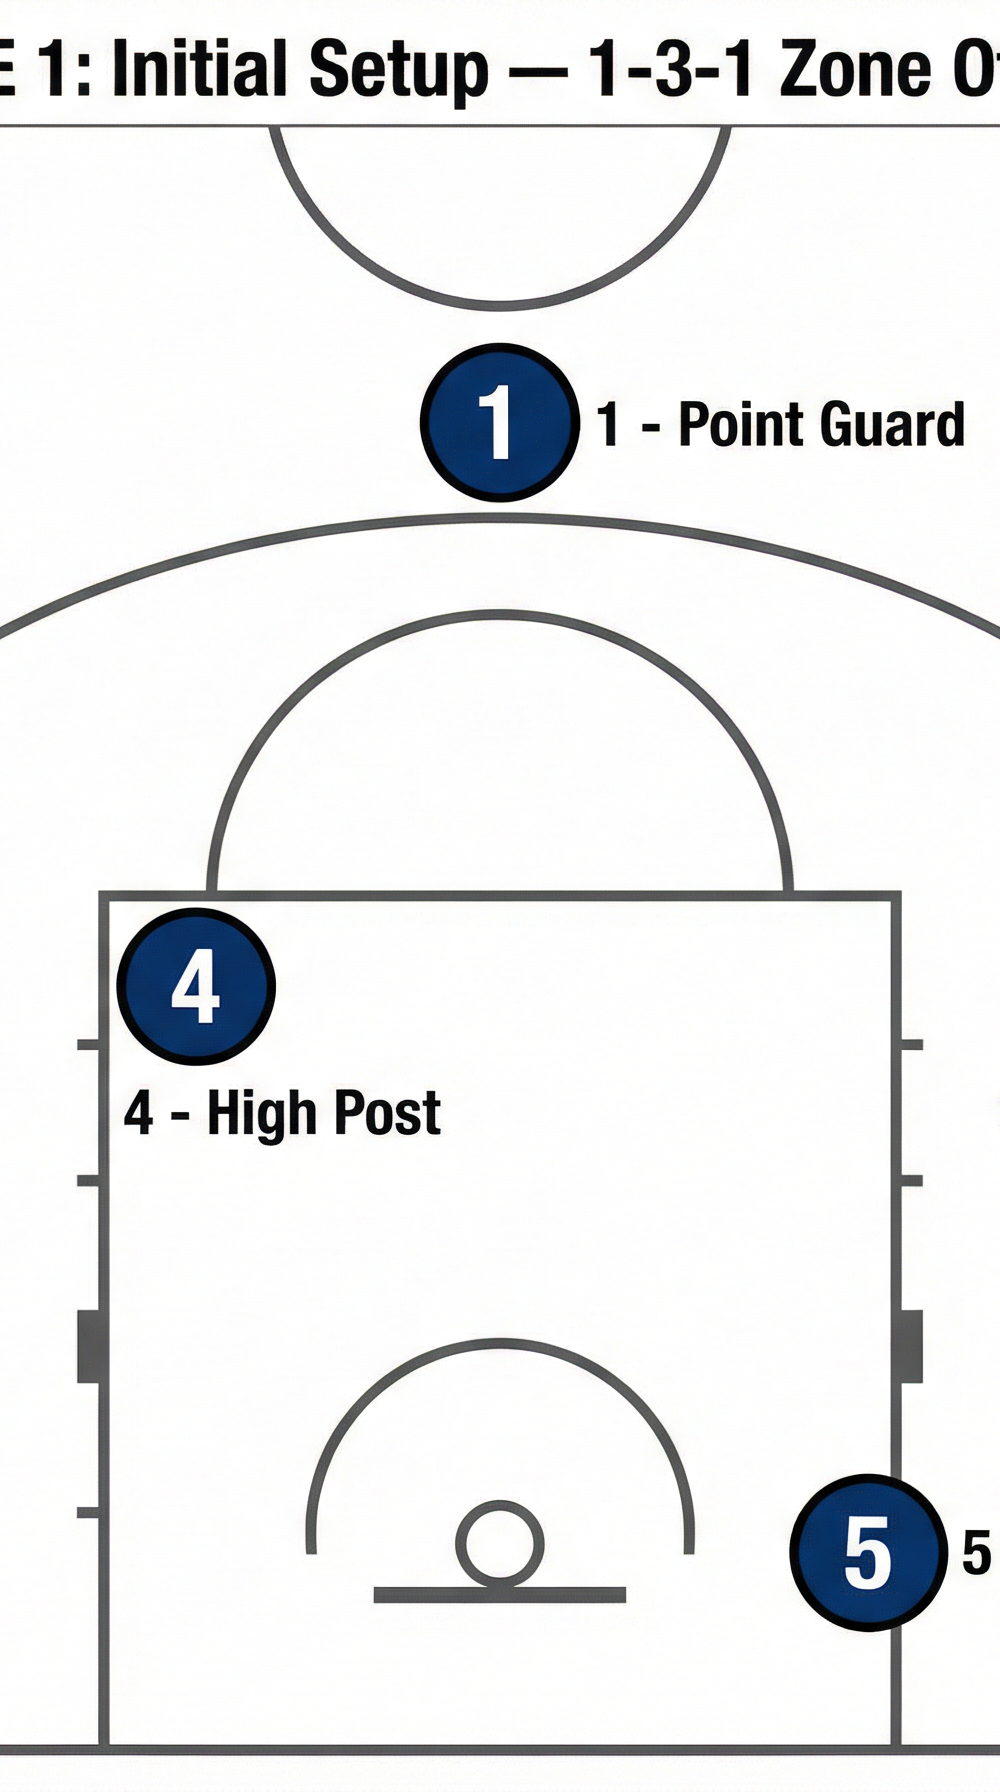
Player Positions:
| # | Position | Starting Location | Primary Role |
|---|---|---|---|
| 1 | Point Guard | Top of key, ~1m beyond the arc | Initiates offense, directs traffic |
| 2 | Left Wing | Left wing, ~1m outside the arc | Ball receiver, perimeter threat |
| 3 | Right Wing | Right wing, ~1m outside the arc | Primary kick-out shooter |
| 4 | High Post | Free-throw line elbow (ball-side) | Facilitator, mid-range scorer |
| 5 | Baseline Runner | Strong-side block, baseline | Baseline scorer, offensive rebounder |

3. Step-by-Step Instructions

Executing this offense requires patience, precise passing, and decisive player movement. Walk your team through each phase before adding defense.
Step 1 — The Initial Entry (0–2 seconds)
Player 1 brings the ball across half-court and initiates the offense by making a sharp chest pass to Player 2 on the left wing. This forces the top defender of the 1-3-1 zone to shift toward the ball, while the wing defender must close out on Player 2. Player 1 does not stand still — they immediately shift slightly toward the right wing to open the passing lane for a potential reversal.
Step 2 — The High Post Flash (simultaneous with Step 1)
As the ball is passed to Player 2, Player 4 immediately flashes to the ball-side elbow (left elbow, approximately 5m from the basket). This movement forces the middle defender of the zone to step up and make a decision: guard the high post or protect the lane. Player 4 must present a target hand and be ready to catch and face the basket in one motion.
Step 3 — The Baseline Roam (simultaneous with Steps 1–2)
Player 5 moves along the baseline to the strong-side corner (left corner, approximately 1m from the sideline and 1m from the baseline). This movement forces the bottom defender of the zone to commit to the corner, opening the weak-side block for a potential skip pass or offensive rebound position.
Step 4 — Reading the Defense (2–4 seconds)
Player 2 now reads the defense and has three immediate options:
- Pass to Player 4 at the high post if the middle defender has not stepped up.
- Pass to Player 5 in the corner if the bottom defender has not closed out.
- Reverse the ball to Player 1 if both options are covered.
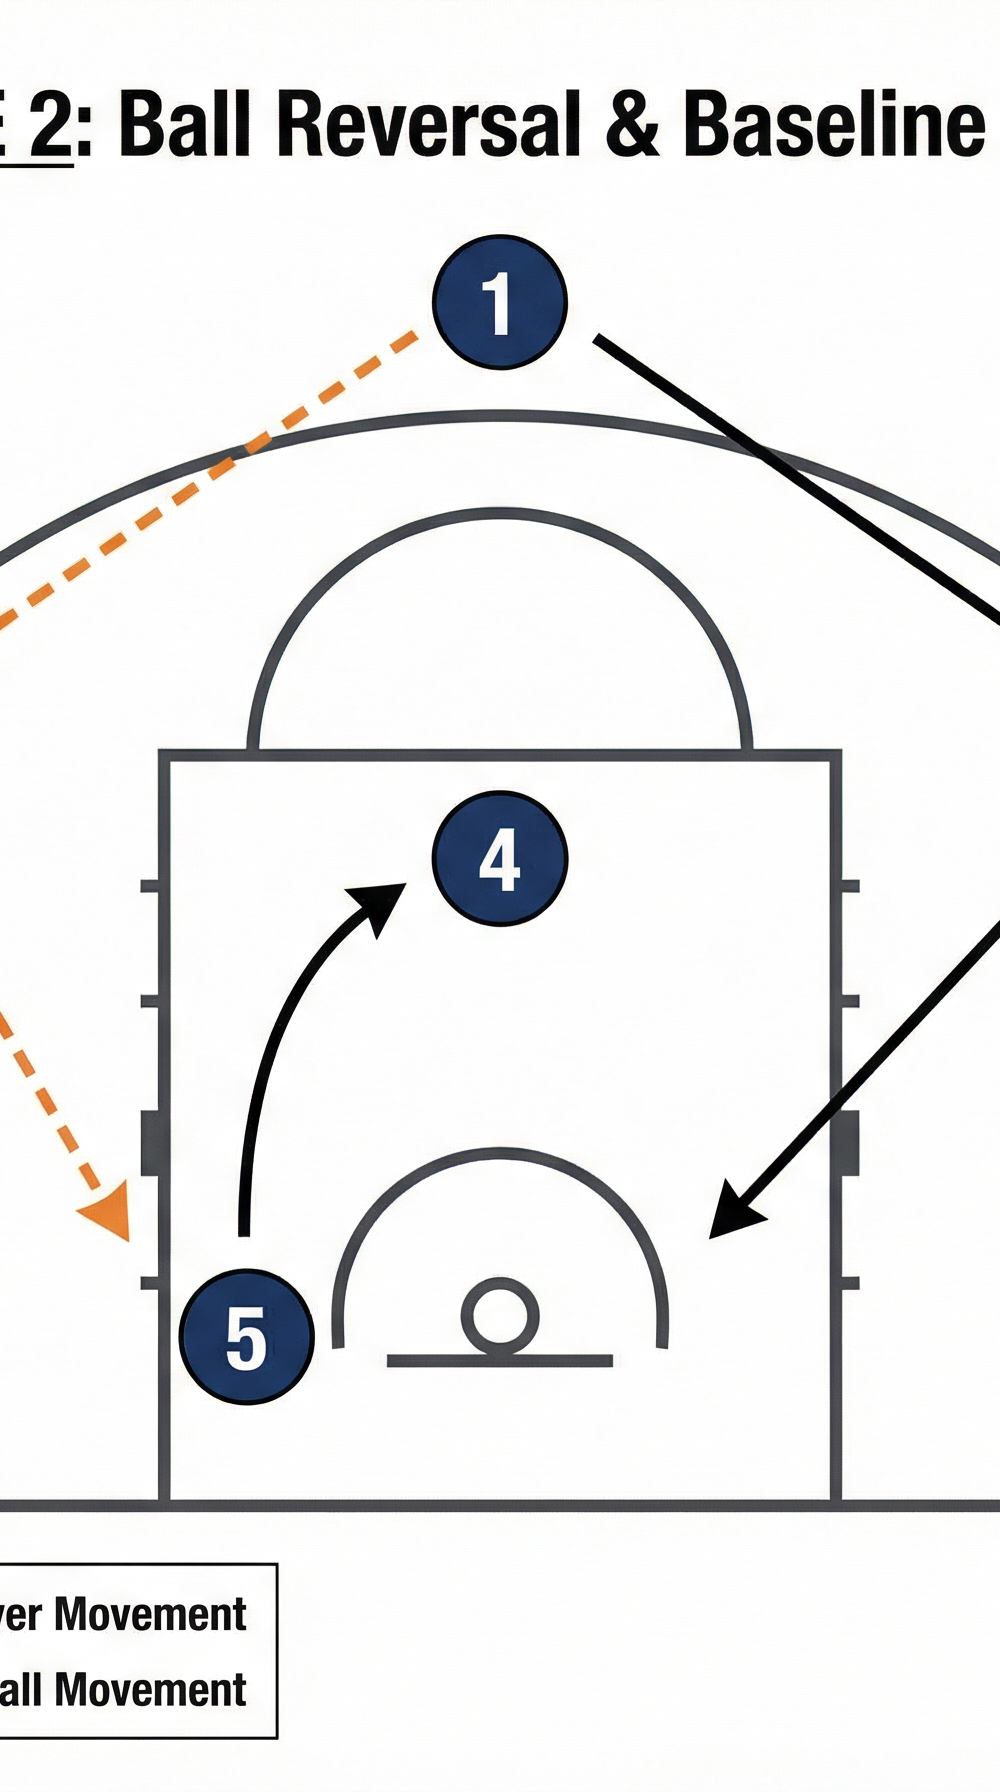
Step 5 — The Ball Reversal (if needed)
If the defense successfully covers both the high post and the corner, Player 2 quickly reverses the ball to Player 1 at the top of the key. Player 1 immediately swings the ball to Player 3 on the right wing. This reversal must be completed in under 2 seconds to prevent the zone from recovering.

Step 6 — The Weak-Side Attack (4–6 seconds)
As the ball is reversed to Player 3, the defense is forced into a long, scrambling closeout across the entire width of the court. Player 5 sprints along the baseline to the right corner, while Player 4 flashes to the right elbow. Player 3 now has the same three options as Player 2 had in Step 4, but against a defense that is now out of position and scrambling.
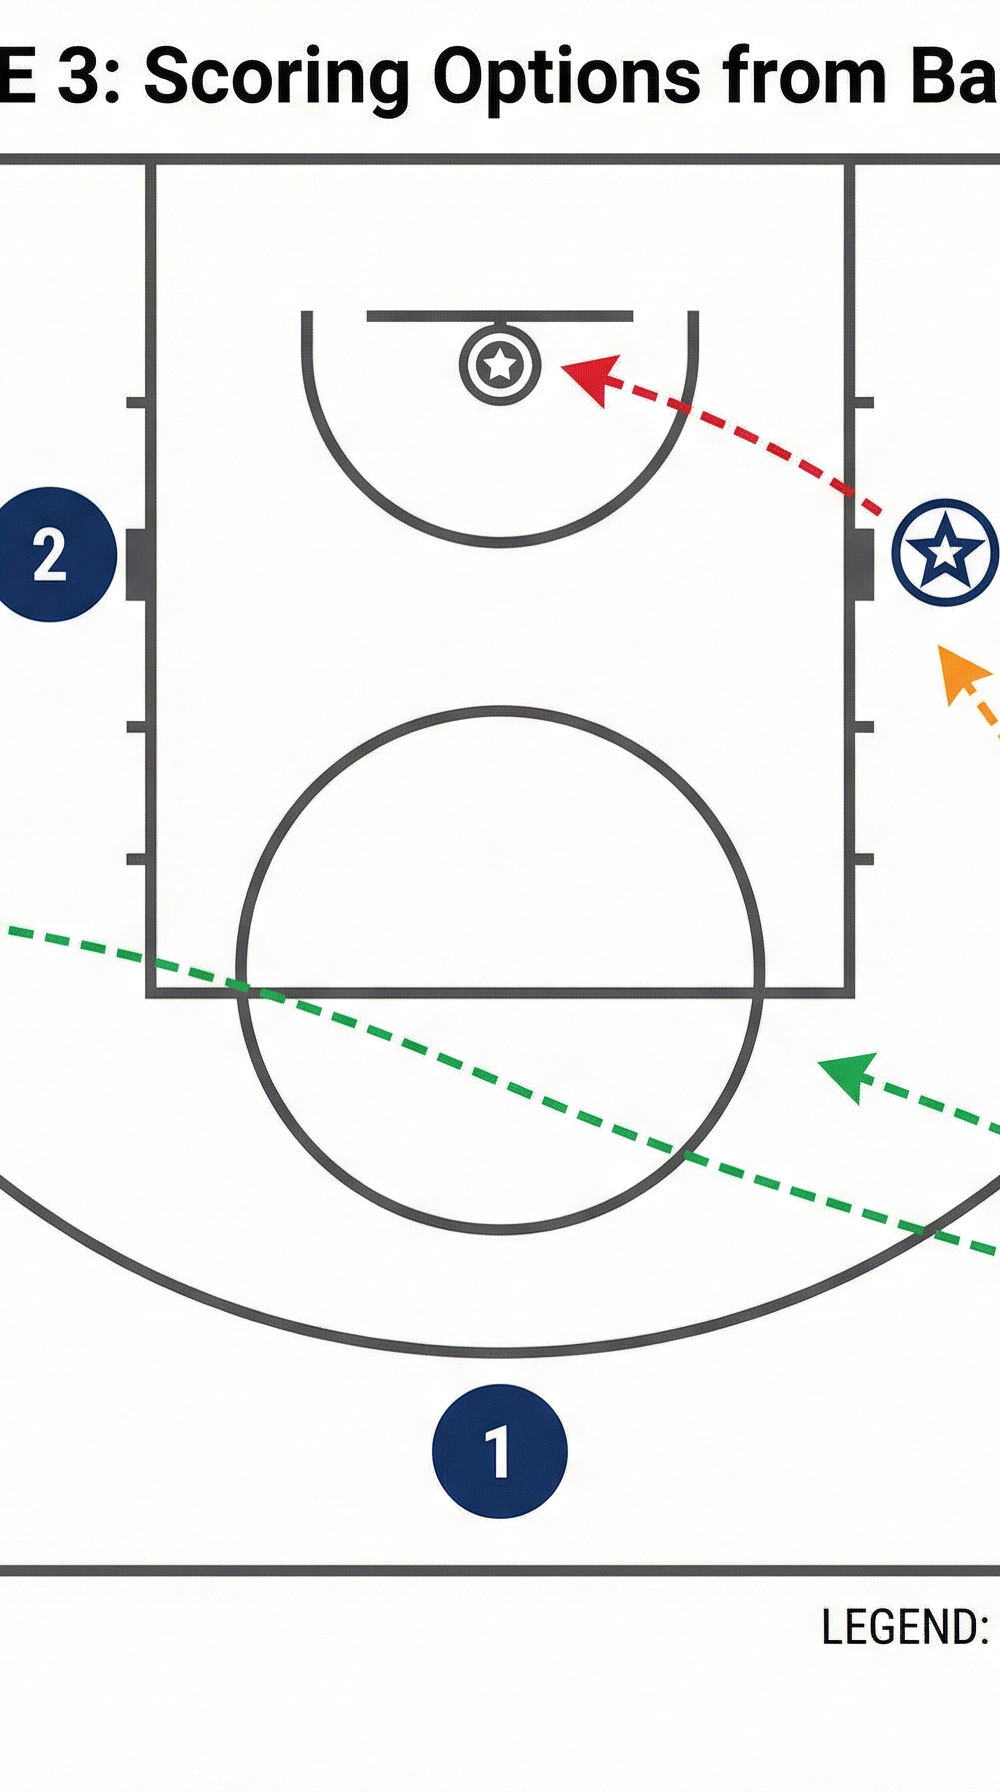
Step 7 — Executing the Scoring Options
Once the ball reaches the corner (Player 5) or the wing (Player 3), the offense attacks with one of three primary scoring options:
- Option A — High-Post Mid-Range: Player 5 or Player 3 passes to Player 4 at the ball-side elbow for a mid-range jump shot (~5m from the basket). The middle defender cannot guard both the high post and the lane simultaneously.
- Option B — Baseline Drive: Player 5 receives the ball in the corner and drives the baseline toward the basket. The bottom defender has been drawn to the corner, leaving the lane open for a layup or short floater.
- Option C — Kick-Out Three: Player 5 receives the ball in the corner, draws the defense, and kicks the ball out to Player 3 (or Player 2 via a skip pass) for an open three-point attempt from the wing.

4. Key Coaching Points
To ensure your team runs this offense effectively, emphasize the following points in every practice session.
1. Move the Ball, Move the Defense. The entire premise of this offense is that the ball must move faster than the defense can shift. Emphasize quick, crisp passes — no more than 2 seconds with the ball before making a decision. A stationary ball gives the zone time to set and trap.
2. High Post Spacing is Non-Negotiable. Player 4 must maintain their position at the free-throw line elbow. If they drift below the block, they clog the lane and allow the middle defender to guard both the high and low post simultaneously. The free-throw line is their home — they must flash to it aggressively every time the ball enters the wing.
3. Player 5 Must Be Relentless on the Baseline. The baseline runner is the engine of this offense. Player 5 must sprint from corner to corner on every ball reversal, never walking and never standing still. A lazy baseline runner allows the bottom defender to cheat up and help on the wings, collapsing the entire offense.
4. Catch the Ball Shot-Ready. Every perimeter player (1, 2, and 3) must catch the ball in triple-threat position, feet set, ready to shoot. If players catch and then set their feet, the defense has time to close out and take away the shot. Shot-readiness forces the defense to respect the perimeter threat and opens up the interior.
5. Communicate the Options. Player 1 should be calling out the play and directing traffic. Verbal communication — "reverse," "high post," "corner" — keeps all five players on the same page and speeds up decision-making.
6. Offensive Rebounding Positioning. When a shot goes up, Players 4 and 5 must crash the offensive glass from the high post and baseline positions. Players 1, 2, and 3 must maintain defensive balance by staying back. The 1-3-1 zone is vulnerable to offensive rebounds because the bottom defender is often out of position.
5. Common Mistakes
Watch for these errors in practice and correct them immediately before they become habits.
Mistake 1 — Holding the Ball. The most common mistake. Players receive the ball and freeze, looking for the perfect pass. Teach players to make a decision before they catch the ball by reading the defense as the pass is in the air. Use a 3-second shot-clock rule in practice to force quick decision-making.
Mistake 2 — Stagnant High Post. Player 4 stands at the elbow and waits. The middle defender simply guards them without having to move. Player 4 must flash to the ball-side elbow on every pass, making the defender work and creating passing angles. If the defender fronts Player 4, they should seal and call for a lob pass.
Mistake 3 — Ignoring the Baseline Runner. Wings and the point guard forget to look for Player 5 on the baseline. This allows the bottom defender to sag and help on the high post and wings. Remind players to check the corner on every catch — even a look in that direction will freeze the bottom defender.
Mistake 4 — Slow Ball Reversals. Players take two or three dribbles before reversing the ball, giving the zone time to recover. Emphasize that the reversal should be a direct pass — no dribbling unless necessary to create a passing angle. Every dribble gives the defense a step.
Mistake 5 — Perimeter Players Drifting Inside the Arc. Wings and the point guard drift inside the three-point arc, compressing the spacing and making it easier for the zone to cover multiple players. Establish clear court markers (cones) in practice to keep perimeter players at the correct distance.
6. Variations & Progressions
Once your team has mastered the basic structure, introduce these variations to add layers of complexity and keep the defense guessing.
Variation 1 — High Post Isolation. If Player 4 consistently receives the ball at the high post and the middle defender is slow to close out, call a set play where Player 4 catches and immediately faces the basket for a one-on-one isolation. Player 4 can shoot the mid-range jumper, drive left toward the baseline, or drive right toward the top of the key. This forces the defense to send a second defender, which opens up a kick-out pass to a perimeter player.
Variation 2 — Baseline Skip Pass. Instead of reversing the ball through Player 1, Player 2 (or Player 3) can look for a skip pass directly to the opposite wing, bypassing the top of the key entirely. This is a higher-risk, higher-reward option that can generate an open three-pointer before the defense can rotate. Teach this variation only after players are comfortable with the basic reversal.
Progression — Add a Screener. Once the basic offense is running smoothly, add a cross-screen from Player 3 for Player 5 as the ball is reversed. Player 5 uses the screen to get open in the corner, and Player 3 pops to the wing after setting the screen. This creates a two-player action that is very difficult for the 1-3-1 zone to defend.
7. Age Adaptations

This offense can be scaled to suit different age groups and experience levels.
| Age Group | Adaptation |
|---|---|
| Under 12 | Focus only on basic perimeter passing and spacing. Remove the high post flash and baseline roam. Teach players to pass around the perimeter until a defender overcommits, then drive the gap. Use cones to mark positions. |
| Under 14 | Introduce the high post flash (Step 2) and the baseline roam (Step 3). Focus on the two-man game between the wing and the high post. Introduce the concept of reading the defense before catching the ball. |
| Under 16 | Implement the full offense including ball reversals, all three scoring options, and the skip pass variation. Begin teaching players to read the defense and make the correct decision under pressure. |
| Open / Senior | Add the cross-screen progression and the high post isolation variation. Focus on tempo control, shot selection, and offensive rebounding positioning. Introduce the offense against live 1-3-1 zone defense in 5-on-5 scrimmages. |