Mastering the 1-3-1 Zone Offense: Overload & High-Low Action
Dismantle the 1-3-1 zone defense using strategic floor spacing, rapid ball reversal, and lethal high-low actions to create high-percentage scoring opportunities.
Equipment Needed
1. Overview
The 1-3-1 zone defense is designed to trap the corners, force turnovers, and disrupt offensive rhythm by aggressively pressuring the ball handler. To counter this, a structured 1-3-1 zone offense focuses on exploiting the gaps in the defense—specifically the corners, the high post, and the weak-side blocks. This set play uses an initial 1-3-1 offensive alignment to stretch the defense, followed by rapid ball reversal and high-low action to create high-percentage shots. It is highly effective when you have a skilled passing big man at the high post and capable shooters on the wings.
2. Setup
Court Dimensions: Standard FIBA Court (28m x 15m)
Equipment Needed: 1 Basketball, 5 offensive players, 5 defensive players (for live drills)
Initial Player Positions:
- Player 1 (Point Guard): Top of the key, initiating the offense.
- Player 2 (Right Wing): Right wing, stationed behind the three-point arc.
- Player 3 (Left Wing): Left wing, stationed behind the three-point arc.
- Player 4 (High Post): Free throw line elbow, ready to act as the primary offensive hub.
- Player 5 (Low Post / Baseline Runner): Starting on the right block, prepared to run the baseline.
3. Step-by-Step Instructions
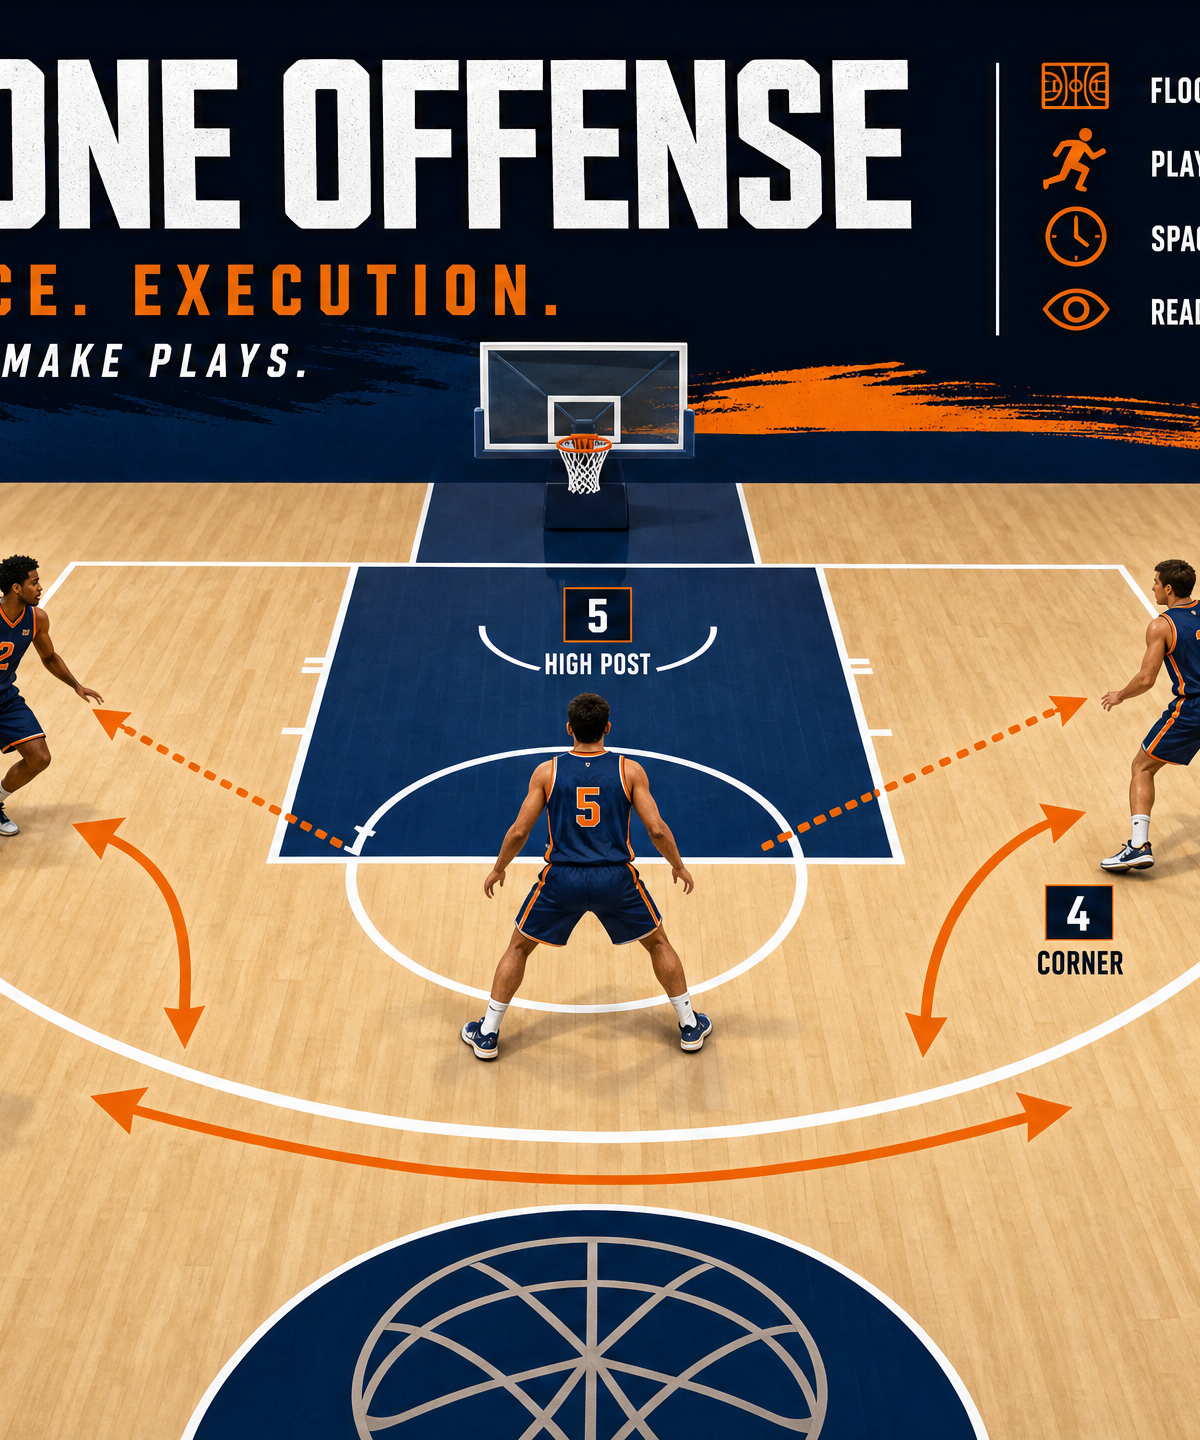
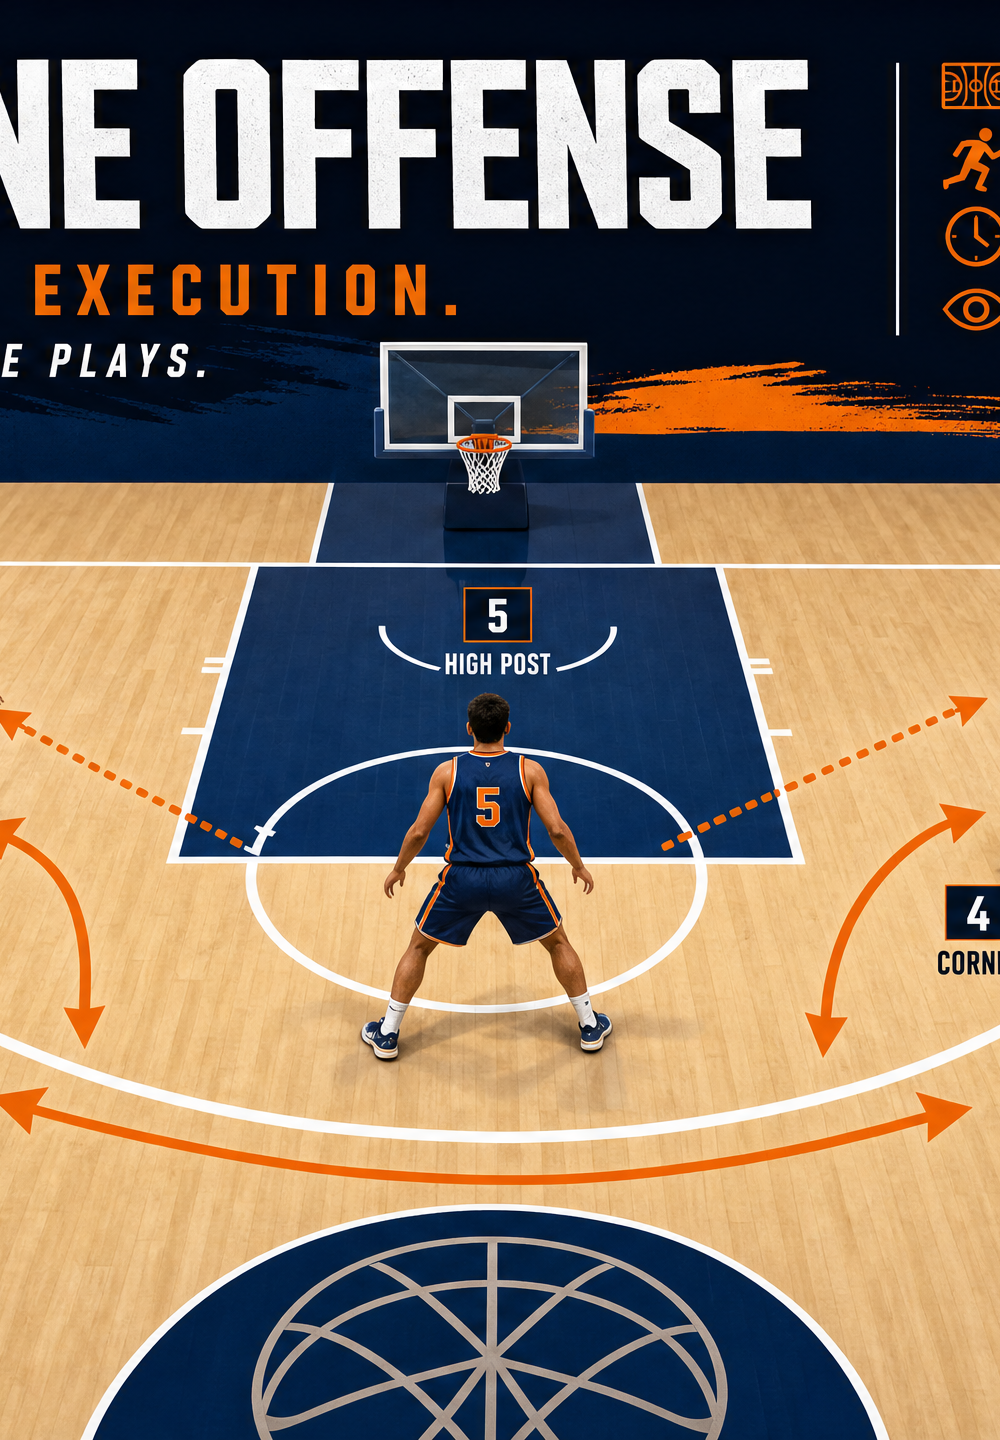
Phase 1: Initial Entry & Spacing
- Player 1 brings the ball up the court and establishes position at the top of the key. The primary goal is to engage the top defender of the 1-3-1 zone.
- Player 2 and Player 3 must maintain wide spacing on the wings to stretch the middle three defenders of the zone.
- Player 4 flashes to the free throw line (high post), looking to find the soft spot in the middle of the zone.
- Player 5 starts on the strong-side block (right block) and prepares to act as the baseline runner.
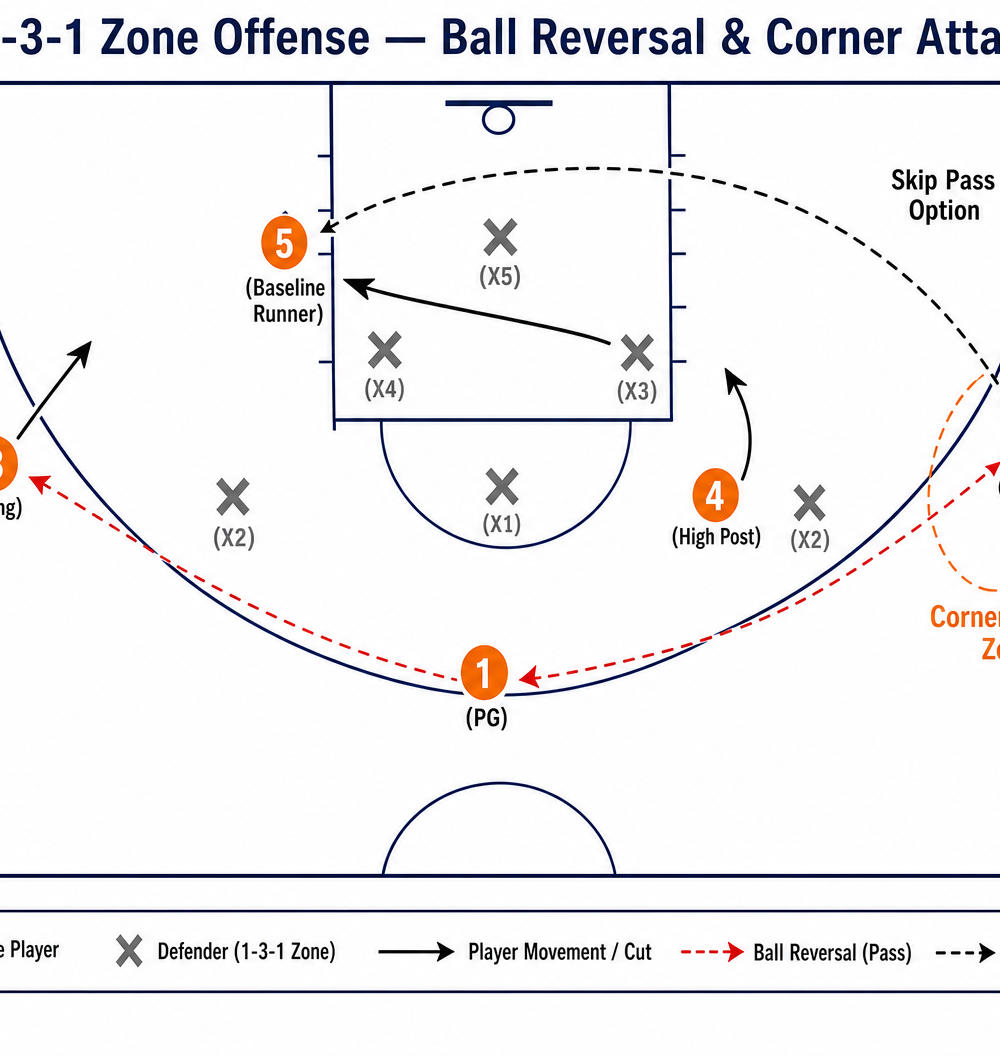
Phase 2: Ball Reversal & Corner Attack
- Player 1 passes the ball to Player 2 on the right wing.
- As the pass is made, Player 5 cuts along the baseline to the strong-side corner (right corner) to overload the zone.
- Player 2 immediately looks to enter the ball to Player 5 in the corner. If the corner is covered, Player 2 reverses the ball back to Player 1.
- Player 1 quickly swings the ball to Player 3 on the left wing.
- On the pass to Player 3, Player 5 runs the baseline from the right corner to the left block, forcing the bottom defender of the 1-3-1 zone to make a difficult decision.

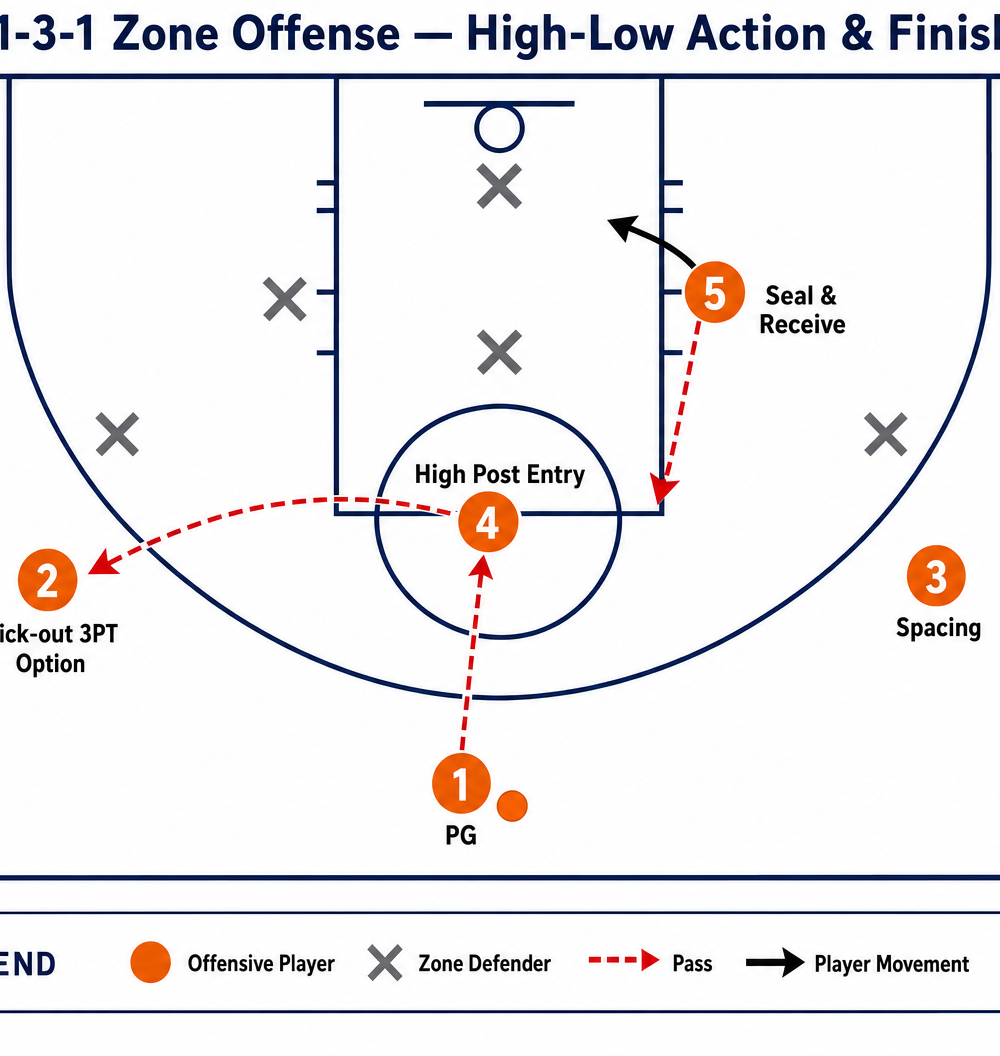
Phase 3: High-Low Action & Finish
- With the ball on the left wing with Player 3, the defense shifts. Player 4 dives from the high post to the strong-side elbow (left elbow).
- Player 3 passes the ball to Player 4 at the high post.
- As Player 4 catches the ball, Player 5 seals their defender on the left block.
- Player 4 reads the defense:
- Option A (Primary): Pass down to Player 5 for an easy layup (High-Low Action).
- Option B: If the defense collapses on Player 5, Player 4 kicks the ball out to Player 2 on the opposite wing for a wide-open three-point shot.
- Option C: Player 4 can take the mid-range jumper if the defense sags off.
4. Key Coaching Points
- Patience and Ball Movement: The zone will not break down on the first pass. Players must use quick, crisp passes to force the defense to shift continuously.
- High Post Hub: Player 4 must be a willing passer and a threat to score. Catching the ball at the high post is the key to collapsing the 1-3-1 zone.
- Baseline Runner Timing: Player 5 must time their baseline cuts with the flight of the ball. Arriving too early allows the defense to adjust; arriving too late misses the window of opportunity.
- Use Pass Fakes: Encourage players to use shot fakes and pass fakes to freeze the zone defenders and open up passing lanes.
5. Common Mistakes
- Holding the Ball: Players holding the ball for more than 2 seconds allow the zone to recover and set their traps.
- Poor Spacing: Wings creeping in too close to the paint allow one defender to guard two offensive players.
- Ignoring the High Post: Settling for perimeter passes without looking inside to Player 4 at the free throw line.
- Weak Passes: Lob passes or slow bounce passes are easily intercepted by the long arms of the zone defenders.
6. Variations & Progressions
- Skip Passes: Instead of reversing the ball through the point guard, encourage the wings to throw skip passes directly across the court to shift the zone faster.
- Dribble Penetration: If the defense over-extends to deny the pass, wings can use one or two hard dribbles into the gaps to force the defense to collapse, then kick out.
- Screen the Zone: Add a pin-down screen on the weak side of the zone to free up a shooter when the ball is reversed.
7. Age Adaptations
- Under 12s: Focus purely on spacing, basic ball reversal, and finding the open player. Reduce the complexity of the baseline runner.
- Under 14s/16s: Introduce the high-low action and emphasize the importance of pass fakes and reading the defense.
- Open/Advanced: Execute the full play with variations, focusing on rapid ball movement, skip passes, and exploiting defensive mismatches.