Break the Press: Full-Court Pressure Survival & Attack System
A complete, immediately deployable press break system that teaches your players to stay calm, find the open man, and turn full-court pressure into fast-break scoring opportunities.
Equipment Needed
Overview
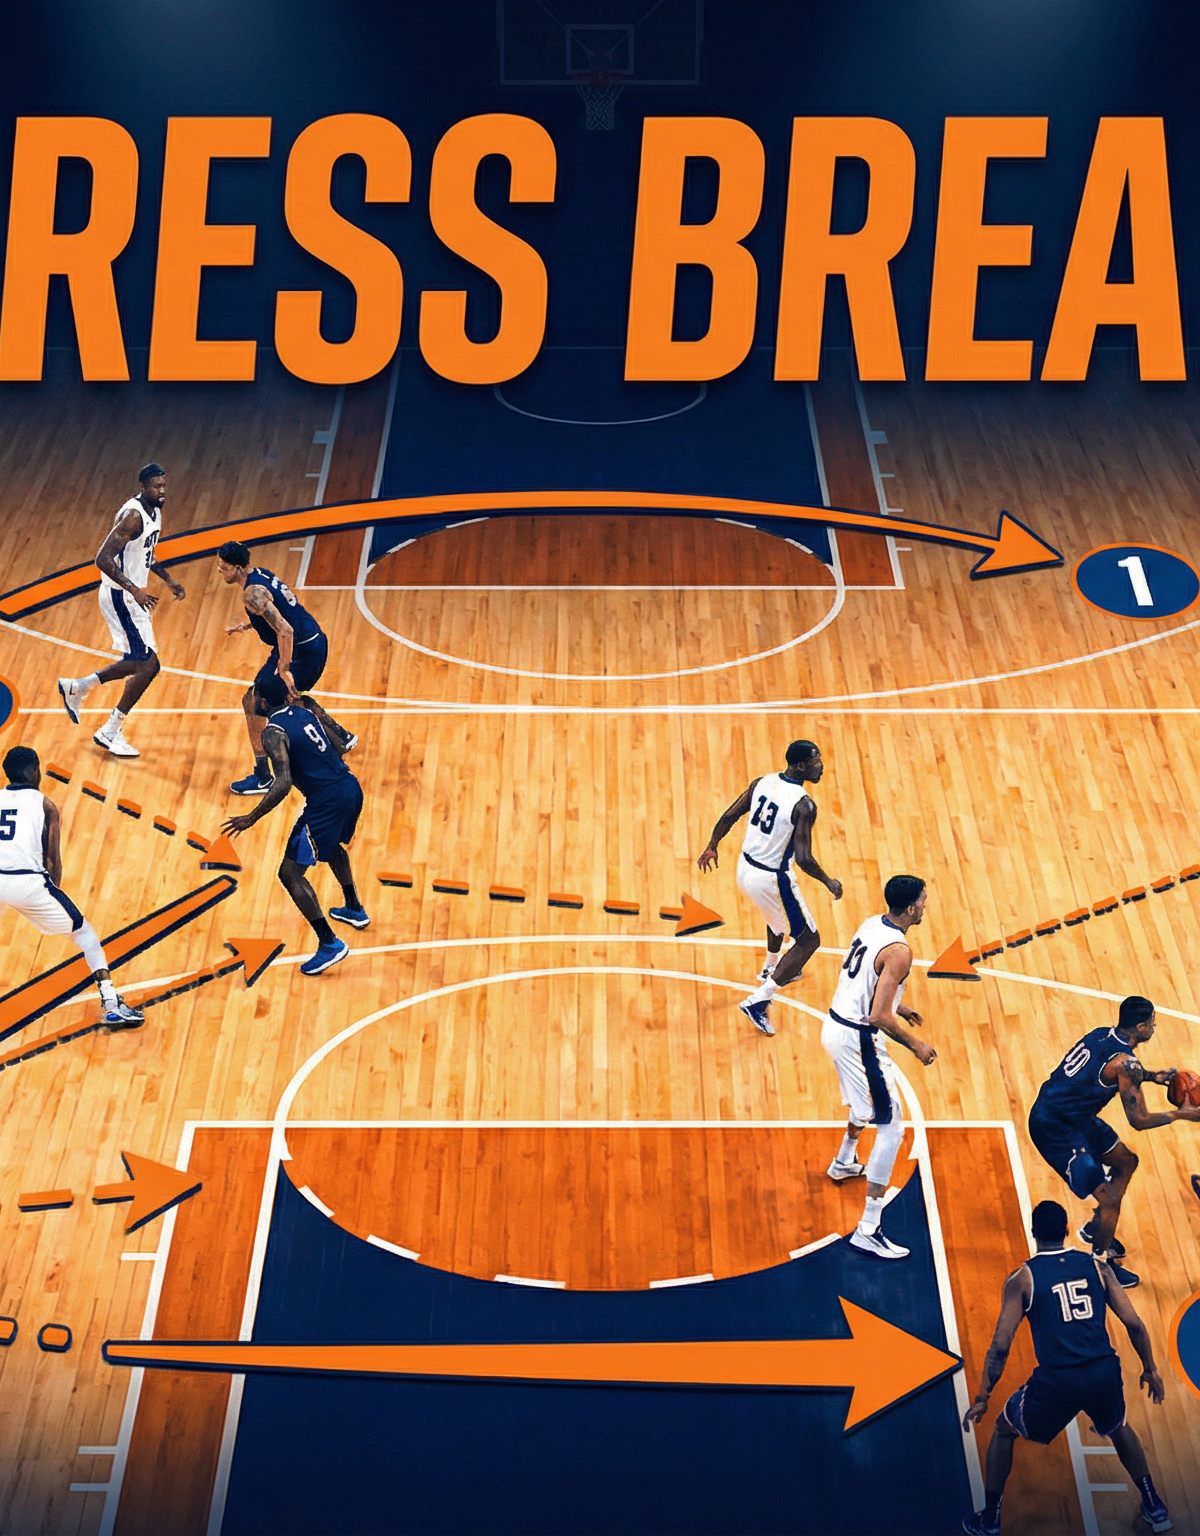
Full-court pressure is one of the most psychologically disruptive tactics in basketball. When a team applies a full-court man-to-man or zone press, their goal is not simply to force a turnover — it is to rattle your players, accelerate the game's tempo beyond your comfort zone, and manufacture easy transition baskets. The Press Break system described in this resource is a structured, five-player set play designed to neutralise that pressure, advance the ball efficiently into the front court, and — crucially — convert the press itself into a numerical advantage at the attacking end.
This play is most effective immediately after your team scores (when the opponent is most likely to initiate the press), following a made free throw, or any time you recognise the opposition setting up in a full-court alignment. On a FIBA-regulation court (28m long × 15m wide), spacing is everything: the play exploits the full width and length of the court to stretch the press and create passing lanes that defenders cannot cover simultaneously.
When to call it: Use a verbal cue (e.g., "BLUE!") or a hand signal from the bench the moment your team scores. All five players must recognise the call and sprint to their designated starting positions before the inbound count begins.
Setup

Equipment Required
- Full FIBA basketball court (28m × 15m)
- 1 basketball per group (minimum 2 balls for multi-group practice)
- Cones or floor markers (optional, for initial learning phase)
- Coaching whiteboard or tablet for pre-session walkthrough
Player Positions & Starting Alignment
The press break uses a 1-2-1-1 inbound formation, which provides width at every level of the court and guarantees a safety valve at all times.
| Position | Role | Starting Location |
|---|---|---|
| 1 — Point Guard | Inbounder / Primary ball-handler | Out of bounds, baseline right side |
| 2 — Shooting Guard | First outlet / Right wing runner | Right sideline, approx. 6–8m from baseline |
| 3 — Small Forward | Left wing runner / Width provider | Left sideline, approx. 6–8m from baseline |
| 4 — Power Forward | Middle safety valve | Centre court, just behind the half-court line |
| 5 — Centre | Long outlet / Rim runner | Far three-point arc, centre of court |

Diagram 1 — Phase 1: Inbound Setup. Player 1 inbounds from the baseline right. Players 2 and 3 provide immediate outlets on each sideline. Player 4 sits at half-court as the safety valve, and Player 5 sprints ahead to the far arc.
Step-by-Step Instructions

Step 1 — Trigger & Sprint to Positions (0–2 seconds)
The moment your team scores, Player 1 sprints out of bounds to retrieve the ball at the baseline. Simultaneously, Players 2 and 3 sprint wide to their respective sideline positions approximately 6–8 metres from the baseline. Player 4 moves immediately to the centre of the court near the half-court line. Player 5 sprints the full length of the court to the far three-point arc. No player should walk to their position. The speed of the initial setup is itself a weapon — it forces the press to scramble and reduces the time defenders have to organise traps.
Step 2 — Read the Defence on the Inbound (2–4 seconds)
Player 1 has 5 seconds to inbound the ball (FIBA rules). Before releasing the pass, Player 1 must read which receiver is most open. The priority order is: Player 2 first (right sideline), then Player 3 (left sideline), then Player 4 (safety valve). Player 5 is almost never the inbound target — their role is to stretch the defence vertically. Player 2 should use a V-cut: take one step toward the baseline to engage their defender, then explode back up the sideline to create separation. If no outlet is available within 3 seconds, Player 4 must immediately drop back toward the baseline to provide a closer safety option.
Step 3 — Receive and Attack the Sideline (4–6 seconds)
Whichever perimeter player (2 or 3) receives the inbound pass must immediately face up the court and attack the sideline at pace. Do not stop and dribble in place. The receiver's first instinct should be to push the ball forward. If their defender has recovered and is cutting off the advance, they look immediately for the next pass option. Player 1, after inbounding, sprints inbounds along the baseline and then up the opposite sideline from the receiver, providing a back-side outlet and keeping the court balanced.
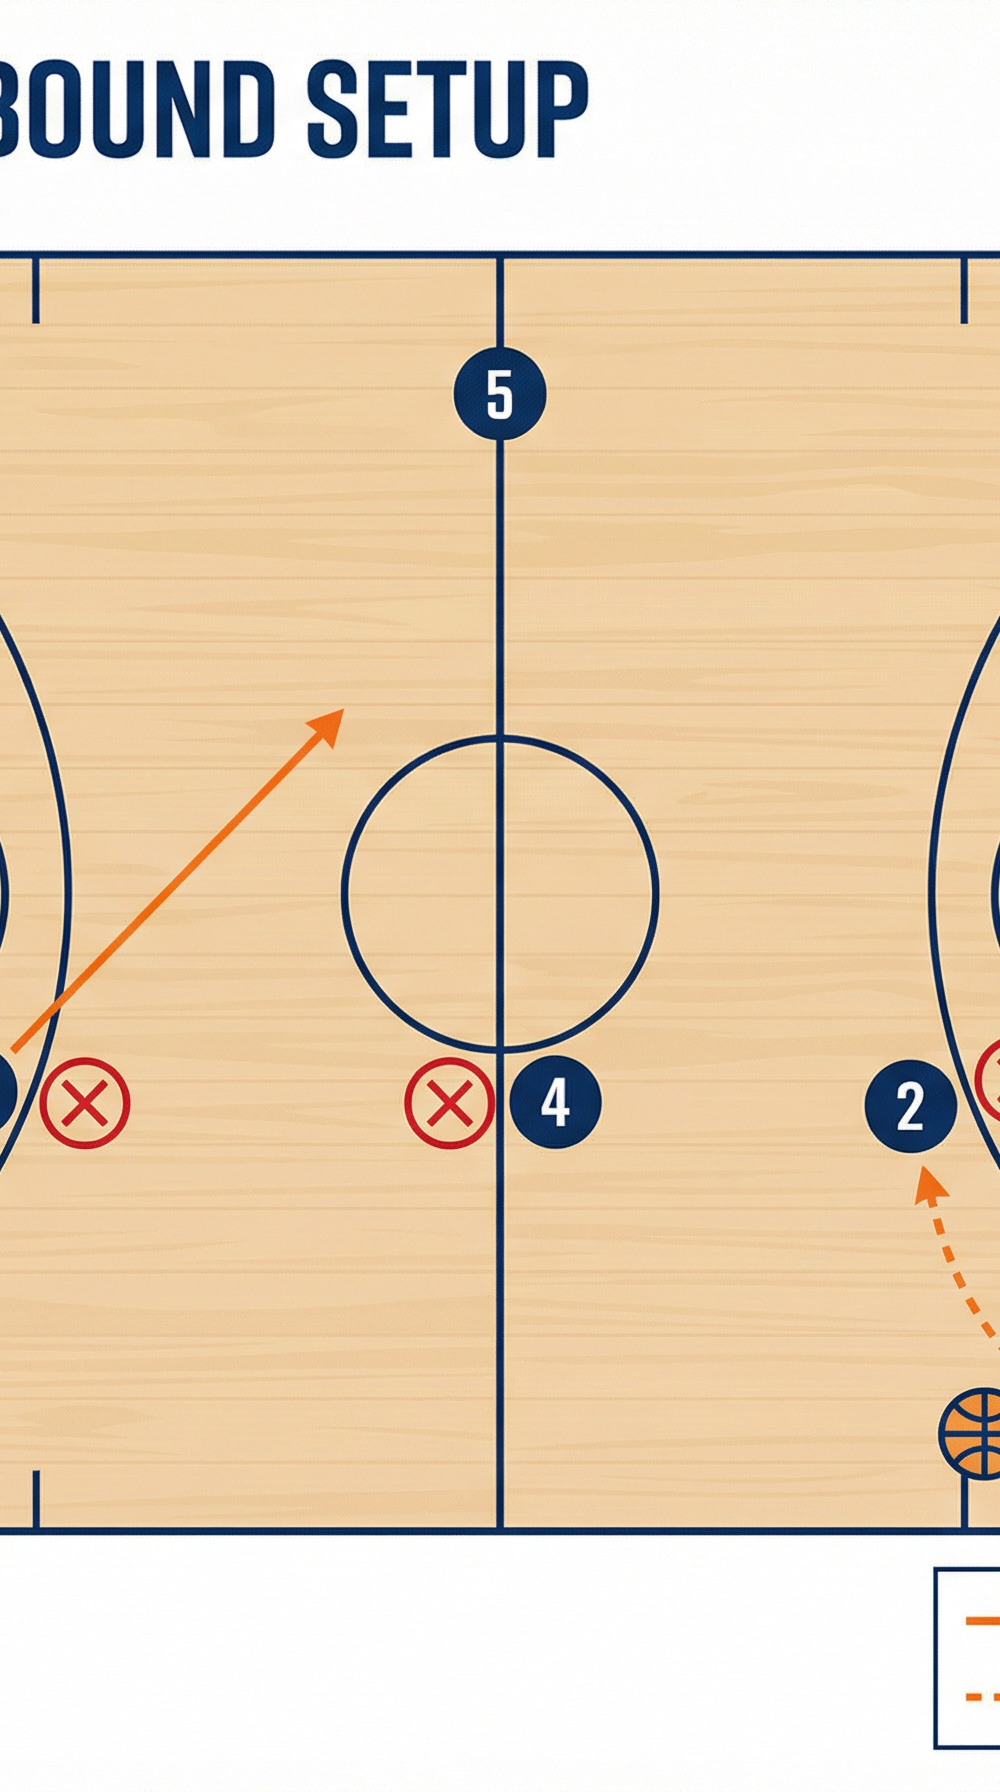
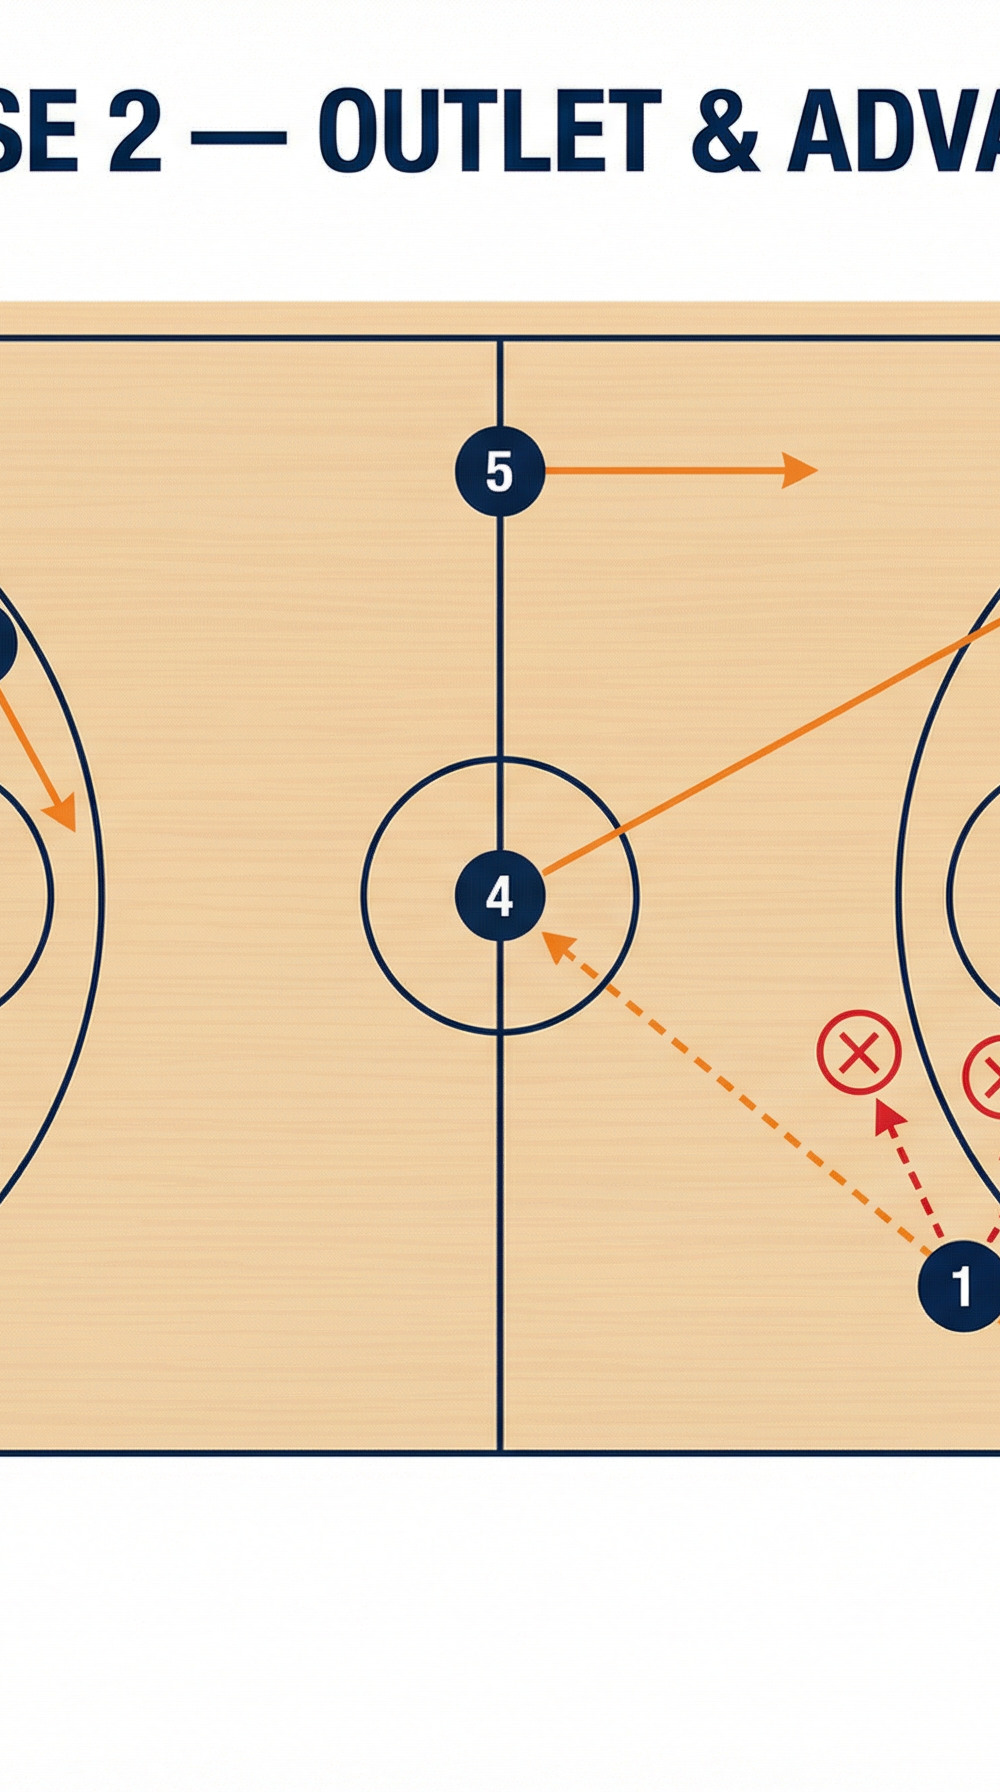
Diagram 2 — Phase 2: Outlet & Advance. Player 1 has delivered the inbound pass to Player 2 on the right sideline. Player 2 pushes up the sideline. Player 3 continues sprinting up the left side as a wide option. Player 4 provides the safety valve at half-court. Player 5 continues running to the far arc.
Step 4 — Navigate the Half-Court Trap Zone (6–9 seconds)
The most dangerous area for turnovers is the half-court trap zone — the area within 3 metres either side of the mid-court line, especially near the sideline corners. Many pressing teams will attempt a two-man trap here. Player 4's role becomes critical: they must position themselves in the middle of the court, away from the sideline, so the ball-handler always has an interior pass option that splits the trap. If Player 2 is trapped near the right sideline at half-court, the pass to Player 4 in the middle is the escape route. Player 4 must catch, pivot, and immediately look to advance to Player 5 or Player 3 on the far side.
Step 5 — Attack the Front Court (9–12 seconds)
Once the ball crosses half-court, the press is effectively broken. The team should now have a numerical advantage — typically 3v2 or 4v2 — because the pressing team's defenders are scrambling back. Player 1 (now trailing) pushes into the front court. Player 5 at the far arc becomes the primary scoring option if they have a step on their defender. Player 4 attacks the elbow. Players 2 and 3 fill the wings. Player 1 becomes the point guard at the top of the key, reading the advantage and making the final decision: drive, kick to the wing for a three, or hit Player 5 cutting to the basket.

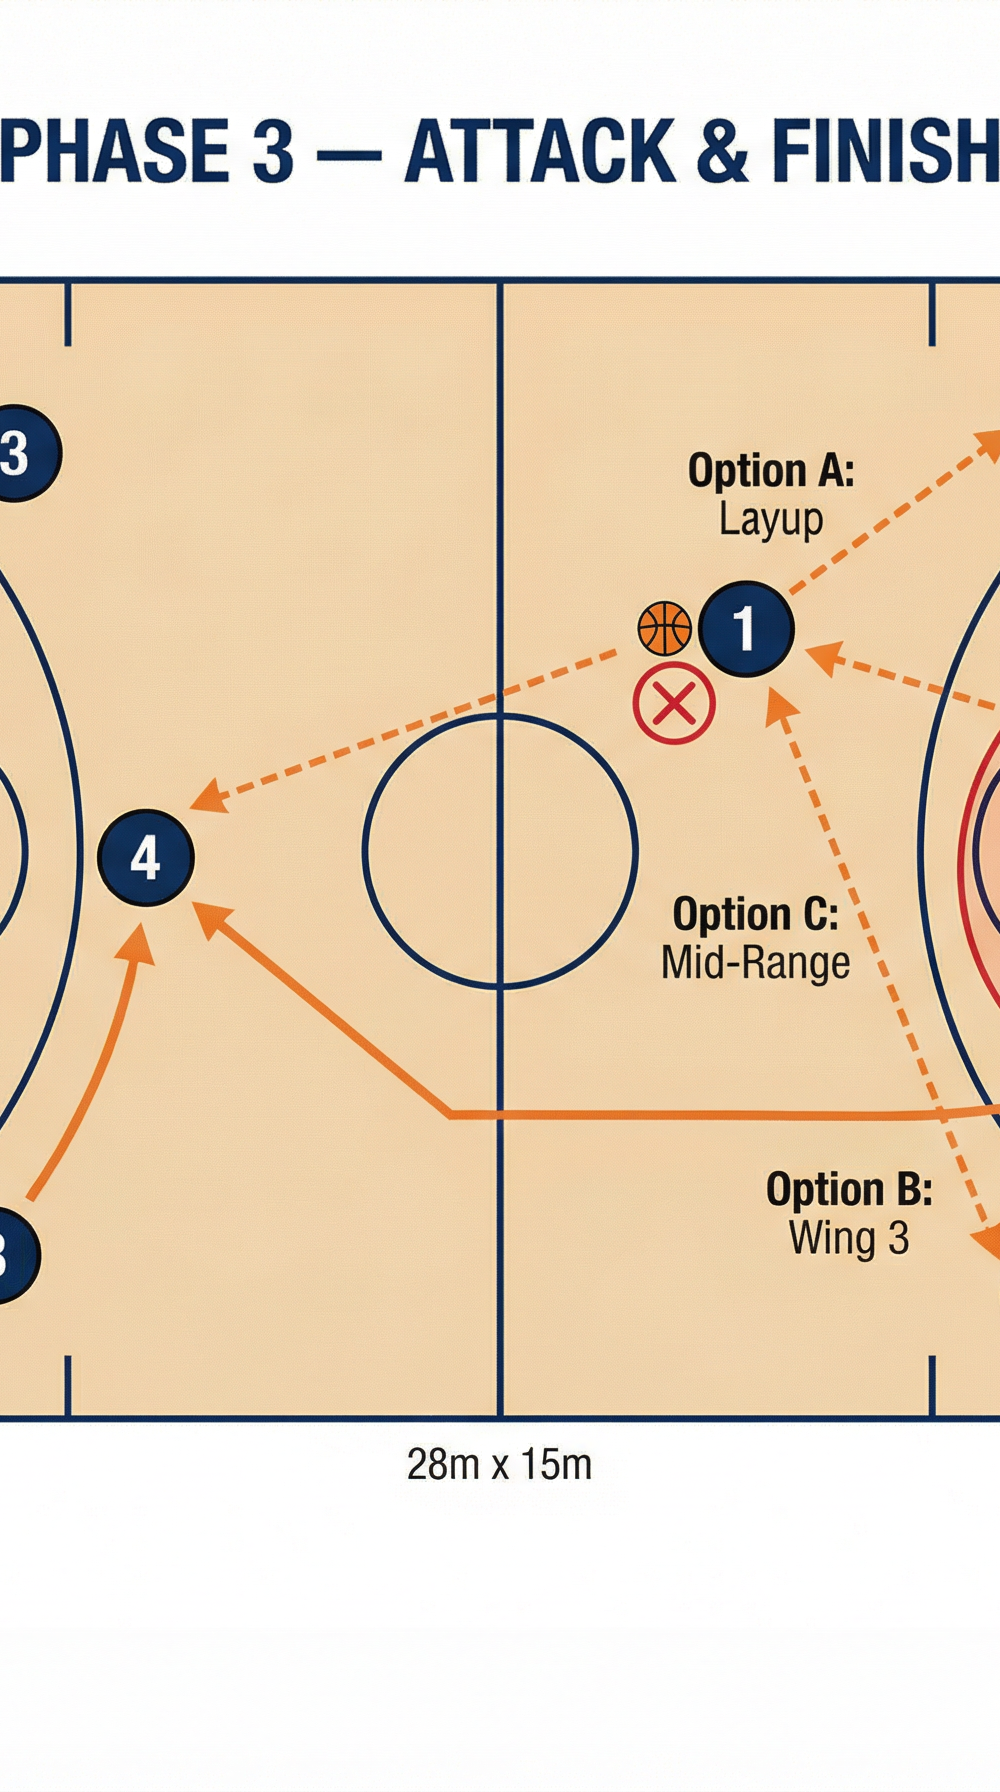
Diagram 3 — Phase 3: Attack & Finish. The press is broken. Player 1 is at the top of the key with three scoring options: Option A — pass to Player 5 cutting to the basket (layup); Option B — kick to Player 2 on the right wing (three-pointer); Option C — hit Player 4 at the elbow (mid-range). The 2v1 advantage in the paint must be exploited.
Key Coaching Points

1. Spacing is the antidote to pressure. The press only works when it can funnel the ball into a congested area. Insist that Players 2 and 3 hug the sidelines — they should be within 1 metre of the line. This forces defenders to cover the maximum possible width of the 15-metre court.
2. The ball-handler must keep their dribble alive. One of the most common press-break killers is a player who catches the ball, picks up their dribble, and then has nowhere to pass. Drill your players to catch in a triple-threat position and, if they must dribble, to push the ball forward rather than sideways or backward.
3. Player 4 is the heartbeat of the press break. The safety valve at half-court is the most important position in this system. Select your most composed, high-basketball-IQ player for this role. They must be able to catch under pressure, pivot quickly, and make the correct decision in under two seconds.
4. Attack the gaps, not the defenders. Teach your players to pass to spaces — lead passes ahead of a sprinting teammate — rather than throwing the ball directly at a stationary receiver who is being fronted by a defender. A pass to the open space 2–3 metres ahead of Player 5 is far more effective than a lob over a defender.
5. Composure is a skill. Practise this play under fatigue and simulated pressure. Run the press break after a conditioning drill when players are tired. The ability to execute calmly when the score is tight and the crowd is loud is built in training, not discovered in games.
6. Never dribble into a trap — pass out of it. If a player finds themselves with two defenders converging, the rule is simple: pass before the trap closes. Establish a "no dribbling into corners" rule during practice and enforce it consistently.
Common Mistakes
Mistake 1 — Clustering near the inbounder. Players instinctively want to help their teammate, so they drift toward the ball. This is the opposite of what the press break requires. Enforce a rule in training: if you are not Player 1, you must sprint away from the ball to your designated position. Use cones in early sessions to mark where each player must stand.
Mistake 2 — Picking up the dribble too early. A player who catches the inbound pass and immediately dribbles twice before stopping has given away their most valuable asset. Teach receivers to survey the court for one full second before dribbling, and to only dribble with purpose — either to advance or to create a passing angle.
Mistake 3 — Player 4 positioning too close to the sideline. The safety valve must be in the middle of the court. A Player 4 who drifts to the sideline becomes part of the trap rather than the escape from it. Physically mark the centre of the court with a cone during early practice sessions.
Mistake 4 — Failing to sprint after inbounding. Player 1 must become an active offensive player the moment the ball leaves their hands. Coaches frequently see the inbounder stand and watch after making the pass. Drill the habit of Player 1 sprinting inbounds immediately, providing a trailing outlet and court balance.
Mistake 5 — Slowing down after crossing half-court. Players often relax once the ball crosses the mid-court line, believing the press is beaten. Emphasise that the advantage is only valuable if they attack immediately. Any hesitation allows the defence to recover and reset.
Variations & Progressions

Variation 1 — "BLUE REVERSE" (Left-Side Inbound)
Mirror the entire play to the left side, with Player 1 inbounding from the baseline left and Player 3 becoming the primary first outlet on the left sideline. This variation is called when the opponent's press is overloading the right side. Having both versions in your playbook forces the pressing team to defend the full width of the court and prevents them from loading up on one side.
Variation 2 — "BLUE LONG" (Direct Long Pass to Player 5)
If Player 5 has beaten their defender to the far arc and has a clear step advantage, Player 1 can bypass the intermediate outlets and throw a direct long pass to Player 5 for an immediate layup or short jumper. This is a high-risk, high-reward option that should only be used when the advantage is clear. Practise the long inbound pass separately as a standalone drill.
Progression — 4-on-4 Press Break Drill
Begin teaching the press break in a 4-on-4 format (removing Player 5) on a half-court, then expand to full-court 4-on-4, and finally to full 5-on-5. The 4-on-4 format simplifies the decision-making and allows players to understand their roles before adding the complexity of the long outlet. Add a live defence that is permitted to trap aggressively, rewarding the offence with a free throw attempt for every clean press break that results in a front-court shot.
Age Adaptations
Under 10 & Under 12
At these ages, the focus should be entirely on spacing and not panicking under pressure. Simplify the play to a 1-2-2 formation: Player 1 inbounds, Players 2 and 3 provide wide outlets, and Players 4 and 5 stand at half-court. Remove the concept of the long outlet entirely. Use a passive or semi-active defence that applies token pressure without trapping. The primary teaching objective is that players sprint wide and do not cluster around the ball.
Under 14 & Under 16
Introduce the full 1-2-1-1 formation and begin teaching the half-court trap recognition. Players at this age can understand the concept of the safety valve and the priority pass order. Introduce the "BLUE REVERSE" variation once the base play is consistent. Begin using live, active defence that is permitted to trap at the sideline.
Open / Senior
Run the full system including both variations and the direct long pass option. Introduce a secondary press break for use when the first option is denied — a "reset" action where Player 4 drops back to receive a backward pass and the team resets the formation. Senior players should also practise the press break in game-simulation conditions: trailing by two points, under 30 seconds remaining, with crowd noise piped through a speaker system to simulate pressure.