UCLA Cut Entry Play: Mastering the High-Post Screen to Create Easy Scoring Opportunities
Learn how to install the UCLA cut entry play — one of basketball's most time-tested actions — to attack man-to-man defences, create layup opportunities, and open up your half-court offence from the very first pass.
Equipment Needed
Overview
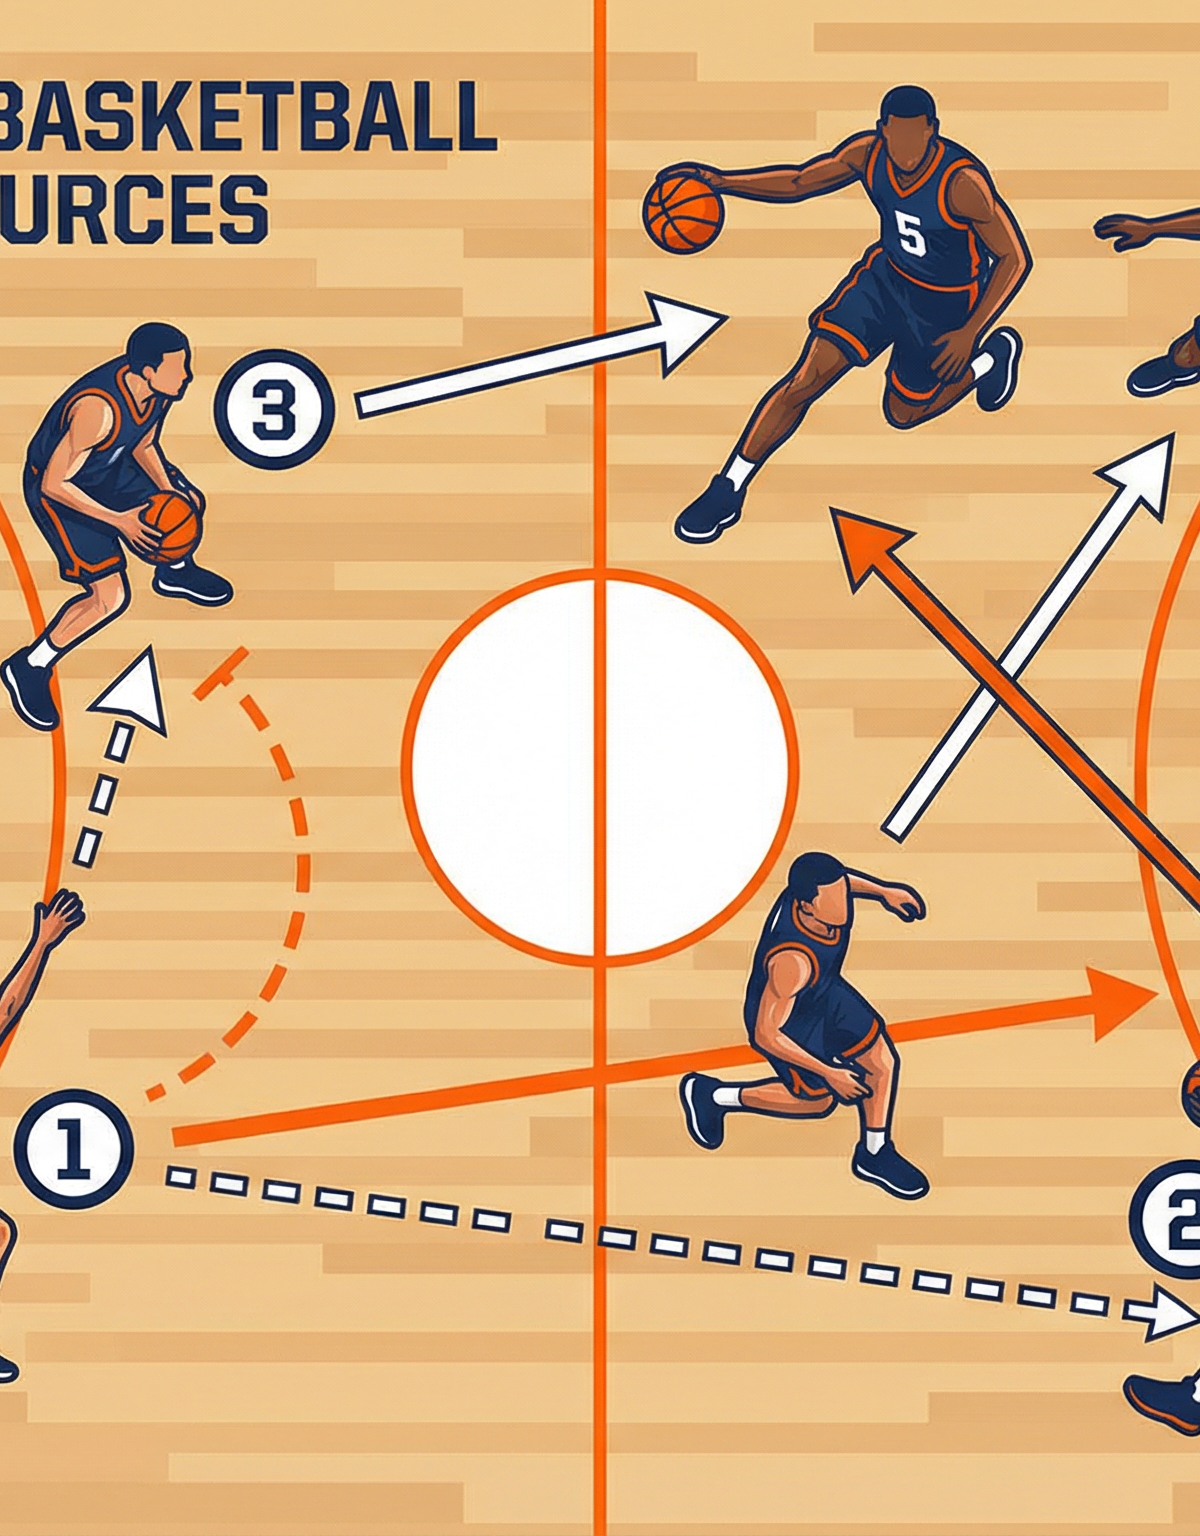
The UCLA cut is one of the most enduring and effective actions in basketball, originating from the legendary UCLA Bruins programme under coach John Wooden in the 1960s. At its core, the play uses a high-post screen by the centre (5) to free the off-guard (2) for a hard cut to the basket immediately after the point guard (1) makes the entry pass to the wing. When executed with precision, it generates a high-percentage layup opportunity within the first three seconds of a half-court possession — before the defence can rotate or recover.
This play is most effective against aggressive man-to-man defences that apply pressure on the ball handler and overplay passing lanes. It is also a superb tool against teams that switch screens, as the screener (5) is left in an advantageous high-post position after the cut. Coaches at every level — from under-12 development programmes to elite senior competitions — use the UCLA cut as both a primary scoring action and as the trigger to initiate a broader half-court offence.
When to call it: Use the UCLA cut when your opponent is denying the wing entry, when you need a quick layup in transition to half-court, when your 5 has a mismatch at the high post, or when your 2 is being overplayed and needs a release valve.
Setup

Equipment Required
A regulation FIBA half-court (28m x 15m full court; half-court = 14m x 15m) is used for this play. You will need one basketball per group, cones or floor tape to mark the high-post elbow positions (approximately 5.8m from the baseline, at the junction of the free throw line and the lane line), and bibs or coloured vests to distinguish offensive from defensive players during live practice.
Player Positions — Initial Alignment
| Position | Player | Starting Location |
|---|---|---|
| 1 — Point Guard | Ball handler | Top of the key, approximately 7m from the basket |
| 2 — Shooting Guard | Off-guard / cutter | Right wing, 1–2m inside the three-point arc (6.75m from basket) |
| 3 — Small Forward | Weak-side wing | Left wing, near the three-point arc, providing spacing |
| 4 — Power Forward | Weak-side post | Left block, low post position |
| 5 — Centre | Screener / high post | Right elbow — junction of free throw line and right lane line |
This alignment places the ball on the strong side (right), with the screen already set before the entry pass is made. Player 5 must be positioned at the elbow — approximately 4.6m from the baseline and 2.9m from the sideline — before Player 1 initiates the action.

Diagram 1: Initial setup and Step 1 — Entry pass from 1 to 2, triggering the UCLA cut by 2 off 5's high-post screen.
Step-by-Step Instructions

Step 1 — Set the High-Post Screen (Pre-Action)
Player 5 establishes position at the right elbow before the play begins. The screen must be set legally — feet shoulder-width apart, arms crossed or at sides, stationary. Player 2 positions themselves on the right wing, approximately 1m inside the three-point arc, making eye contact with Player 1 to signal readiness. Players 3 and 4 space to the weak side to clear the lane.
Step 2 — Entry Pass: 1 to 2
Player 1 initiates the play with a crisp chest or bounce pass to Player 2 on the right wing. The pass must be made before Player 2 begins the cut — the entry pass is the trigger. Player 1 should use a jab step or ball fake toward the left to draw the defence before delivering the pass to the right wing.
Step 3 — The UCLA Cut: 2 Cuts Off 5's Screen
The instant Player 2 catches the ball on the wing — or in some systems, the instant Player 1 releases the pass — Player 2 immediately passes back to Player 1 (or holds) and makes a hard cut toward the basket, using Player 5's body as a screen. The cut is a straight-line drive toward the basket, running shoulder-to-shoulder with Player 5's screen. Player 2 must read their defender: if the defender trails, cut straight to the rim; if the defender goes under the screen, curl toward the elbow.
Coaching cue: "Catch, pass back, and go — no hesitation. The cut must be explosive within one second of the catch."
Step 4 — Player 1 Receives the Return Pass
Player 1 relocates to the right wing after delivering the entry pass, ready to receive the ball back from Player 2. Player 1 now becomes the primary decision-maker with the ball on the wing.
Step 5 — Read the Defence: Three Primary Options
Player 1 reads the defence and chooses from three options:
- Option A — Feed the Cutter (2): If Player 2's defender is caught on the screen, Player 1 delivers a lob or bounce pass to Player 2 cutting to the basket for a layup. This is the primary read.
- Option B — High-Post Entry to 5: If the cutter is covered, Player 1 passes to Player 5 at the elbow. Player 5 can face up, shoot the mid-range jumper, drive, or hit Player 4 sealing on the weak-side block.
- Option C — Drive or Reset: If both options are covered, Player 1 can attack off the dribble, or the offence resets into a secondary action (e.g., dribble hand-off with 5, or a DHO into a pick-and-roll).
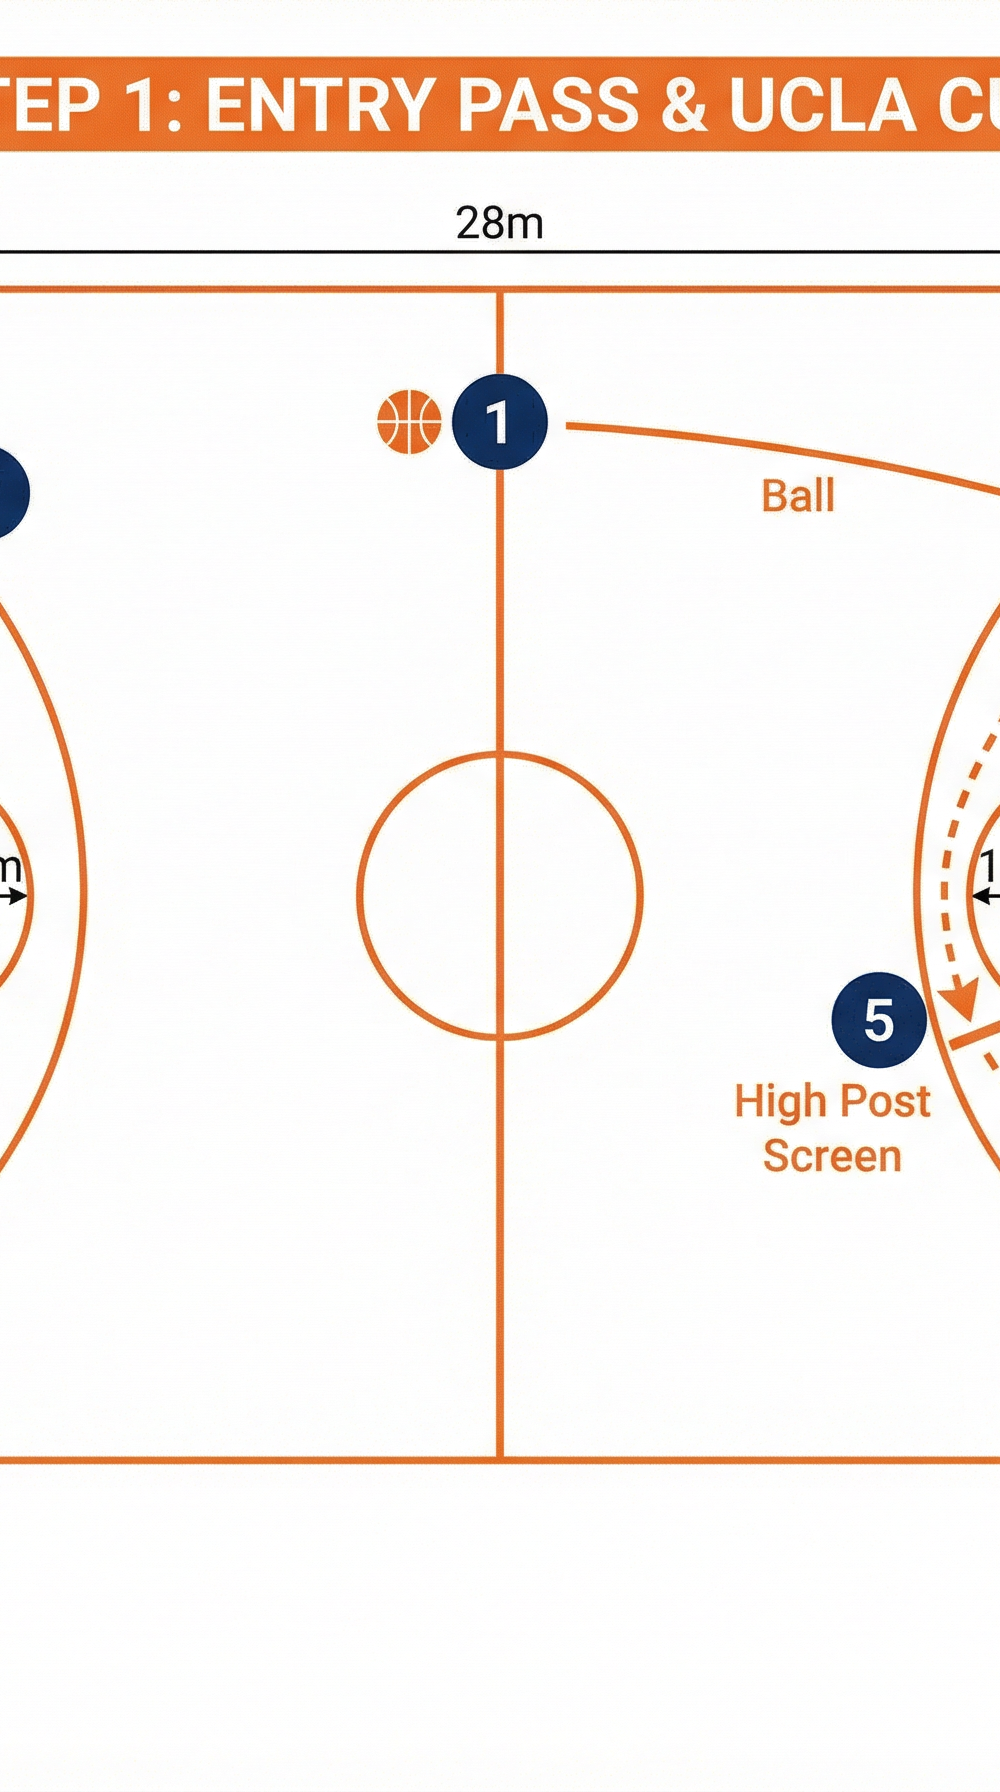
Diagram 2: Step 2 — Secondary options after the UCLA cut. Player 1 reads the defence and chooses between feeding the cutter (2), entering to the high post (5), or driving.
Step 6 — Continuity and Reset
If no scoring opportunity materialises, the offence flows into continuity. Player 5 can initiate a dribble hand-off (DHO) with Player 1, triggering a new ball-screen action. Player 3 relocates from the weak-side wing to the top of the key, Player 4 sets a cross-screen for Player 2 (who has cut through to the weak-side corner), and the play can be re-run from the opposite side.

Diagram 3: Step 3 — Continuity and reset. After the initial action, the offence flows into a cross-screen for 2 and a DHO between 5 and 1, allowing the UCLA cut to be re-run from the left side.
Key Coaching Points

1. Timing is Everything — The Cut Must Be Immediate
The UCLA cut only works when Player 2 cuts the instant the ball is passed. A delayed cut allows the defender to recover. Drill this with a "catch and go" rule: the moment Player 2's hands touch the ball on the wing (or in a pass-back variation, the moment the ball leaves their hands), the cut begins. Aim for the cut to reach the basket within 1.5–2 seconds of the entry pass.
2. Screen Quality Determines Cut Quality
Player 5 must set a wide, stationary screen at the elbow. A moving screen is illegal and breaks the play. Teach Player 5 to "show the chest" to the cutter's defender — the screen is only effective if it physically impedes the defender's path. The screen should be set at the elbow, approximately 5.8m from the baseline.
3. The Cutter Must Read Their Defender
Player 2 should not cut blindly. Teach them to read the defender's hip: if the defender's hip is toward the baseline, cut straight to the rim (straight cut); if the defender goes over the top of the screen, curl toward the elbow for a mid-range catch; if the defender completely loses them, seal and call for the lob.
4. Player 1 Must Be a Composed Decision-Maker
The entire play rests on Player 1's ability to read the defence after receiving the return pass. They must not rush — hold the ball for a beat, identify which option has opened, and deliver an accurate pass. Drill Player 1 separately on the three reads before adding full-team complexity.
5. Spacing Must Be Maintained on the Weak Side
Players 3 and 4 must resist the temptation to collapse toward the ball. Their spacing on the weak side is what keeps the lane open for Player 2's cut. If 3 or 4 drift toward the paint, they clog the cutting lane and negate the entire action. Reinforce: "If you are not the cutter or the screener, you are spacing."
6. Player 5's Post-Screen Role Is a Scoring Threat
After setting the screen, Player 5 should not stand still. They should step toward the ball (a "roll" or "pop" depending on their skill set), presenting themselves as Option B. A Player 5 who can shoot the elbow mid-range or drive from the high post makes this play exponentially more difficult to defend.
Common Mistakes

Mistake 1 — Player 2 Cuts Too Late
This is the most frequent error at all levels. If Player 2 waits to see where the ball goes before cutting, the defender has time to recover. Correction: use a "trigger word" drill — the coach calls "go" the instant the entry pass is released, conditioning Player 2 to cut on sound rather than sight.
Mistake 2 — Player 5 Sets the Screen Too Early or Too Late
If Player 5 moves to set the screen after the entry pass is already in the air, the screen is not ready and Player 2 has nowhere to go. Equally, if Player 5 sets the screen too far from the lane (more than 1m outside the elbow), the cut angle is too wide and the defender can recover. Correction: mark the exact elbow position with a cone in practice and require Player 5 to be stationary at that spot before Player 1 initiates.
Mistake 3 — Player 1 Does Not Relocate After the Entry Pass
If Player 1 stands at the top of the key after passing, they are out of position to receive the return pass and make the secondary read. Correction: drill Player 1 to "pass and move" — every entry pass must be followed by a step toward the right wing to receive the ball back.
Mistake 4 — Telegraphing the Pass to the Cutter
Player 1 often stares at the cutting Player 2, alerting the defence to rotate. Correction: teach Player 1 to look away ("look off") toward the weak side before delivering the pass to the cutter. Use eye-contact drills where Player 1 must look at Player 3 for one second before passing to Player 2.
Mistake 5 — Weak-Side Players Collapsing the Lane
Players 3 and 4 instinctively move toward the ball when they see a scoring opportunity developing. This collapses the cutting lane and removes the threat of a kick-out pass. Correction: introduce a "freeze" rule in early practice — Players 3 and 4 cannot move until the ball is passed to Player 5 or Player 1 drives.
Variations & Progressions

Variation 1 — UCLA Cut from the Dribble Hand-Off (DHO)
Instead of a direct entry pass from 1 to 2, Player 1 dribbles toward Player 5 at the elbow for a dribble hand-off. Player 2 reads the DHO as the trigger and makes the UCLA cut off Player 5's body. This variation is more difficult to guard because the defender cannot anticipate the screen as easily, and it adds a ball-screen threat for Player 1 if they reject the DHO.
Variation 2 — Double UCLA (Back-to-Back Cuts)
After Player 2 cuts through and does not receive the ball, Player 3 immediately makes a second UCLA cut off Player 4's screen from the weak-side block. This creates two consecutive cutting threats and is extremely effective against teams that switch, as it generates a mismatch on the second cut. Run this as a continuity action where the play does not reset until two cuts have been made.
Variation 3 — UCLA Cut into Horns Set
After the initial UCLA cut, if neither the cutter nor the high post is available, Player 1 initiates a Horns alignment — Player 5 steps to the right elbow and Player 4 steps to the left elbow simultaneously. Player 1 can then attack either ball-screen, creating a two-ball-screen action that flows naturally from the initial UCLA cut entry. This is an advanced progression suited to under-16 and open-age groups.
Age Adaptations

| Age Group | Adaptation |
|---|---|
| Under 10 | Remove the return pass — Player 1 simply passes to Player 2 and Player 2 drives to the basket. Focus only on the cut and the layup. Use a smaller ball (size 5) and lower the basket to 2.60m if available. |
| Under 12 | Introduce the screen by Player 5 but allow Player 5 to be stationary without a roll or pop. Focus on the cutter reading the defender (straight cut vs. curl). Use walk-through repetitions before live play. |
| Under 14 | Add the three reads for Player 1 (cutter, high post, drive). Introduce the return pass concept. Begin with 3-on-3 (1, 2, 5 only) before adding Players 3 and 4. |
| Under 16 | Run the full 5-on-5 play with all three options and the continuity reset. Introduce Variation 1 (DHO trigger) and begin scouting-based decision-making ("read the defence before you cut"). |
| Open / Senior | Implement all variations and progressions. Add defensive pressure from the outset. Film sessions and use video review to correct timing and decision-making errors. Introduce the Horns continuation (Variation 3). |