The Perfect Path: Fast Bowling Run-Up Alignment Drill
Master the art of bowling straight by creating a physical corridor that forces perfect alignment from the start of the run-up through to the delivery stride.
Equipment Needed
1. Overview
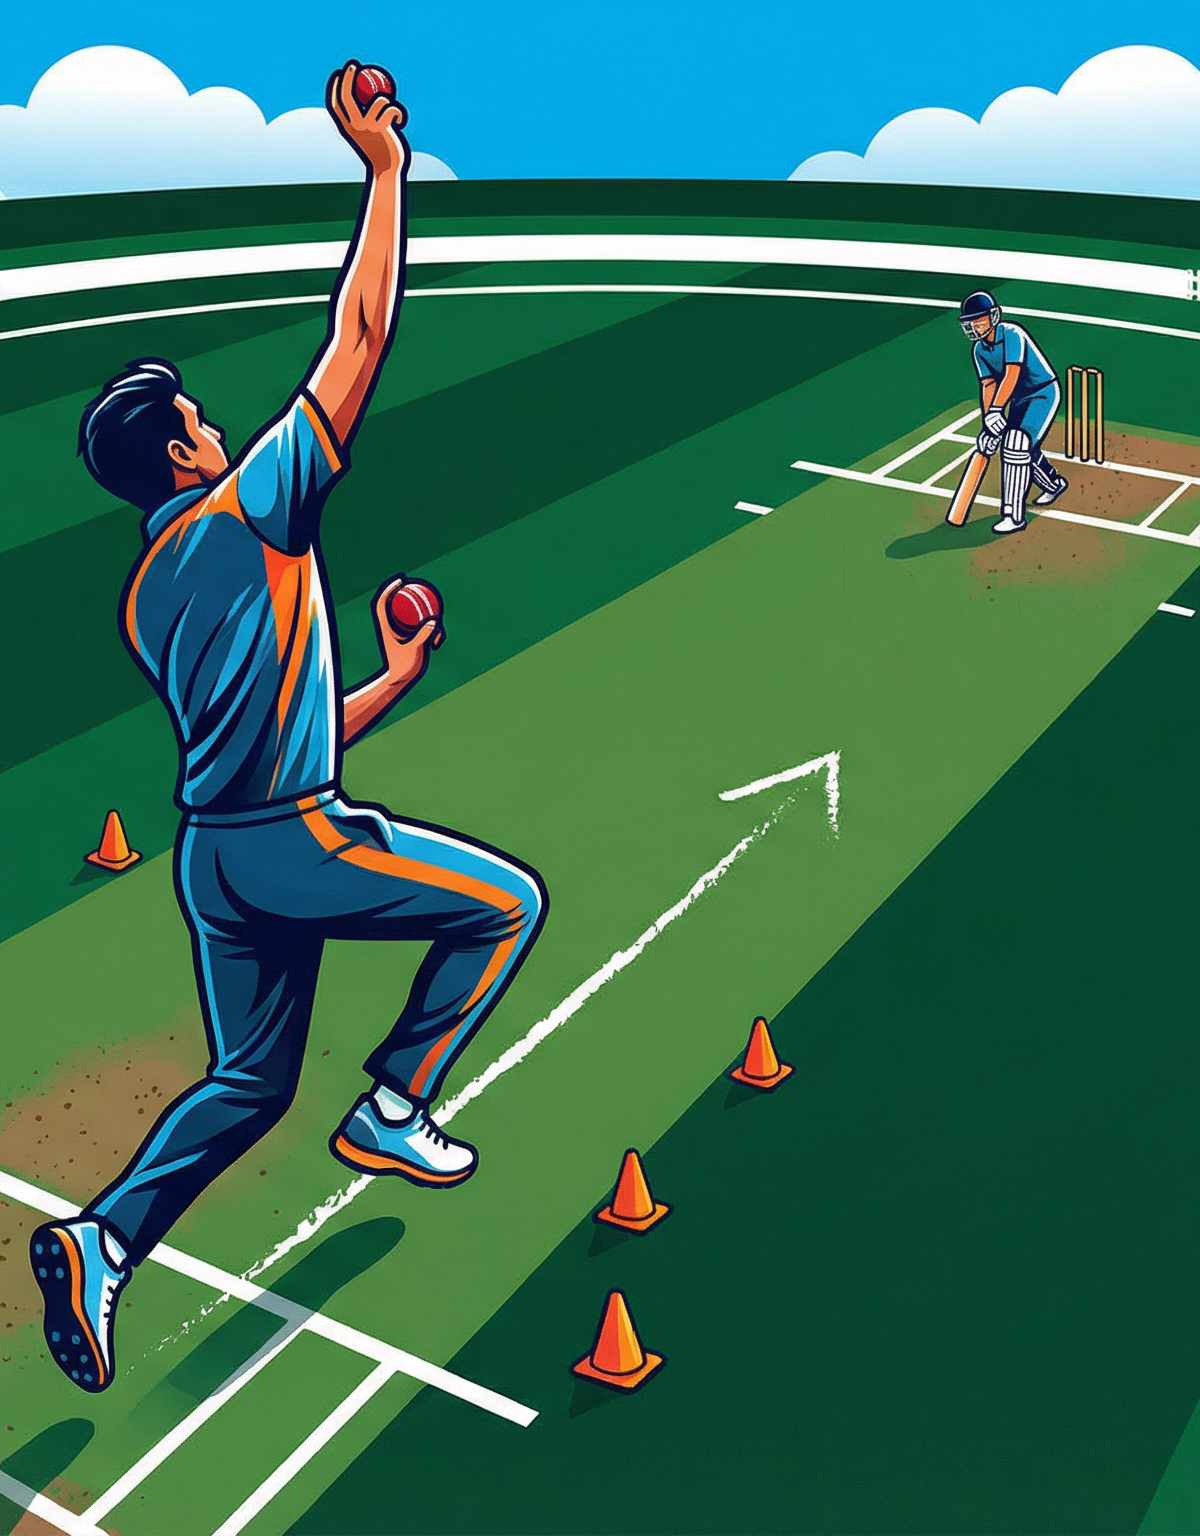
One of the most common issues fast bowlers face is "running in" on an angle or drifting across the crease during their delivery stride. This fundamental flaw bleeds momentum, reduces pace, and compromises accuracy. The Perfect Path Run-Up Alignment Drill is designed to physically constrain the bowler's approach, forcing them to maintain a straight, energy-efficient line from their starting mark all the way through the crease. By creating a visual and physical "corridor," coaches can help bowlers build the muscle memory required for a perfectly aligned, rhythmic run-up that maximizes momentum transfer into the delivery.
This drill is highly effective during pre-season conditioning or as a corrective measure during net sessions when a bowler is struggling with consistency or rhythm.
2. Setup
To run this drill effectively, you need a clear, flat surface—ideally an actual cricket pitch (turf or synthetic) or a marked outfield area of at least 30 yards.
Equipment Needed:
- 12-16 small marker cones (preferably flat discs to avoid tripping hazards).
- 1 target marker or landing mat (optional, for the landing zone).
- A tape measure (to accurately set the corridor width).
- Cricket balls (if incorporating the delivery phase).
Pitch & Field Setup:
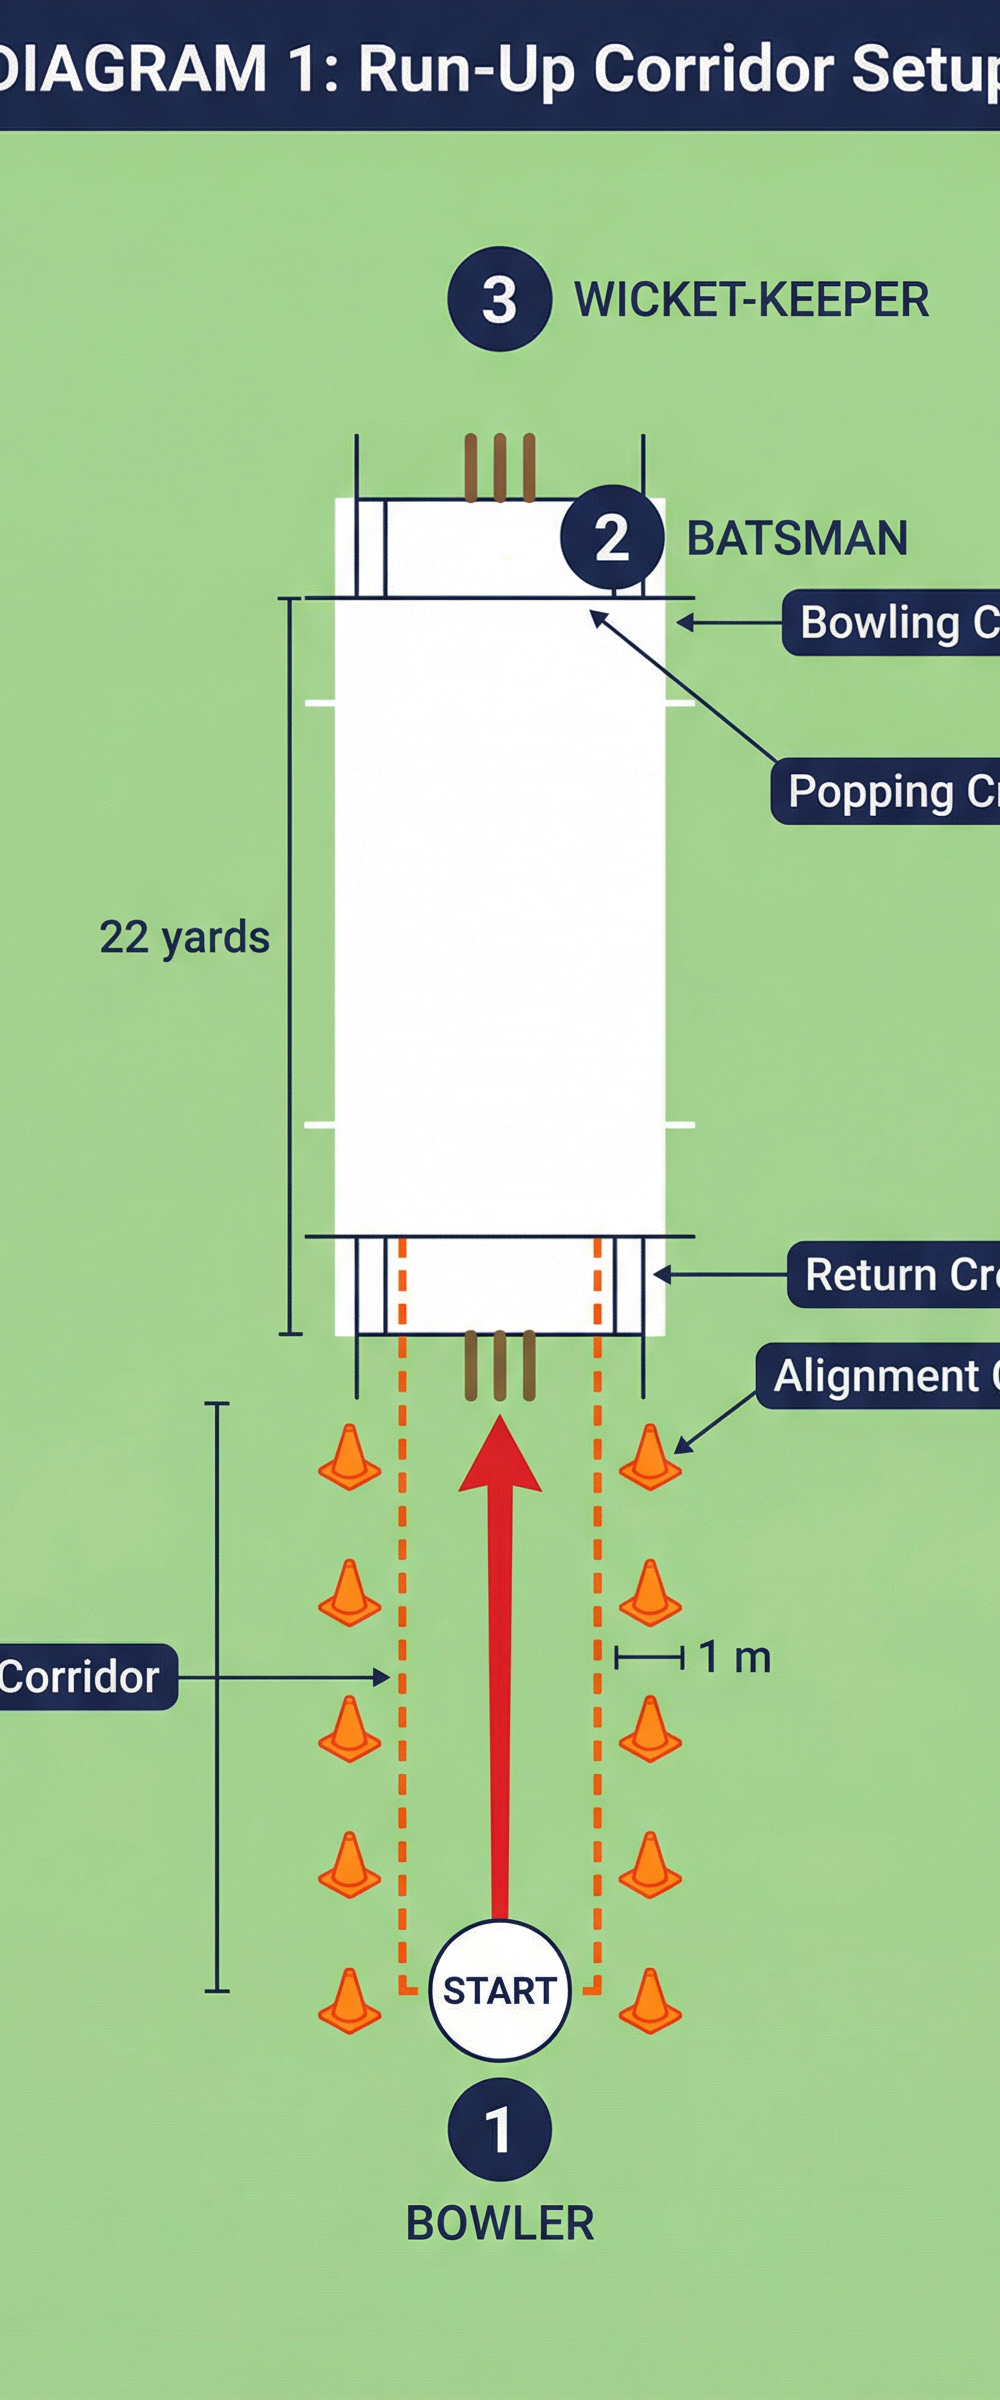
- Identify the bowler's starting mark (typically 15-25 yards from the stumps).
- Create a "Run-Up Corridor" by placing two parallel lines of cones starting from the bowler's mark and ending at the bowling crease.
- The corridor should be approximately 1 metre wide, centered perfectly on the desired delivery line (e.g., just outside off stump).
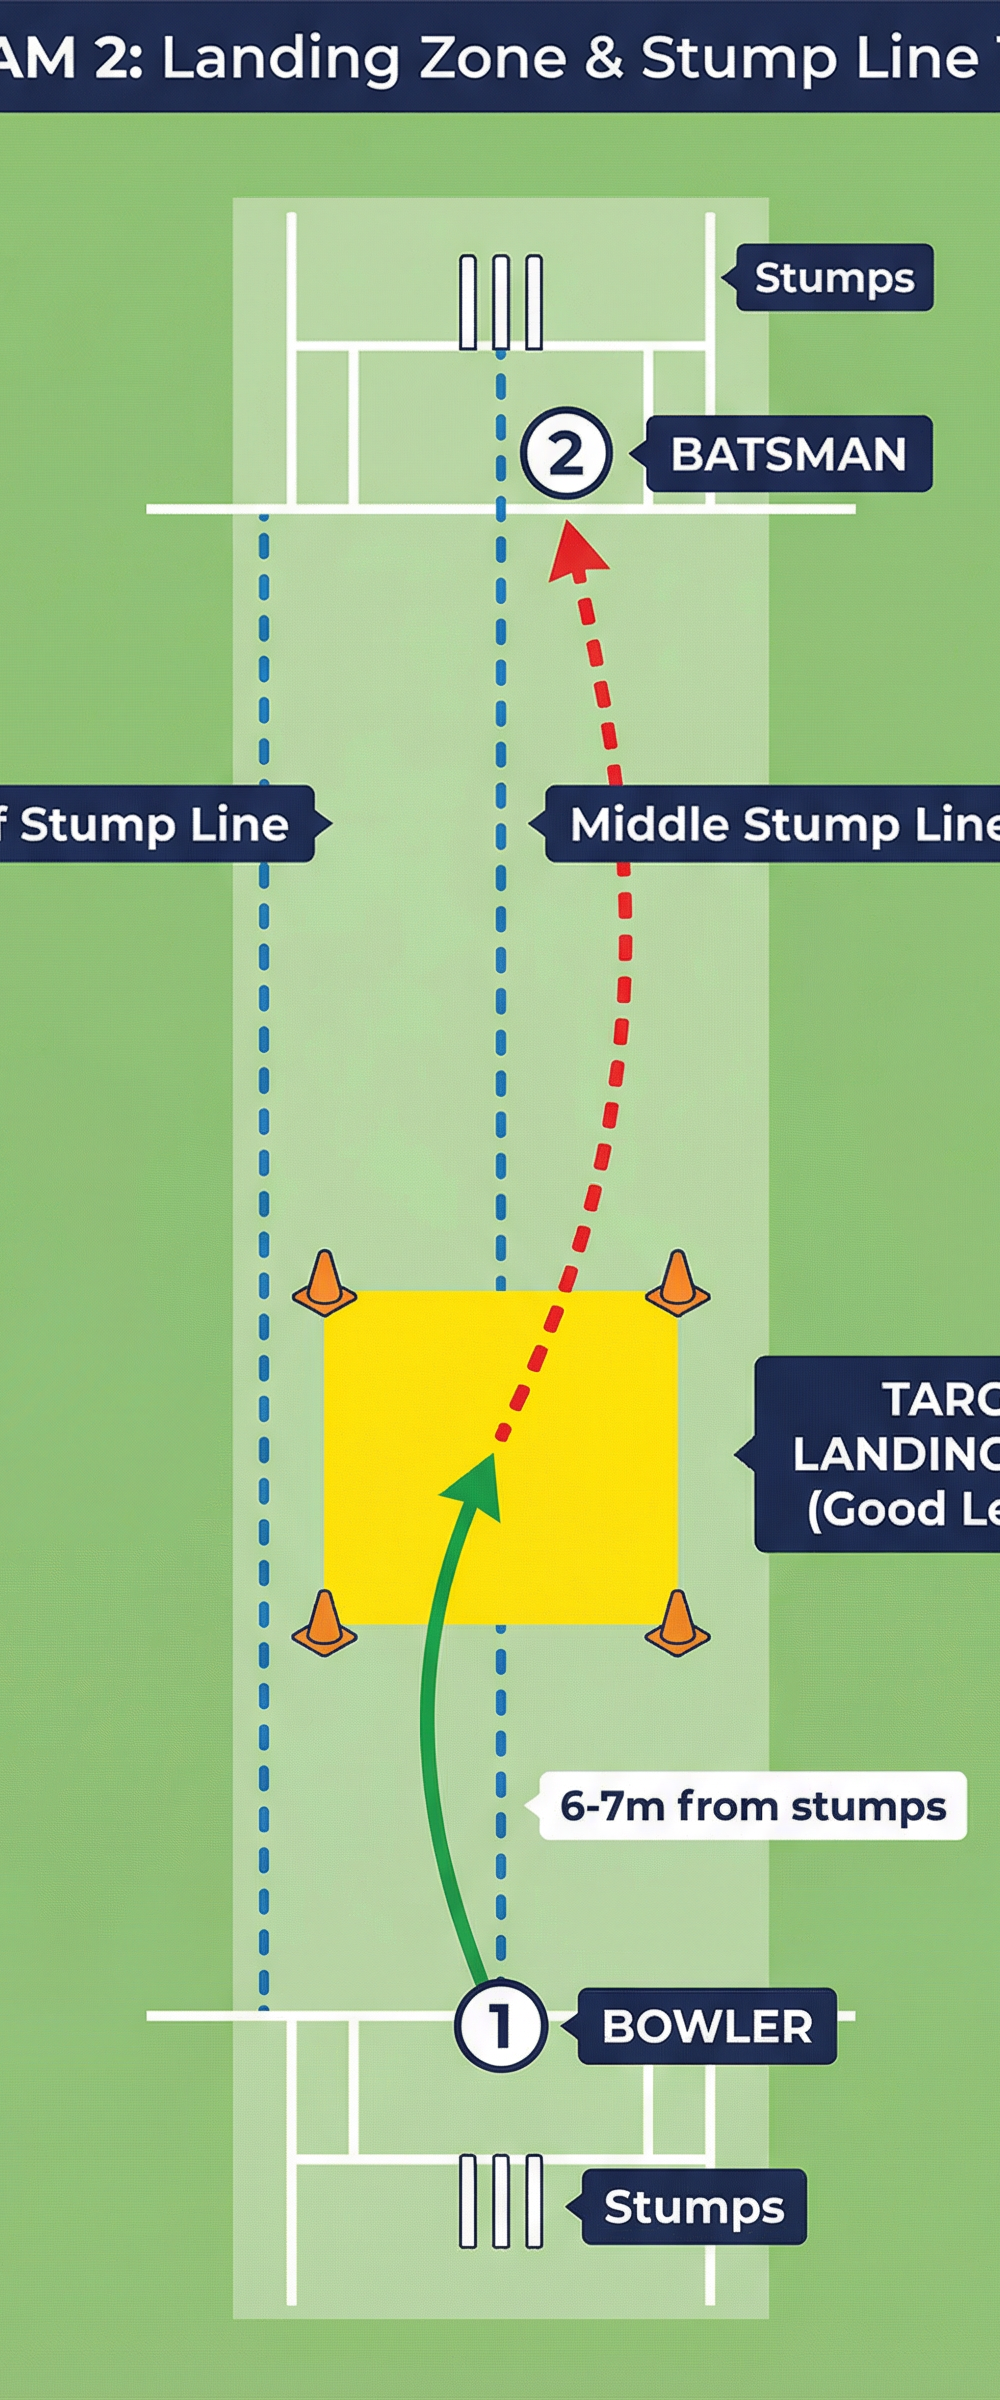
- Place a target zone on the pitch (good length, 6-7 metres from the batsman's stumps) to give the bowler a focal point.

3. Step-by-Step Instructions

Follow these steps to execute the drill effectively during your coaching session:
- Establish the Starting Mark: Have the bowler mark their run-up as they normally would. Ensure they are starting from a stationary, balanced position facing directly down the pitch.
- Walk the Corridor: Before running, have the bowler simply walk their run-up through the coned corridor. This helps them visualize the straight line and feel the spatial constraints without the pressure of pace.
- Jog and Bound: Progress to a light jog, focusing on keeping the head still and eyes fixed firmly on the target zone at the other end. The bowler should aim to keep their feet squarely within the 1-metre channel.
- Full Pace (No Ball): The bowler executes their full run-up at match intensity, going through their complete action but without releasing a ball (shadow bowling). They must stay within the cones and "drive" straight through the crease.
- Full Delivery: Finally, introduce the ball. The bowler runs in at full pace through the corridor and delivers the ball, aiming for the target landing zone. They must hold their follow-through to ensure they haven't fallen away to the off or leg side after release.
4. Key Coaching Points

As a coach, focus your observation and feedback on these critical elements:
- Head Position: The head is the heaviest part of the body. If it tilts or drops, the body will follow. Ensure the bowler's head remains still and upright, with eyes locked on the target from the very first step.
- Arm Drive: The arms should pump in straight, linear lines parallel to the corridor. Any lateral (side-to-side) arm swinging will cause the body to rotate prematurely and break the straight alignment.
- Foot Placement: Watch the footfalls. They should land pointing straight down the pitch. "Crabbing" (feet pointing outward) bleeds forward momentum.
- Momentum Transfer: The run-up should build rhythm smoothly. The alignment corridor should not cause the bowler to stutter or hesitate; they must attack the crease with confidence.
- Follow-Through: The alignment doesn't end at the crease. Ensure the bowler continues their momentum straight down the pitch in their follow-through, rather than veering off immediately.
5. Common Mistakes

Watch out for these frequent errors and correct them immediately:
- Looking at the Cones: Bowlers often look down at the cones to make sure they are inside them. This drops the head and ruins posture. Correction: Tell them to trust their peripheral vision and keep their eyes fixed on the target length.
- Over-Striding: In an effort to stay straight, some bowlers artificially lengthen their stride, causing them to "reach" and lose power. Correction: Emphasize rhythm over stride length; the steps should feel natural.
- Falling Away at Delivery: A bowler might run straight but then collapse their front side at the point of delivery, throwing their alignment off at the last second. Correction: Focus on a strong, braced front leg and pulling the non-bowling arm aggressively down the line of the body.
6. Variations & Progressions

To keep the drill challenging and adaptable, use these variations:
- The Narrowing Corridor (Progression): Start with a 1.5-metre wide corridor and gradually narrow it to 0.75 metres as the bowler improves. This demands hyper-precise footwork.
- The Blind Start (Variation): Have the bowler start facing away from the pitch, turn on the coach's call, and immediately hit the corridor. This tests their ability to find alignment instinctively.
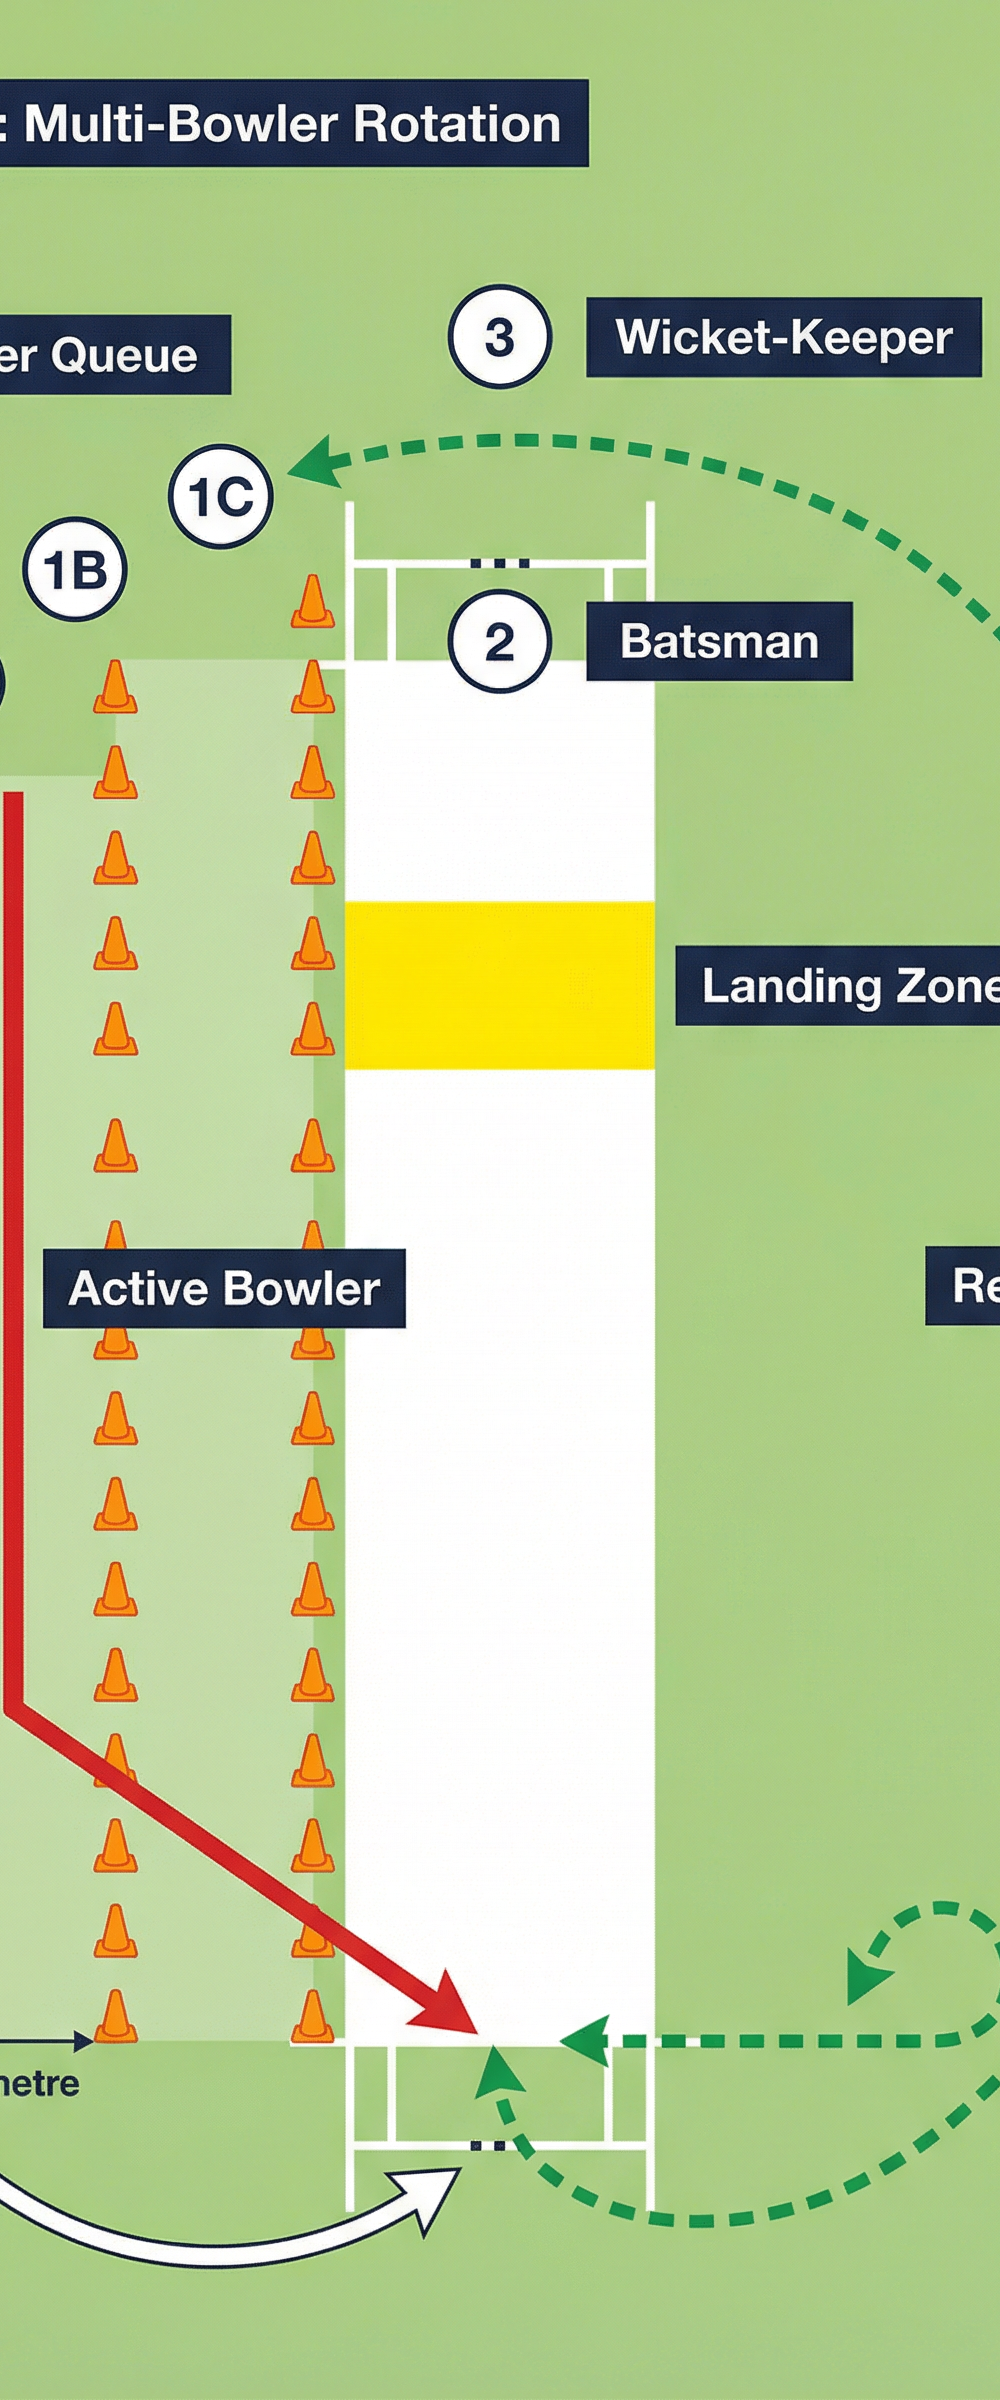
- Multi-Bowler Rotation (Team Drill): Set up 2 or 3 corridors side-by-side on the outfield (no pitch required). Have a queue of bowlers continuously cycling through the corridors, shadow bowling. This maximizes reps and conditioning in a short time.

7. Age Adaptations
Tailor the drill to the age and skill level of your players:
- Under 10s: Make the corridor much wider (up to 2 metres) and use bright, tall cones. Focus purely on running in a general straight line rather than technical perfection. Make it a race or game.
- Under 14s: Introduce the target landing zone. At this age, the physical growth spurts often ruin coordination. Use this drill frequently to help them "re-learn" their straight lines as their bodies change.
- Seniors/Open: Use the narrowest possible corridor and demand absolute perfection in the follow-through. Incorporate video analysis, filming from behind the bowler to show them their exact alignment through the channel.