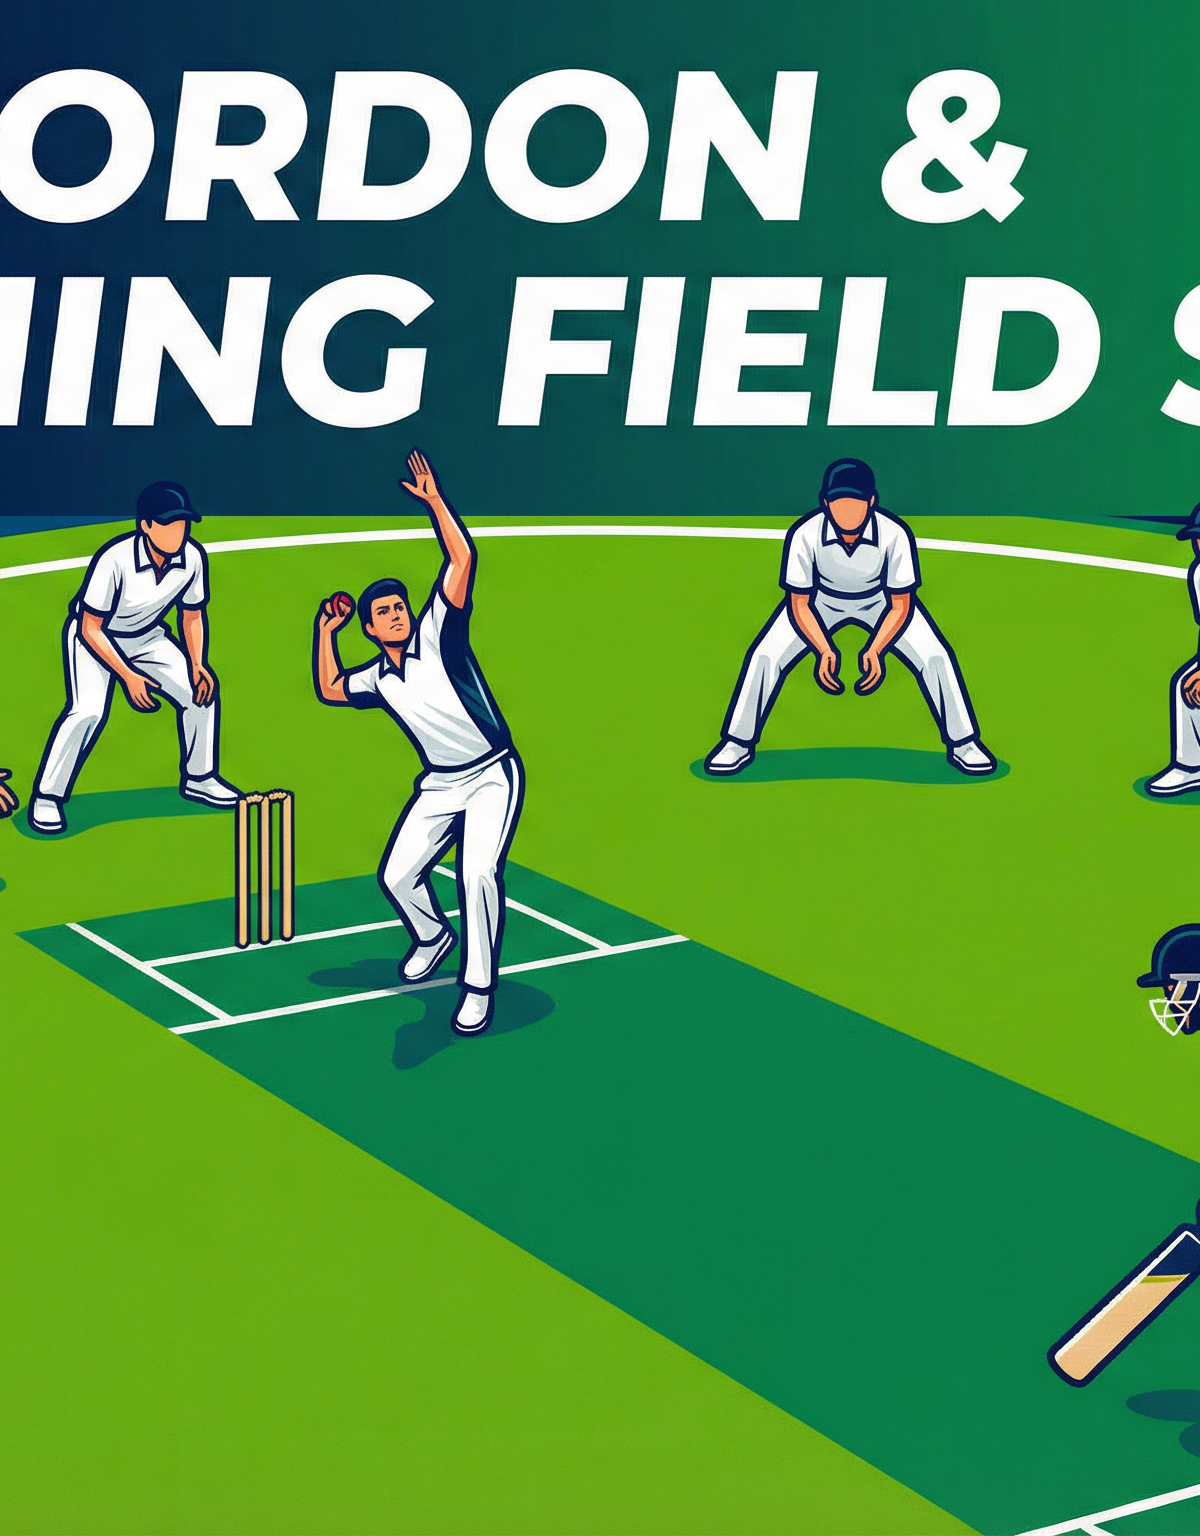
Slip Cordon & Catching Field Setup: Building a Wicket-Taking Fielding Structure
Master the art of setting and maintaining an attacking slip cordon and full catching field — giving your bowlers the best possible chance of converting edges and miscues into wickets.
Equipment Needed
Overview
The slip cordon and catching field is one of the most powerful tactical weapons available to a cricket captain and coaching staff. When set correctly, it transforms a good delivery into a wicket-taking opportunity, creating sustained pressure on the batting side and rewarding disciplined, attacking bowling. This set play is most effective in the first 10–15 overs of an innings when the ball is new and swinging, on seaming or spinning surfaces, or when a new batsman has just arrived at the crease.
A well-drilled slip cordon does far more than simply station fielders behind the wicket. It communicates intent to the batting side, forces the batsman to play with greater caution, and creates a psychological environment where every edge carries the threat of dismissal. As a coach, your role is to ensure every player in the cordon understands not just where to stand, but why they are there and how to react when the ball arrives.
This resource covers the full setup for a four-man slip cordon with gully — the standard attacking configuration for seam and swing bowling — as well as the broader catching field placement across the oval. It is suitable for use in training sessions and as a pre-match tactical briefing tool.
Setup
Equipment Required
- Standard cricket oval (minimum 55 metres radius)
- 22-yard pitch with clearly marked batting and bowling creases
- 1 set of stumps at each end
- 1 cricket ball (preferably new or semi-new)
- Cones or markers for initial position setting during training
- Coaching whiteboard or printed diagrams (optional but recommended)
Field Dimensions & Zones
The catching field operates primarily within the 30-yard (27.4 m) fielding circle, which is marked by white painted lines or fielding discs on the oval. All slip and catching positions are placed inside or on the edge of this circle. The 22-yard pitch runs through the centre of the oval.
Player Positions — Slip Cordon (11 Players)
| Position | Abbreviation | Location | Primary Role |
|---|---|---|---|
| Bowler | B | Bowling crease end | Deliver the ball |
| Wicketkeeper | WK | 1–2 m behind stumps | Take edges, stumpings |
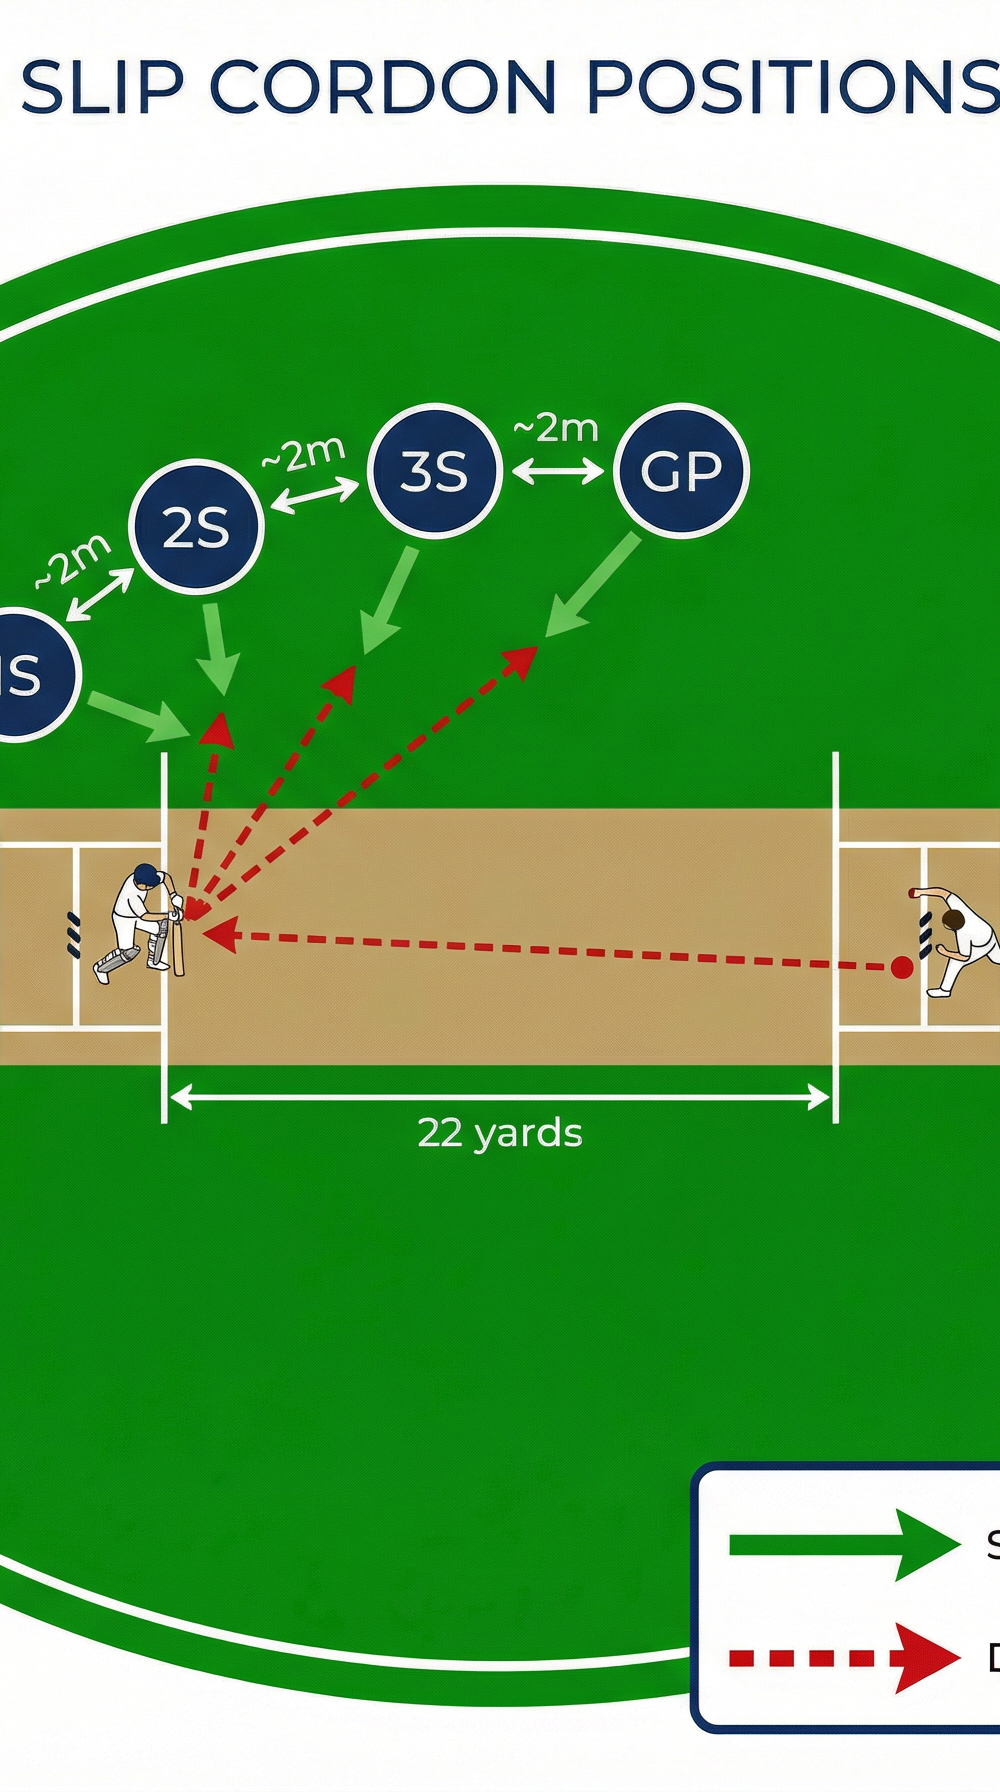
| 1st Slip | 1S | ~2 m to WK's right | Thick outside edges |
| 2nd Slip | 2S | ~2 m right of 1S | Medium outside edges |
| 3rd Slip | 3S | ~2 m right of 2S | Thin outside edges |
| Gully | GP | ~45° from stumps, wider | Thick edges, cut shots |
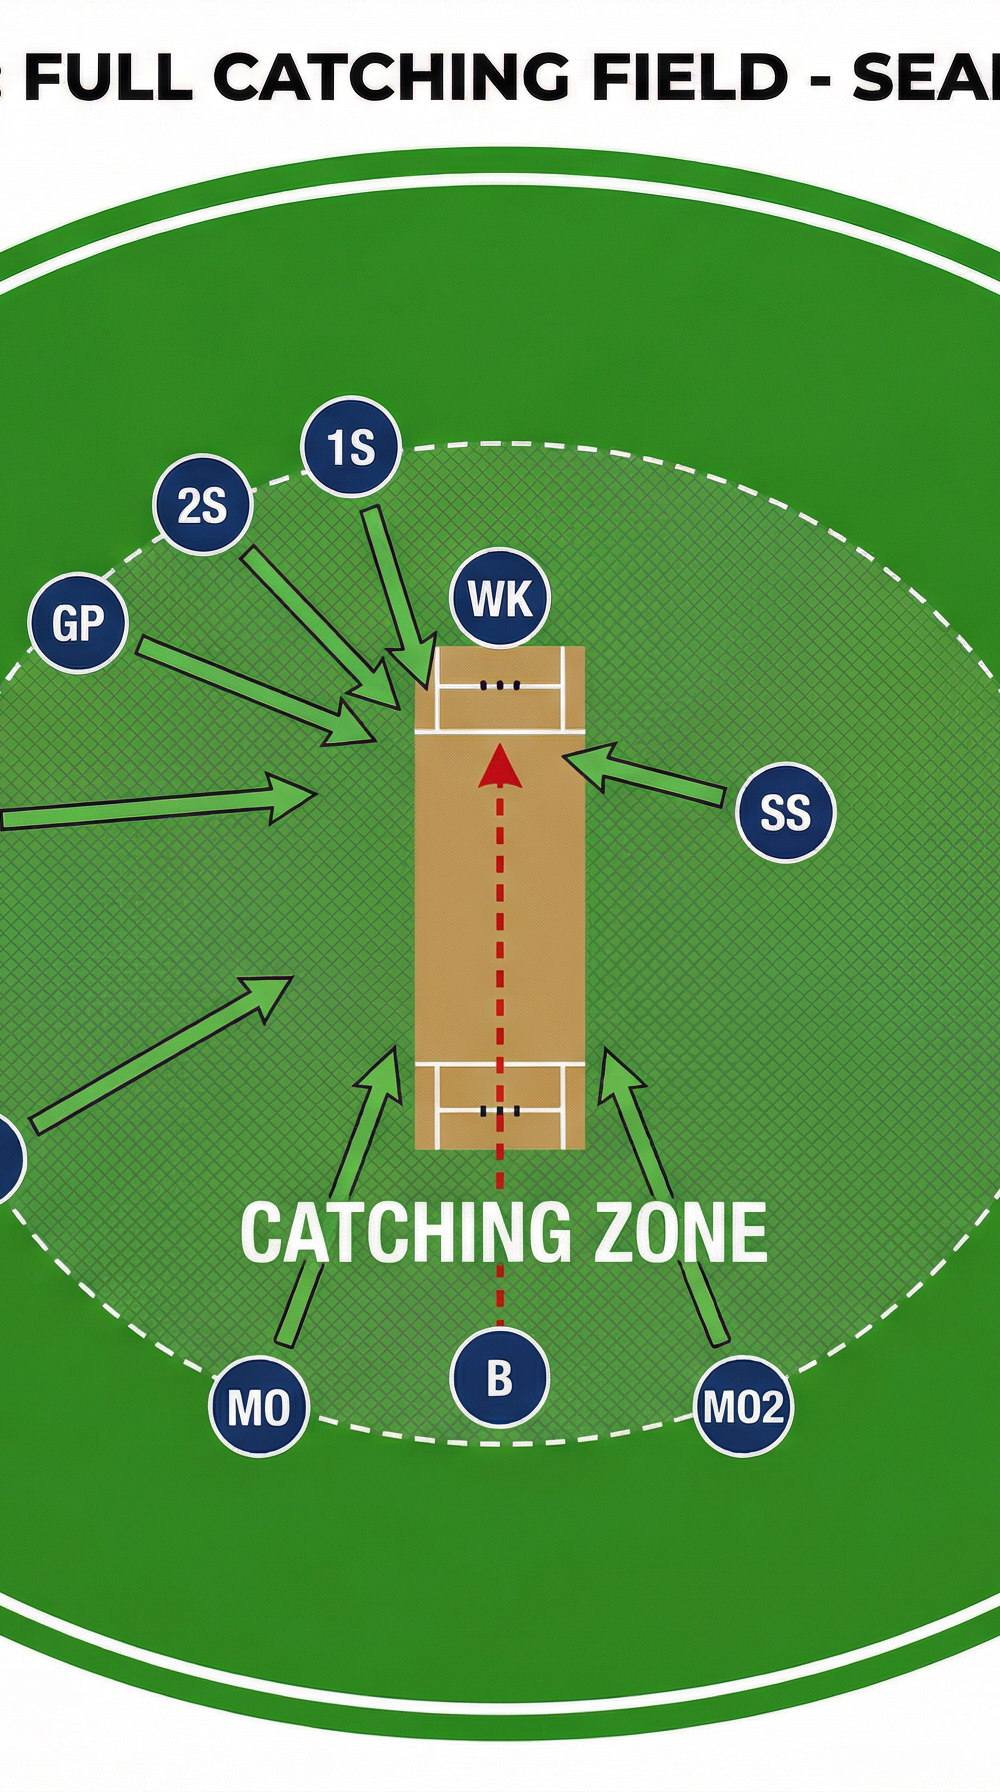
| Short Leg / Silly Mid-On | SS | 2–3 m from bat, leg side | Bat-pad catches |
| Point (catching) | PT | Inside circle, off side | Drive edges, cut shots |
| Cover (catching) | C | Inside circle, off side | Drives, defensive pushes |
| Mid-Off (catching) | MO | Inside circle, straight | Straight drives, full balls |
| Mid-On (catching) | MO2 | Inside circle, on side | On drives, full balls |

Diagram 1 above shows the slip cordon spacing and ball-path trajectories for a right-handed batsman facing right-arm over-the-wicket seam bowling.

Diagram 2 above shows the full 11-player catching field configuration, with all fielders positioned inside or on the 30-yard circle.
Step-by-Step Instructions
Phase 1 — Briefing the Cordon (Pre-Delivery)
Gather the slip cordon at the start of each bowling spell. As captain or coach, walk the WK, 1S, 2S, 3S, and GP through their exact starting positions using the pitch edge as a reference point. The WK sets first, then each slip takes their position approximately 2 metres to the right (for a right-handed batsman), forming a gentle arc curving away from the stumps.
Set the depth based on the pace of the bowling. For fast bowling (135+ km/h), slips should stand 2–3 metres further back than for medium-pace (110–120 km/h). A useful rule of thumb: the WK's gloves determine the depth — slips should be at the same depth or slightly shallower than the WK's catching position.
Confirm the arc — the cordon should curve slightly, not stand in a straight line. 1st slip is slightly behind and wider than the WK; 2nd slip is slightly behind and wider than 1st slip; and so on. This arc accounts for the natural trajectory of an edged ball, which travels wider as it moves further from the stumps.
Phase 2 — The Ready Position (Every Delivery)
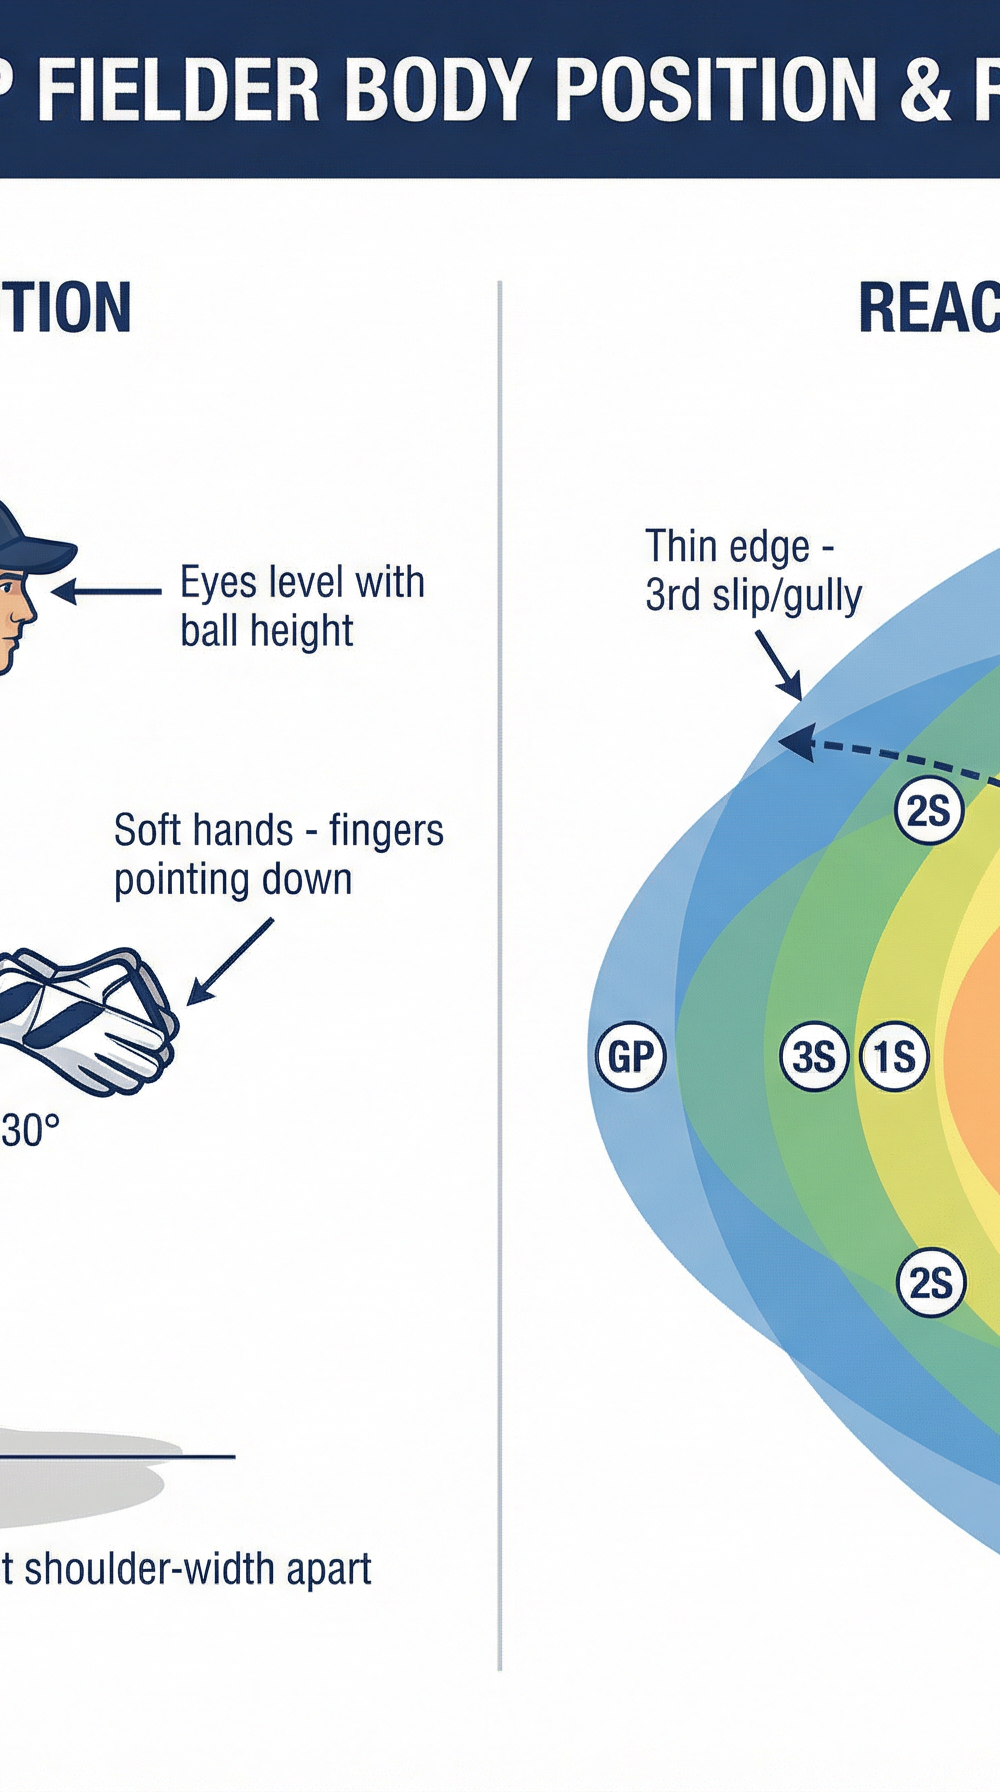
Call the ready position as the bowler begins their run-up. Every fielder in the cordon must adopt the athletic stance: feet shoulder-width apart, knees bent at approximately 30 degrees, hands held low and relaxed in front of the body with fingers pointing downward, weight on the balls of the feet. Eyes must be level and focused on the bat-ball contact point.
Trigger movement — as the bowler enters their delivery stride, each slip fielder should perform a small weight transfer or "trigger step" — a subtle rocking forward onto the toes. This primes the body for explosive lateral movement and prevents the fielder from being caught flat-footed.
Watch the bat, not the ball — coach all slip fielders to focus on the bat face at the moment of contact, not on the ball in the bowler's hand. The edge of the bat gives the earliest possible signal of where the ball will travel.
Phase 3 — The Catch (Reaction & Execution)
Hands first, body second — on a catching opportunity, the fielder's hands should move to the ball, not the body. Encourage fielders to "give" with the ball on contact, drawing the hands back toward the body to absorb pace and prevent the ball from popping out.
Calling in the cordon — establish a calling system. The fielder who has the clearest view and best angle calls "MINE" loudly. All other fielders immediately freeze to avoid collisions. This is especially important between 1st slip and the WK.
Resetting after a chance — whether a catch is taken or dropped, the coach should immediately reset the cordon before the next delivery. Use this moment to reinforce position, depth, and the ready-position routine.

Diagram 3 above illustrates the correct ready-position body mechanics and the reaction zones for each position in the cordon.
Key Coaching Points
The arc is everything. A flat, straight slip cordon leaves gaps between positions. Ensure the cordon curves naturally away from the stumps, with each fielder slightly wider and slightly deeper than the one inside them. Walk the arc with fielders using cones before the session to build muscle memory.
Soft hands are non-negotiable. The most common reason for dropped catches in the slip cordon is hard, rigid hands at the moment of contact. Drill the "give" motion in isolation — have fielders catch a ball thrown at pace and consciously draw their hands back 15–20 cm on contact. Repeat until it becomes automatic.
Depth is dictated by pace, not habit. Many teams set their slips at a fixed depth regardless of who is bowling. Remind fielders and captains to adjust depth for every bowler — a spinner's slips will be significantly closer than a fast bowler's.
The trigger step prevents flat feet. A fielder who is stationary and flat-footed when the edge arrives will always be late. The trigger step — a small forward rock onto the toes as the bowler delivers — is the single biggest technical improvement most amateur slip fielders can make.
Communication prevents collisions. Establish the calling protocol in training, not in a match. Run dedicated cordon drills where the coach hits edges from a throw-down and fielders must call loudly and clearly. Make calling a non-negotiable habit.
Gully is part of the cordon. Gully is often treated as a separate fielding position, but in an attacking field it functions as the outer edge of the cordon. Gully must adopt the same ready-position stance and trigger step, and must be included in all cordon briefings and calling protocols.
Common Mistakes

Standing too straight (no knee bend). This is the most prevalent technical error. Fielders who stand upright cannot move laterally at speed and will consistently fail to reach catchable edges. Use video review or a partner observation drill to identify and correct this in training.
Watching the ball, not the bat. Fielders who track the ball from the bowler's hand through the air will always react too late to a fast edge. The correct focus point is the bat face at the moment of contact. Reinforce this with a verbal cue: "Watch the bat, not the ball."
Incorrect arc — standing in a straight line. A straight cordon creates blind spots and gaps. If an edge travels at a slight angle, it will pass between two fielders who are both moving in the wrong direction. Correct this by physically walking each fielder to their arc position using cones.
Slips standing too close together. Overcrowding the cordon — particularly between WK and 1st slip — leads to collisions and confusion on catchable balls. Maintain a minimum of 1.5–2 metres between each position. If the cordon feels crowded, remove a slip rather than compress the spacing.
Failing to reset between deliveries. Fielders drift from their positions over the course of an over, particularly after a near-miss or a boundary. The captain and coach must actively monitor and reset the cordon before every delivery. Designate the WK as the cordon anchor — all other slips reset relative to the WK's position.
Variations & Progressions

Variation 1 — Spin Bowling Cordon
For off-spin bowling to a right-handed batsman, reduce the cordon to WK, 1st slip, and a catching position at silly mid-off or forward short leg. The WK stands up to the stumps. 1st slip moves closer (1–1.5 m from WK) and slightly squarer. Add a short leg on the leg side to account for the bat-pad catching opportunity. This variation teaches fielders to adjust their depth and angle based on the type of bowling.
Variation 2 — Left-Handed Batsman Adjustment
When a left-handed batsman takes strike against right-arm over-the-wicket bowling, the entire cordon mirrors to the leg side. WK remains behind the stumps; 1st slip moves to the leg side of the WK; gully moves to leg gully. This variation is often overlooked in training and should be drilled explicitly. Use a cone to mark the new 1st slip position before the batsman arrives at the crease.
Variation 3 — Pressure Progression (Live Edges)
Once fielders are comfortable with static positioning, progress to a live-edge drill. A coach or throw-down specialist feeds the ball to a batsman who deliberately edges to different parts of the cordon. Fielders must react in real time, call correctly, and take the catch. Increase the pace of the throw-down progressively to simulate faster bowling. This is the most match-realistic training environment for the slip cordon.
Age Adaptations

Under 12 and Below
At this age, the priority is introducing the concept of a slip cordon rather than drilling technical perfection. Use a two-man cordon only (WK and 1st slip) to keep things manageable. Use a softer ball or incrediball to reduce fear of the hard ball. Focus exclusively on the ready-position stance — feet apart, knees bent, hands low. Run the drill at reduced pace using underarm or gentle throw-down feeds.
Under 14 — Under 16
Expand to a three-man cordon (WK, 1st slip, 2nd slip) and introduce the trigger step. Begin working on the calling protocol. Use a full cricket ball with throw-down feeds at medium pace. Introduce the concept of arc versus straight line, and use cones to set positions before each drill. At this age, players can begin to understand the tactical rationale for the catching field — explain why each position is placed where it is.
Open Age (Senior)
All elements of this resource apply at full intensity. Senior players should be able to set the cordon independently, adjust depth for different bowlers, mirror the field for left-handed batsmen, and execute the full calling protocol under match pressure. Introduce video analysis of the cordon during training sessions — reviewing footage of dropped catches is one of the most effective coaching tools available at this level.