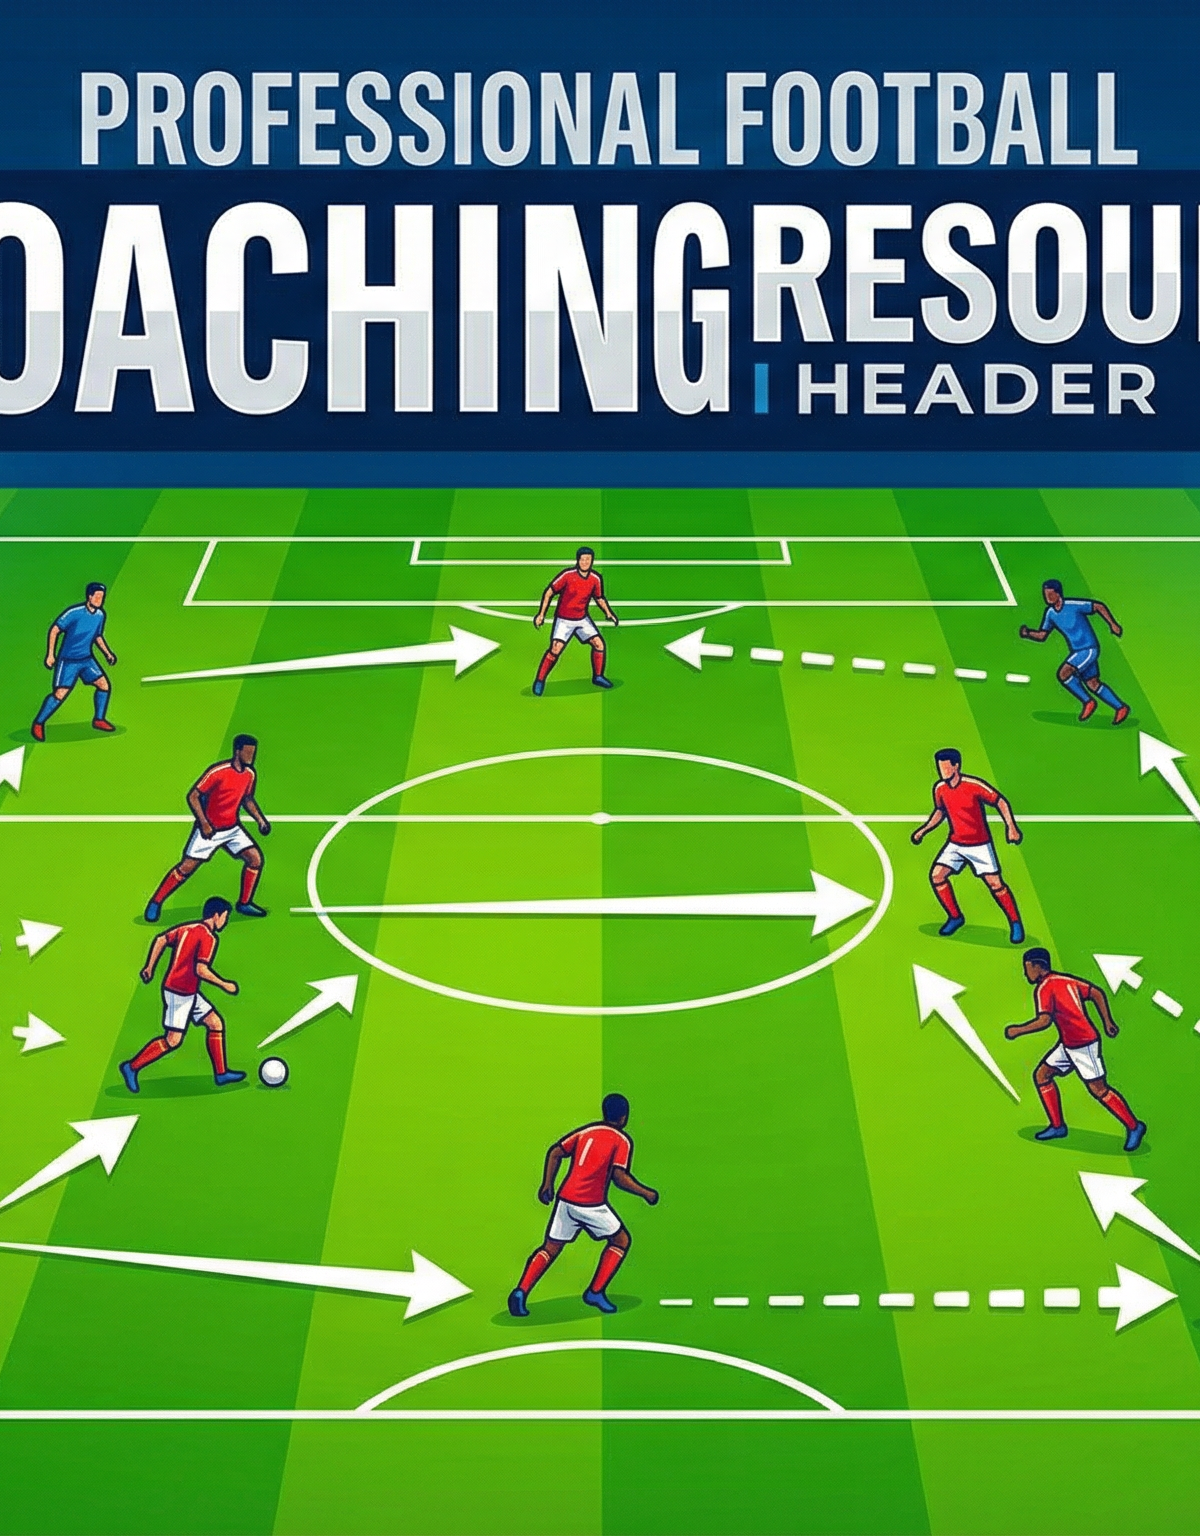
Pressing Trigger & Recovery Drill: Coordinated High Press with Organised Retreat
Teach your team exactly when to press, how to press as a unit, and how to recover instantly into a compact defensive block when the press is beaten.
Equipment Needed
Overview
The Pressing Trigger & Recovery Drill is one of the most tactically important sessions you can run with any team that wants to defend from the front. Modern football demands that players do not simply react to the ball — they must read specific cues (triggers) that tell the whole unit when to press aggressively and, critically, when to abandon the press and recover at pace into a compact defensive shape.
This drill trains two complementary skills in a single, continuous exercise: coordinated high pressing initiated by a recognised trigger, and immediate collective recovery when that press is bypassed. It is suitable for teams playing a 4-4-2, 4-2-3-1, or 4-3-3 defensive shape and can be adapted for any age group from Under-12 upward.
When to use this drill: Deploy it in the middle phase of a training session after a technical warm-up. It works best as a 20-25 minute block, 2-3 times per week during a pre-season or early competitive phase when you are embedding your defensive principles.
Setup

Equipment
| Item | Quantity |
|---|---|
| Full-size or 3/4-size pitch (approx. 70m x 50m minimum) | 1 |
| Bibs (two colours) | 20 |
| Size 5 footballs | 6-8 |
| Cones (to mark zones) | 16 |
| Coaching board / whiteboard | 1 |
| Stopwatch | 1 |
Pitch Setup
Use a 70m x 50m zone (or a full pitch if available). Mark a high press zone in the opponent's half using cones at approximately 35m from the attacking goal. Mark a recovery line at 35m from the defending goal using cones along the width of the pitch. These two reference lines are the spatial anchors for the drill.
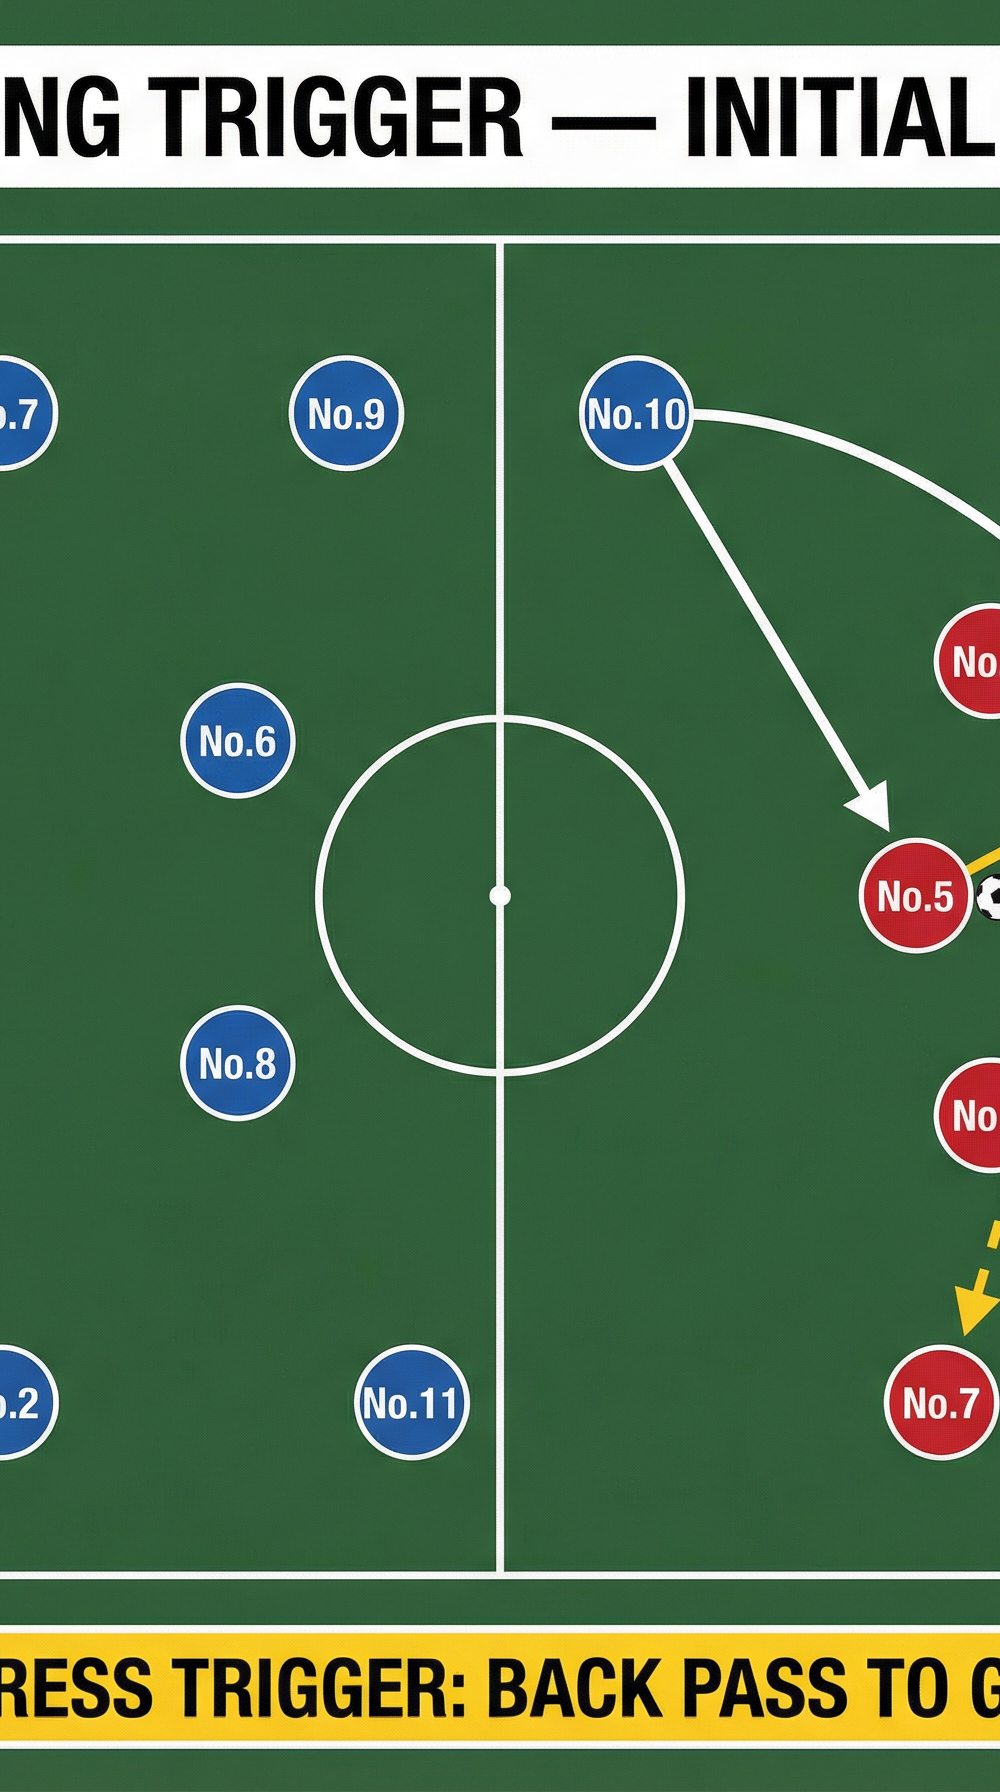
Player Positions (4-4-2 Pressing Team - Blue)
| Number | Position | Starting Zone |
|---|---|---|
| No.1 | Goalkeeper (GK) | Own goal line |
| No.2 | Right Back (RB) | Own defensive third |
| No.3 | Left Back (LB) | Own defensive third |
| No.4 | Centre Back (CB) | Own defensive third |
| No.5 | Centre Back (CB) | Own defensive third |
| No.6 | Central Midfielder (CM) | Own half, central |
| No.8 | Central Midfielder (CM) | Own half, central |
| No.7 | Right Midfielder (RM) | Halfway line, wide right |
| No.11 | Left Midfielder (LM) | Halfway line, wide left |
| No.9 | Striker (ST) | Opponent's half, right channel |
| No.10 | Striker (ST) | Opponent's half, left channel |
The attacking/build-up team (Red) lines up in a 4-3-3 or 4-2-3-1 shape and is instructed to play out from the back, with the goalkeeper actively involved.
Step-by-Step Instructions


Step 1 - Set the starting shape. The Blue team sets up in their 4-4-2 mid-block, with No.9 and No.10 positioned 5-8m apart in the opponent's half, angled to show the Red centre-backs onto one side. The midfield four holds a compact line approximately 30m from the Blue goal. Emphasise that the starting position is a passive press - players are in position but not yet pressing.
Step 2 - Introduce the trigger. Nominate the coach or a designated player to call the press or signal with a raised hand. The agreed trigger for this drill is the back pass from a Red outfield player to the Red goalkeeper. The moment the ball travels back to the goalkeeper, the press is activated.
Step 3 - Execute the press. On the trigger: No.9 sprints to close the Red GK from one side, cutting off the throw or kick to the right centre-back. No.10 simultaneously curves their run to block the pass to the left centre-back and the central midfielder. No.7 and No.11 push up to press the Red fullbacks, preventing easy wide outlets. No.6 and No.8 step up 8-10m to compress the space in front of the Red midfield. The back four holds its line but shifts collectively toward the ball side.
Step 4 - Apply the press for 5 seconds. The Blue team has a 5-second press window. If the ball is won, play continues toward the Blue attacking goal. If the press is not successful within 5 seconds, the coach calls the recovery command - this is the second trigger.
Step 5 - Execute the recovery. On the recovery signal: All Blue outfield players sprint back toward the recovery line (35m from their own goal). No.9 and No.10 drop into a mid-block striker position. No.7 and No.11 tuck inside to form a compact midfield four. No.6 and No.8 drop to the recovery line. No.2 and No.3 recover to their defensive positions. No.4 and No.5 hold a flat defensive line 25-30m from goal.

Step 6 - Defend the block. Once recovered, the Blue team holds their compact 4-4-2 block and defends against the Red team's attack. The Red team is encouraged to play quickly and exploit any gaps left by the press. If Blue win the ball, they counter-attack. If Red score or the ball goes out, reset and repeat.
Step 7 - Rotate and repeat. Run the sequence 6-8 times per set, then rotate the pressing team and the build-up team. Each set should last approximately 4-5 minutes.
Key Coaching Points
1. Trigger recognition is non-negotiable. Every single player must recognise the pressing trigger simultaneously. If even one player misses the cue, the press becomes disorganised and easily bypassed. Drill the trigger recognition in isolation first - show the back pass, call the press, freeze the players and check their positions before allowing movement.
2. The press must be angled, not straight. No.9 and No.10 must curve their runs to channel the ball into a specific zone, not simply run at the nearest defender. The objective is to force the Red GK toward the touchline or into a risky long ball, not to give them an easy pass to the other side.
3. Compactness in the press - no gaps between lines. As the front two press, the midfield four must step up in unison. The distance between the pressing strikers and the midfield line should never exceed 10m. If it does, the Red team will find easy passes through the press.
4. The recovery must be immediate and at sprint pace. The moment the press is beaten, there is zero tolerance for jogging back. Every player must sprint to their recovery position. Emphasise that the speed of the recovery determines the quality of the defensive block. A slow recovery leaves gaps that good teams will exploit.
5. Hold the defensive shape - do not chase. Once recovered into the block, players must resist the urge to press again immediately. The block requires patience. Communicate to your players: we press on our terms, not theirs.
6. Communication throughout. The goalkeeper and the defensive midfielder (No.6) should be the primary communicators during both the press and the recovery. Encourage constant verbal cues: Press, Step, Drop, Hold, Line.
Common Mistakes

Mistake 1 - Pressing without a trigger (random pressing). Players begin pressing as soon as the ball moves, without waiting for the agreed trigger. This exhausts the team and creates disorganised gaps. Correction: Stop the drill immediately when this occurs. Reset, walk through the trigger recognition, and restart. Reward discipline over enthusiasm.
Mistake 2 - The front two press but the midfield stays deep. No.9 and No.10 sprint to press, but No.6, No.8, No.7, and No.11 fail to step up, leaving a large gap between the press and the midfield line. Correction: Use a rope or bib line on the ground to show the midfield the minimum step-up distance. Physically walk the midfield through their movement in slow motion.
Mistake 3 - Slow or passive recovery runs. After the press is beaten, players jog or walk back rather than sprinting. Correction: Time the recovery with a stopwatch. Set a target of 4-5 seconds to reach the recovery line from the press position. Publicly acknowledge players who hit the target and challenge those who do not.
Mistake 4 - The press is straight, not angled. No.9 runs directly at the Red GK rather than curving to cut off the right side. This gives the GK an easy pass to the opposite centre-back. Correction: Place a cone 3m to the left of the GK as a target for No.9's press angle. The cone forces the curved run.
Mistake 5 - Fullbacks push too high during the press. No.2 and No.3 push up to press the Red fullbacks but do not track back quickly enough during the recovery, leaving space in behind. Correction: Instruct fullbacks to press only to the edge of the opponent's half. They must be the first players to begin their recovery run.
Variations & Progressions
Progression 1 - Add a second trigger (the misplaced pass). In addition to the back-pass trigger, introduce a second pressing trigger: a horizontal pass between the two Red centre-backs under pressure. This increases the cognitive load and trains players to recognise multiple cues. Begin with one trigger and add the second only once the first is mastered.
Progression 2 - Restrict the press window to 3 seconds. Reduce the press window from 5 seconds to 3 seconds. This forces sharper, more decisive pressing runs and faster decision-making. It also increases the frequency of recovery situations, giving players more repetitions of the recovery shape.
Progression 3 - Live 11v11 with triggers. Move the drill into a full 11v11 game on a full-size pitch (100-110m x 64-75m). The Blue team plays their normal defensive shape and presses only on the agreed triggers. The coach observes and pauses play to correct positioning. This is the closest simulation to a competitive match and should be the final stage of the progression.
Age Adaptations
| Age Group | Pitch Size | Players | Key Modifications |
|---|---|---|---|
| Under-12 | 50m x 35m | 7v7 | Use one trigger only (back pass). Simplify to a 3-3 or 4-3 shape. Walk through movements before running at speed. |
| Under-14 | 60m x 40m | 9v9 | Introduce two triggers. Use a 4-3-2 shape. Begin timing the recovery. |
| Under-16 | 70m x 50m | 11v11 | Full 4-4-2 shape. Three triggers. Introduce the live 11v11 progression. |
| Open/Senior | Full pitch | 11v11 | All triggers active. Integrate with team's match-day pressing plan. Video analysis of sessions recommended. |
For younger age groups, always prioritise understanding over intensity. Walk through the trigger and recovery at 50% pace before increasing the tempo. Use coloured bibs to help younger players identify their pressing partner and their recovery landmark.