Horns Set Play: The Open Three-Pointer
Learn how to utilize the classic Horns formation to generate high-quality three-point looks for your best shooters through screening and quick ball reversal.
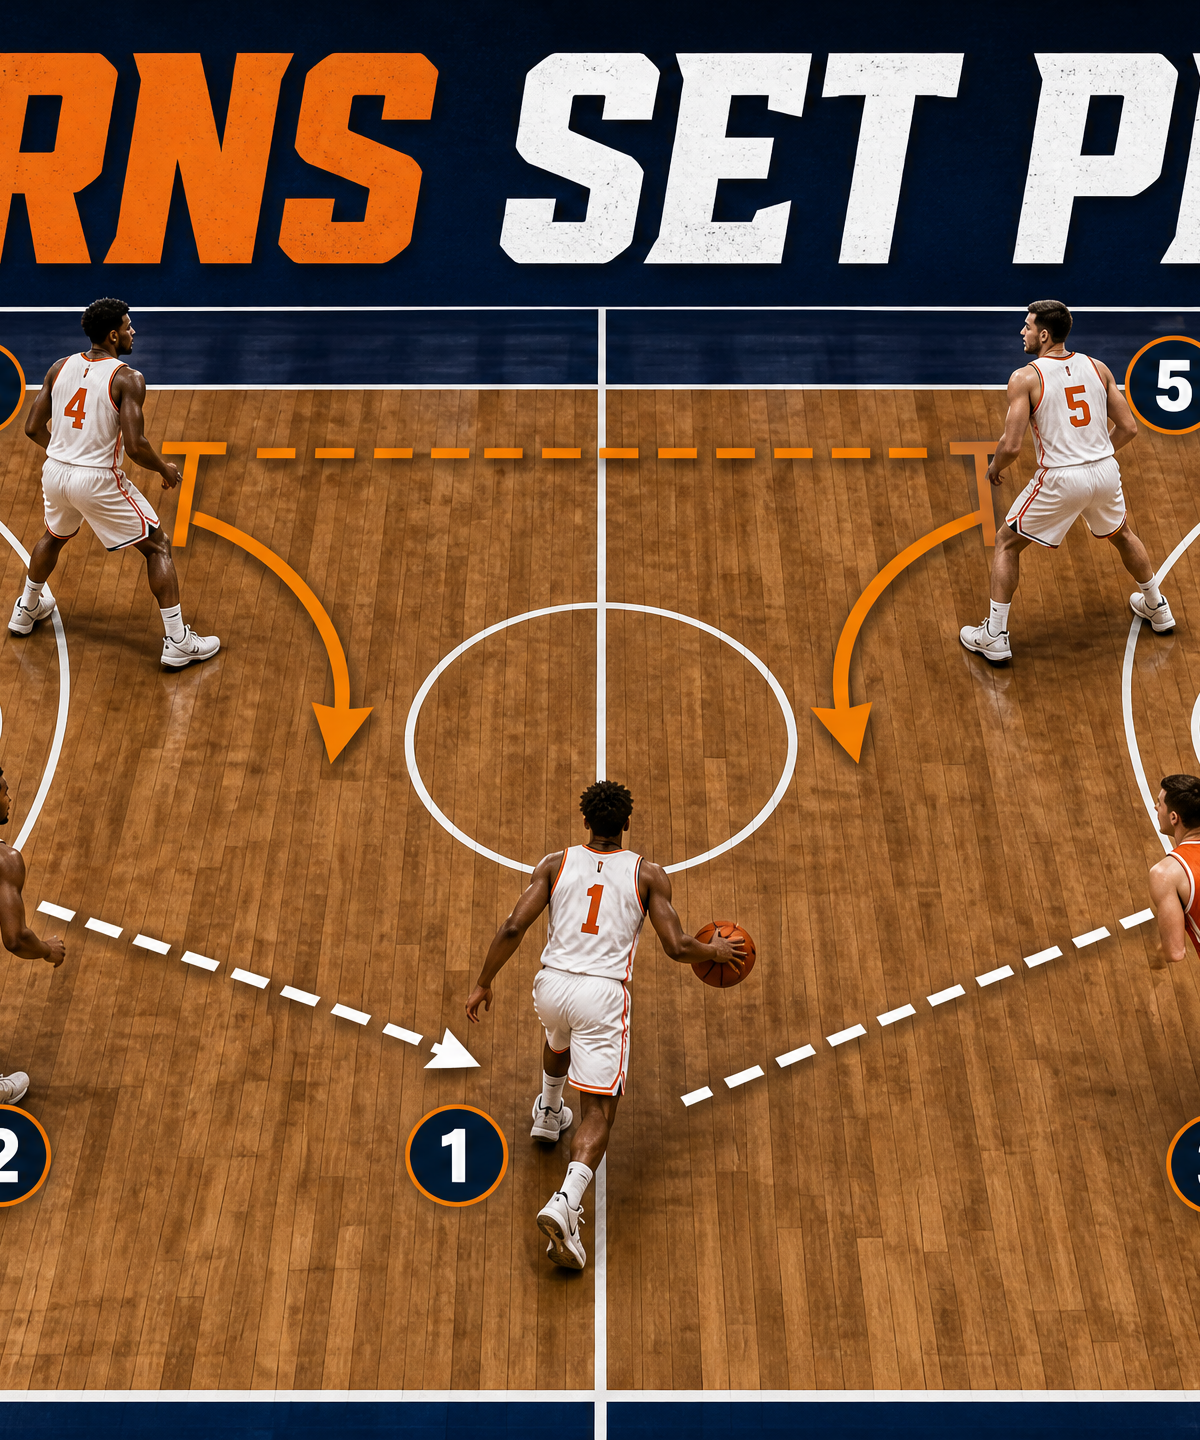
Equipment Needed
1. Overview
The Horns set is a staple in modern basketball at all levels, from FIBA international play to the NBA and high school. Its primary advantage lies in the spacing it creates. By lifting both bigs (the "Horns") to the elbows and dropping the wings to the corners, the paint is completely open. This specific action leverages that spacing to create an open three-point shot for your best perimeter shooter. It relies on a quick ball reversal and a well-timed pin-down or flare screen, forcing the defense into difficult rotation decisions.
Use this play when you need a crucial three-pointer, particularly out of a timeout (ATO) or late in the shot clock when you need to quickly generate an open look from deep.
2. Setup
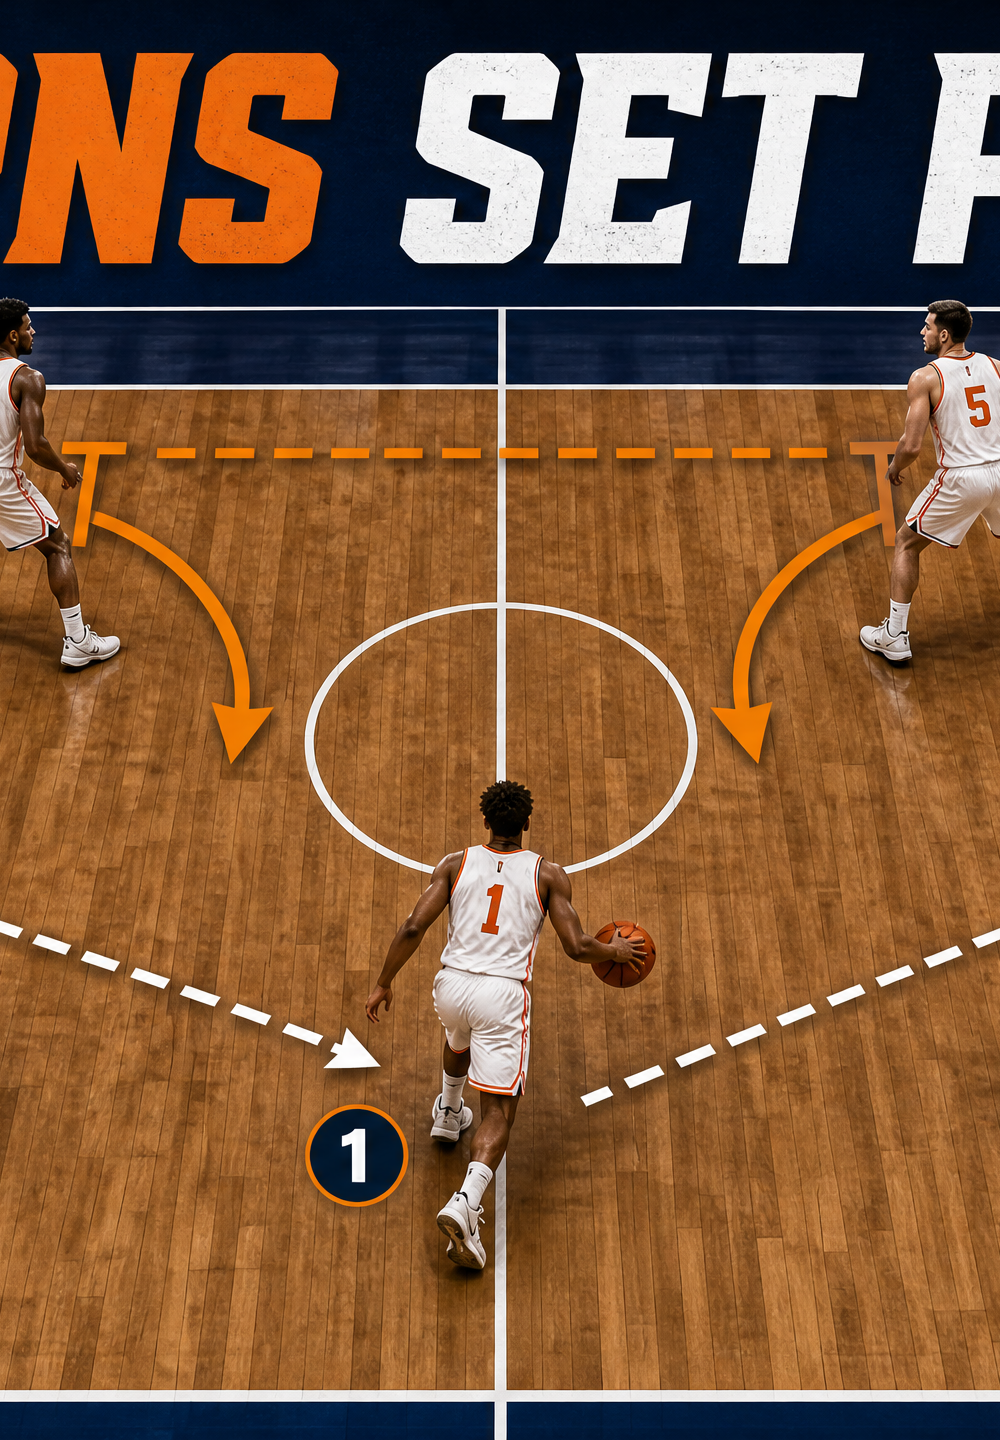
- Equipment Needed: 1 Basketball, half-court (FIBA 28m x 15m dimensions).
- Court Setup: Standard half-court setup.
- Player Positions:
- 1 (Point Guard): Top of the key, initiating the offense.
- 2 (Shooting Guard): Left wing/corner area.
- 3 (Small Forward): Right wing/corner area. (This should be your target shooter).
- 4 (Power Forward): Left elbow (high post).
- 5 (Center): Right elbow (high post).
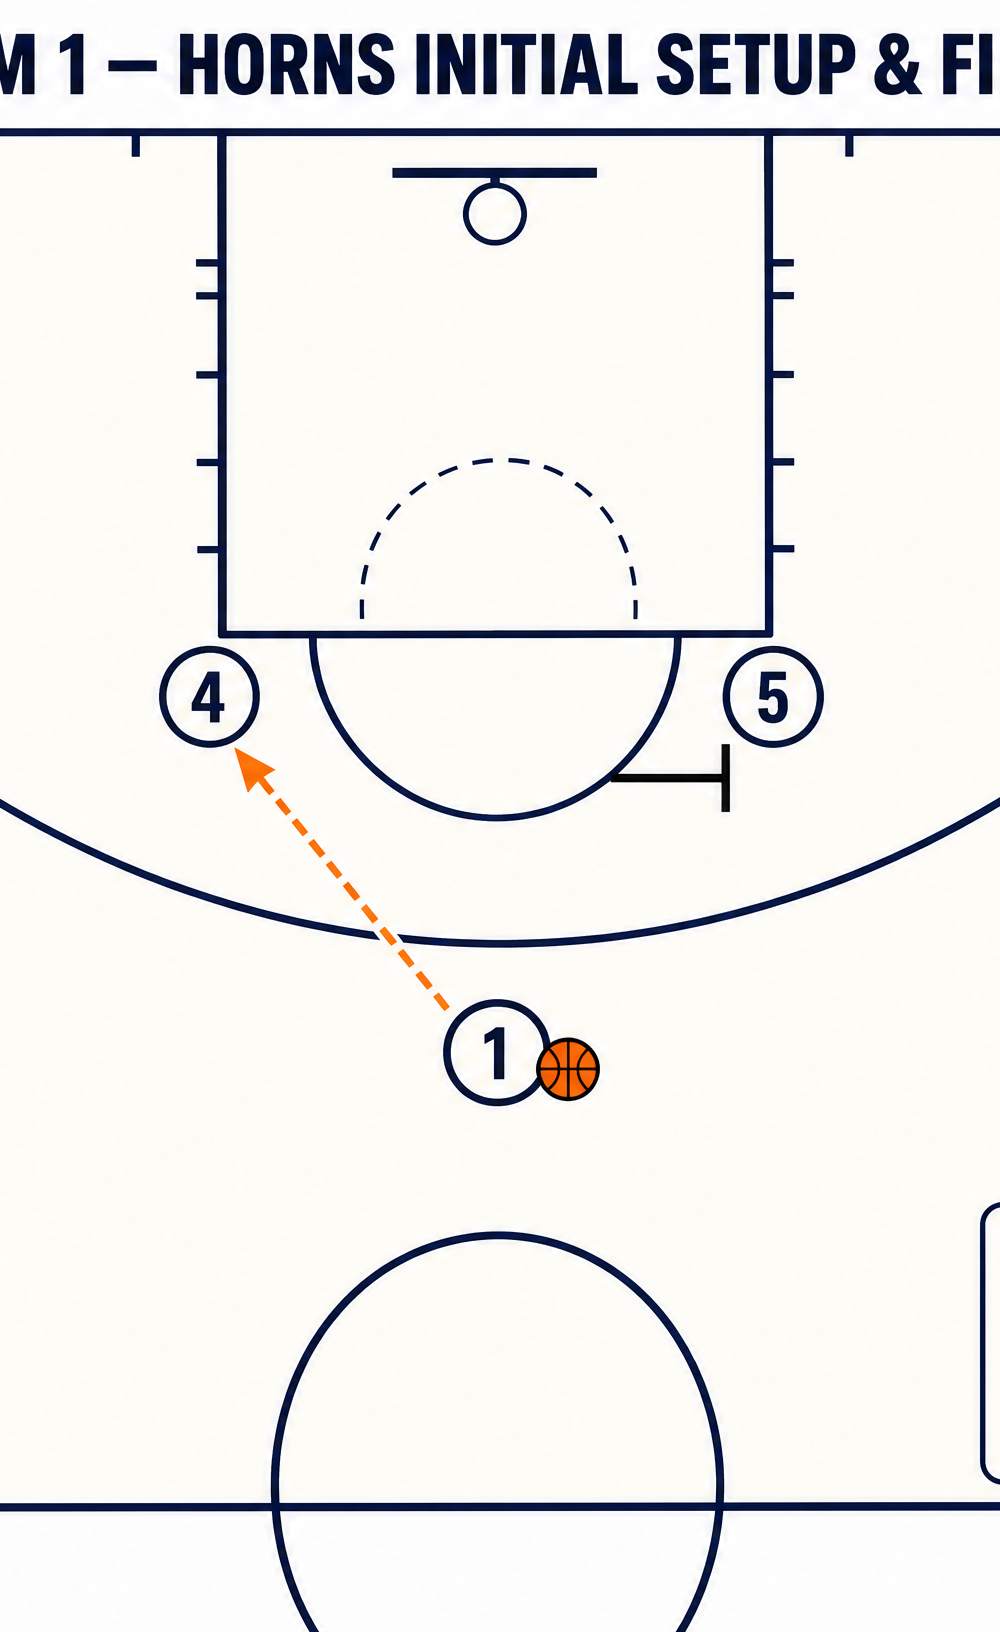
3. Step-by-Step Instructions
Step 1: The Entry and Initial Spacing
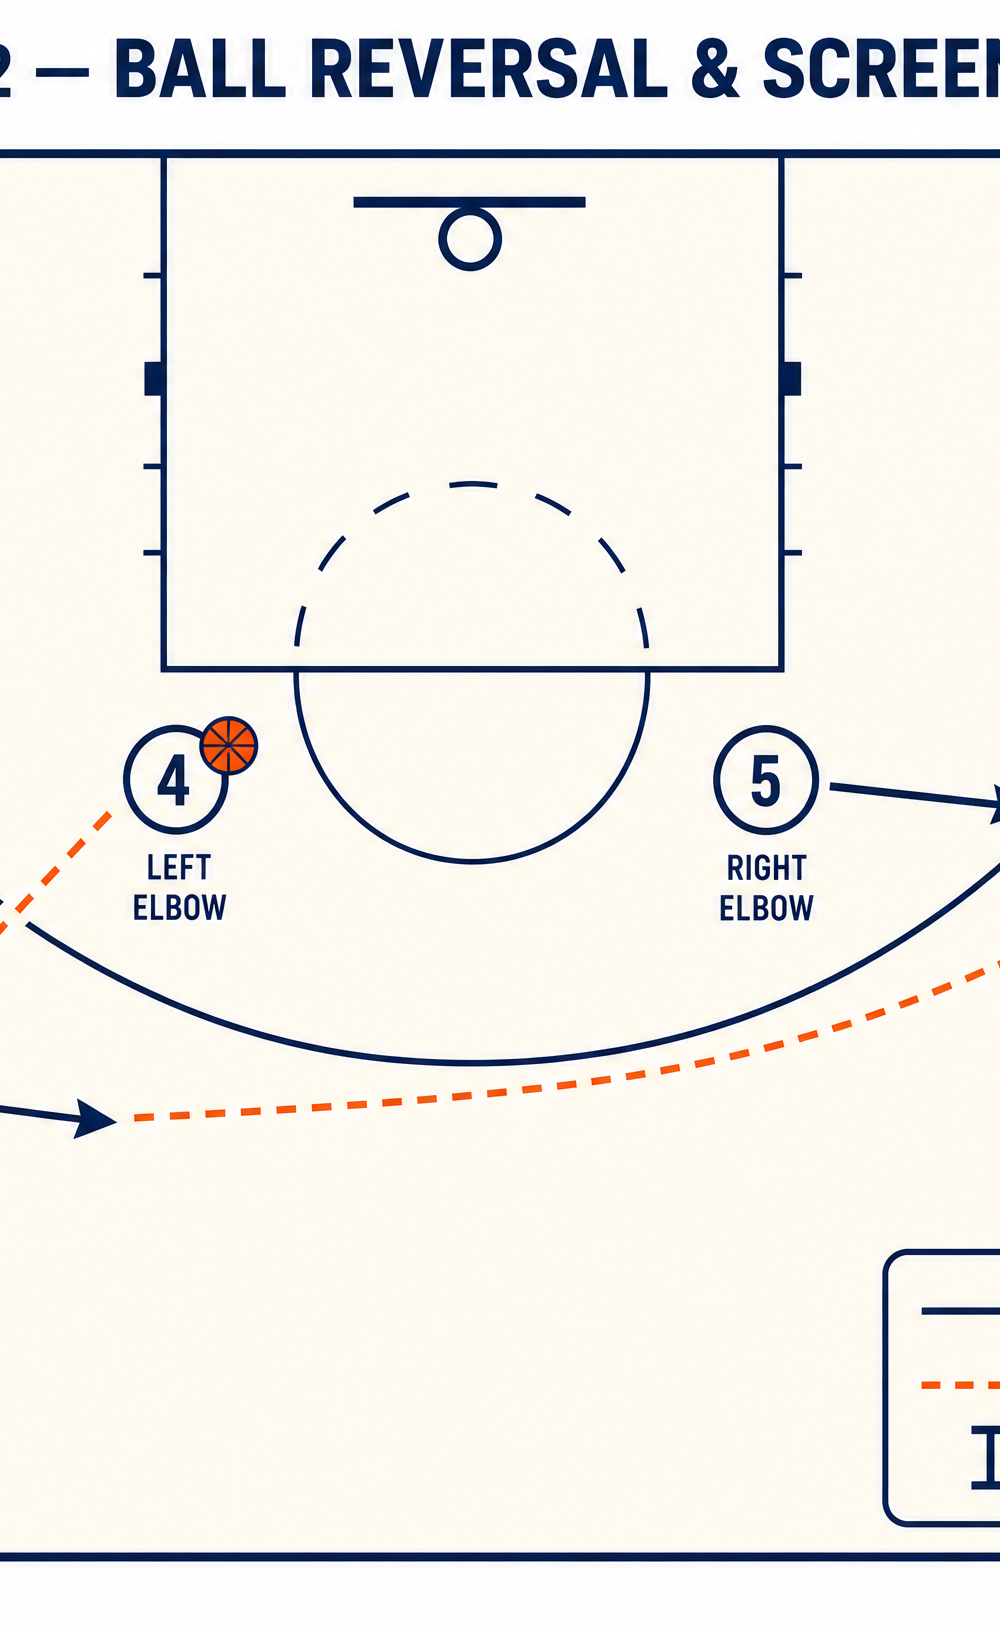
1 brings the ball up the floor and calls the play. 4 and 5 establish position at the elbows. 2 and 3 drop to the deep corners to stretch the defense and clear the wings. 1 initiates the action by passing the ball to 4 at the left elbow.
Step 2: The Clear Out and Reversal
As soon as 4 catches the ball, 1 immediately cuts hard away from the ball toward the left wing, replacing the space that 2 has vacated (if 2 is deep in the corner). 4 squares up to the basket, surveying the floor. 4 then executes a quick, crisp reversal pass back to 1 on the left wing.
Step 3: The Weak-Side Screen
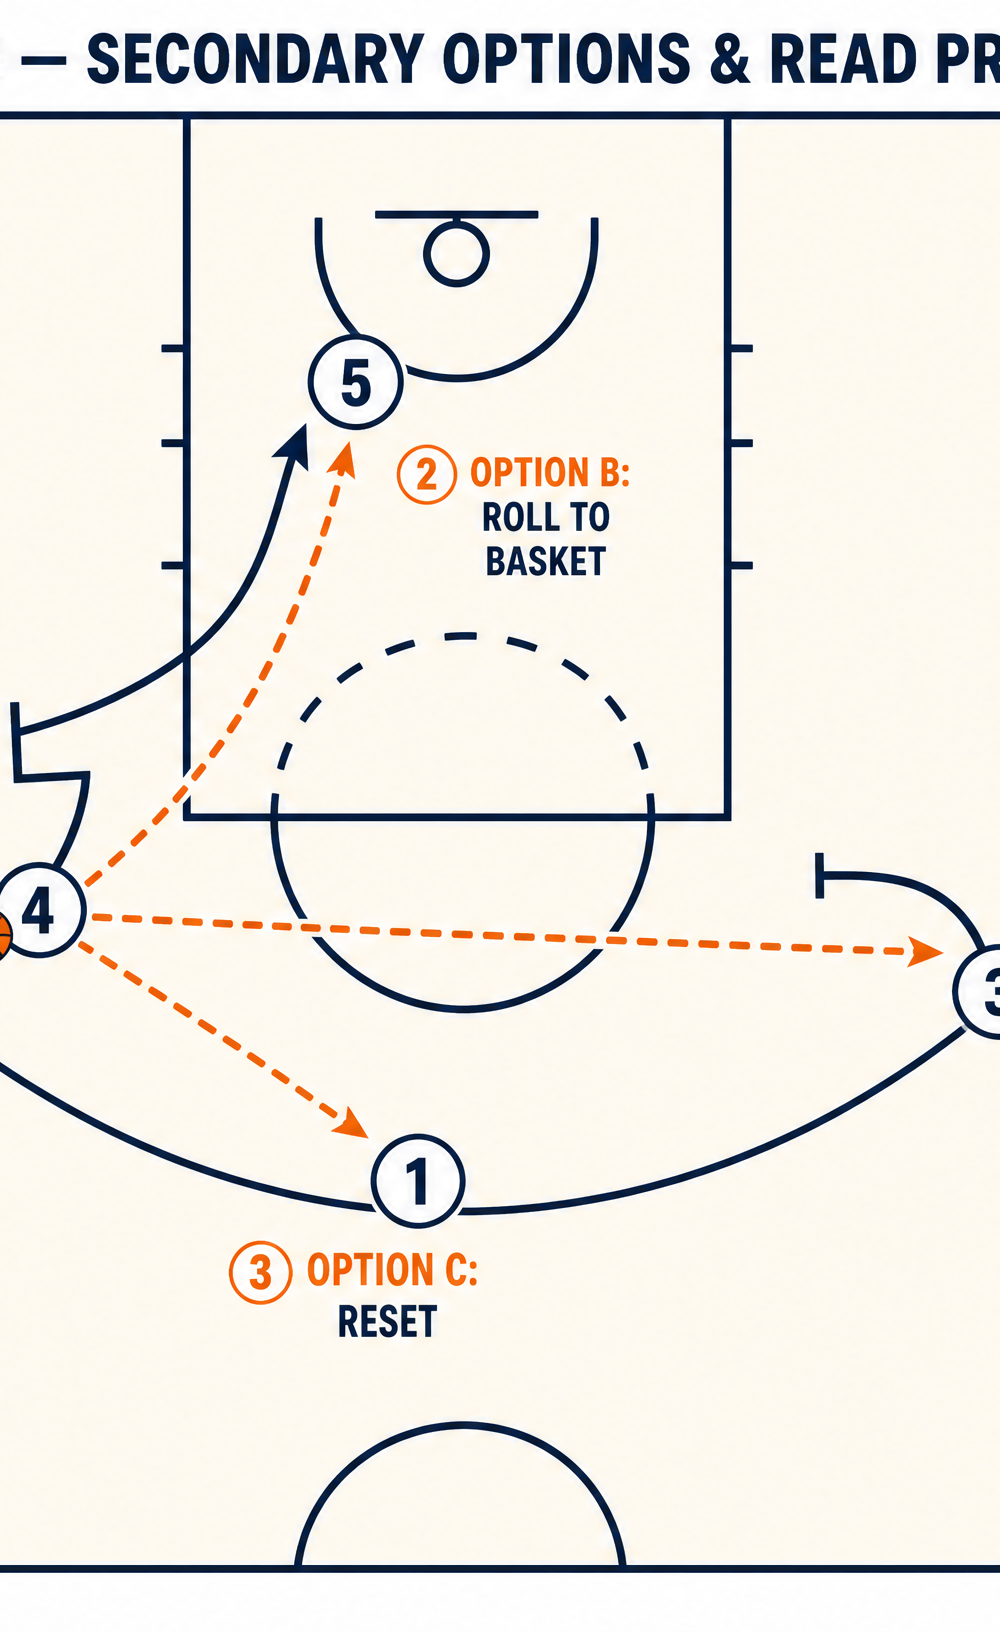
As the ball is reversed from 4 to 1, the crucial weak-side action occurs. 5, starting from the right elbow, sprints down to set a solid pin-down screen (or flare screen, depending on how the defender is playing) for 3 on the right wing/corner area.
Step 4: The Shot Opportunity
3 reads the screen set by 5. 3 curls tightly off 5's shoulder, sprinting to the top of the three-point arc or the right wing. 1 delivers a sharp, on-target pass to 3. 3 catches the ball ready to shoot, squaring up to the basket for the open three-pointer.
Step 5: Secondary Reads (If the Three is Covered)
If 3's defender fights over the screen effectively and takes away the shot, 3 has immediate secondary options. 5, after setting the screen, rolls hard to the basket. 3 can look to feed 5 on the roll. Alternatively, 4 can step out for a reset, or 2 remains an option in the opposite corner for a skip pass if the defense over-helps.
4. Key Coaching Points
- Patience and Timing: The timing of the screen by 5 and the cut by 3 must perfectly synchronize with the ball reversal to 1. If 3 cuts too early, the defense can recover.
- Screening Angle: 5 must take a wide stance and set a legal, solid screen. The angle of the screen should force 3's defender to go under (giving up the shot) or trail (giving up the drive or a quick catch-and-shoot).
- Reading the Defense: 3 must be a smart player. If the defender cheats over the screen, 3 should fade to the corner. If the defender trails, 3 curls tight for the shot.
- Pass Quality: The pass from 1 to 3 must be thrown to the outside hand, away from the recovering defender, right into 3's shooting pocket.
- Spacing at the Horns: 4 and 5 must stay wide at the elbows initially to keep the paint unclogged.
5. Common Mistakes
- Slipping the Screen Too Early: 5 slips the screen before making solid contact, allowing 3's defender to easily stay attached.
- Poor Spacing by the Wings: 2 and 3 creeping up from the corners too early, which shrinks the floor and allows defenders to stunt and recover.
- Telegraphing the Pass: 1 staring down 3 during the reversal, allowing the defense to anticipate the pass and jump the passing lane.
- Rushing the Shot: 3 catching the ball off-balance instead of squaring up properly before shooting.
6. Variations & Progressions
- Horns Flare: Instead of a pin-down, 5 sets a flare screen for 3, who fades to the deep corner while 1 skips the ball directly to the corner.
- Horns Hand-Off (DHO): Instead of reversing to 1, 4 keeps the ball and executes a dribble hand-off with 2 coming out of the left corner, while 5 still screens for 3 on the weak side to occupy the defense.
- Horns Pick and Roll: 4 passes to 1, then immediately follows the pass to set a side pick-and-roll with 1, while 5 spaces out or screens away.
7. Age Adaptations
- Under 10 / Under 12: Focus heavily on the basic spacing (standing on the "spots") and the fundamental passing mechanics. The screen away might be too complex; instead, just have 3 make a V-cut to get open.
- Under 14 / Under 16: Introduce the screening action and emphasize the importance of setting a legal screen and reading the defender (curl vs. fade). Start working on the roll option for 5.
- Open / Advanced: Execute the play at game speed with multiple reads. Emphasize the precision of the pass, the angle of the screen, and the immediate transition into secondary actions if the primary shot is denied.

