The Decoy Drive: A High-Percentage Baseline Throw-In Set Play
Master this essential attacking set play designed to isolate your Goal Shooter under the post by using the Goal Attack as a dynamic decoy.
Equipment Needed
1. Overview
The baseline throw-in from the attacking end is one of the most critical set-piece opportunities in Netball. When executed correctly, it almost guarantees a high-percentage shot on goal. This specific set play, "The Decoy Drive," is designed to manipulate the defensive structure inside the goal circle. By using the Goal Attack (GA) and Goal Shooter (GS) in a coordinated split movement, the play forces defenders to commit, ultimately isolating the GS under the post for an easy feed from the GA. It is highly effective against both one-on-one and basic zone defensive structures.
2. Setup

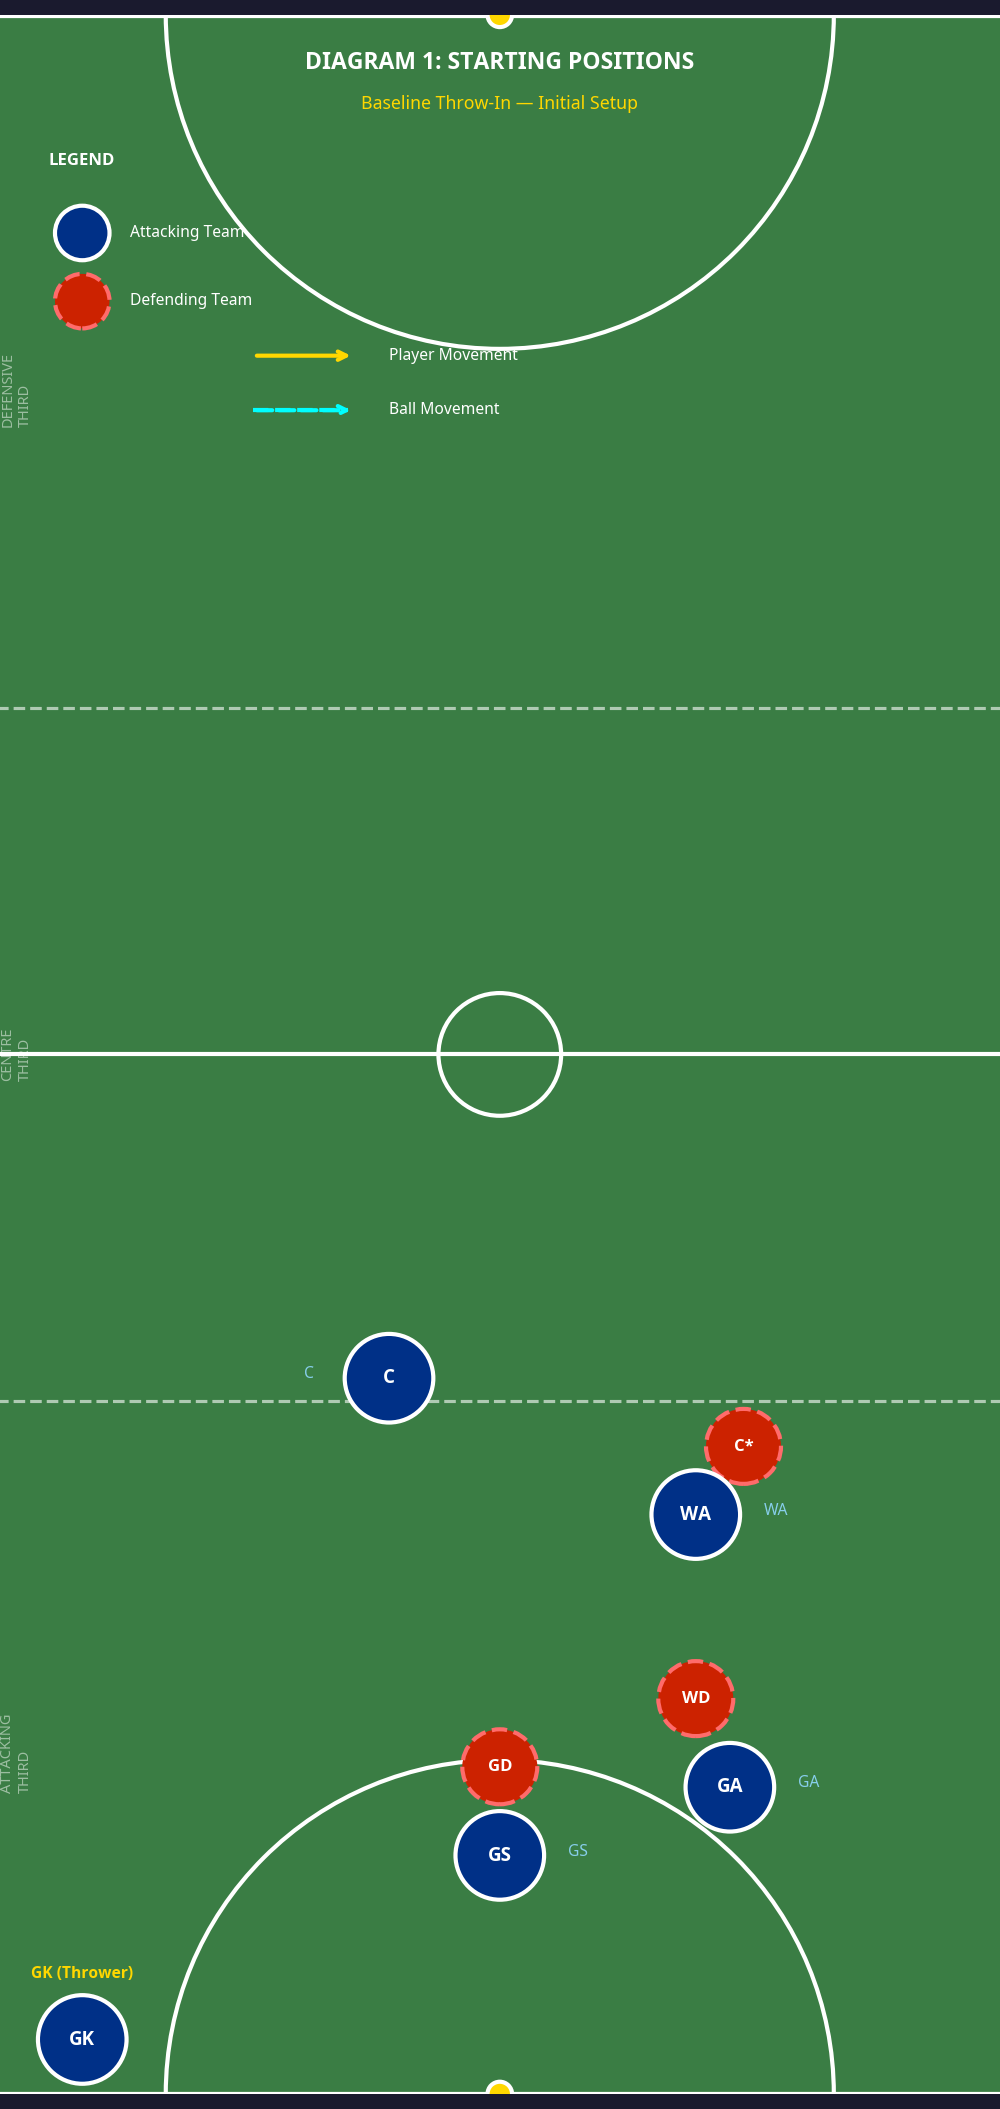
Court Position: Attacking baseline, directly under or slightly offset from the goal post.
Player Positions:
- GK (Thrower): Takes the throw-in from the baseline, positioned just outside the court boundary.
- GS: Starts deep inside the goal circle, positioned near the post to hold space.
- GA: Positions on the edge of the goal circle, typically on the right side, ready to dictate the initial movement.
- WA: Sets up wide in the goal third, providing a crucial safety outlet if the primary options are covered.
- C: Holds the top of the goal third near the transverse line, balancing the court and providing depth.
3. Step-by-Step Instructions

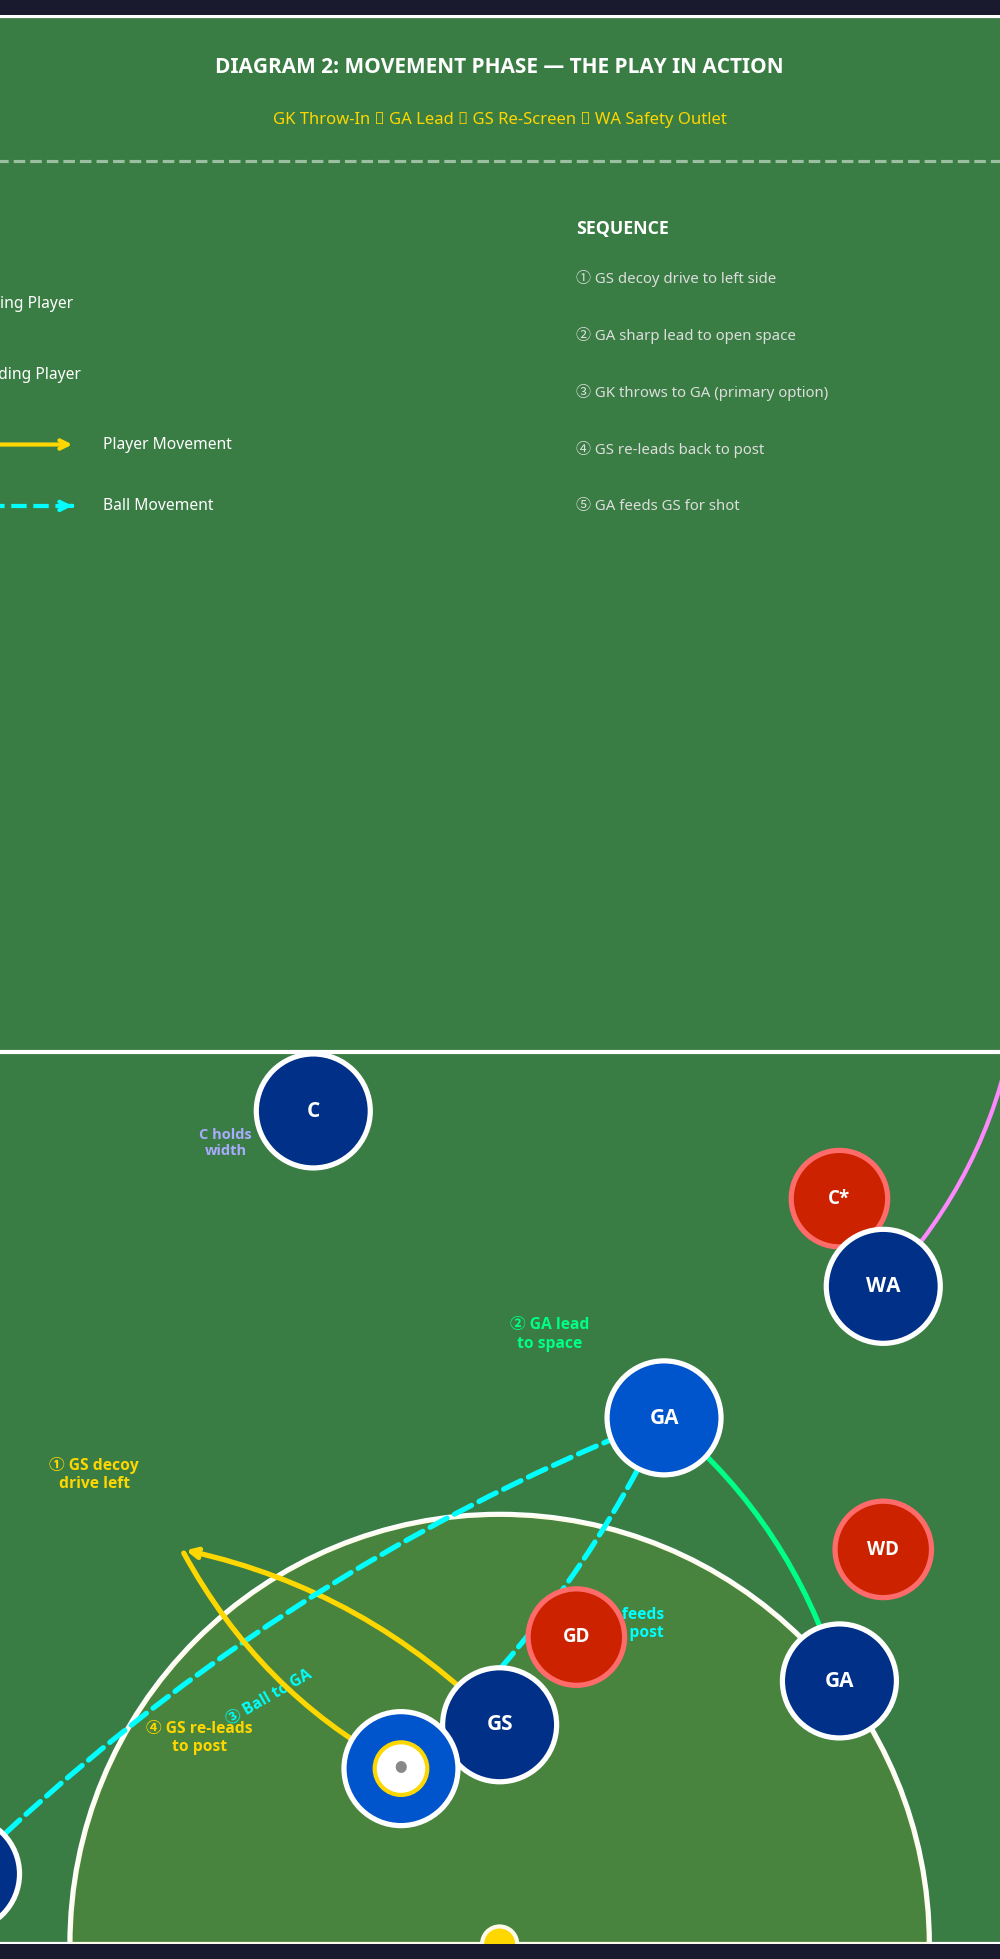
- The Setup: The GK calls the play or signals the trigger (e.g., a ball tap or a specific verbal call) to initiate movement.
- The Decoy (GS): As the GK releases the ball, the GS makes a strong, hard drive across the goal circle toward the left side. This movement is a decoy designed to draw the Goal Defender (GD) away from the post and open up the central channel.
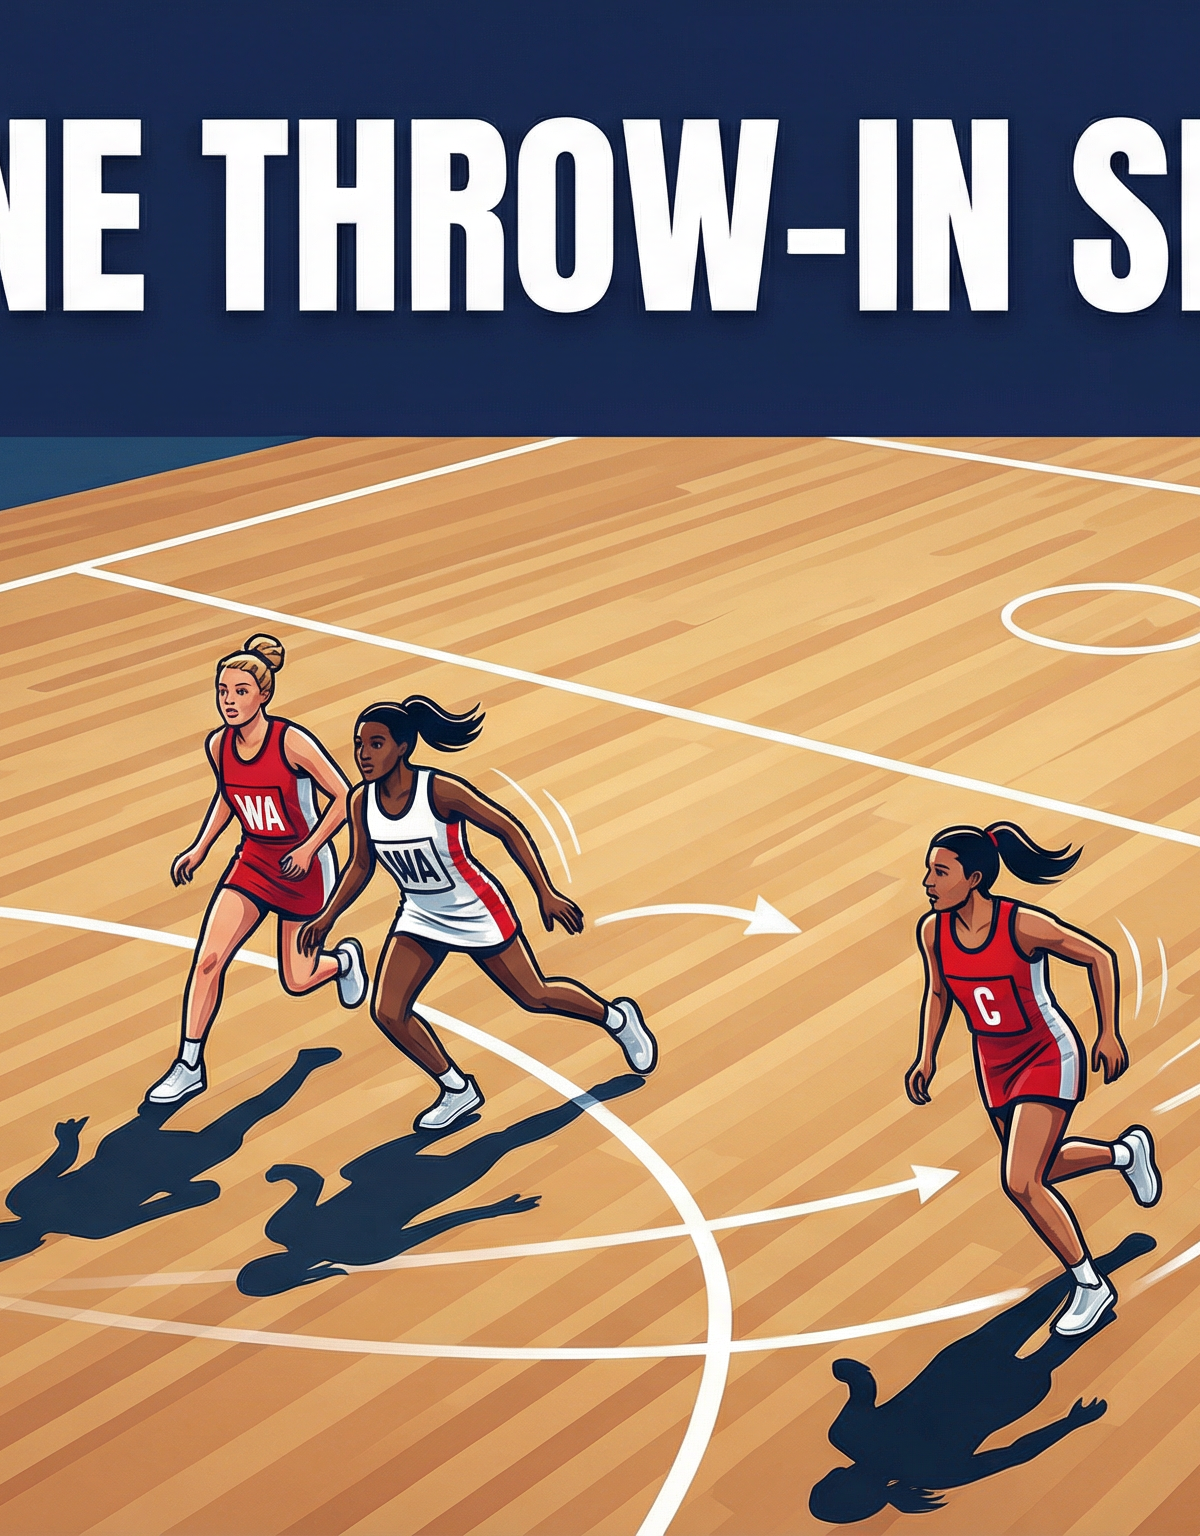
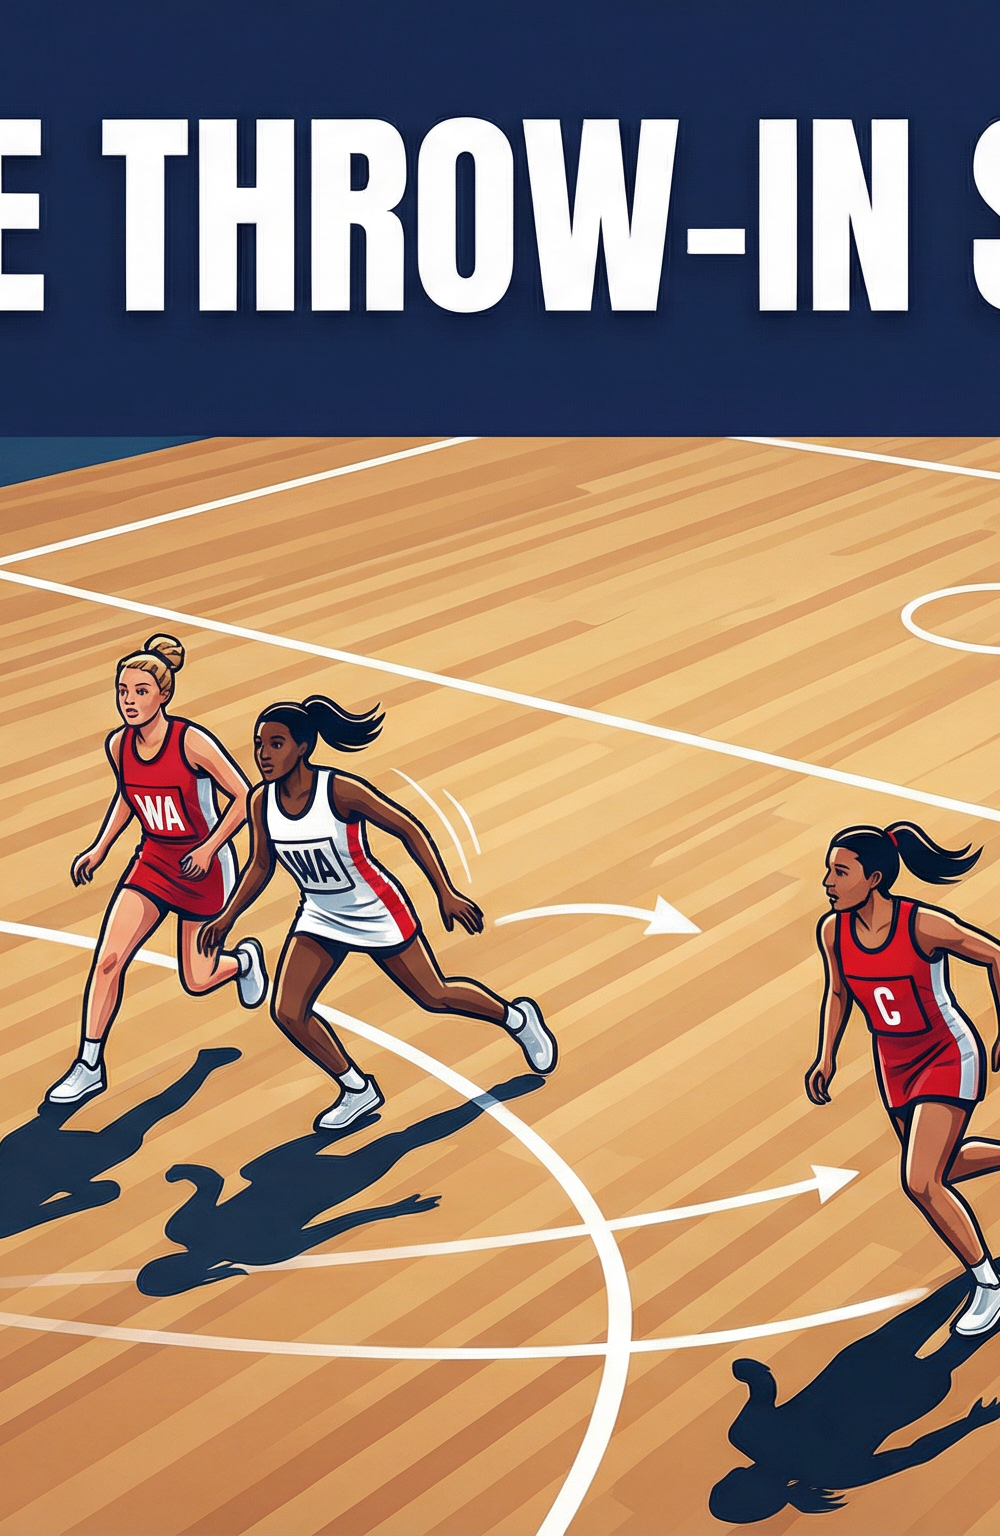
- The Lead (GA): Simultaneously, the GA makes a sharp, explosive lead into the newly created space on the right side of the goal circle edge, shaking off the Wing Defence (WD).
- The Primary Pass: The GK delivers a crisp, flat pass to the GA hitting the top of the circle.
- The Re-Lead (GS): As soon as the GA receives the ball, the GS immediately changes direction, pushing off their outside foot to re-lead back to the space directly under the goal post, effectively sealing off the GD.
- The Feed: The GA turns and delivers a quick, precise feed (often a lob or a bounce pass, depending on the defender's position) to the GS under the post for a high-percentage shot.

4. Key Coaching Points

- Timing is Everything: The GS and GA must time their movements perfectly. If the GA leads too early, the space won't be clear; if too late, the GK will hold the ball for too long (risk of a 3-second call).
- Convincing Decoys: The GS must sell the initial drive across the circle. They need to sprint and call for the ball to force the GD to commit fully to the decoy movement.
- Strong Holds: When the GS re-leads to the post, they must establish a strong, low body position to hold off the recovering defender and provide a clear target for the GA.
- Vision and Execution (GA): The GA must have excellent peripheral vision to catch the pass from the GK while immediately scanning for the GS's re-lead under the post.
5. Common Mistakes
- Lack of Eye Contact: The GK failing to make eye contact with the GA before the pass, leading to turnovers or poorly timed throws.
- Weak Decoy Runs: The GS jogging through the initial movement, which fails to draw the defender and clogs the passing lane for the GA.
- Crowding the Space: The WA or C driving too deep into the goal third, bringing their defenders into the play and closing down the space needed for the GA and GS.
- Forcing the Pass: The GA forcing the feed to the GS even when the defender has recovered. They must be prepared to reset the play if the primary option is covered.
6. Variations & Progressions
- The WA Outlet (Safety): If the GA is tightly marked and the primary pass is unavailable, the GK can hit the WA on a wide lead. The WA then feeds the GA or resets the play through the C.
- The Direct Feed (Progression): If the GD completely abandons the GS to double-team the GA, the GK can look for a direct, high lob pass over the defense straight to the GS under the post.
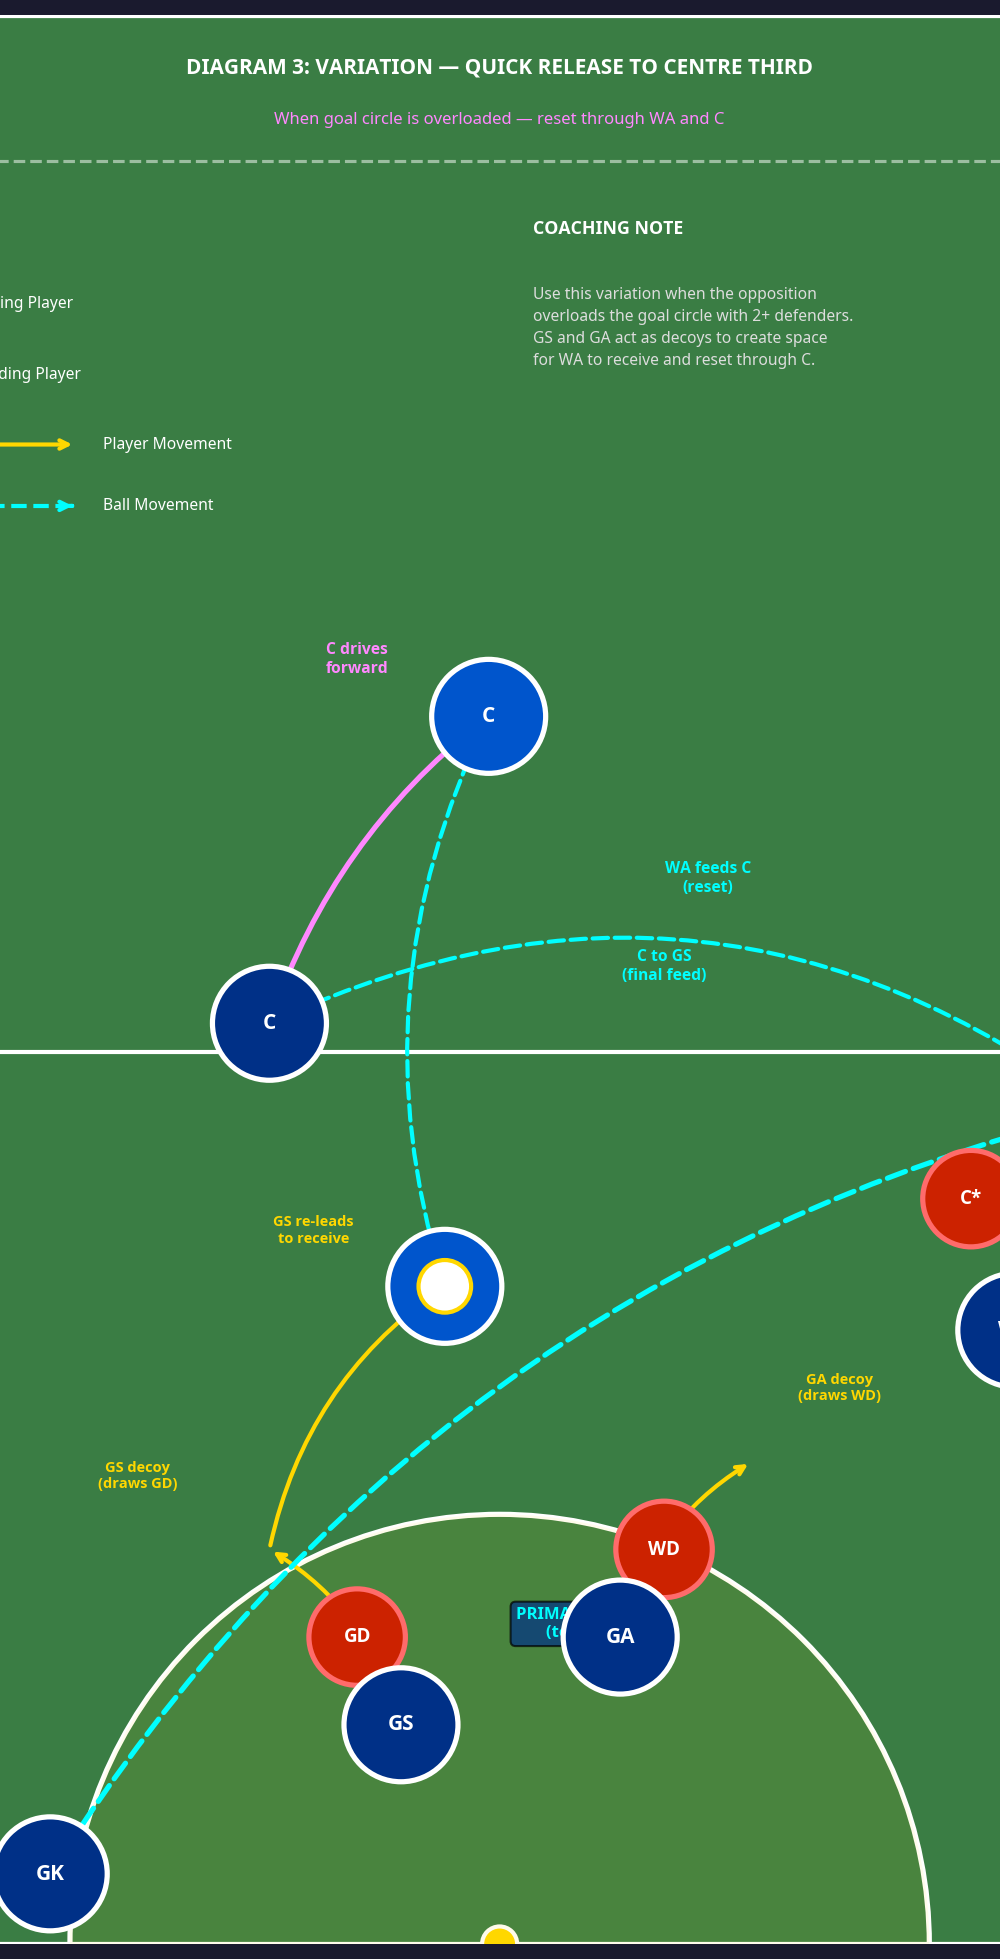
- The Overload Reset (Variation): When the circle is heavily congested (e.g., against a zone), the GK throws to the WA, who immediately resets the ball back to the C. The C then drives forward to deliver the final feed to the GS, bypassing the crowded circle edge.

7. Age Adaptations
- Under 10s: Focus purely on the timing of the GA's lead and the GK's pass. Simplify the GS's movement to just holding space near the post rather than a complex re-lead.
- Under 12s/14s: Introduce the decoy movement for the GS. Emphasize the importance of the GS "selling" the fake drive to draw the defender.
- Under 16s/Open: Demand high-speed execution and precision passing. Introduce the variations (WA outlet and Overload Reset) to give players options against more sophisticated defensive structures.