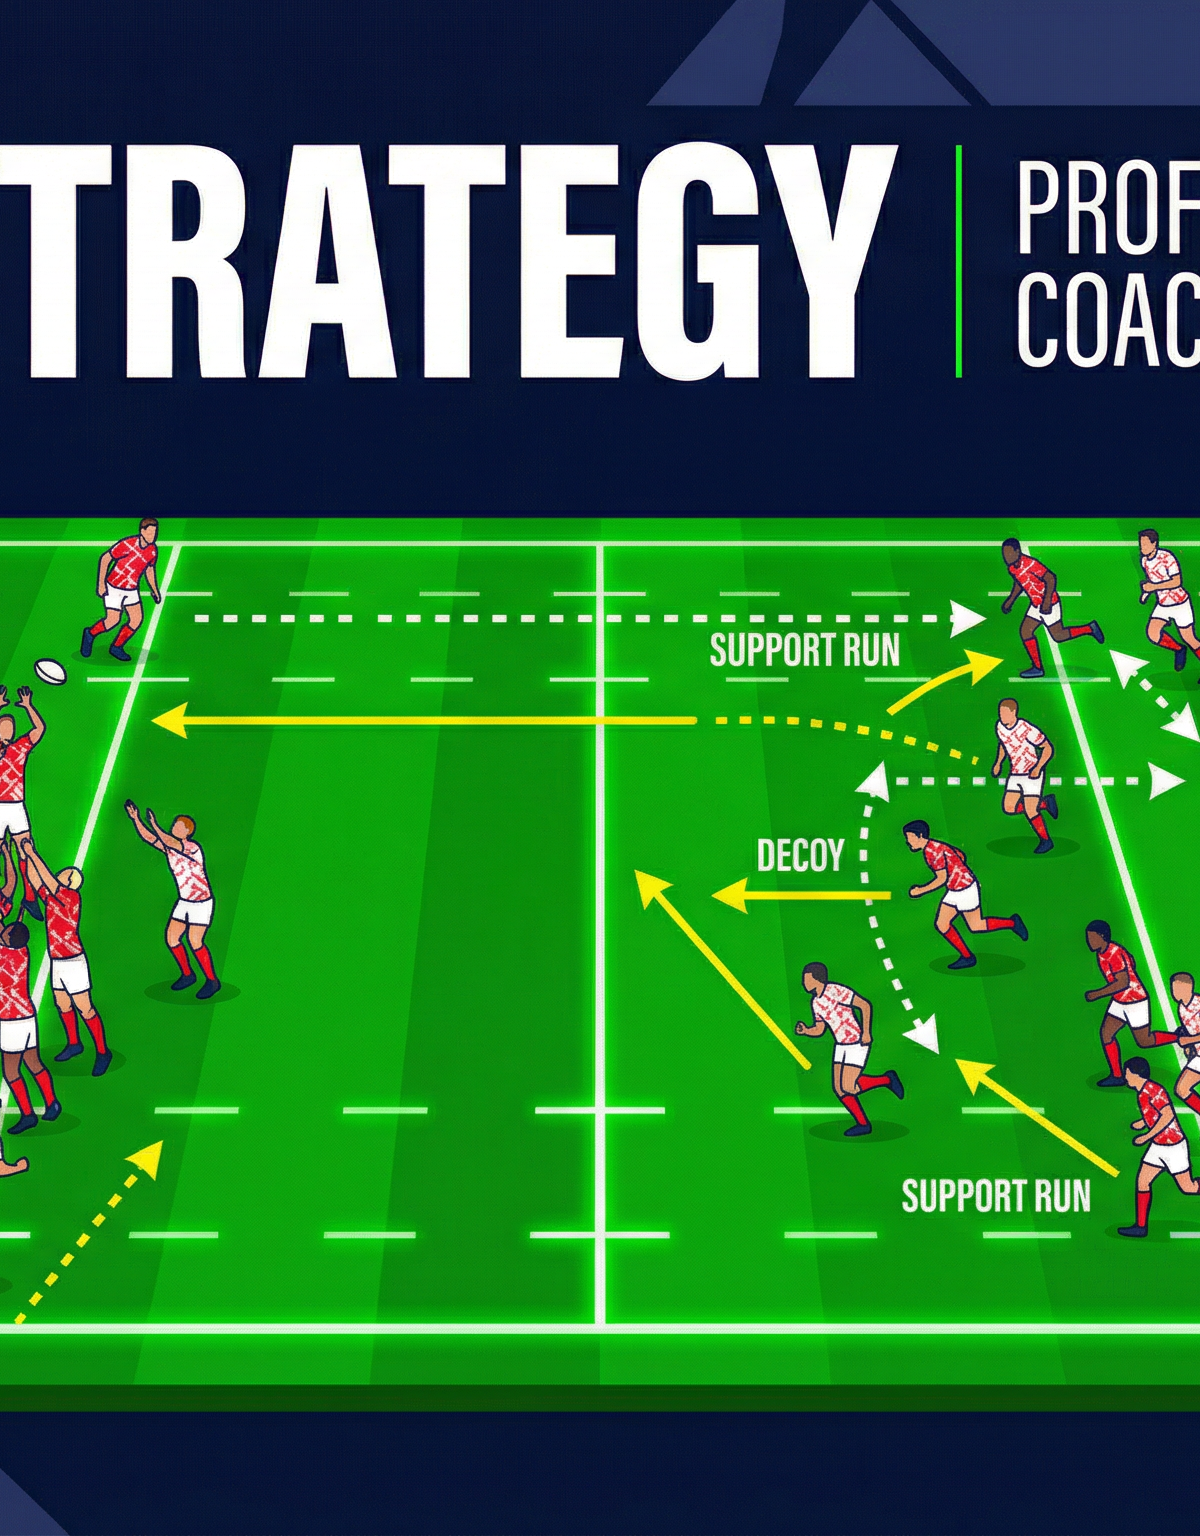
The 22-Metre Fortress: Master the Box Kick Exit Strategy
A structured, low-risk exit strategy from your own 22 that relieves pressure, clears your lines, and creates counter-attacking opportunities through a disciplined box kick sequence.
Equipment Needed
Overview
Exiting your own 22 is one of the most critical phases in Rugby. A botched exit immediately hands the opposition prime attacking real estate, while a well-executed exit strategy not only relieves pressure but can flip field position and momentum in a single sequence. The 22-Metre Fortress Box Kick Exit is a highly structured, low-risk play designed to safely clear your lines using a Scrum-half (9) box kick, supported by an aggressive, organized chase line and a counter-attack option if the defense is misaligned.
This play is best utilized when receiving a deep kick-off, after a turnover near your own try line, or when under sustained defensive pressure within your 22. It relies on a strong forward pod to secure the ruck, accurate kicking from the base, and disciplined chasing to compete for the ball or force a poor return. When executed correctly, it transforms a defensive crisis into a platform for attack.
Setup

Pitch Setup: Standard Rugby pitch (100m x 70m). The focus area is the defensive 22-metre zone. Mark a Kick Landing Zone with 4 cones approximately 15-20m past the 22m line, near the touchline.
Equipment Required: Rugby balls (minimum 4), cones (8-10), tackle shields (optional, for ruck simulation).
| Position | Number | Role in This Play |
|---|---|---|
| Loosehead Prop | 1 | Ruck security, forward pod |
| Hooker | 2 | Ruck security, forward pod |
| Tighthead Prop | 3 | Ruck security, forward pod |
| Lock | 4 | Ruck security, forward pod |
| Lock | 5 | Ruck security, forward pod |
| Blindside Flanker | 6 | Ruck security, kick chaser |
| Openside Flanker | 7 | Ruck security, kick chaser |
| Number 8 | 8 | Ruck security, forward pod |
| Scrum-half | 9 | Box kick executor |
| Fly-half | 10 | Decoy runner / secondary kicker |
| Left Winger | 11 | Wide alignment, kick chaser |
| Inside Centre | 12 | Counter-attack switch option |
| Outside Centre | 13 | Wide attack option |
| Right Winger | 14 | Primary kick chaser |
| Fullback | 15 | Deep cover, counter-attack initiator |
Step-by-Step Instructions

Phase 1: Kick Reception & Initial Alignment
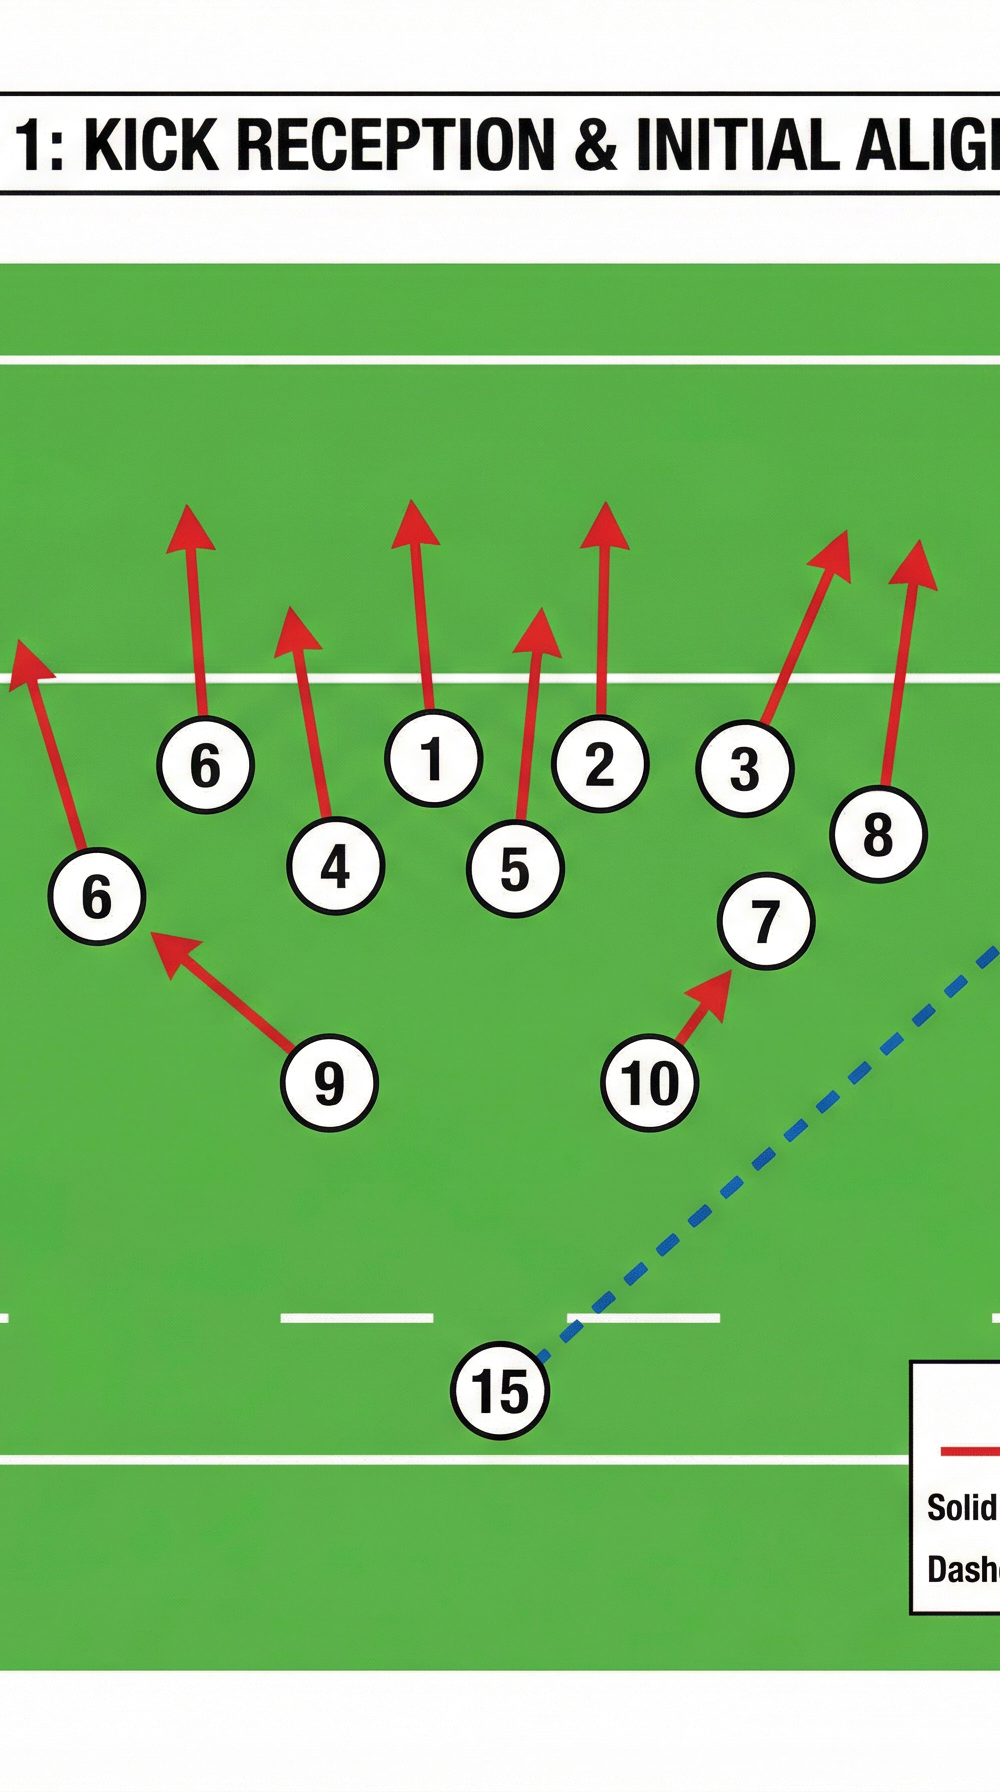
Step 1 — Secure Possession: Upon receiving the ball (e.g., from a deep kick-off or turnover), the receiving player — typically the Fullback (15) or a back-three player — must carry the ball strongly into contact. Avoid going to ground in open space; always drive for a ruck platform.
Step 2 — Form the Ruck: The forward pack (1-8) must rapidly converge on the breakdown. Aim for a ruck secured within 3 seconds of the ball carrier going to ground. A strong, immovable ruck is non-negotiable — this is the foundation of the entire exit.
Step 3 — Set the Screen: A pod of 2-3 forwards positions themselves as a 'caterpillar' screen on the blindside of the ruck, protecting the 9 from charge-downs and creating a clean kicking lane.
Step 4 — Align the Backs: The 10, 12, and 13 align on the openside to offer a visible running threat, keeping the defensive line honest and preventing them from flooding the kicking lane. Wingers (11, 14) hold their width, preparing for the chase.
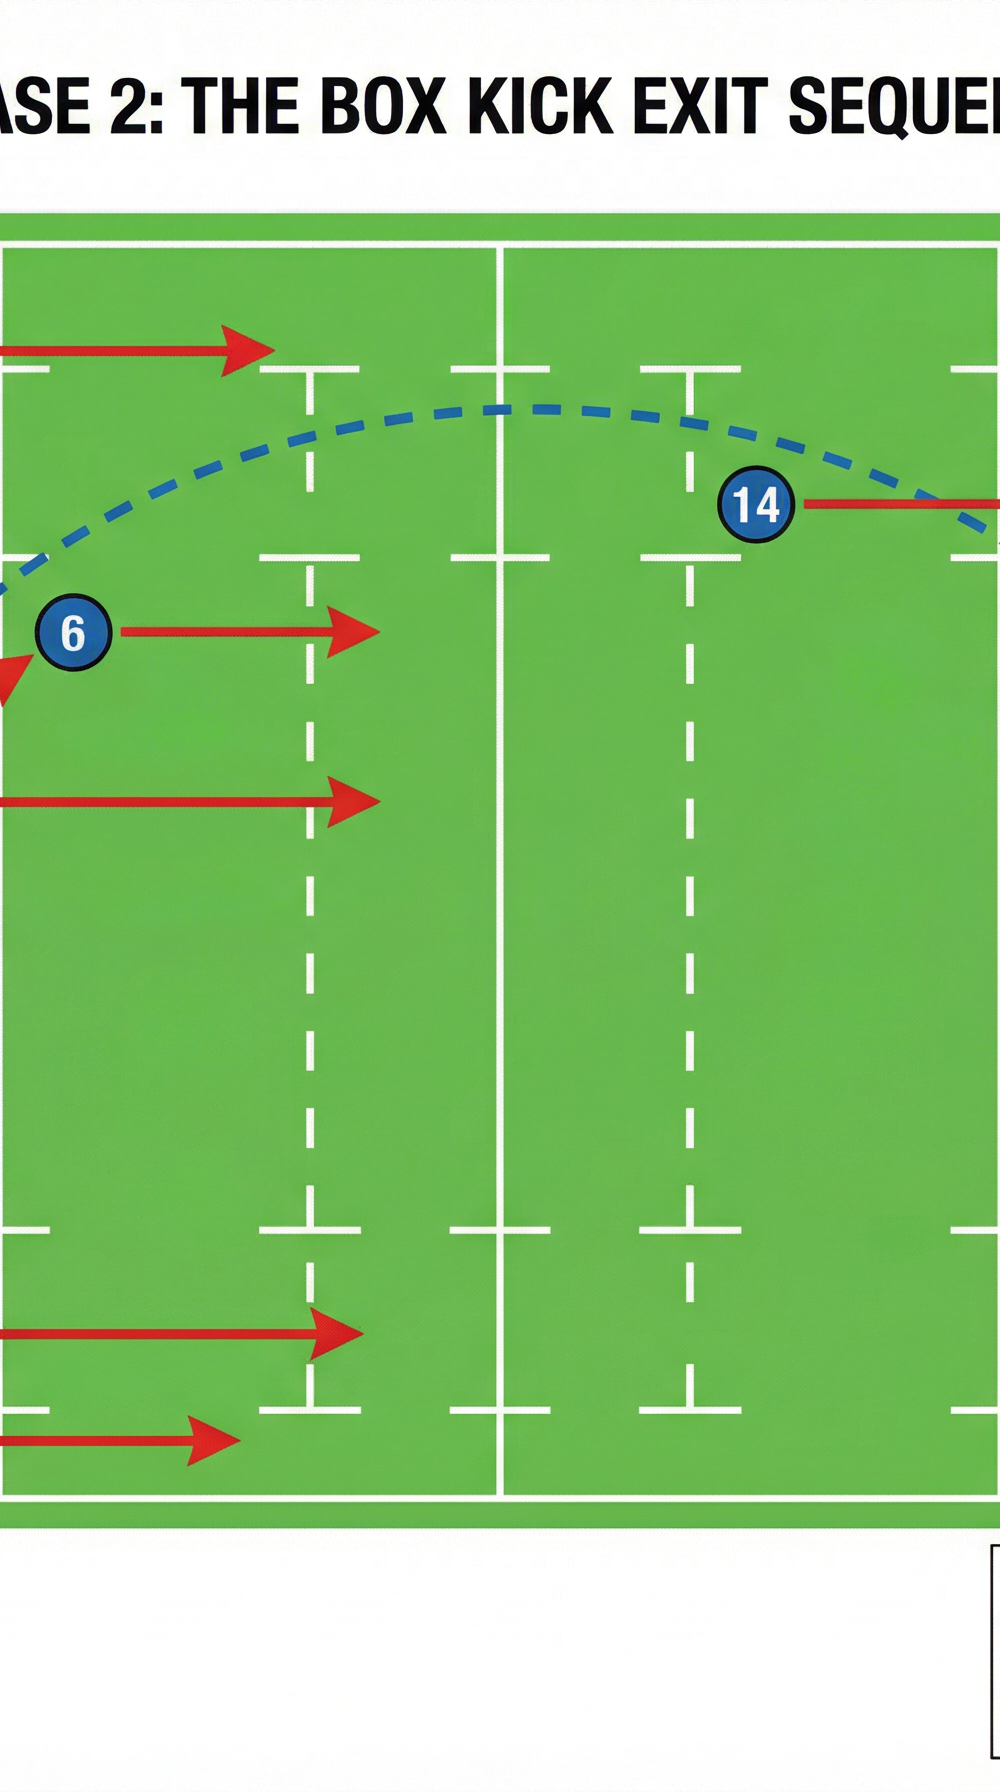
Phase 2: The Box Kick Exit Sequence

Step 5 — Read the Defense: The 9 assesses the defensive line. If the chase-down defenders are flat and the kicking lane is clear, the box kick is on. The designated landing zone is 15-20m past the 22m line, near the touchline.
Step 6 — Execute the Box Kick: The 9 executes a high, hanging box kick. The trajectory must allow a hang time of 3.5 to 4.5 seconds — this is the critical metric. A 25-metre kick with 4 seconds of hang time is far superior to a 40-metre kick with 2 seconds of hang time.
Step 7 — Primary Chase: The Winger on the side of the kick (14) sprints immediately upon the ball leaving the boot. They are the primary chaser, aiming to catch the ball or tackle the catcher man-and-ball before they can set a counter-attack.
Step 8 — Escort Chase: The Blindside Flanker (6) and Openside Flanker (7) follow closely behind the winger, 3-5m apart, to secure the ensuing breakdown, gather any loose ball, or apply secondary pressure.
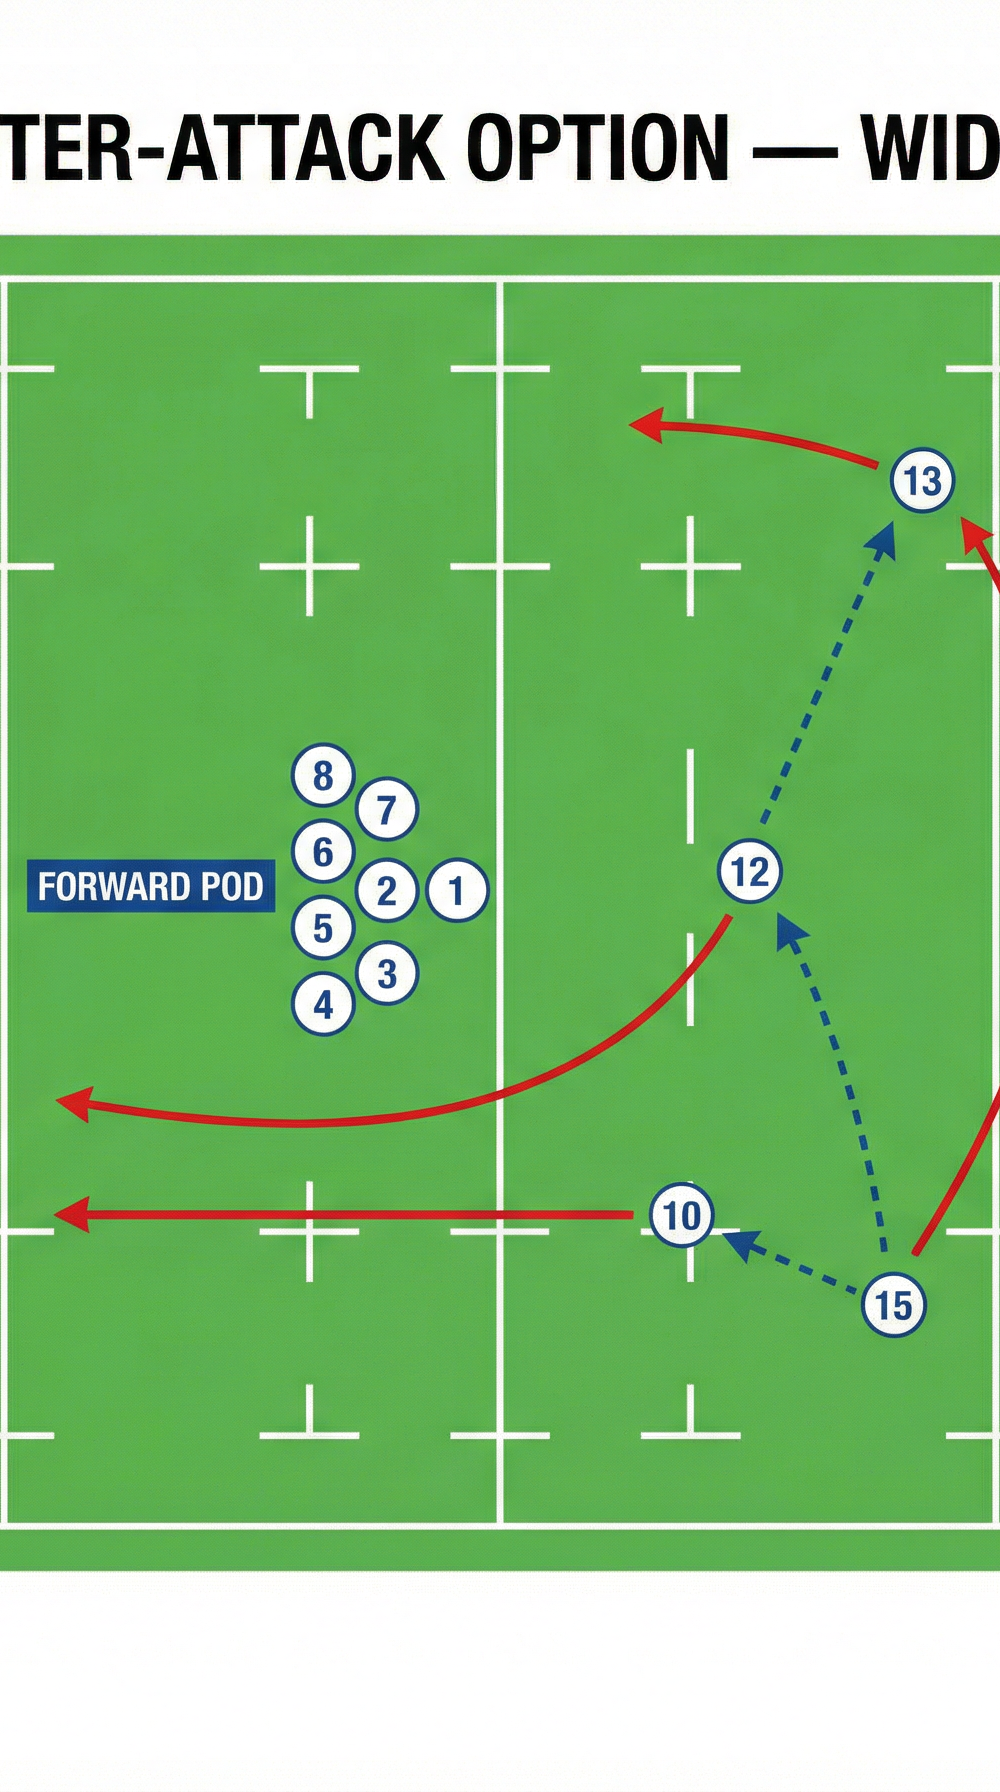
Phase 3: Counter-Attack Option — Wide Switch Play

This phase is activated only if the initial reception was clean and the defense is visibly misaligned — for example, if defenders are committing too early to the kicking lane.
Step 9 — The Decoy: The Fly-half (10) runs a hard, flat decoy line to draw the inside defenders and create a gap.
Step 10 — The Switch: The Fullback (15) receives the ball from the 9 and executes a switch pass with the Inside Centre (12), who cuts back sharply against the grain.
Step 11 — The Wide Attack: The 12 quickly distributes to the Outside Centre (13), who attacks the wide channel, exploiting the space created by the decoy runs. The Left Winger (11) provides a final wide option.
Step 12 — Forward Support: The forward pod must work hard to support the breakdown in the wide channel if a tackle is made, ensuring continuity.
Key Coaching Points
1. Ruck Security is Everything. The entire exit strategy fails if the initial ruck is slow, contested, or turned over. Drill aggressive, low body height at the breakdown. Forwards must arrive with purpose — no passengers.
2. Hang Time Over Distance. This is the most common technical error coaches must correct. Drill the 9 to kick up, not out. Use a stopwatch in training to measure hang time. Target 3.5-4.5 seconds consistently.
3. Chase Line Discipline. A staggered chase line creates gaps for the opposition counter-attack. Chasers must leave simultaneously and maintain a flat, cohesive line. Reinforce the offside law — leaving early concedes a penalty and undoes all the work.
4. Communication is the Trigger. The 9 must clearly call the kick — a pre-agreed verbal or visual signal — so chasers can time their runs perfectly. Silence leads to hesitation and late chases.
Common Mistakes

Slow Ball: Forwards taking too long to set the ruck, allowing the defense to organize a charge-down or reset their defensive line. Fix: Drill rapid ruck arrival with a 3-second target.
Kicking Too Long: The 9 overcooks the kick, outkicking the chase and giving the opposition Fullback time and space to counter-attack unopposed. Fix: Use cones to mark the landing zone and penalize kicks that overshoot in training.
Offside Chasers: Wingers or flankers leaving fractionally early, resulting in a penalty and instantly returning pressure to the defense. Fix: Use video review and a dedicated offside referee in training sessions.
Poor Escort: Forwards failing to support the primary chaser, leaving the Winger isolated if they make the tackle. Fix: Make forward escort a graded coaching point — the chase is a team effort, not a solo sprint.
Telegraphing the Kick: The 9 sets up too obviously for the box kick, alerting the defense to flood the kicking lane. Fix: Ensure the 10 and backline always present as a genuine running threat until the ball leaves the boot.
Variations & Progressions
Variation 1 — The 10 Exit: If the 9 is heavily pressured or the kicking lane is blocked, the ball is passed quickly to the 10, who executes a longer, clearing kick to touch. This is a safety valve and should be a pre-agreed call between 9 and 10.
Variation 2 — The Dummy Box: The 9 sets up for the box kick but instead snipes around the fringe if the defense commits too heavily to the charge-down. This variation requires the 8 to be positioned as a short-side support runner.
Progression 1 — Live Contested Rucks: Introduce live, contested rucks with a defensive pod attempting to slow the ball. This replicates match pressure and forces forwards to work harder for clean ball.
Progression 2 — Active Charge-Down Pressure: Add a live defensive player pressuring the 9's kicking lane. This forces the 9 to make a real decision — kick, pass to 10, or dummy — replicating the decision-making demands of a match.
Age Adaptations

Under 10 – Under 12: Focus entirely on the basics of securing the ball and executing a simple pass to the 10 for a clearance kick to touch. Box kicking is generally too complex and physically demanding for this age group. Emphasize communication and the concept of 'getting the ball away from our line.'
Under 14 – Under 16: Introduce the box kick mechanics in isolation before integrating them into the full sequence. Emphasize the importance of the chase line and staying onside. Use softer balls if necessary to build confidence in catching high balls under pressure.
Open / Senior: Full implementation of the strategy, including caterpillar rucks, complex decoy runs, and reading defensive alignments to choose between kicking and running options in real time. Introduce video analysis of the opposition's kick-chase patterns to refine the landing zone selection.