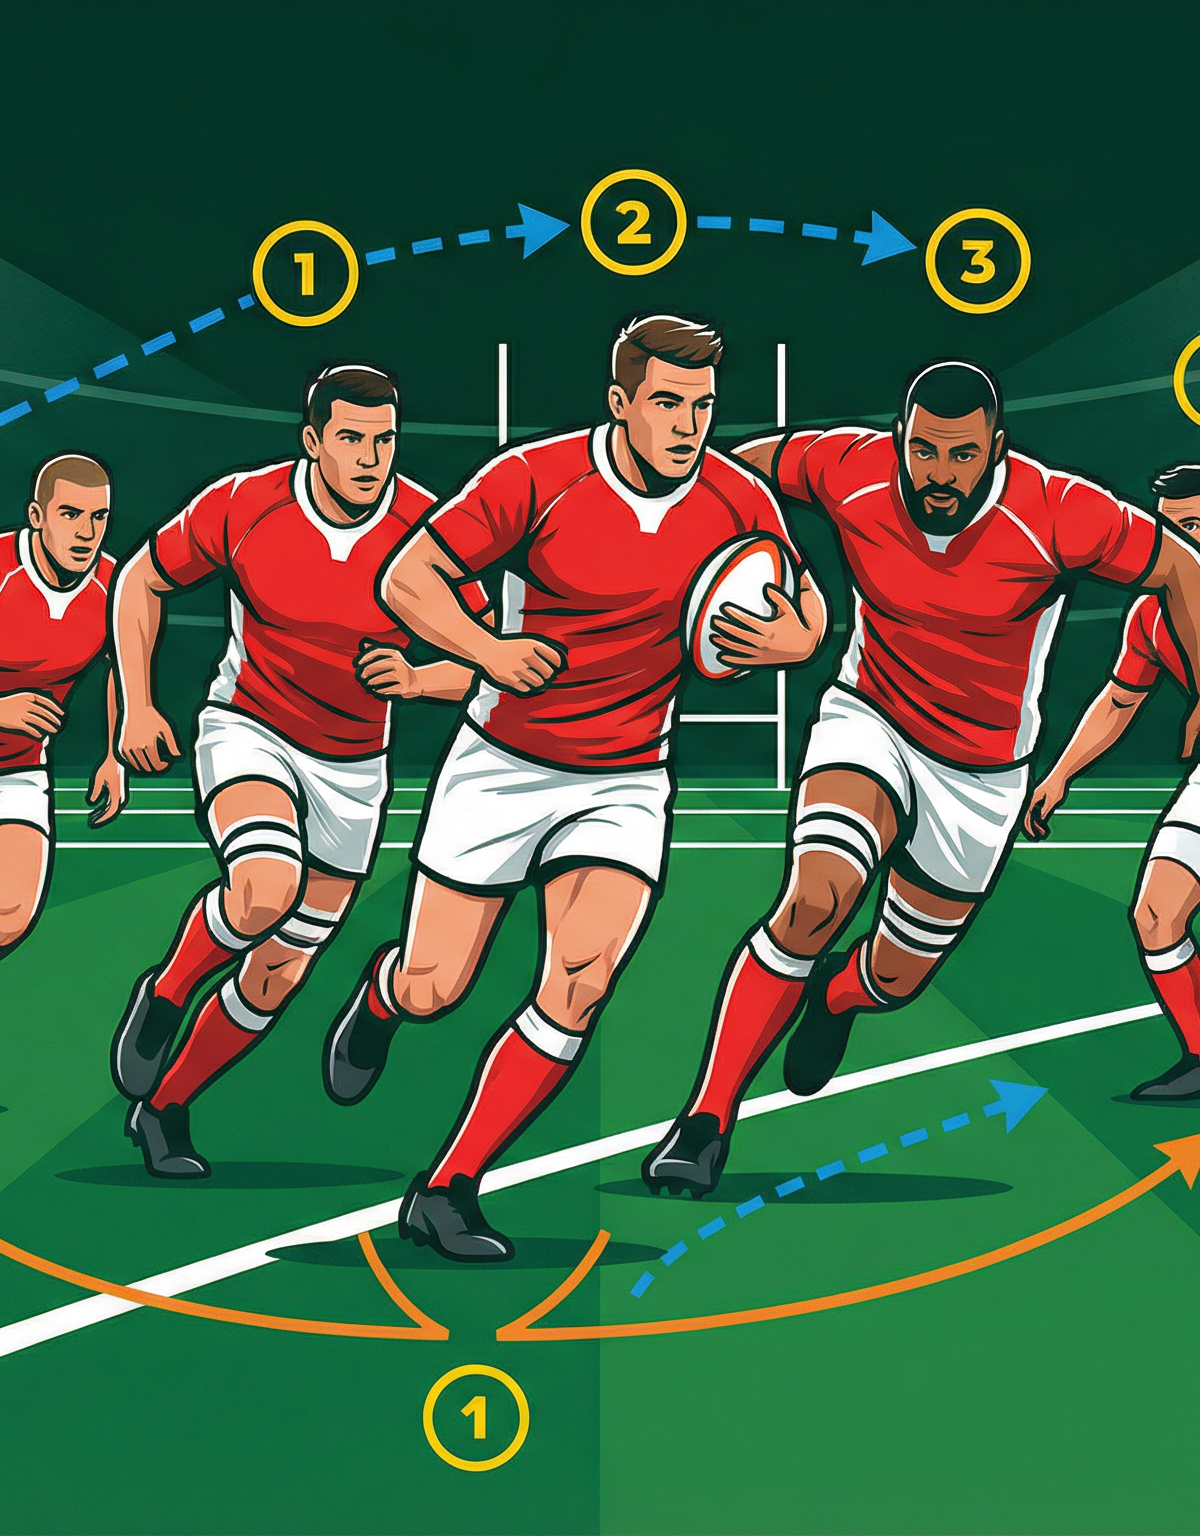
Forward Pod Play with Offload Option: Breaking the Defensive Line
Master the forward pod play with embedded offload option — a structured, repeatable attacking system that creates go-forward ball, draws in defenders, and unlocks space for your backline strike runners.
Equipment Needed
Overview
The forward pod play with offload option is one of the most effective and adaptable attacking structures in modern rugby. At its core, this set play deploys groups of three to four forwards — known as pods — in pre-set positions across the width of the pitch, each capable of receiving the ball and either carrying hard into contact or offloading to a support runner before the tackle is completed. The play is designed to be used from any phase of play — off a ruck, lineout, or scrum — and is equally effective in the middle of the park (between the 15m channels) or in the tight channels within 10m of the touchline.
The primary tactical objective is twofold: first, to generate consistent go-forward ball by committing multiple defenders to the forward collision; and second, to exploit the defensive drift and blitz tendencies of modern defences by releasing a support runner through the gap created at the point of contact. When executed with correct timing and body position, this play can break the gain line on every phase, progressively shifting the defensive structure until a clear strike opportunity emerges for the backline.
When to use this play: Deploy the pod play when your team is in the opposition's 22m–40m zone and needs to soften the defensive line before a backline strike. It is also highly effective as a territory-gaining tool when your team is under pressure and needs to reset field position through controlled, physical forward play.
Setup

Equipment Required
- 1 full-size rugby ball (or appropriate size for age group)
- 16 flat marker cones
- 4 tackle bags or contact shields (for early-stage drilling)
- Scrimmage vests in two colours (attack and defence)
- 1 whiteboard or coaching clipboard for pre-session briefing
Pitch Setup
Use a 40m x 40m grid marked out within the full 100m x 70m pitch, centred between the two 15m channels. Mark a clear gain line with cones across the middle of the grid. Place four cones at 5m intervals along the gain line to define the pod channels. The ruck starting point should be marked at the centre of the grid.
Player Positions and Roles
| Position | Number | Role in Pod Play |
|---|---|---|
| Number 8 | 8 | Primary ball carrier — hits the pod channel at pace |
| Blindside Flanker | 6 | Left-side pod support — close-in offload receiver |
| Openside Flanker | 7 | Right-side pod support — close-in offload receiver |
| Lock (x2) | 4, 5 | Second-wave pod — arrives 2–3 seconds after initial contact |
| Hooker | 2 | Alternate pod carrier — used in Pod B variation |
| Scrum-half | 9 | Ball distributor — triggers the play from ruck base |
| Fly-half | 10 | Backline controller — holds defenders wide, strike option |
| Inside Centre | 12 | Wide offload receiver — strike runner in Phase 2 |
| Outside Centre | 13 | Secondary strike runner — exploits space created |
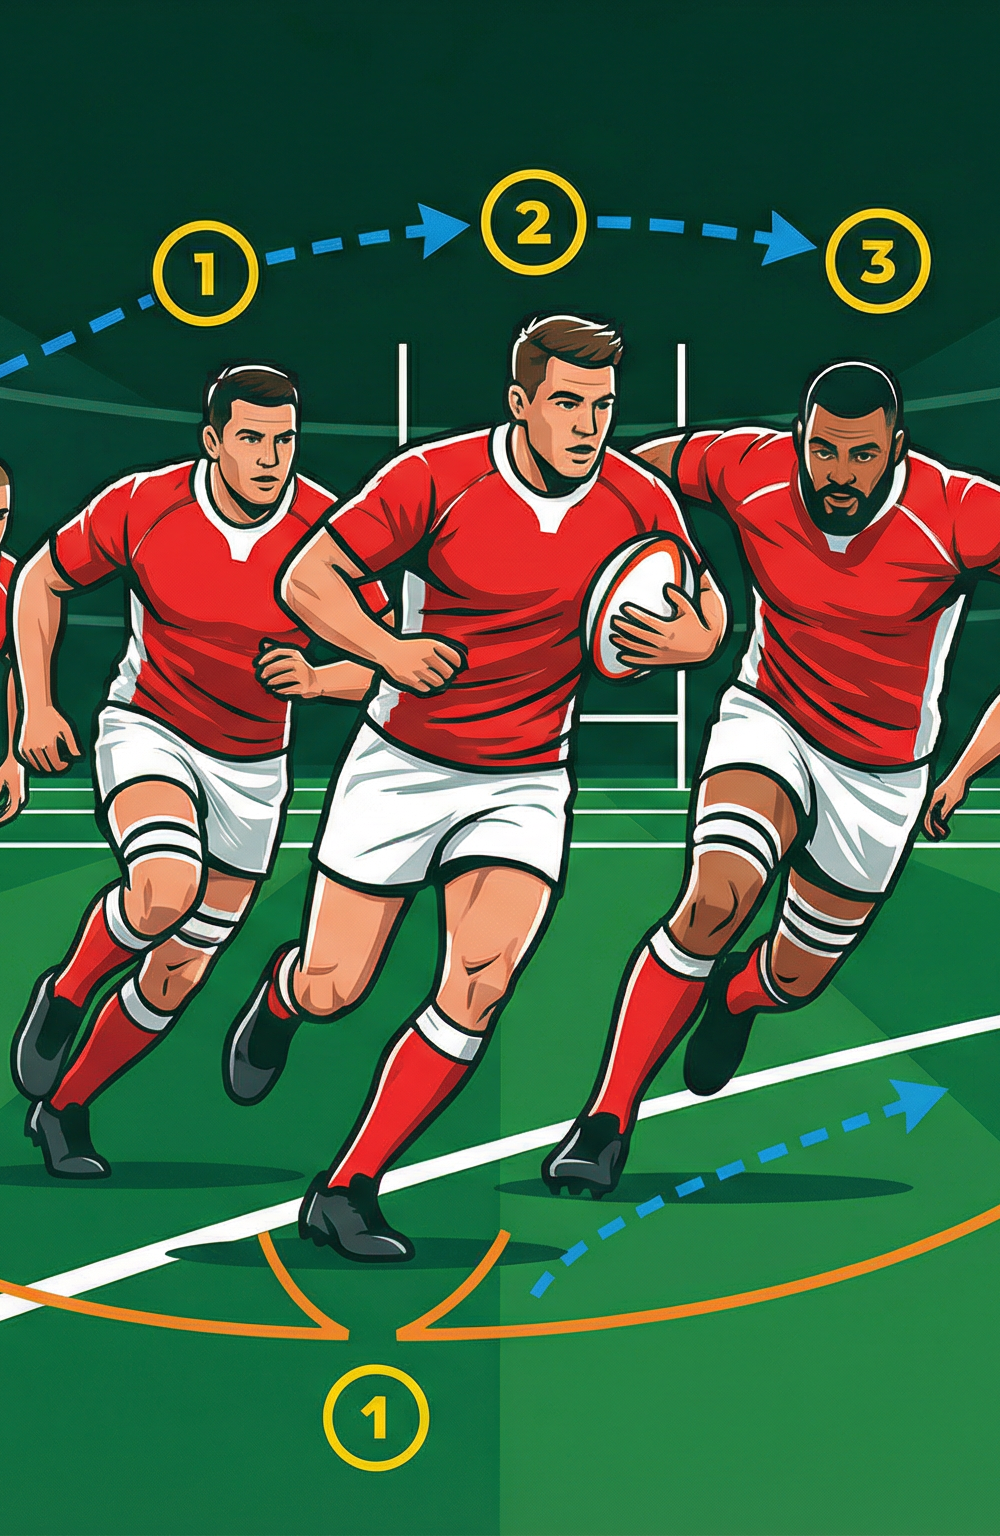
Diagram 1 shows the initial pod alignment. Number 8 receives the ball 2m behind the ruck from scrum-half (9). Flankers 6 and 7 are positioned 1m either side of the pod channel, running hard support lines. Locks 4 and 5 are the second-wave pod, positioned 4m behind the gain line.
Step-by-Step Instructions
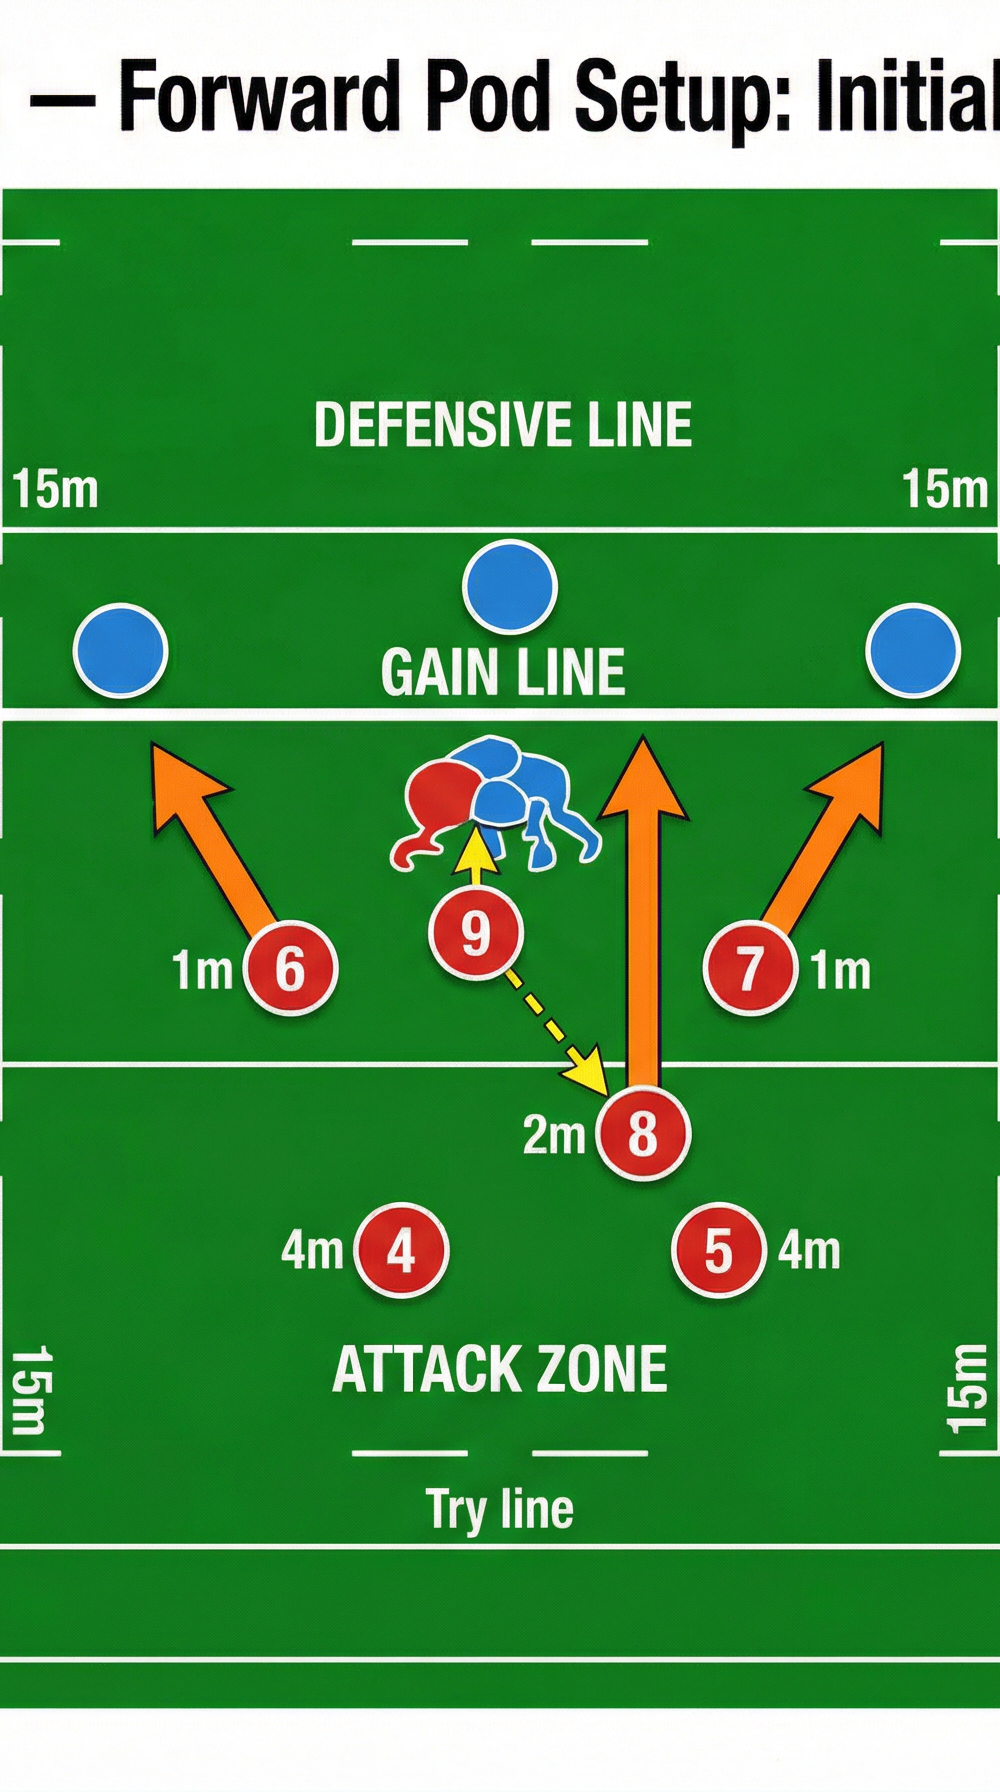
Phase 1 — Pod Alignment and Call
- From a ruck or set piece, the scrum-half (9) surveys the defensive line and makes the pod call — either a verbal cue (e.g., "POD LEFT") or a pre-agreed signal.
- Number 8 positions himself 2m directly behind the ruck, square to the gain line, weight on the front foot. He is the primary ball carrier.
- Flankers 6 and 7 take positions 1m to either side of the Number 8, slightly behind him, running hard lines toward the gain line before the ball is delivered. Their job is to threaten the space on both sides of the ball carrier, forcing defenders to commit.
- Locks 4 and 5 align 4m behind the ruck, staggered left and right, ready to arrive as the second-wave pod after contact.
- Scrum-half (9) delivers the ball to Number 8 with a flat, accurate pass — the ball should arrive as Number 8 is already accelerating into the channel. A slow or looping pass kills the momentum of the play.
Phase 2 — The Carry and Contact Decision
- Number 8 receives the ball and drives hard at the gain line, targeting the inside shoulder of the first defender. The objective is to get the body beyond the gain line before contact is initiated.
- As Number 8 approaches contact, he must make an immediate decision: carry and recycle (present the ball cleanly to the ground for 9 to pick up) or offload to a support runner.
- The offload trigger is body position — if Number 8 is upright and has two hands free before the tackle is completed, he looks for the support runner. If he is being driven down or wrapped up, he protects the ball and goes to ground.

Diagram 2 shows the two offload options. The short offload goes to Flanker 6 running a tight inside line. The wide offload goes to Inside Centre 12 running a hard 45-degree support line from depth. Fly-half 10 holds his position wide as a third option.
Phase 3 — Support Runner Execution
- Flanker 6 runs a tight inside line, arriving at the contact point at the same moment as Number 8 hits the defender. His line should be parallel to the gain line, not diagonal — this keeps him in space and gives Number 8 a clear short offload target at hip height.
- Inside Centre 12 runs a deeper support line from 8–10m behind the gain line, approaching at a 45-degree angle from the left. This line is designed to receive the ball beyond the gain line, in the space vacated by the defender who has committed to Number 8.
- Scrum-half 9 immediately moves to the new ruck position to receive and distribute if no offload is made.
- If the offload is made to Flanker 6, he drives forward for 2–3m and either recycles or looks for the second-wave offload to Lock 4 or 5, who should be arriving in support.
Phase 4 — Multi-Phase Continuation and Backline Strike
- After 2–3 pod phases, the defensive line should be compressed toward the pod channels. Scrum-half 9 now has the option to shift the ball wide quickly to Fly-half 10, who attacks the space created on the edge.
- Outside Centre 13 and Right Wing 14 position themselves in the wide channel, ready to receive the ball in space behind the defensive drift.
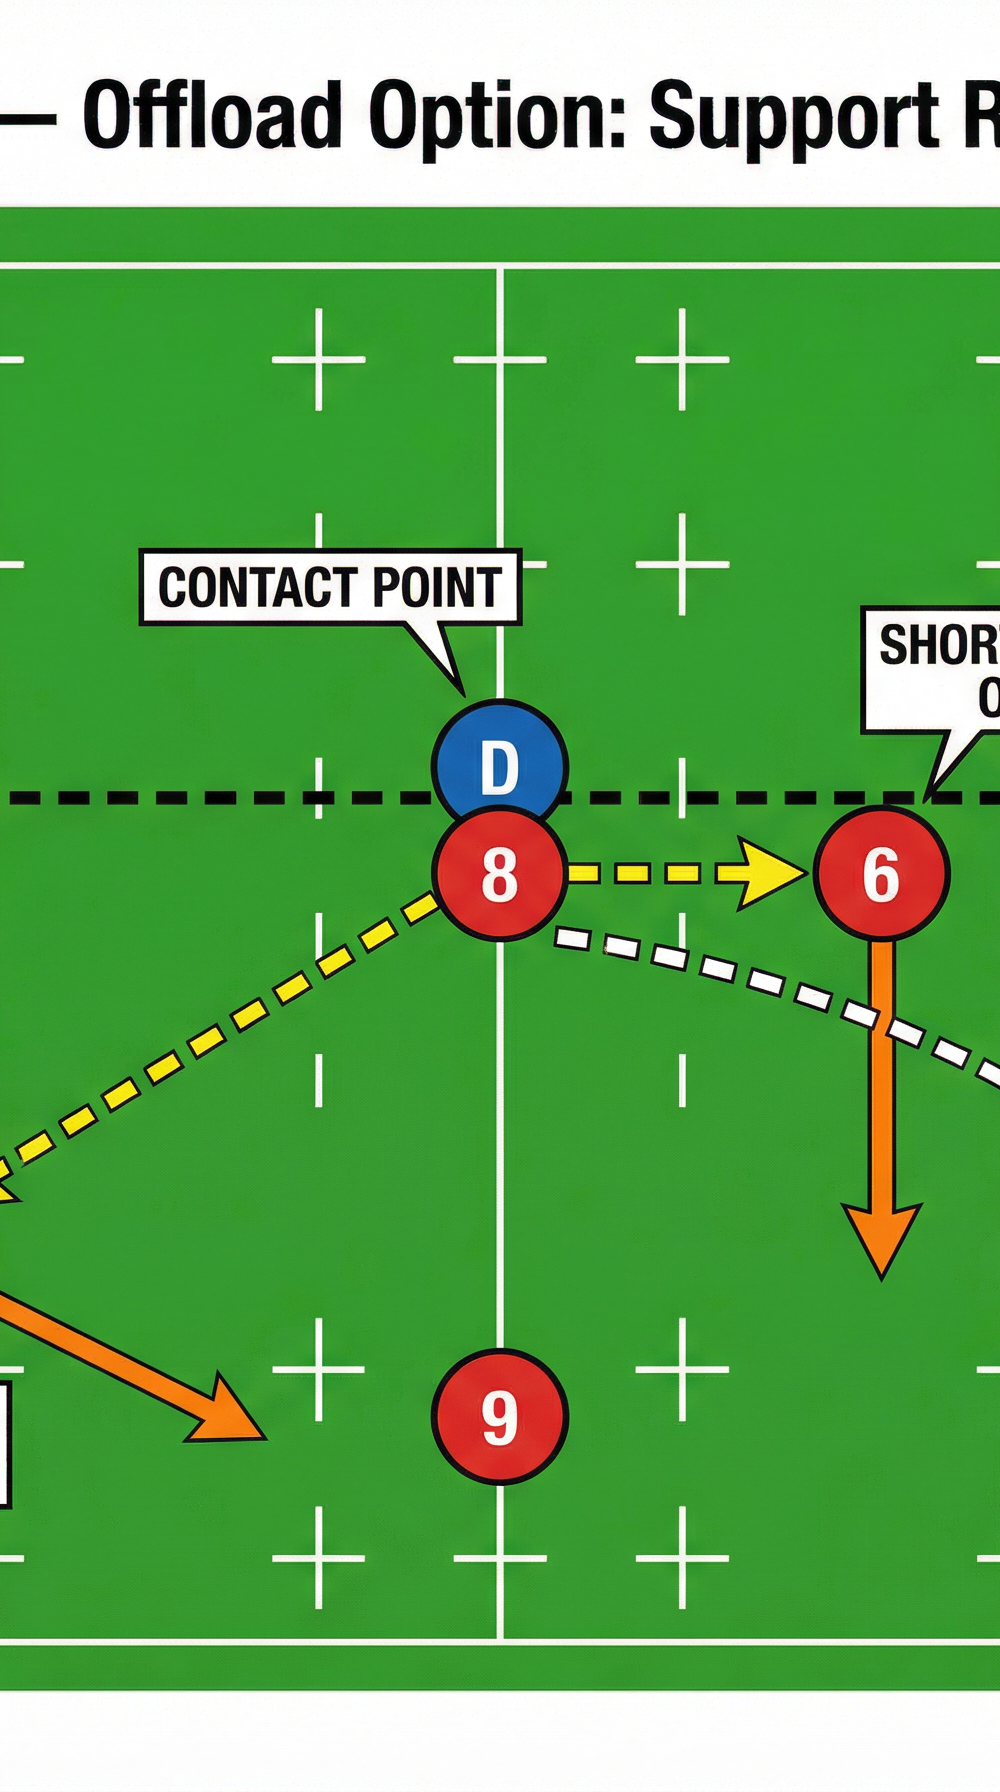
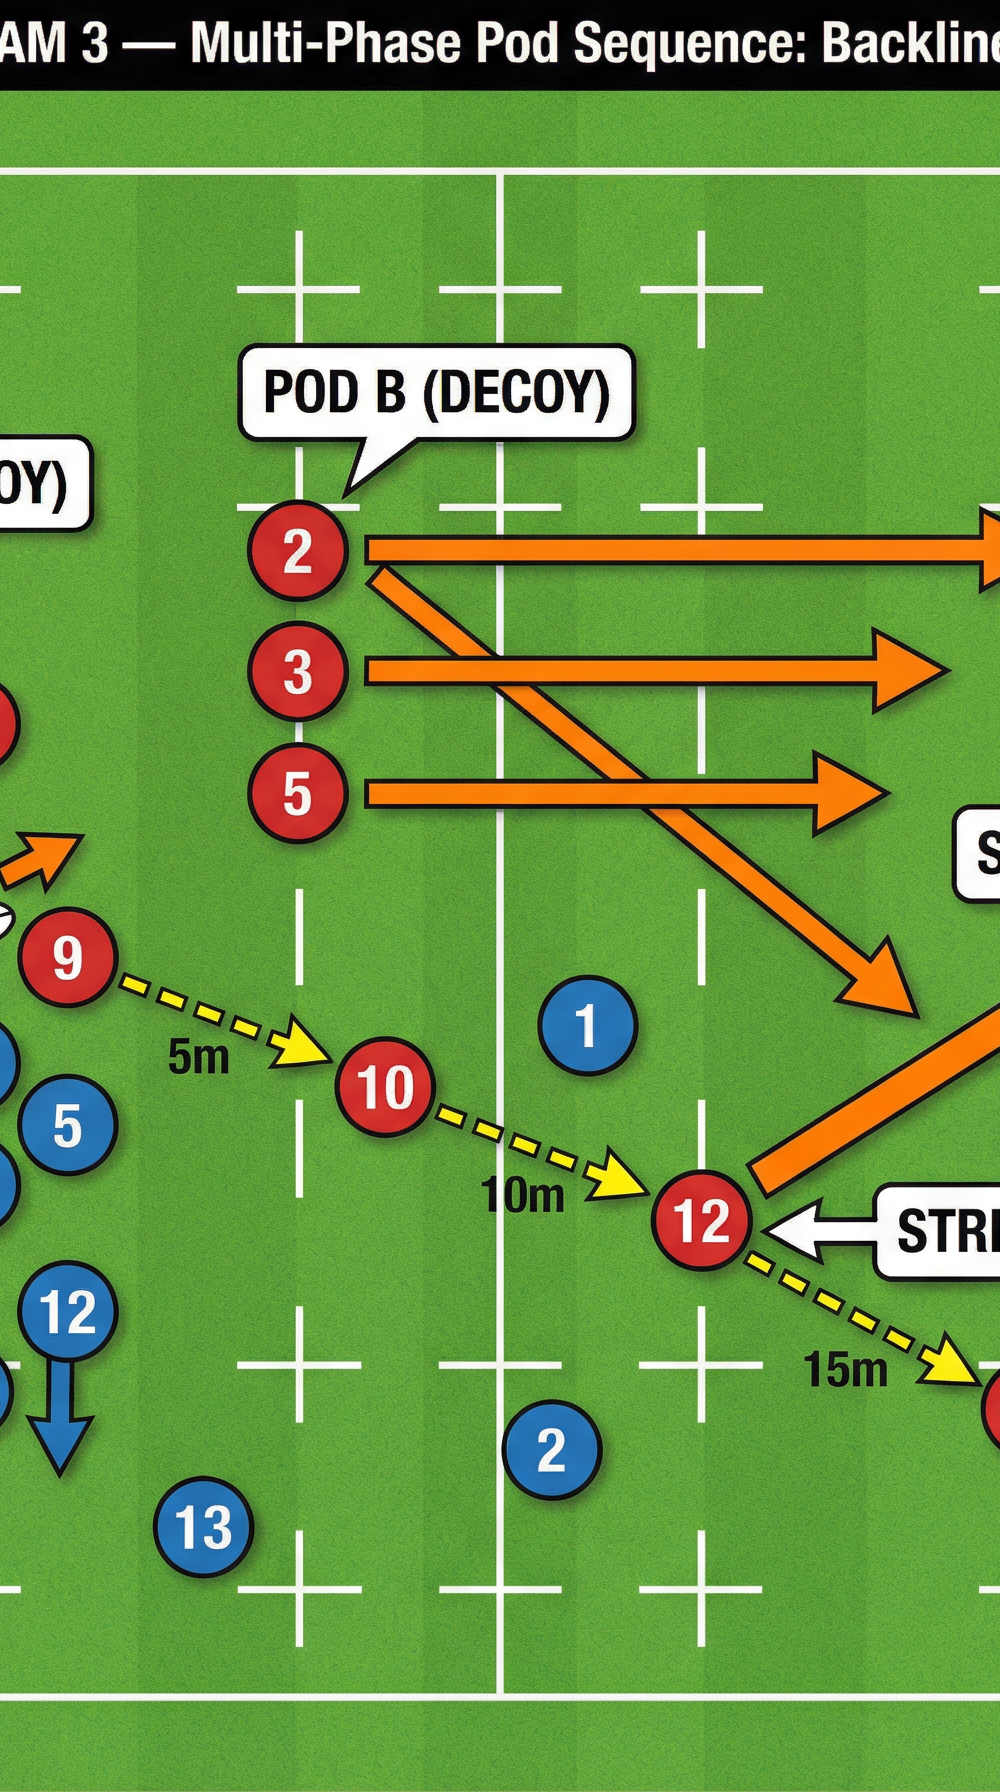
Diagram 3 shows the multi-phase sequence. After Pod A and Pod B have drawn in the defence, the scrum-half passes to Fly-half 10, who hits Inside Centre 12 as the strike runner into the space created. The defence has been pulled left, leaving a clear channel on the right.
Key Coaching Points

1. Ball Carrier Body Position at Contact
The single most important technical element of this play is the ball carrier's body position at the moment of contact. Demand that Number 8 and all pod carriers arrive at the gain line with a low, powerful body position — hips below the defender's hips, knees bent, back flat. A high ball carrier will be stopped dead and the offload option disappears. Cue: "Get low before you go."
2. Support Runner Timing — Arrive Late, Not Early
The most common timing error is support runners arriving too early, which crowds the channel and removes the offload option. Flankers 6 and 7 should hold their run until Number 8 is within 2m of the defender, then accelerate hard into their support line. Arriving early also telegraphs the offload to the defence. Cue: "Wait, then explode."
3. The Offload Decision Must Be Pre-Committed
Coach your players to make the offload decision before contact, not during it. If Number 8 is scanning for a support runner while absorbing a tackle, the ball will be lost. The decision framework is simple: if the body is upright and the support runner is in position — offload. If not — carry and present. Cue: "Decide before you arrive."
4. Pod Spacing — 1m Either Side, No More
Flankers 6 and 7 must maintain exactly 1m spacing from the ball carrier. Any wider and the short offload becomes a pass, which is slower and easier to intercept. Any tighter and they obstruct the ball carrier's running line. Use cones in training to enforce the correct spacing. Cue: "Stay in the shadow."
5. Second-Wave Pod Arrival Time
Locks 4 and 5 must arrive at the breakdown within 3 seconds of initial contact. Use a stopwatch in training to enforce this. A second-wave pod that arrives late means the scrum-half has no forward option and the defence has time to reset. Cue: "If you're not there in three, you're too late."
6. Scrum-Half Positioning After the Carry
Number 9 must be at the new ruck position before the ball carrier hits the ground. This requires the scrum-half to read the carry and move immediately, not react after the tackle. A slow scrum-half means slow ball, which negates the entire purpose of the pod play. Cue: "Move with the carrier, not after him."
Common Mistakes
Mistake 1 — Pod Carriers Running Across the Pitch Instead of Through It
This is the most destructive error in pod play. If Flankers 6 or 7 run lateral lines across the gain line rather than through it, they create a traffic jam at the contact point and give the defence time to reset. Correction: Use cones to mark a 1m-wide channel for each support runner. Insist that every running line is directed at the cones, not across them. If a player runs across the channel, stop the drill and reset.
Mistake 2 — Offloading from the Ground
Players who attempt to offload after they have been taken to ground will concede a turnover. The offload window is before the knee hits the ground. Correction: In contact drills, use the rule that any offload made after the carrier's knee touches the ground is called back as a turnover. This quickly trains players to make the decision earlier.
Mistake 3 — Scrum-Half Telegraphing the Pod Call
If Number 9 always looks at the pod before passing to it, the defence will read the play before it starts. Correction: Train the scrum-half to use a consistent pre-pass scanning routine — look left, look right, then deliver — regardless of where the ball is going. The call should be made verbally before the ruck is formed, not communicated through eye contact at the ruck.
Mistake 4 — Locks Arriving as Passengers, Not Pod Carriers
Locks 4 and 5 sometimes treat their second-wave role as a cleanup job — arriving to secure the ruck rather than as genuine ball-carrying threats. This removes a key element of the play. Correction: In training, regularly give the ball to the second-wave pod and let them carry. Defenders must respect the threat of 4 and 5 as carriers, not just cleaners.
Mistake 5 — Backline Drifting Before the Pod Phases Are Complete
Fly-half 10 and the centres sometimes drift wide too early, removing themselves as strike options and giving the defence a clear read on the play structure. Correction: Set a rule that the backline holds its depth (minimum 10m from the gain line) for the first two pod phases. Only on the third phase does the backline attack the line.
Variations and Progressions

Variation 1 — Double Pod (Pods A and B)
Instead of a single pod, deploy two pods simultaneously — Pod A (8, 6, 4) on the left of the ruck and Pod B (2, 3, 5) on the right. The scrum-half calls which pod receives the ball. The non-ball pod runs their lines as decoys, drawing two defenders each. This variation is shown in Diagram 3 and is most effective when the defence is using a blitz or rush defensive system.
Variation 2 — Pod Play into Kick
After two pod phases have drawn the defence in, instead of passing wide to the backline, the fly-half executes a grubber kick or chip kick into the space behind the compressed defensive line. This is particularly effective in the opposition's 22m zone when the defensive line is flat and fast. The pod play creates the flat line; the kick exploits the space behind it.
Progression 1 — Add Live Defenders
Begin the drill with passive defenders (walking pace only), then progress to semi-active defenders (50% effort), then to full-contact live defenders. This three-stage progression allows players to build the movement patterns correctly before adding defensive pressure.
Progression 2 — Conditioned Game (Pod Play Only)
Run a conditioned game where the attacking team must complete a minimum of two pod phases before the ball can go to the backline. This forces the forwards to execute the pod play under match-realistic pressure and trains the backline to be patient and read the play before striking.
Age Adaptations

Under 12 and Under 14 — Simplified Pod (3-Player)
Reduce the pod to three players: one ball carrier and two support runners. Remove the second-wave pod entirely and focus only on the primary carry and the short offload to one pre-designated support runner. Use contact shields instead of live tackling. The key learning outcome at this age is body position at contact and support runner timing — not the full multi-phase structure.
Under 16 — Full Pod with Passive Defence
Introduce the full pod structure (Diagram 1) but keep defenders passive for the first four sessions. Add the second-wave pod (Locks 4 and 5) and introduce the wide offload option to Inside Centre 12. Begin to introduce the verbal pod calls and the scrum-half's decision-making role. Progress to semi-active defence in sessions five and six.
Open Age — Full Play with Backline Integration
Run the complete play as described, including the multi-phase sequence (Diagram 3) and the backline strike option. Add the kick variation in sessions three and four. Introduce the double-pod variation for experienced squads. At open age, the emphasis shifts from individual technique to collective timing — the entire forward pack and backline must operate as a single coordinated system.