Scrum Half Passing Accuracy Drill: Precision Under Pressure
A progressive, three-phase drill that builds the scrum half's passing accuracy, body mechanics, and decision-making speed from static repetitions through to live defensive pressure.
Equipment Needed
Overview
The scrum half (#9) is the heartbeat of every attacking phase. A fraction of a second's hesitation, a pass that lands behind the receiver's hands, or a ball delivered at the wrong height can kill momentum and hand the opposition a turnover opportunity. This drill — Scrum Half Passing Accuracy: Precision Under Pressure — is designed to isolate and develop the three pillars of elite #9 distribution: body mechanics, spatial accuracy, and decision-making under defensive pressure.
Use this drill in the first 20–25 minutes of a skills-focused training session, after a thorough warm-up, when players are mentally fresh and physically primed. It is equally effective as a standalone skills block or as the opening exercise in a backs-unit session. The drill scales from beginner to advanced through three clearly defined progressions, making it suitable for age groups from Under-12 through to senior open-age rugby.
Setup

Equipment Required
- 6–8 rugby balls (size 5 for open-age; size 4 for U14 and below)
- 12 flat marker cones (4 colours: yellow, orange, blue, green)
- 6 tall cone poles or passing gates (pairs of poles 1.5m apart)
- 1 ruck pad or scrum machine base (or a bag held by a teammate)
- Measuring tape or pre-marked 5m grid
- Bibs: red for scrum half(ves), blue for receivers, black for defenders (Phase 3)
Pitch Setup
Mark out a 20m wide × 15m deep training zone within the full 100m × 70m pitch. Use the 5m grid lines already present on most training pitches. The ruck simulator (or pad) is placed at the left edge of the zone, representing the base of a ruck. Three target zones — each 3m wide × 3m deep — are marked at 5m (Zone A), 10m (Zone B), and 15m (Zone C) from the ruck base, aligned along a horizontal channel approximately 1m behind the gain line.
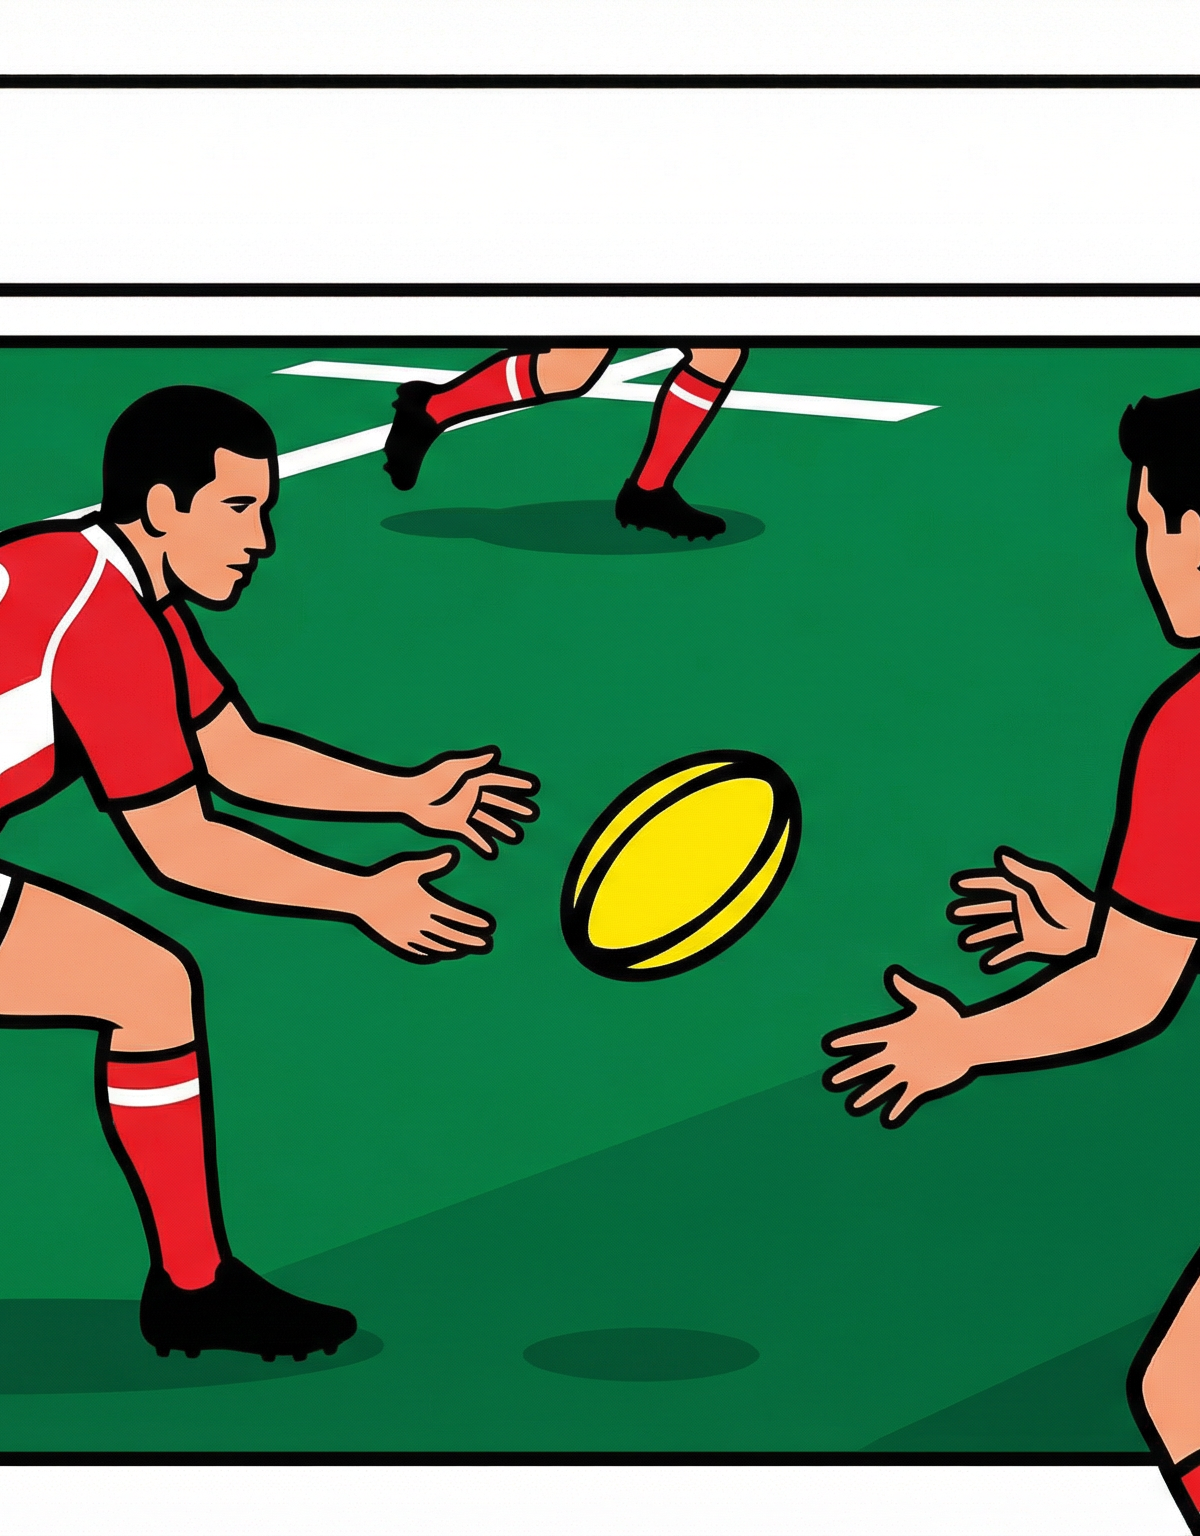
The scrum half starts 1m from the ruck base, in a low athletic stance facing the target zones. Receivers (#10 Fly Half, #12 Inside Centre, #13 Outside Centre) stand at the back edge of their respective target zones, facing the scrum half at a slight angle — simulating a realistic backline alignment.
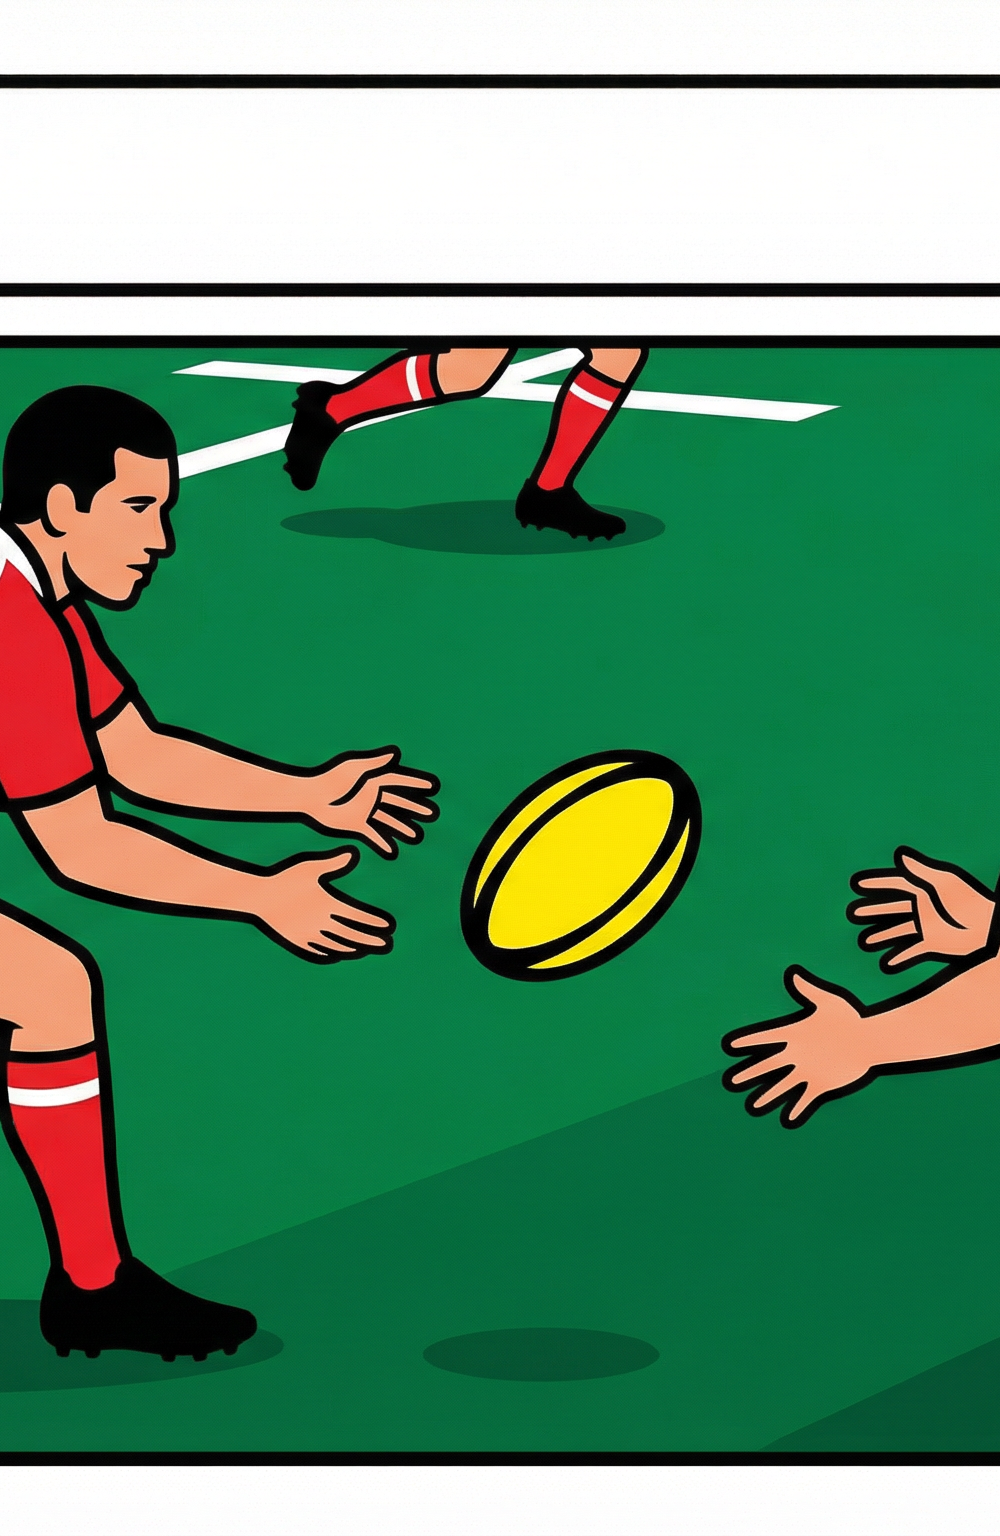
Diagram 1: Basic setup showing the ruck simulator, three target zones at 5m / 10m / 15m, and the scrum half's starting position. Dashed gold arrows show ball pass trajectories; solid red arrow shows the SH approach path.
Player Positions
| Position | Jersey # | Role in Drill | Starting Location |
|---|---|---|---|
| Scrum Half | 9 | Primary passer — all phases | 1m from ruck base |
| Fly Half | 10 | Receiver — Zone A (5m) | Back edge of Zone A |
| Inside Centre | 12 | Receiver — Zone B (10m) | Back edge of Zone B |
| Outside Centre | 13 | Receiver — Zone C (15m) | Back edge of Zone C |
| Flanker / Feeder | 7 | Ball feeder from ruck | At ruck pad |
| Defender (Phase 3) | D | Applies lateral pressure | Gate 1 position |
Step-by-Step Instructions

Phase 1 — Static Accuracy (Minutes 1–8)
- The flanker (#7) places the ball at the base of the ruck pad and calls "Ball!" to signal readiness.
- The scrum half (#9) approaches from a standing start 2m behind the ruck, driving forward on a low, bent-knee approach — never standing tall.
- #9 picks up the ball cleanly with two hands, fingers spread wide, and immediately adopts the passing stance: hips square to the target, lead shoulder pointing at the receiver.
- The coach calls out a target zone — "A!", "B!", or "C!" — as #9 reaches the ball. This prevents pre-selection and forces reactive decision-making even in the static phase.
- #9 delivers the pass. The ball must arrive at chest height within the marked target zone. A pass that lands outside the zone, below the knee, or above the shoulder counts as a miss.
- Receivers catch and immediately return the ball to the flanker for the next rep.
- Complete 10 reps per scrum half, then rotate. Track accuracy: aim for 8/10 or better before progressing to Phase 2.
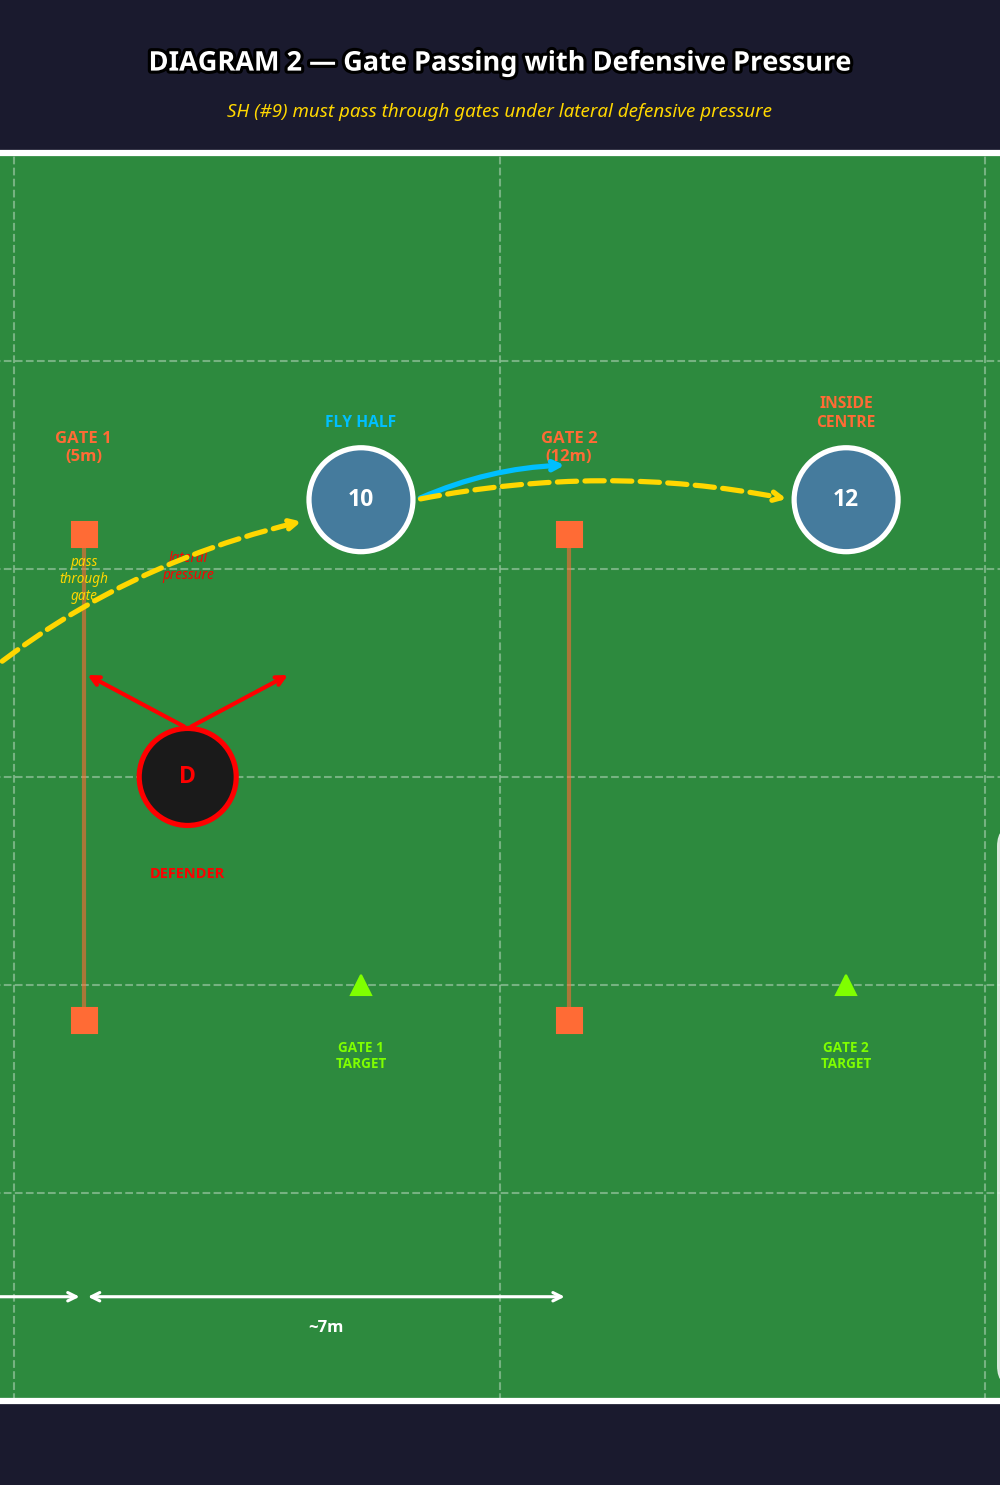
Phase 2 — Gate Passing with Movement (Minutes 9–18)
Replace the flat target zones with passing gates: two tall cone poles set 1.5m apart at the 5m and 12m marks. Receivers now stand 2m behind the gate, running a shallow angle line toward the gain line.
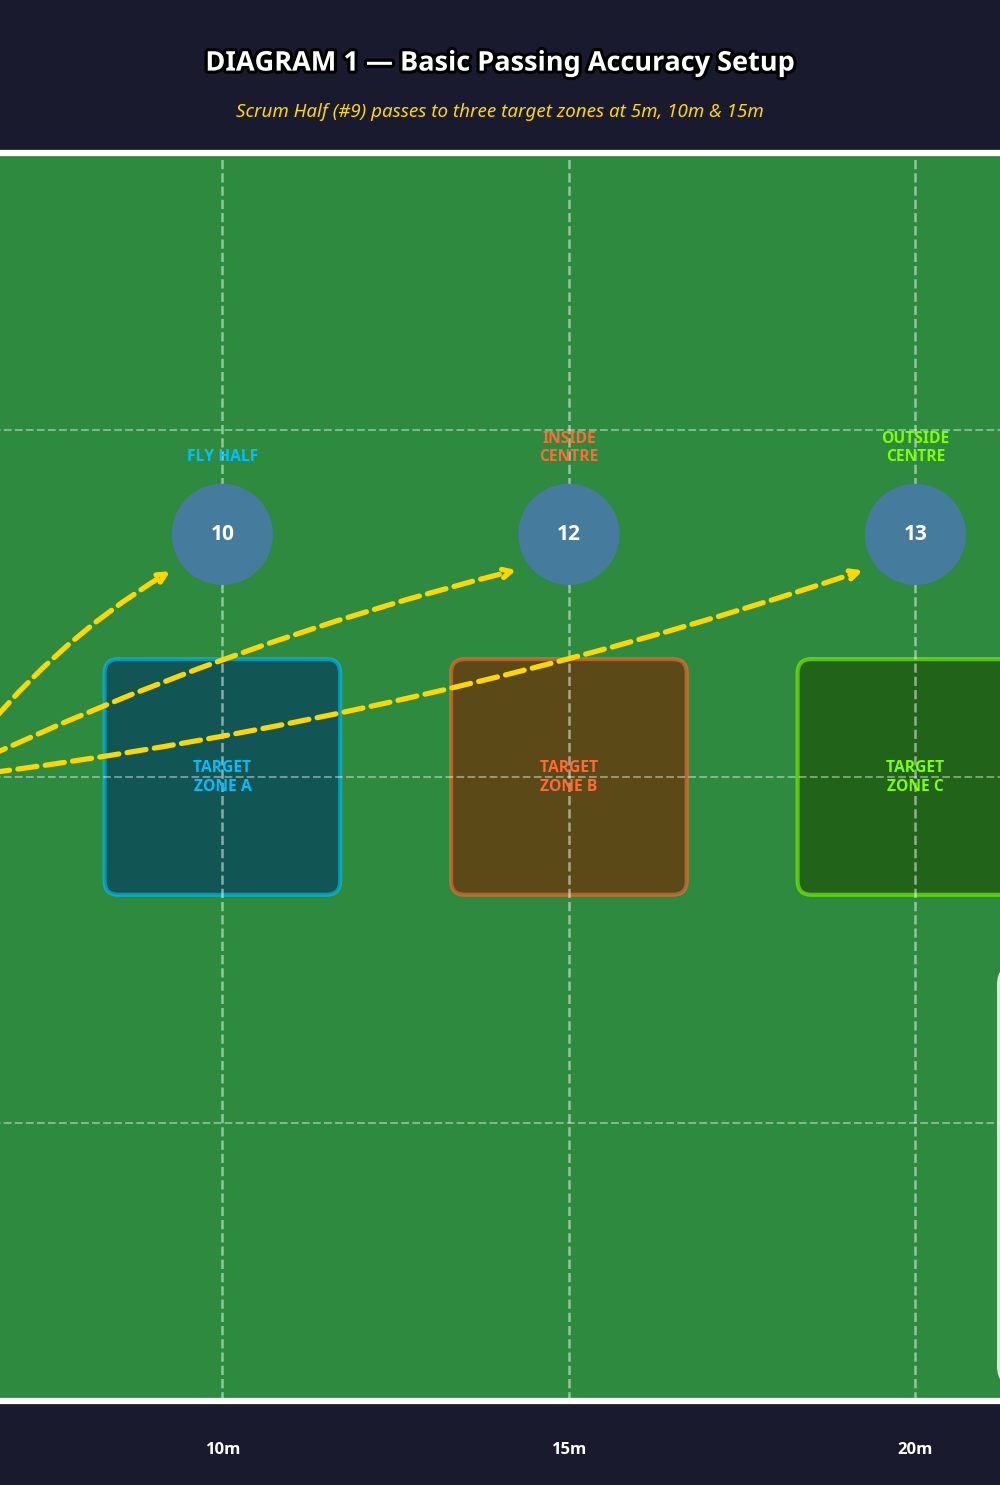
Diagram 2: Gate passing setup with defensive pressure. The scrum half must thread the pass through the gate while a defender applies lateral pressure from the inside channel. Receivers (#10 and #12) run onto the ball through their respective gates.
- The flanker feeds the ball to the base as before. #9 approaches and picks up.
- Receivers begin their run as soon as the flanker calls "Ball!" — they must be moving onto the pass, not standing still.
- #9 must deliver the pass through the gate (between the two poles) so the receiver catches it in stride. A pass that clips a pole or forces the receiver to check their run is a miss.
- A passive defender stands 1m inside the first gate and shuffles laterally, forcing #9 to commit to the pass without telegraphing the target. The defender does not attempt to intercept — their role is purely to create visual and spatial pressure.
- Complete 8 reps per scrum half across both gates (4 to Gate 1 / #10, 4 to Gate 2 / #12), with the coach varying the call.
- Accuracy target: 6/8 clean passes through the gate before progressing to Phase 3.
Phase 3 — Live Phase Simulation (Minutes 19–30)
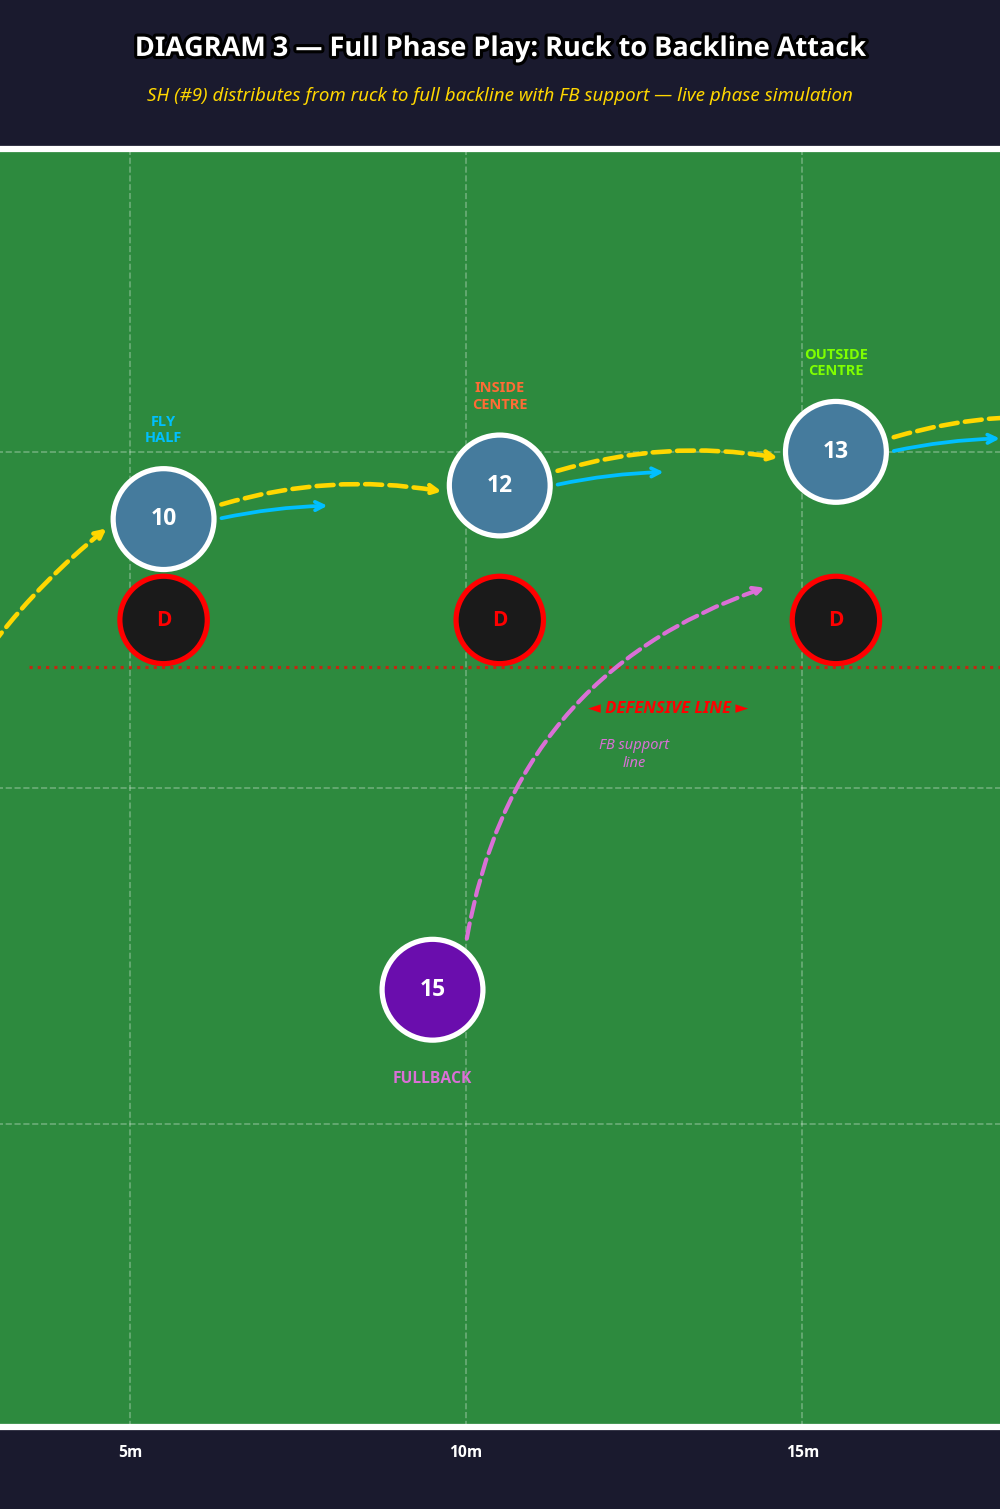
This is the full-context application of the skill. Set up as per Diagram 3, with a complete backline (#10, #12, #13, #14) and a fullback (#15) in a support line. Four defenders mirror the backline.

Diagram 3: Full phase play simulation. The scrum half distributes from the ruck to a complete backline (#10–#14) with #15 in a support line. Four defenders apply realistic pressure across the width of the attack.
- The coach or team captain calls the play: "Wide to 13", "Short to 10", or "Switch with 15". The call is made as the flanker feeds the ball — not before.
- #9 picks up and executes the called pass. The receiving backline runs their lines as in a live match.
- Defenders are live from the moment the pass leaves #9's hands — they may intercept, tackle, or apply pressure to the receiver.
- The sequence runs for 4 phases before resetting. Rotate the scrum half every two sets.
- The coach observes and provides immediate feedback after each rep — no waiting until the end of the set.
Key Coaching Points

1. Low hips, flat back on the pick-up. The most common cause of a slow, inaccurate pass is a scrum half who picks up the ball standing upright. Demand that #9's hips stay below the level of the ruck pad throughout the pick-up. A low centre of gravity generates rotational power and keeps the pass flat.
2. The pass starts from the ground, not the hands. Power is generated through the legs and core, transferred through the torso rotation, and released through the wrists and fingers. Coaches should watch for players who rely entirely on arm strength — these passes are slow, loopy, and easy to read for defenders.
3. Lead shoulder points at the target. Before the ball is released, #9's lead shoulder should be aligned directly at the intended receiver. This is the single most reliable indicator of pass accuracy. If the shoulder is wrong, the pass will be wrong.
4. Eyes on the target, not the ball. Once the ball is in the hands, #9's eyes must be up and fixed on the receiver's chest — specifically the hands. A scrum half who looks down at the ball during the pass will consistently deliver late, telegraphed distribution.
5. Follow-through points at the target. The passing hand should finish pointing directly at the receiver's chest. A follow-through that drops or sweeps wide indicates a wrist or elbow mechanics issue and will produce a pass that dips or curves unpredictably.
6. Communicate before the pick-up. Elite #9s call the pass before they pick up the ball — a short, sharp verbal cue ("Ten!", "Wide!") that tells the receiver to begin their run. Build this habit from Phase 1 onwards, even in static drills.
Common Mistakes
Mistake 1 — Pre-selecting the target. Many scrum halves decide where they are passing before they pick up the ball. This is catastrophically readable for experienced defenders. Reinforce the coach's call system from Phase 1 so that #9 is always reacting, never pre-planning.
Correction: Delay the target call until the moment of pick-up. In Phase 3, use a hand signal from the fly half rather than a verbal call, forcing #9 to scan the backline as they approach.
Mistake 2 — Standing up through the pass. Players who rise onto their toes as they release the ball lose rotational power and produce a high, looping pass that hangs in the air. This is especially common when passing to the wider channels (#12, #13).
Correction: Place a cone at head height directly above the ruck pad. If #9 rises above the cone during the pass, it is called a fault. This creates immediate kinesthetic awareness of body height.
Mistake 3 — Passing across the body (inside-out). When passing to the short side (#10 at 5m), some scrum halves sweep the ball across their body rather than driving through with the hips. This produces a pass that curves away from the receiver and arrives behind their hands.
Correction: Use the gate poles at 5m. An inside-out pass will always clip the inside pole. The gate provides instant, objective feedback without the coach needing to intervene verbally.
Mistake 4 — Slow ball off the ground. A hesitation of even 0.3 seconds between pick-up and release gives the defensive line time to drift and close the channel. Time the pick-up-to-release interval with a stopwatch. Elite #9s release within 0.8–1.0 seconds of the ball leaving the ruck.
Correction: Run the drill with a countdown: the coach counts "3... 2... 1..." as #9 approaches. The ball must be released before "1" is called. This creates urgency without sacrificing technique.
Mistake 5 — Neglecting the non-dominant side. Most scrum halves have a strong-side pass (typically left-to-right for right-handed players) and a weaker reverse pass. Coaches often allow players to default to their strong side in drills. Ensure that at least 40% of all reps are to the non-dominant side.
Correction: Alternate the ruck position between left and right sides of the training zone on each set, forcing #9 to pass equally in both directions.
Variations & Progressions

Progression 1 — Blindfold Target Recognition (Easier → Harder)
Begin with receivers holding coloured bibs above their heads (matching the cone colours of each zone). Progress to receivers wearing plain bibs, forcing #9 to read position and depth rather than colour cues. Final stage: receivers wear identical bibs and #9 must read the defensive line to identify the best target — replicating match conditions.
Progression 2 — Fatigue-Based Passing
Precede the drill with a 60-second high-intensity conditioning block (e.g., 10 burpees or a 50m shuttle sprint). #9 must then immediately execute 5 passing reps. This trains the neuromuscular control required to maintain technique when physically fatigued — the exact condition in which most passing errors occur in matches.
Progression 3 — Two-Scrum-Half Competition
Run two scrum halves simultaneously on adjacent zones. Each SH completes 10 reps. The SH with the higher accuracy score wins the set. The losing SH completes a short conditioning forfeit (5 press-ups). This introduces competitive pressure, replicating the psychological load of a match environment and creating intrinsic motivation to maintain technique.
Age Adaptations
| Age Group | Key Modifications |
|---|---|
| Under 12 | Use size 4 ball. Reduce target distances to 3m, 6m, 9m. Remove defensive pressure entirely — focus purely on body mechanics and two-handed pick-up. Allow 5 seconds between pick-up and pass. |
| Under 14 | Use size 4 ball. Maintain 5m / 10m / 12m distances. Introduce gate passing (Phase 2) but use wider gates (2m). Passive defender only — no live defence. Emphasise verbal communication habit. |
| Under 16 | Full size 5 ball. Standard distances apply. Phase 2 and Phase 3 both appropriate. Introduce the fatigue-based variation (Progression 2) for physically mature players. |
| Open Age | Full drill as written. Add the two-SH competition format (Progression 3). Introduce video review — film from behind the ruck to analyse body mechanics between sets. |
Coach's Note: For all age groups below Under-16, prioritise quality over speed. It is far better for a young #9 to take 1.5 seconds and deliver a technically correct pass than to rush and ingrain poor mechanics. Speed is a product of correct technique repeated thousands of times — not the other way around.