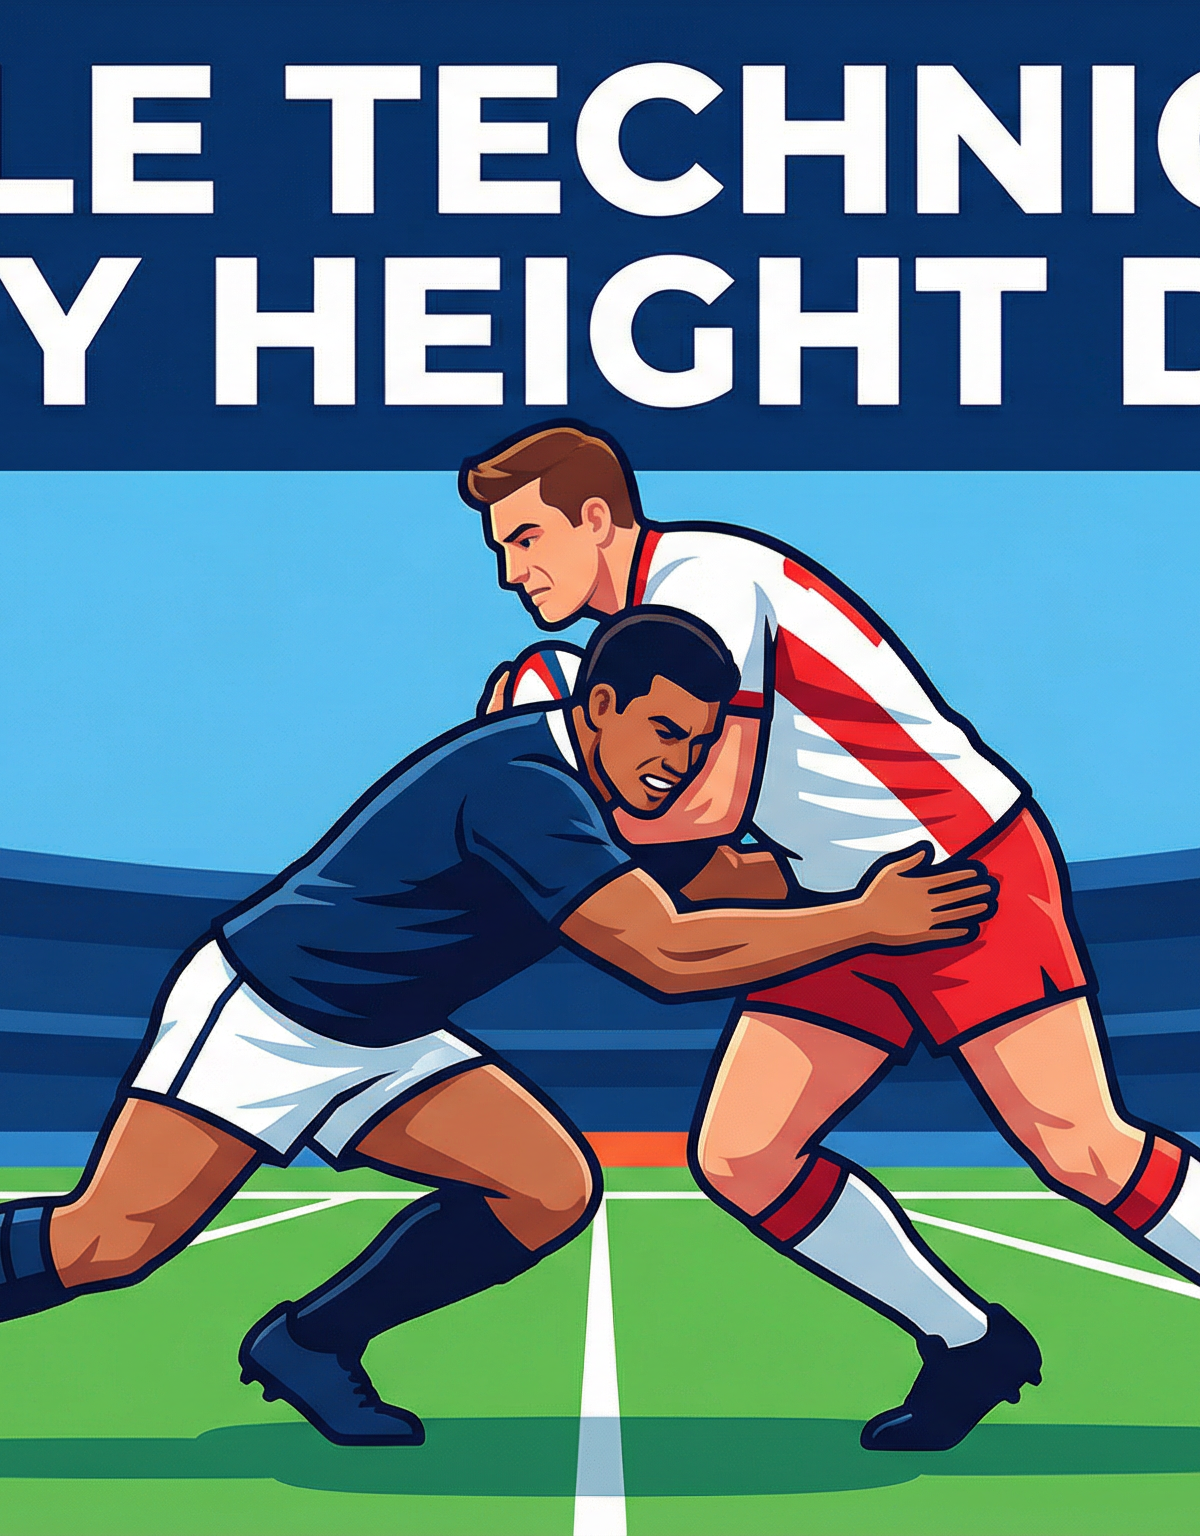
Low & Lethal: Tackle Technique and Body Height Mastery Drill
A three-phase progressive drill that teaches defenders to consistently hit below the ball carrier's hips, wrap with authority, and drive through contact — the foundation of dominant defensive rugby.
Equipment Needed
Overview
Effective tackling is the single most important defensive skill in rugby union, and body height is its cornerstone. A defender who arrives at contact with their hips too high loses power, risks injury, and gives the ball carrier the leverage to offload or break the tackle. This drill — Low & Lethal — is a three-phase progressive session designed to ingrain the correct body position from first contact through to the completed tackle and turnover.
Use this drill at the start of any defensive-focused session, or as a standalone 25-minute block when your squad is learning the fundamentals. It is equally effective as a remedial session for experienced players who have developed bad habits under match pressure. The drill scales from individual technique work all the way to a live 3v2 channel game, making it suitable for a single session arc or spread across multiple training weeks.
Setup

Pitch Area: A 25m x 15m section of the training pitch, marked with flat cones at each corner and 5m interval markers along each touchline. This represents roughly one quarter of a standard 100m x 70m rugby pitch.
Equipment Required:
- 16 flat cones (orange or yellow)
- 4 upright cones (for channel markers)
- 4 tackle shields (one per pair in Phase 1)
- 2 tackle bags (for Phase 2 angled approach work)
- 1 rugby ball per group of 5 players
- Bibs in two colours (red for attackers, blue for defenders)
Players Required: Minimum 10, ideal 14–16. Split into pairs for Phase 1, groups of three for Phase 2, and groups of five (3 attackers vs. 2 defenders) for Phase 3.
Player Positions Used:
- No. 6 — Blindside Flanker (primary tackler in Phase 1 and 2)
- No. 7 — Openside Flanker (support tackler in Phase 2 and 3)
- No. 10 — Fly-half (ball distributor in Phase 3)
- No. 12 — Inside Centre (primary ball carrier in Phase 2 and 3)
- No. 13 — Outside Centre (secondary ball carrier / overlap threat in Phase 3)
Step-by-Step Instructions

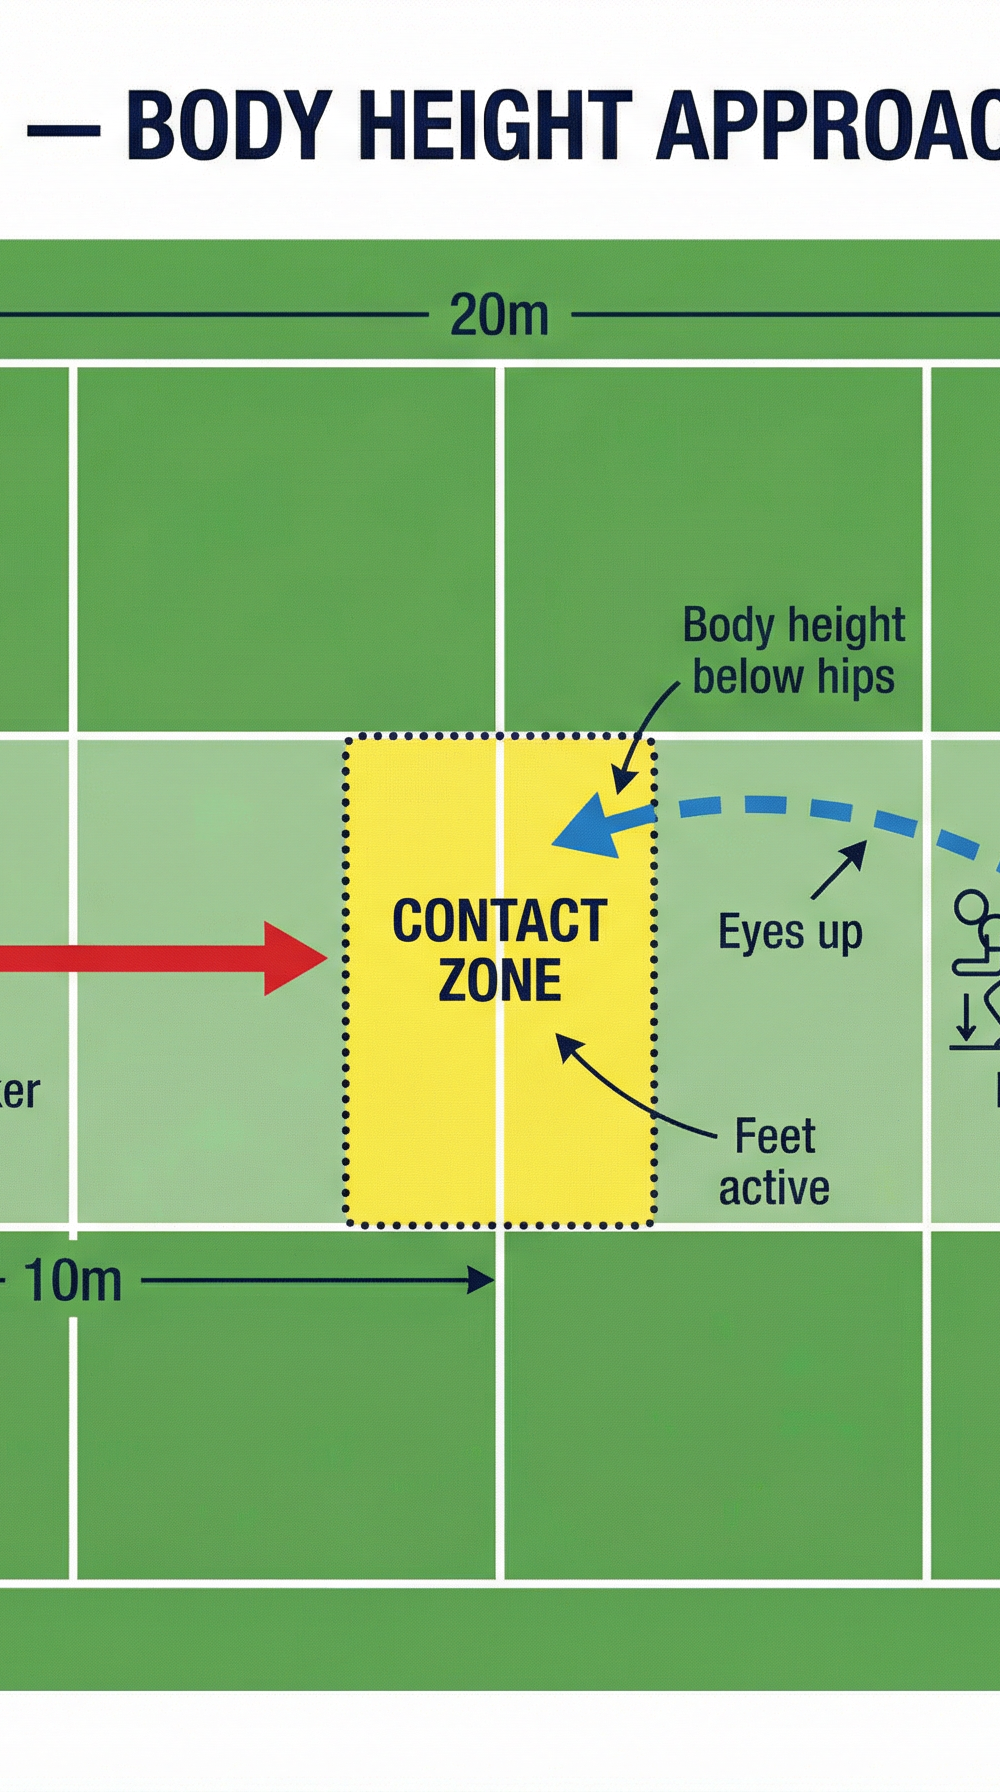
Phase 1 — Body Height Approach (Individual Technique)

- Set up pairs 10m apart in a single-width channel (5m wide), marked by two flat cones on each side. The defender (No. 6) holds a tackle shield at the far end; the ball carrier (No. 12) stands at the start cone.
- Coach calls "Go." The ball carrier jogs at 60% pace toward the defender, holding the ball in two hands at chest height.
- The defender begins in an athletic stance — feet shoulder-width apart, knees bent, hips below shoulder height. As the ball carrier enters the 3m "contact window," the defender takes a short, sharp chop step to close the gap.
- Contact: The defender drives their lead shoulder into the tackle shield at thigh height — not the waist, not the chest. The head goes to the side of the ball carrier's body (never in front). Both arms wrap around the back of the thighs and lock.
- Drive phase: The defender pumps their legs for three short drive steps after contact, simulating bringing the ball carrier to ground.
- Coach feedback: Pause after each rep. Check body height at the moment of contact. The defender's back should be flat, eyes looking up, not down at the ground.
- Rotate after 6 repetitions. Complete 3 sets per player before moving to Phase 2.
Coaching Cue: "Cheek to cheek — your cheek to their cheek. Head to the side, eyes up, and squeeze."
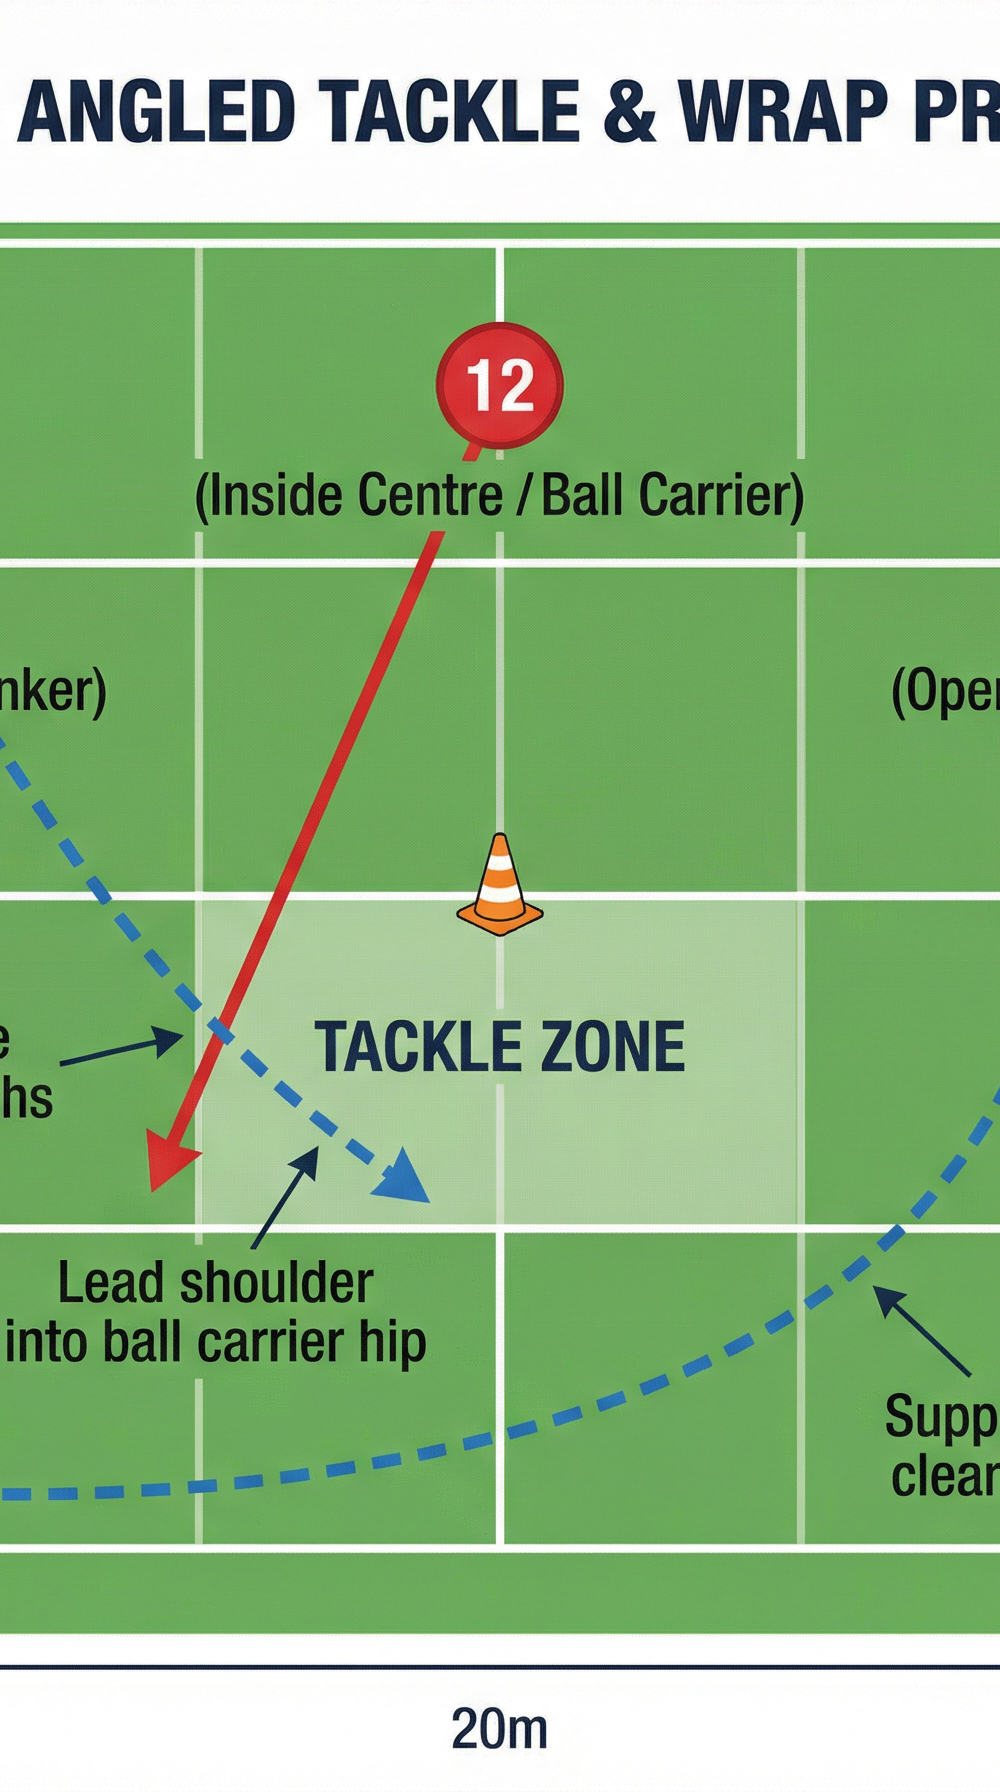
Phase 2 — Angled Tackle and Wrap Progression
- Expand the channel to 15m wide. Place a tackle bag at the 7m mark as a body-height checkpoint. The ball carrier (No. 12) runs a diagonal line from the top-left cone toward the bottom-right cone at 70% pace.
- Defender No. 6 starts at the bottom-left, 5m from the bag. As the ball carrier commits to their line, the defender reads the angle and takes an angled approach path — not running straight at the carrier, but cutting off their space by targeting the hip closest to the touchline.
- The contact point should be at the tackle bag. The defender must arrive with hips below the bag's midpoint (approximately thigh height on a standing player). Any contact above the bag is flagged by the coach as a high tackle.
- Support player No. 7 starts 3m behind No. 6 and sweeps in behind the tackle to clear the ball from the ruck, simulating a live turnover scenario.
- Rotate roles every 4 repetitions. Run 4 sets per group.
Coaching Cue: "Cut the angle, don't chase the man. Make him run into you, not the other way around."
Phase 3 — 3v2 Live Tackle Channel

- Set up a 25m x 15m live channel. Three attackers (No. 10, 12, 13) line up at one end in a flat attacking line, 2m apart. Two defenders (No. 6, 7) line up 15m away in a defensive line.
- No. 10 receives a pass from the coach and the drill begins live. Attackers aim to cross the far try line; defenders aim to make a legal, technically correct tackle.
- Defenders must communicate — calling "mine" or "yours" as the attack shapes up. No. 6 takes the first receiver (No. 12); No. 7 drifts to cover the outside (No. 13). No. 10 is left as the "ghost" — if the ball reaches No. 10 unmarked, the attackers score.
- Scoring for defenders: 2 points for a completed tackle below the hips with a full wrap. 1 point for a completed tackle above the hips. 0 points for a missed tackle. Attackers score 1 point for crossing the line.
- Run 8 repetitions per group, then rotate attacker and defender roles.
Coaching Cue: "Line speed wins the overlap. If you drift and drift slowly, you'll always be one man short."
Key Coaching Points
| # | Coaching Point | What to Look For |
|---|---|---|
| 1 | Body height at contact | Hips below the ball carrier's hips; back flat, not rounded |
| 2 | Head placement | Head to the side of the body — never directly in front of the ball carrier |
| 3 | Foot position on approach | Short, active chop steps in the final 2m — not a long lunge |
| 4 | Arm wrap | Both arms must lock around the thighs or lower; no single-arm tackles |
| 5 | Eyes up throughout | Players must keep their chin up and eyes on the target, not looking at the ground |
| 6 | Drive through contact | Leg drive continues for 2–3 steps after initial contact — the tackle is not complete at first touch |
Common Mistakes

1. High body position on approach. The most common error at all levels. Players run upright and only dip at the last moment, meaning they arrive at contact with their weight going backward, not forward. Correct this by having players hold a low athletic crouch for the final 5m of every approach in Phase 1 until it becomes automatic.
2. Head in front of the ball carrier. A dangerous habit that risks neck injury and is also ineffective — the ball carrier simply runs through the tackle. Reinforce the "cheek to cheek" cue and use a tackle shield in Phase 1 to physically prevent players from leading with the top of their head.
3. Arm wrap too high. Players who are nervous or under-confident will grab at the jersey or waist rather than wrapping the thighs. This results in a standing tackle that the ball carrier can easily offload from. Use the tackle bag in Phase 2 as a physical height checkpoint.
4. Stopping feet at contact. Many players plant their feet the moment they make contact, losing all forward momentum. Emphasise that the tackle is a dynamic, driving action — feet must keep pumping until the ball carrier is on the ground.
5. No communication in Phase 3. Defenders who do not call their man early will both go for the same carrier, leaving the overlap free. Make communication non-negotiable: any tackle made without a verbal call results in the rep being replayed.
Variations and Progressions

Easier — Stationary Shield Work: In Phase 1, have the shield holder remain completely stationary and allow the tackler to approach at walking pace. This removes the decision-making element and lets the player focus entirely on body position and arm wrap. Ideal for players who are new to contact or returning from injury.
Harder — Reactive Approach with Decision: In Phase 2, give the ball carrier a choice of two lines (inside or outside the bag). The defender must read the line and adjust their angle in real time. This introduces the cognitive element of tackle decision-making and mirrors match conditions far more closely.
Harder — 3v2 with Offload Rule: In Phase 3, allow the tackled ball carrier to offload in the tackle if their arms are free. This punishes defenders who do not wrap the arms quickly and rewards technically correct tackles that pin the arms. It also introduces the support player role more explicitly, as the second attacker must be in position to receive the offload.
Age Adaptations

| Age Group | Key Modifications |
|---|---|
| Under 10 | Use tag rugby rules — no contact. Replace tackle with a two-hand touch below the hips. Focus on body height and footwork only. Use soft foam shields for any contact introduction. |
| Under 12 | Introduce Phase 1 with tackle shields only. No live tackling until the body position is consistent. Reduce channel width to 8m. Limit Phase 3 to 2v1 rather than 3v2. |
| Under 14 | Run all three phases as written but reduce Phase 3 intensity to 60% pace. Spend additional time on the "head placement" coaching point, as this age group is most prone to dangerous technique under pressure. |
| Under 16 / Open | Run all phases at full intensity. Add the offload variation in Phase 3. Introduce video review after the session — film Phase 3 and review body height at contact frame by frame with players. |
Session duration: 25 minutes. Recommended frequency: once per week during the pre-season defensive block, then once per fortnight during the competition season as a technical refresher.