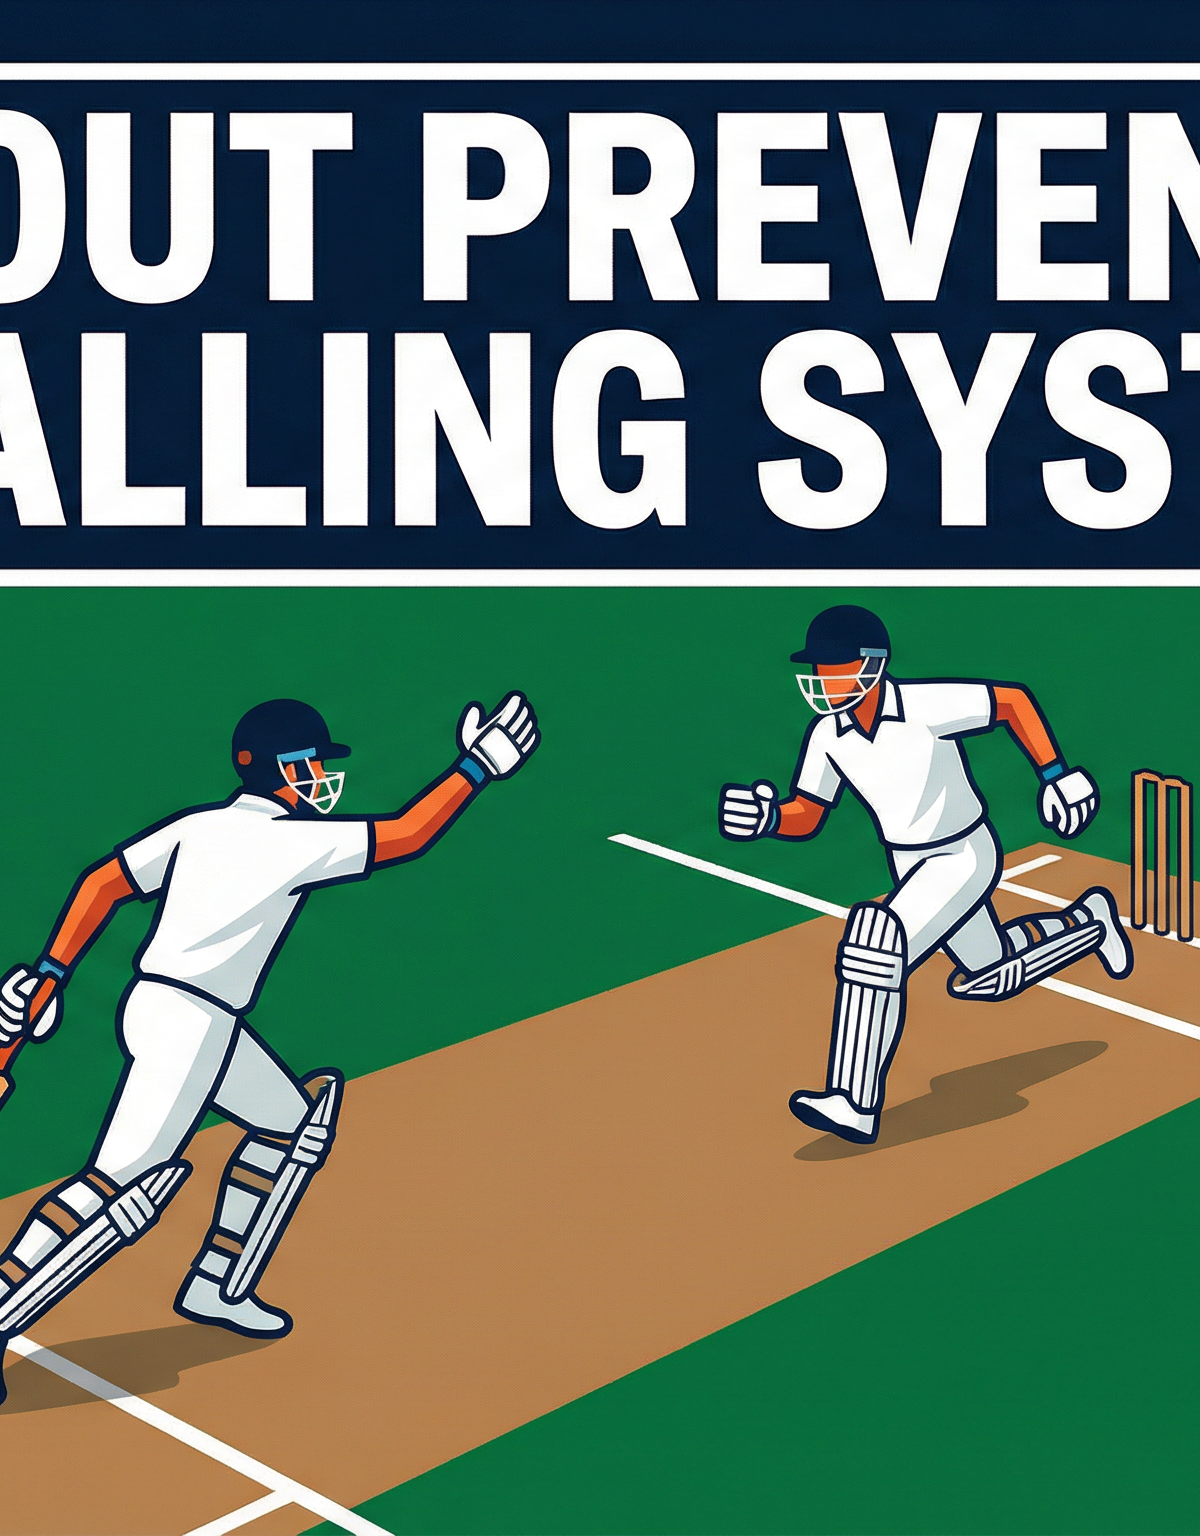
Run Out Prevention & The Calling Zone Responsibility System
Master the art of running between the wickets with a structured calling system designed to eliminate hesitation, improve communication, and drastically reduce run outs.
Equipment Needed
1. Overview
Running between the wickets is often an overlooked aspect of batting, yet it is a critical component of building an innings and maintaining pressure on the fielding side. A significant percentage of run outs occur not due to a lack of speed, but because of poor communication and hesitation. This set play introduces the Calling Zone Responsibility System, a structured approach that defines exactly who is responsible for calling a run based on where the ball is hit. By implementing this system, coaches can empower their players to make quick, decisive calls, thereby eliminating the deadly "yes-no-wait" scenario that frequently leads to dismissals.
This resource is designed to provide coaches with a clear, step-by-step framework for teaching run out prevention. It covers the theoretical zones of responsibility, practical drills to reinforce fielder awareness, and the correct mechanical technique for grounding the bat to ensure safe run completion.
2. Setup
To effectively run this set play and the associated drills, you will need to prepare the training environment to simulate match conditions as closely as possible.
Equipment Needed:
- 2 Cricket bats (minimum)
- Batting pads, gloves, and helmets (for realistic movement)
- 6-8 marker cones (to define fielding positions and calling zones)
- 1 set of stumps (at both ends of the pitch)
- 6 cricket balls (inverto or regular, depending on the drill intensity)
Pitch & Field Setup:
- Utilise a standard 22-yard cricket pitch.
- Ensure the popping creases are clearly marked with white paint or tape.
- Place marker cones to indicate the three calling zones (Striker's Zone, Shared Zone, Non-Striker's Zone) along the length of the pitch.
- Position fielders (or cones representing fielders) at key positions: Mid-on (15 yards), Mid-off (15 yards), Cover Point (25 yards), and Square Leg (25 yards).
3. Step-by-Step Instructions
The implementation of the Calling Zone Responsibility System is broken down into three core phases: understanding the zones, practicing fielder awareness, and mastering the physical completion of the run.
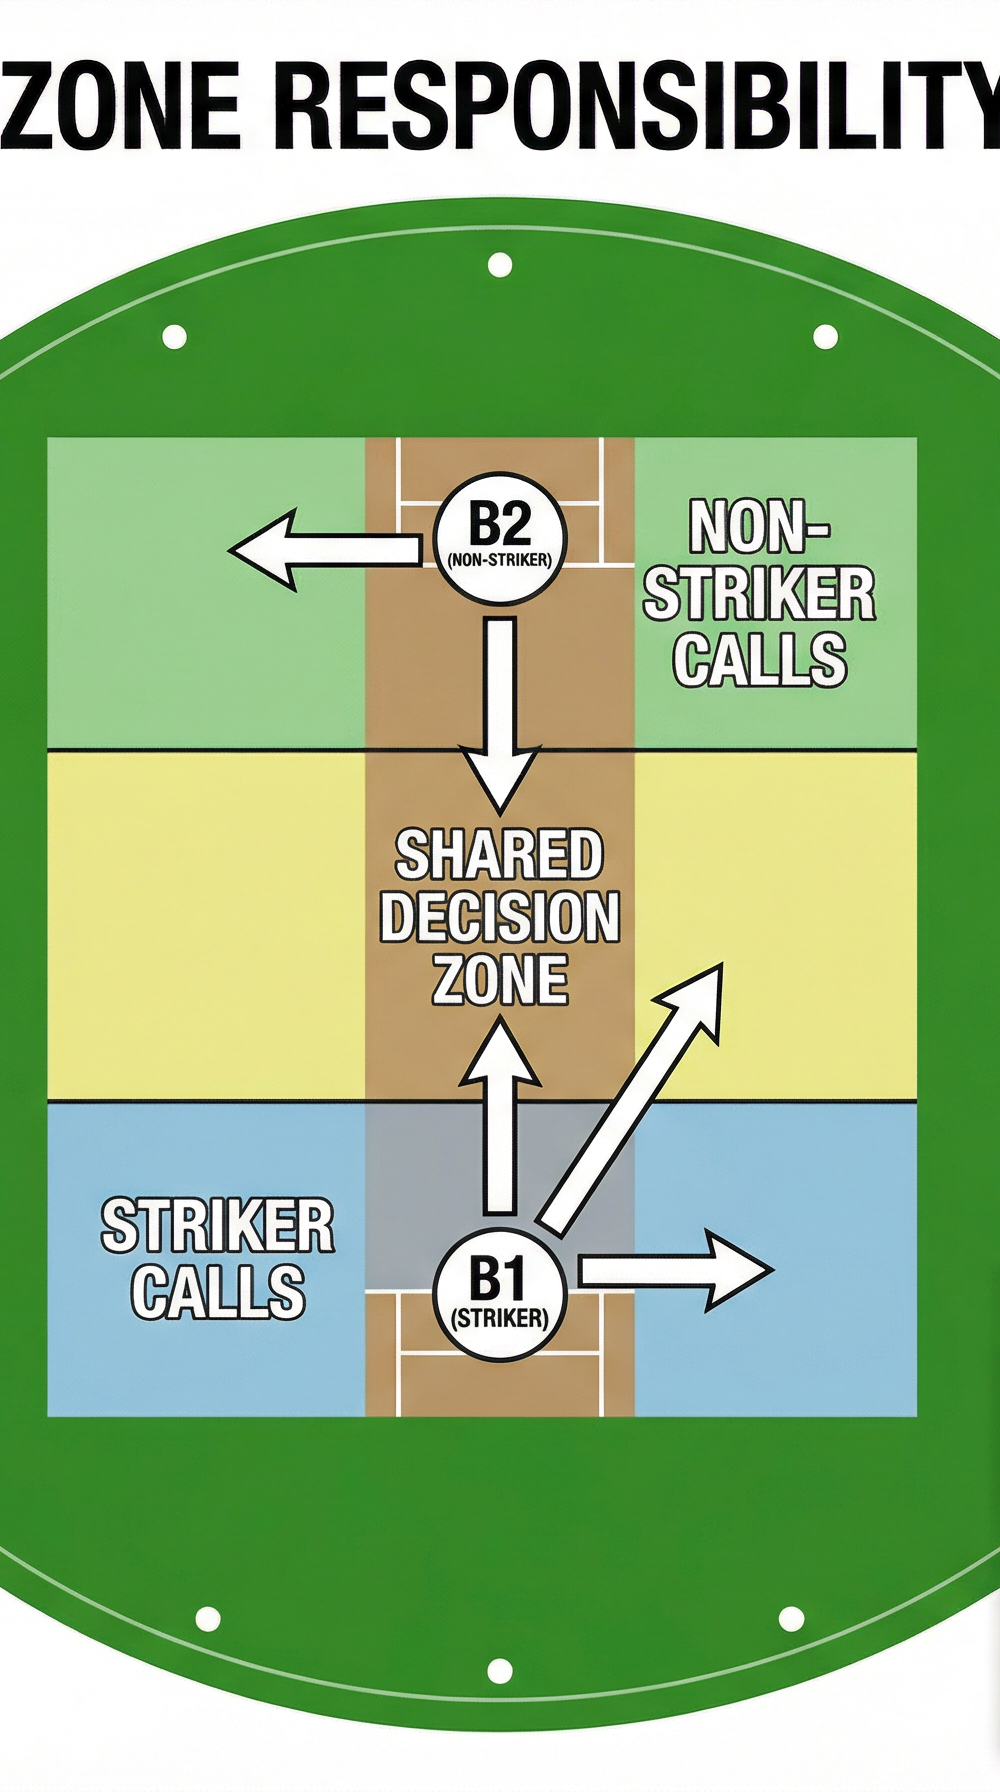
Phase 1: The Calling Zones
The foundation of this system is dividing the field into specific areas of responsibility. This dictates which batsman has the primary authority to call 'YES', 'NO', or 'WAIT'.
- Striker's Responsibility Zone: The striker is responsible for calling any ball hit in front of the wicket, roughly from mid-off through to mid-on. Because the striker is facing this direction and watching the ball off the bat, they have the best view of the fielders in this arc.
- Non-Striker's Responsibility Zone: The non-striker takes charge of calling for balls hit behind square on the off-side (e.g., late cuts, guides to third man) and behind square on the leg-side (e.g., fine leg deflections). The non-striker has a clearer, unobstructed view of these areas compared to the striker, who may be unbalanced or turned around after playing the shot.
- Shared Decision Zone: For balls hit square of the wicket (point, square cover, square leg), both batsmen share the responsibility. Clear, loud, and early communication is vital here. Both players must assess the speed of the ball and the proximity of the fielder.
Phase 2: Fielder Awareness Drill
Once the zones are understood, players must practice making calls under pressure while being aware of the fielding setup.
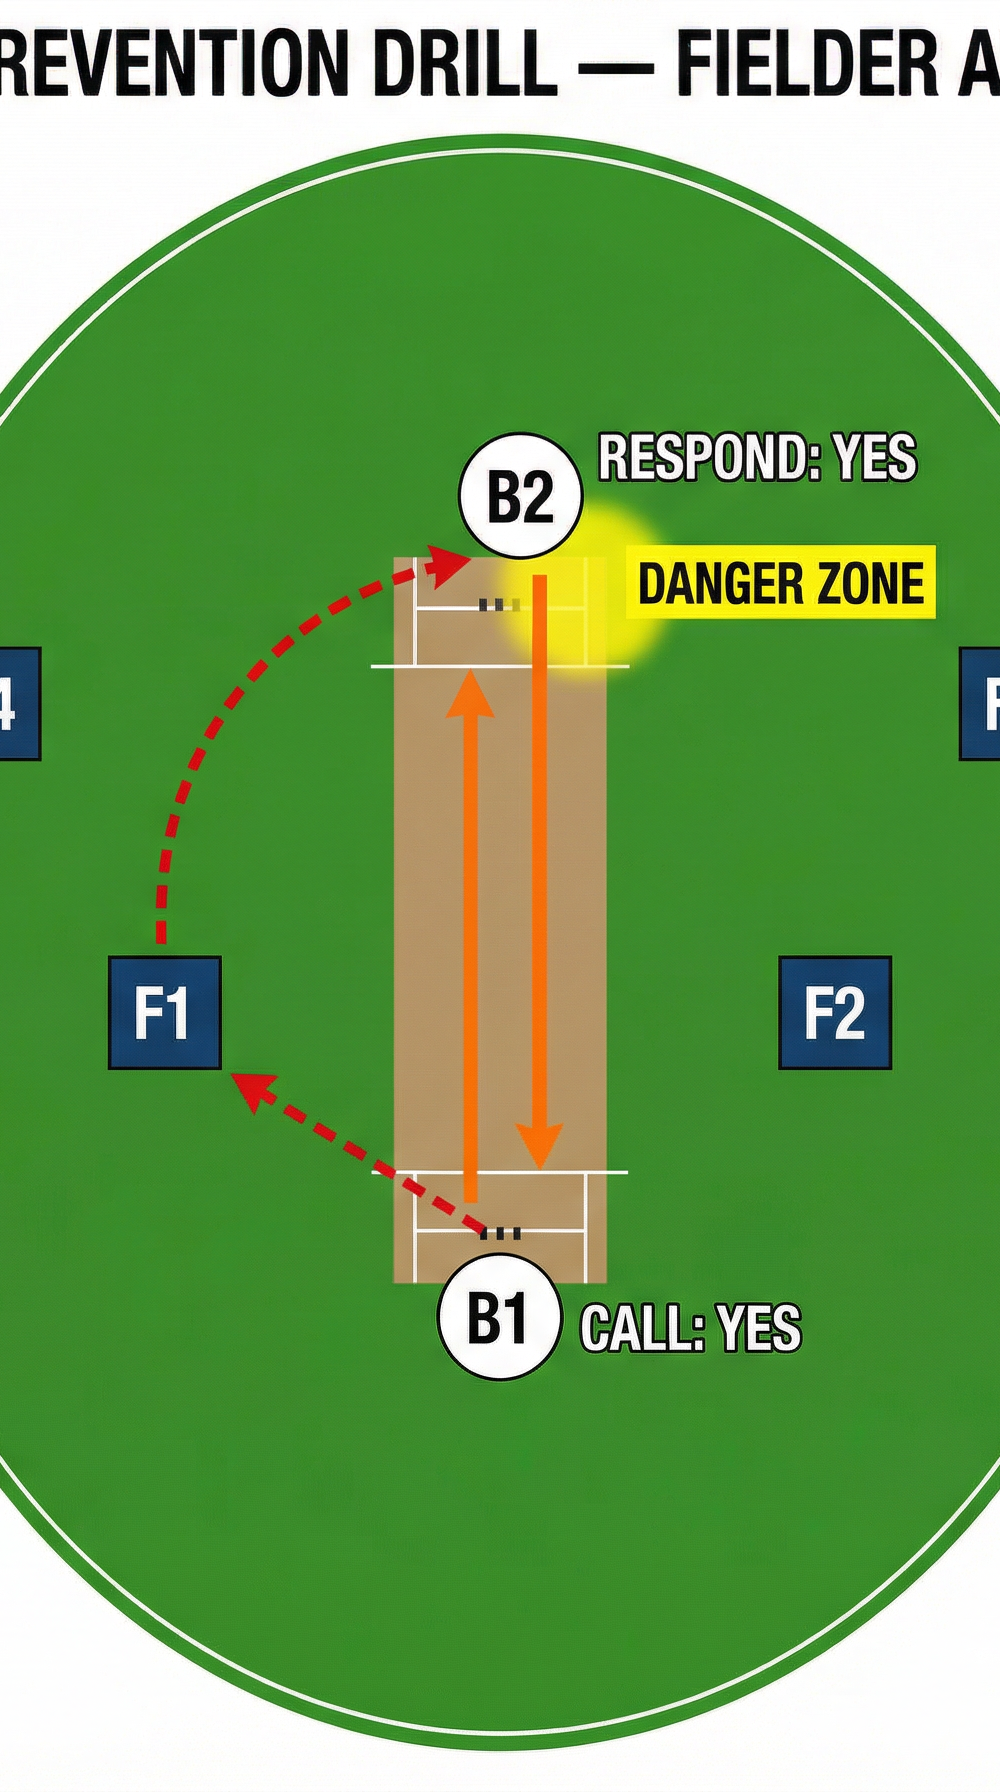
- Initial Setup: Position Batsman 1 (B1) at the striker's end and Batsman 2 (B2) at the non-striker's end. Place four fielders (F1-F4) in the designated positions.
- The Feed: The coach feeds a ball (via throw-down or bowling machine) to B1. B1 plays a deliberate shot toward one of the fielders (e.g., F1 at mid-on).
- The Call: Based on the Calling Zone System, B1 (striker) must immediately call 'YES', 'NO', or 'WAIT'.
- The Response: B2 (non-striker) must respond loudly to confirm the call and initiate the run or stay grounded.
- The Execution: If the call is 'YES', both batsmen sprint to the opposite end. The fielder (F1) attacks the ball and attempts a throw at the stumps (aiming for the 'Danger Zone' at the non-striker's end). The batsmen must complete the run safely before the bails are dislodged.
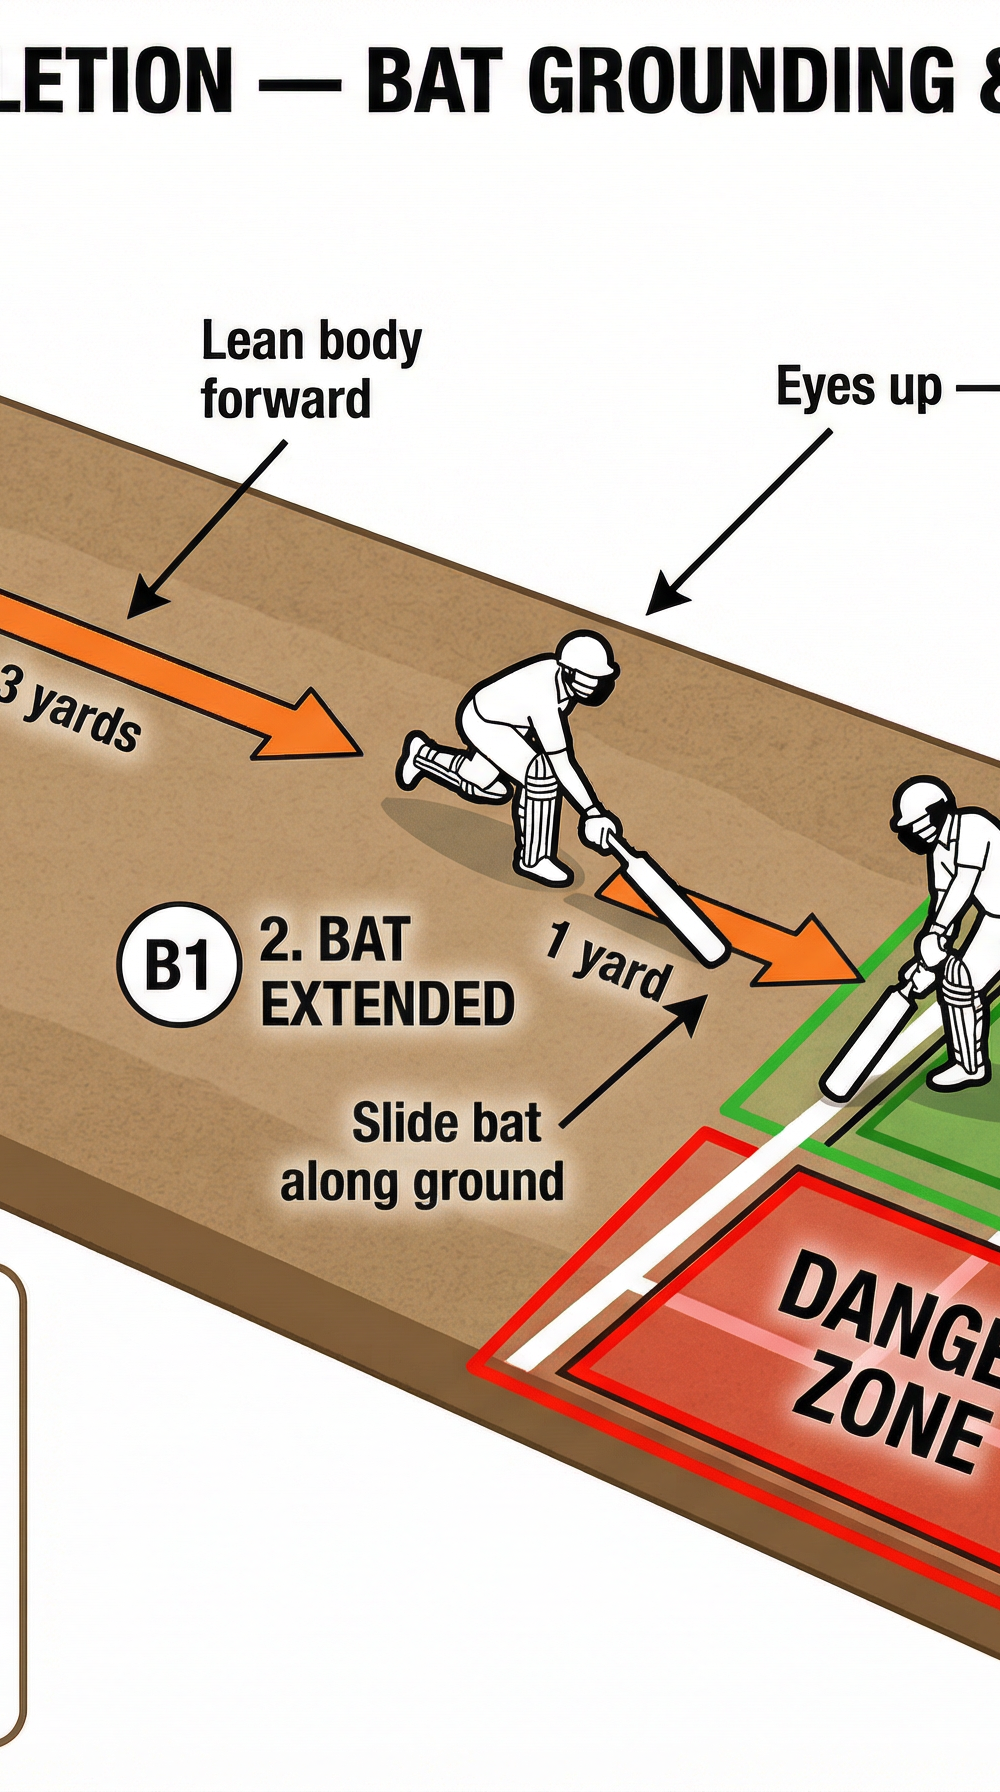
Phase 3: Safe Run Completion Technique
The final step is ensuring that the physical act of completing the run is done efficiently and safely, maximising the batsman's reach.
- The Approach: As the batsman approaches the popping crease (approximately 3 yards out), they must maintain a full sprint. Do not slow down prematurely.
- Body Position: The batsman must lean their body weight forward, lowering their centre of gravity. Their eyes should be up, scanning for the ball or the fielder's throw.
- Bat Extension: At approximately 1 yard from the crease, the batsman extends their bat forward, holding it firmly with the bottom hand.
- The Slide: The critical action is to slide the toe of the bat along the ground across the crease line. Do not bounce the bat. Bouncing the bat can result in it being in the air at the exact moment the bails are removed, leading to a run out. The bat must be grounded behind the line in the 'Safe Zone'.
4. Key Coaching Points
- Loud and Clear Communication: Calls must be definitive ('YES', 'NO', 'WAIT'). Avoid ambiguous terms like 'maybe' or 'let's see'. Volume is crucial, especially in match situations with crowd noise.
- Trust the Caller: The player whose zone the ball is in makes the final decision. The other player must trust and react immediately to that call, even if they disagree initially. Hesitation is fatal.
- Run the First Run Hard: Regardless of where the ball is hit, the first run must always be sprinted aggressively. This puts pressure on the fielders and turns ones into twos.
- Slide the Bat: Emphasise the mechanical action of sliding the bat along the ground. A grounded bat is a safe bat.
- Backing Up: The non-striker must walk in with the bowler and be prepared to launch into a sprint the moment the ball is hit, gaining crucial early momentum.
5. Common Mistakes
- Ball Watching: Batsmen staring at the ball instead of looking at their partner or listening for the call. This causes delayed reactions.
- Running on the Pitch: Running down the protected central area of the pitch (the danger area) instead of the designated running lanes on the sides. This can lead to penalty runs or pitch damage.
- Turning Blind: Turning for a second run without looking at where the ball is. Batsmen should always turn facing the ball to assess the possibility of an extra run.
- Bouncing the Bat: As mentioned, lifting the bat over the crease rather than sliding it through.
6. Variations & Progressions
- Pressure Scenarios: Introduce a time limit or a points system. For example, batsmen must complete 10 safe runs within a specific time frame, with run outs resulting in deducted points.
- Blind Calling: Have the non-striker face away from the pitch until the ball is hit. They must rely entirely on the striker's verbal call to react.
- Variable Fielding: Constantly change the fielding positions without warning the batsmen. This forces them to scan the field and adjust their calls dynamically.
7. Age Adaptations
- Under 8s / Under 10s: Focus primarily on the physical mechanics of running and sliding the bat. Keep the calling simple (just 'YES' or 'NO'). Use shorter pitch distances if necessary.
- Under 12s / Under 14s: Introduce the concept of the Calling Zones. Emphasise loud communication and backing up. Start incorporating basic fielder awareness drills.
- Under 16s / Open: Implement the full system. Drills should be high-intensity and closely mimic match scenarios, including complex fielding setups and direct hit practice.