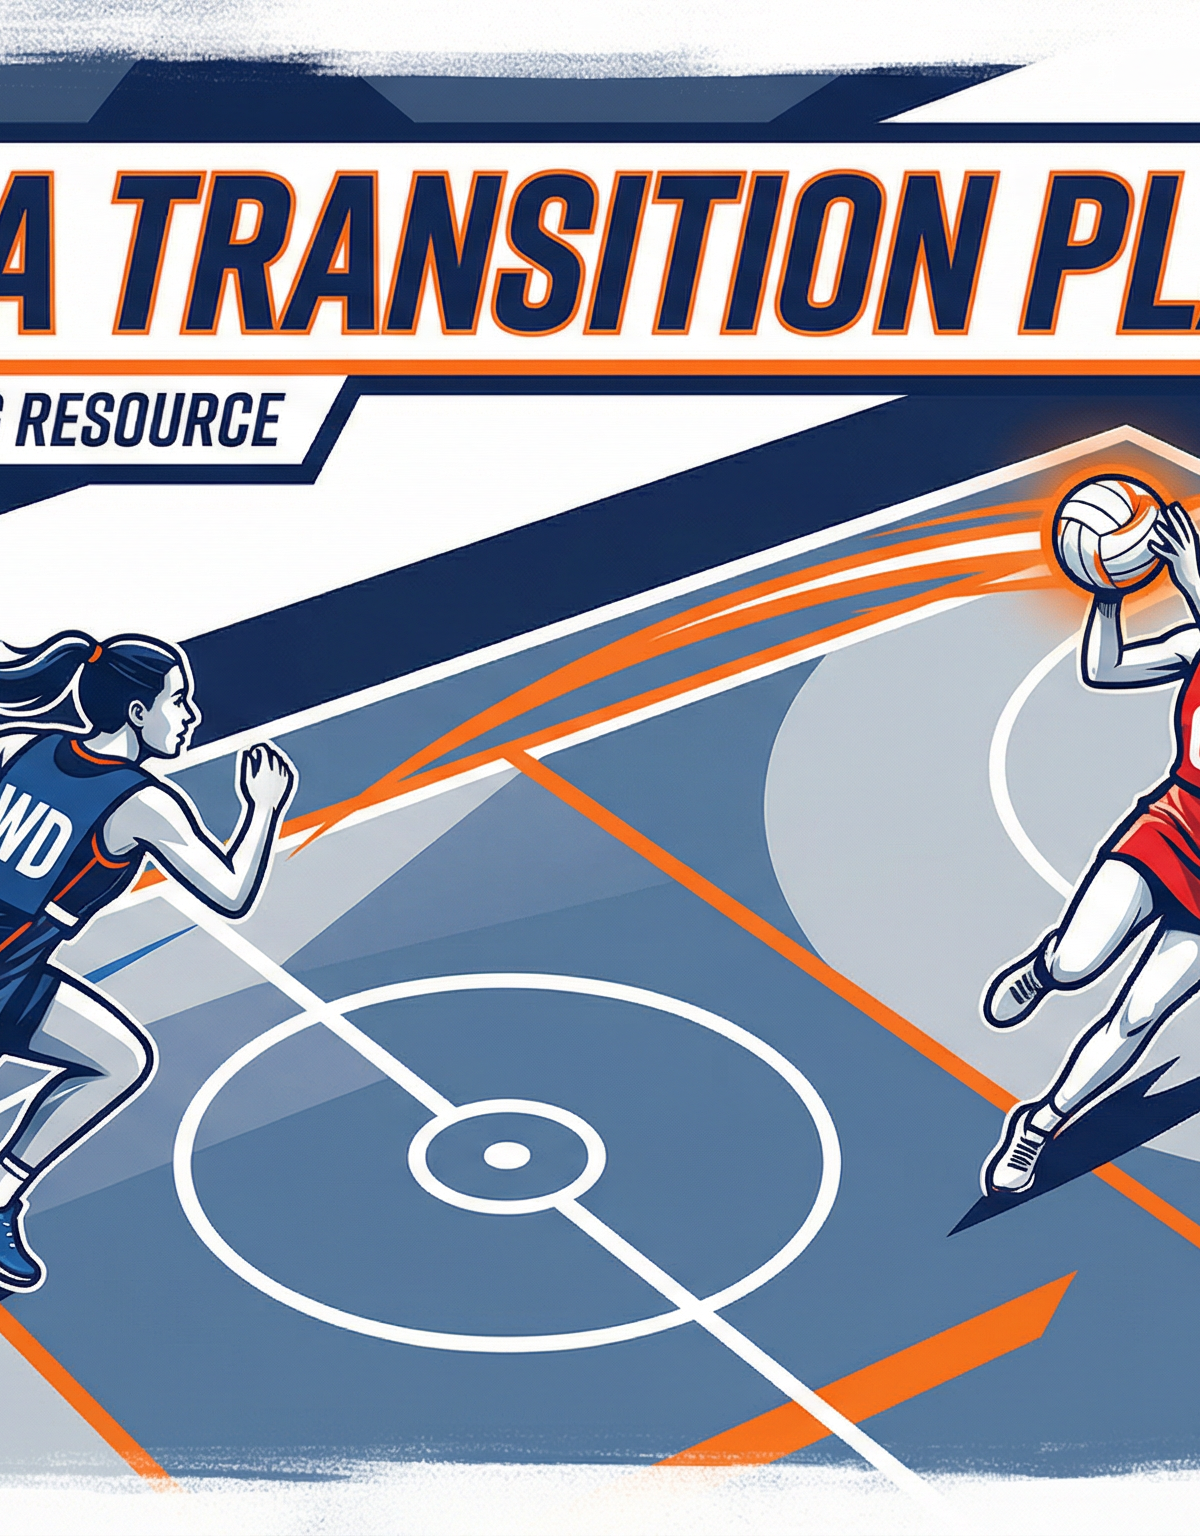
WD to GA Transition Play: Unlocking the Attack
Master the seamless transition from defence to attack by utilising your Wing Defence to deliver precision feeds to the Goal Attack.
Equipment Needed
Overview
The Wing Defence (WD) to Goal Attack (GA) transition play is a dynamic and highly effective strategy designed to rapidly move the ball from the defensive third into the goal circle. Often, opposition teams focus heavily on shutting down the Centre (C) and Wing Attack (WA) during transition. By integrating the WD into the attacking phase, you create an overload in the centre third and provide a clean, unexpected feeding option for your GA. This set play is particularly effective off a turnover or a backline pass, catching the defending team off-guard and exploiting the space left behind the transverse line.
Setup

To effectively run this set play in your training session, ensure you have the correct setup on a standard 30.5m x 15.25m netball court.
Equipment Needed:
- 1 Netball
- 7 Attacking Bibs (GS, GA, WA, C, WD, GD, GK)
- 1-3 Defending Bibs (minimum oGD to mark the WD)
- Optional: Throwdown lines or cones to mark the ~8m lead distance
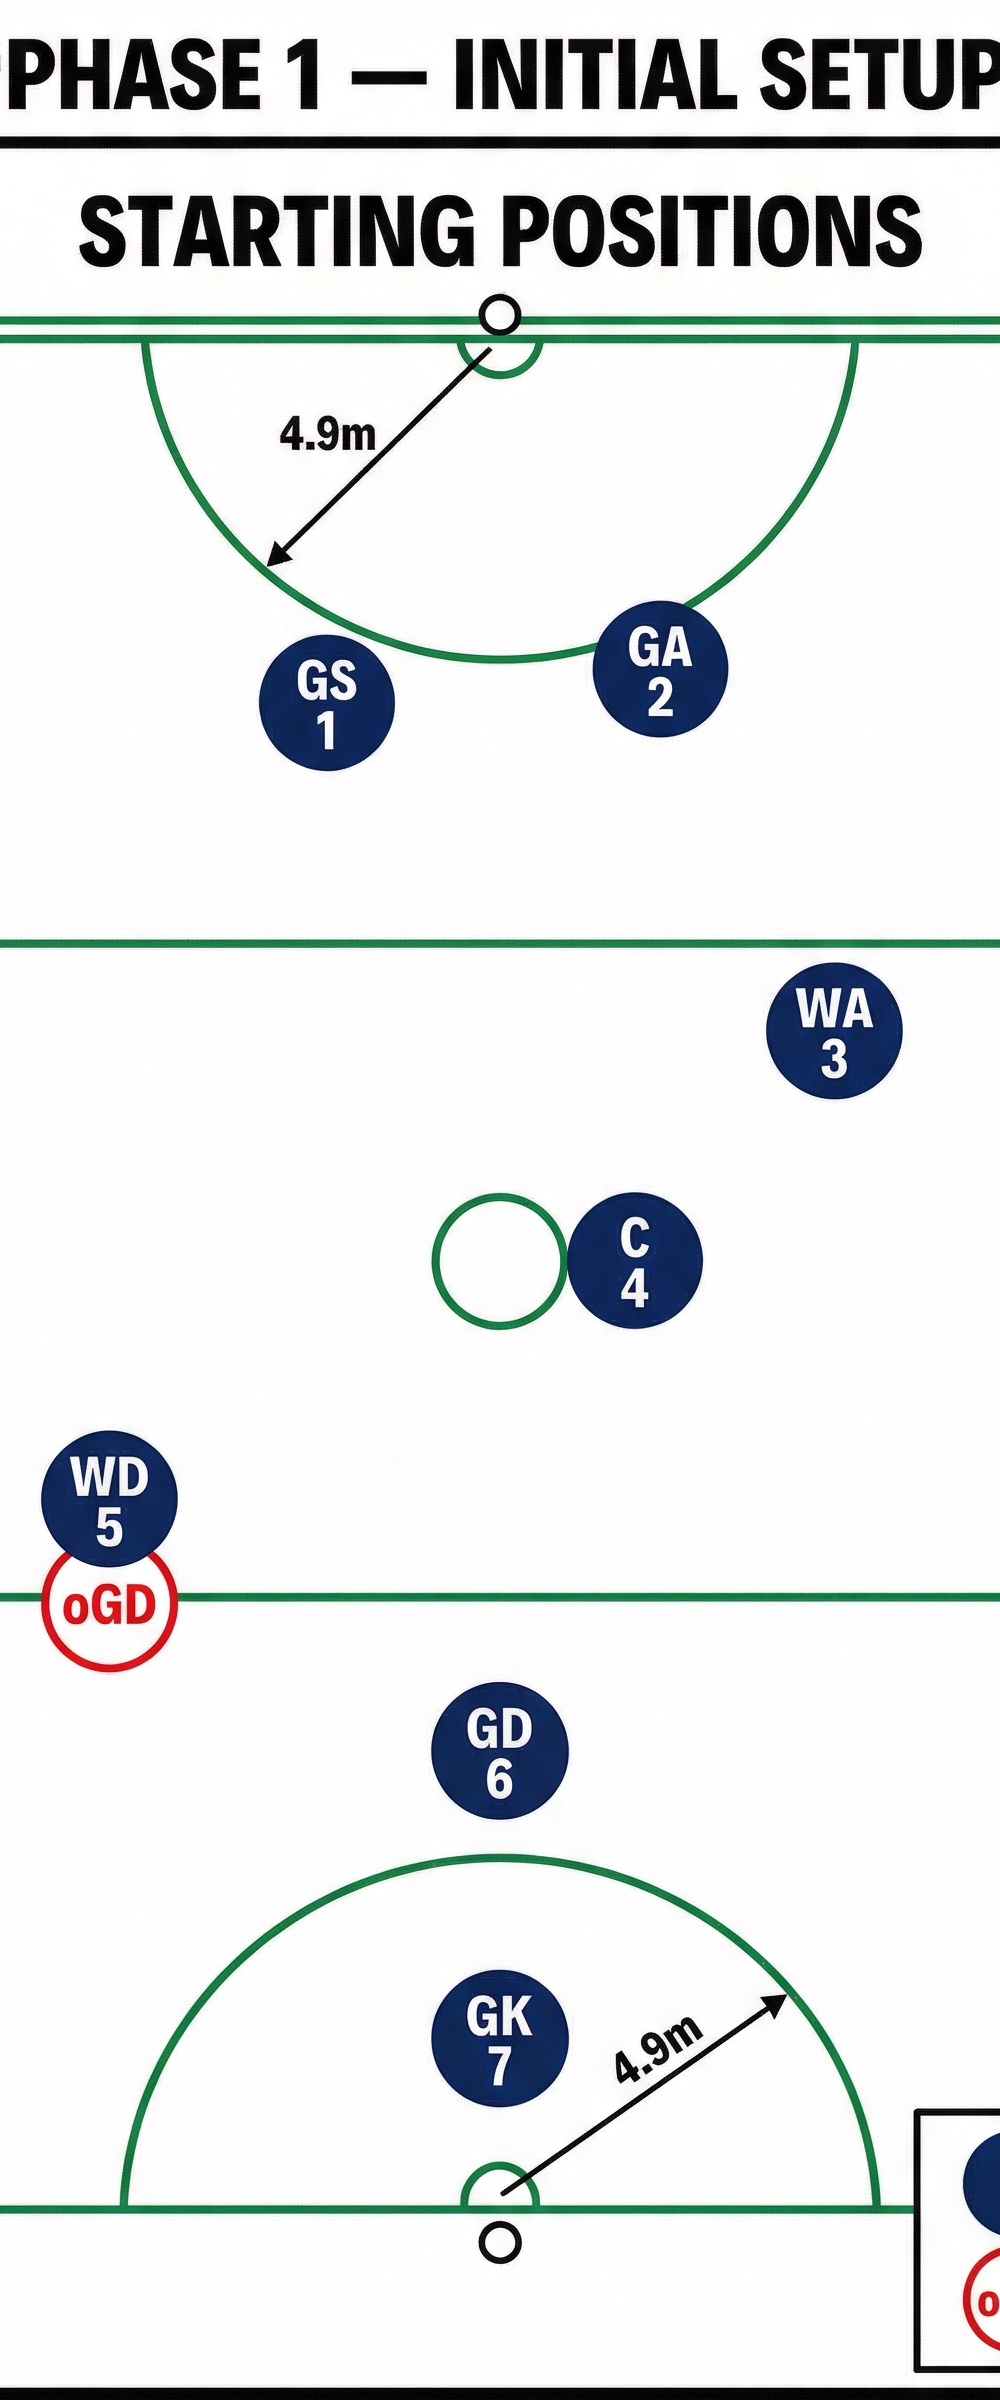
Court Setup & Player Positions:
Set up your players on a full court, focusing on the attacking two-thirds.
- GS (Goal Shooter): Positioned inside the attacking goal circle, initially holding space on the left side.
- GA (Goal Attack): Positioned at the top of the attacking goal circle on the right side.
- WA (Wing Attack): Positioned in the right channel of the centre third, ready to provide a central option.
- C (Centre): Positioned at or near the centre circle with the ball to initiate the play.
- WD (Wing Defence): Positioned in the left channel of the defensive third, just behind the transverse line.
- GD & GK: Positioned in the defensive third to provide realism and back-up options.
Step-by-Step Instructions

Follow these sequential steps to execute the WD to GA transition play effectively.
Phase 1: The Setup and Initiation
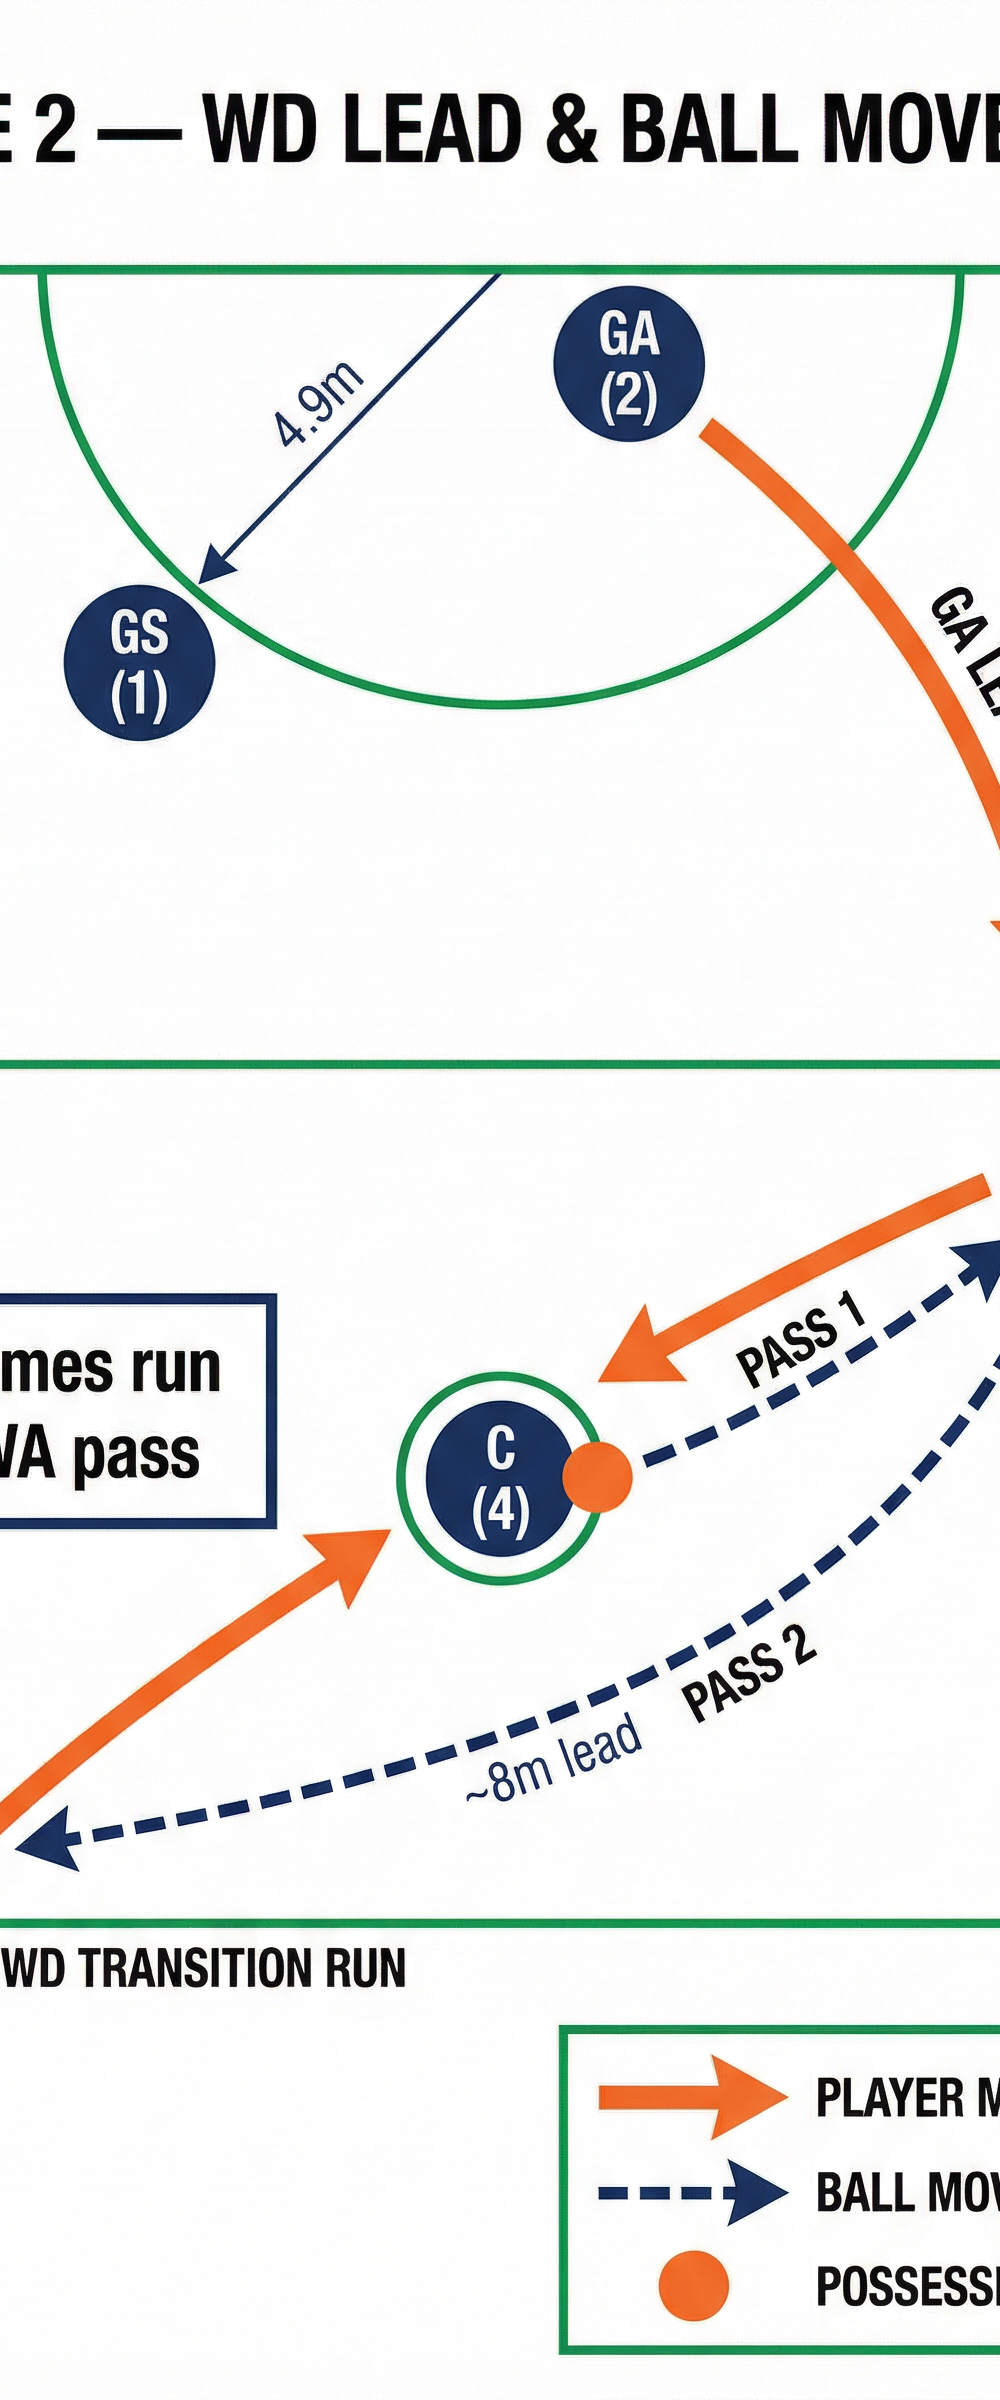
- Initiate Play: The Centre (C) holds the ball near the centre circle. The play begins with a sharp, decisive pass from the C to the Wing Attack (WA), who drives towards the middle of the court to receive the ball.
- The WD Lead: As the C releases the ball to the WA, the Wing Defence (WD) must time their run perfectly. The WD makes a powerful, angled drive across the transverse line into the left channel of the centre third. This lead should be approximately 8 metres, aggressively attacking the open space.
Phase 2: Ball Movement and GA Preparation
- The Second Pass: The WA receives the ball and immediately turns to face down the court. Spotting the driving WD, the WA delivers a crisp, flat pass into the space ahead of the WD.
- GA Preliminary Move: Simultaneously, as the WD receives the ball, the Goal Attack (GA) begins their preliminary movement. The GA pushes wide into the right attacking channel, drawing their defender away from the top of the circle and creating an isolation scenario.

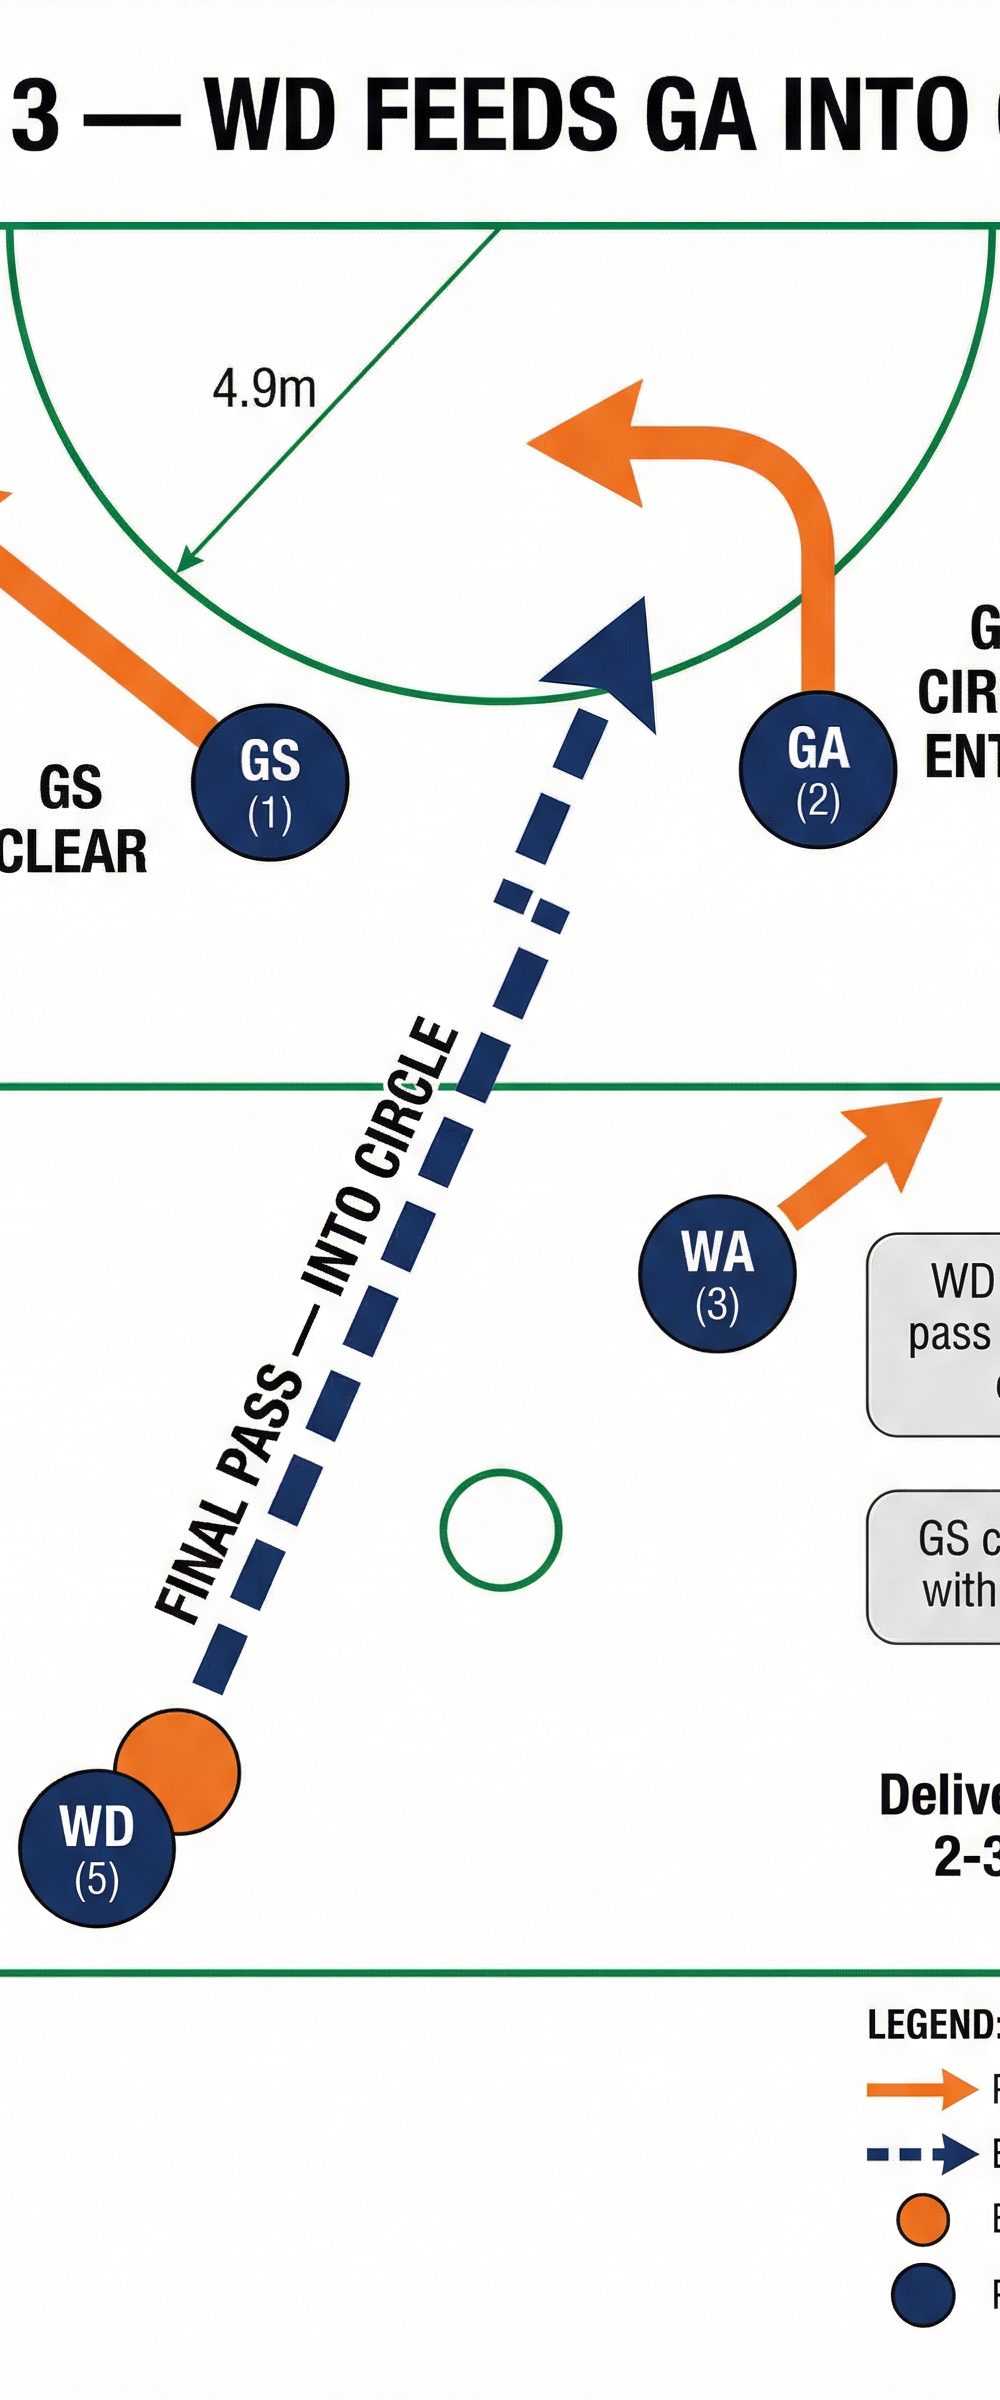
Phase 3: The Final Delivery
- Circle Entry: As the WD balances and looks into the goal third, the GA makes a sharp, hard cut back towards the top of the goal circle.
- Clearing Space: To ensure the GA has maximum space, the Goal Shooter (GS) makes a clearing run to the back or opposite side of the circle, taking the defending GK with them.
- The Feed: The WD delivers a strong, flat pass directly into the path of the cutting GA. The delivery window is tight (2-3 seconds), so the pass must be accurate and weighted perfectly for the GA to catch the ball cleanly on the circle edge or just inside.

Key Coaching Points
To ensure your team executes this play flawlessly, focus on these critical teaching elements:
- Timing is Everything: The WD must not cross the transverse line too early. They should initiate their sprint exactly as the C releases the ball to the WA.
- Angle of the Drive: The WD's drive must be angled towards the sideline and then straighten up, rather than running flat across the court. This creates a better passing angle for the WA and a better feeding angle into the circle.
- Vision and Execution: The WA must turn fully upon receiving the ball to spot the WD. The pass from WA to WD must be placed out in front, allowing the WD to run onto the ball without breaking stride.
- The GA's Change of Direction: The GA must sell the preliminary wide drive to commit their defender, before making a sharp, explosive cut back into the circle. A lazy change of direction will result in an interception.
- GS Awareness: The GS plays a crucial, albeit selfless, role. Their clearing run is mandatory to open up the top of the circle for the GA.
Common Mistakes

Watch out for these frequent errors during practice:
- WD Crowding the Centre Third: If the WD drives too central, they bring their defender into the same space as the WA and C, clogging the attacking channels.
- Hesitation on the Feed: The WD must release the ball to the GA within 2-3 seconds of catching it. Holding the ball allows the defence to recover and set up a zone over the circle edge.
- Lofted Passes: Passes from WA to WD, and particularly WD to GA, must be flat and hard. Lofted or loopy passes give the opposition GD or WD time to elevate and intercept.
Variations & Progressions
Keep your team challenged by introducing these variations:
- Progression 1: Add Full Defence. Once the attacking timing is correct, introduce a full defensive unit (WD, C, GD, GK) to apply pressure on every pass and force the attackers to work harder for their leads.
- Variation 1: The GS Option. If the defending GD completely shuts down the GA's cut, the WD should look over the top to the GS, who can hold space at the back of the circle after their initial clearing run.
- Variation 2: WD to WA Re-offer. If the WD receives the ball but the GA is covered, the WA can make a secondary drive to the circle edge to receive a short pass from the WD, resetting the attack.
Age Adaptations

Tailor this set play to suit the developmental stage of your players:
- Under 10s / Under 12s: Focus purely on the C to WA to WD passing sequence. Do not worry too much about the GA's complex preliminary moves; just encourage the GA to find open space to receive the final pass.
- Under 14s / Under 16s: Introduce the timing of the GA's cut and the GS's clearing run. Emphasise the speed and flatness of the passes.
- Open / Advanced: Execute the play at match speed with full defensive pressure. Focus on the WD's decision-making (whether to feed the GA, look for the GS, or reset) under high pressure.