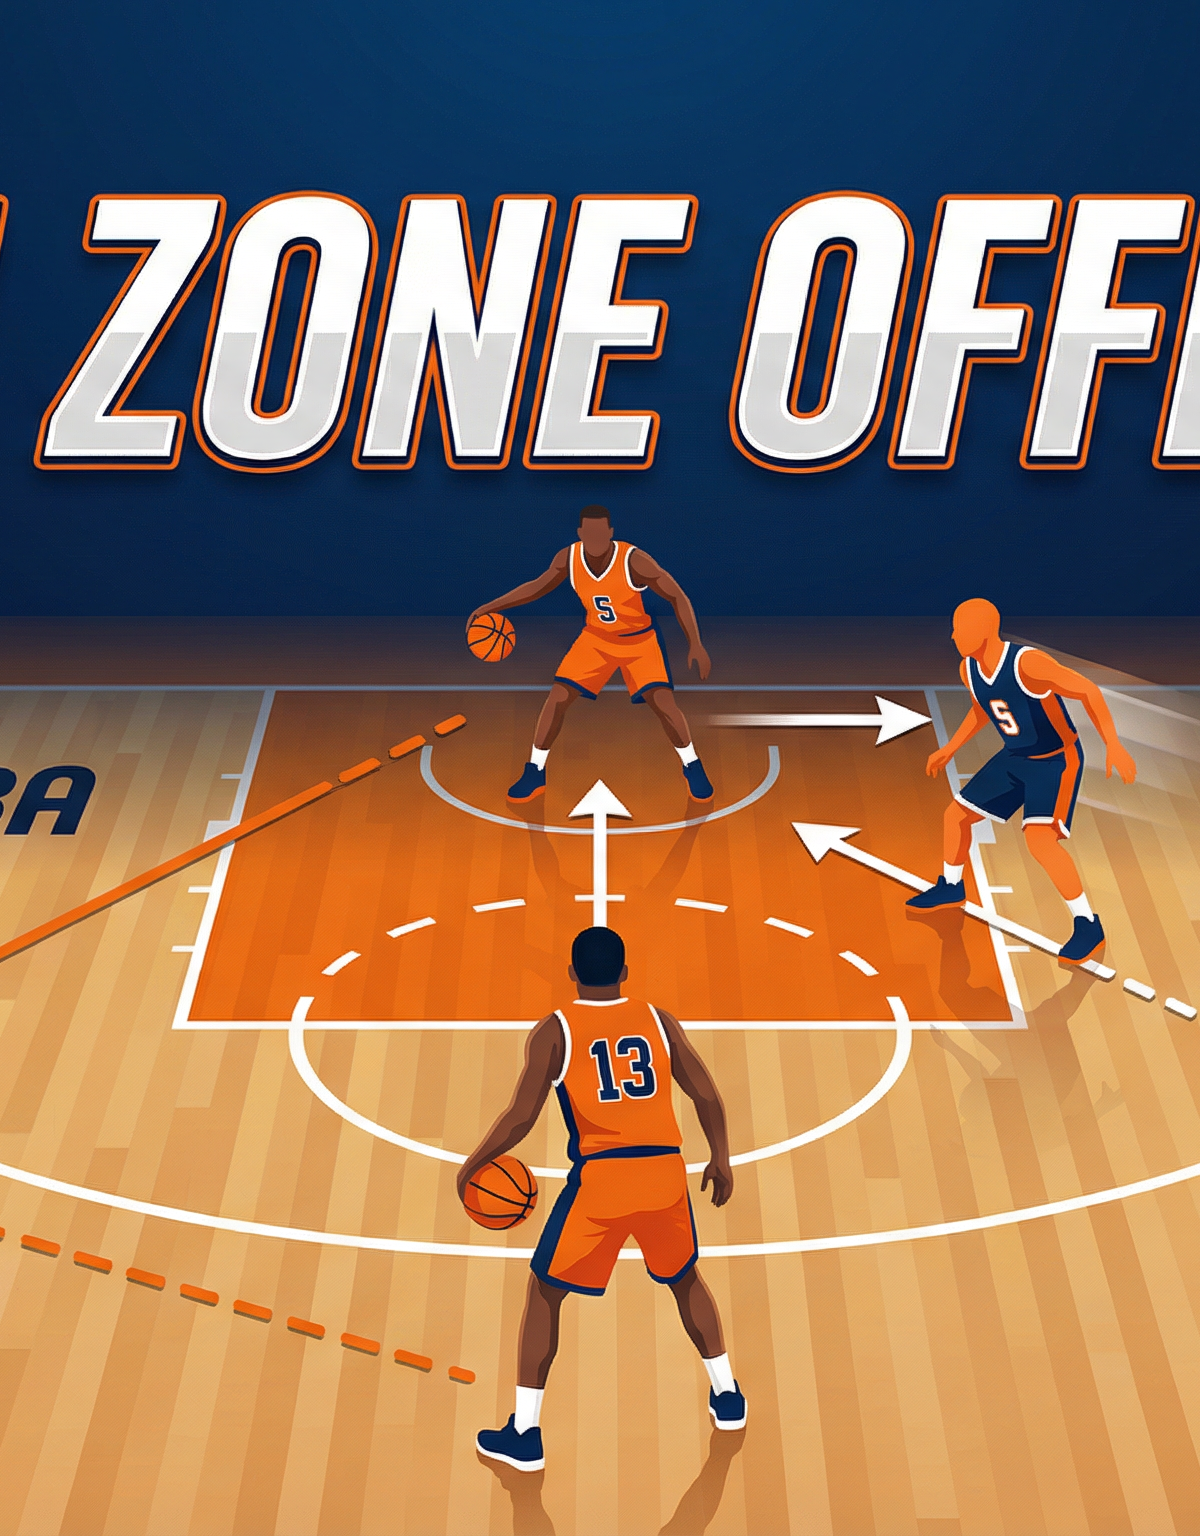
Mastering the 1-3-1 Zone Offense: High-Low Action and Reversal
Break down any zone defense with this structured 1-3-1 offense that uses rapid ball reversal and high-low post action to create wide-open scoring opportunities.
Equipment Needed
1. Overview
The 1-3-1 zone offense is a fundamental tactical alignment designed to dismantle traditional zone defenses, particularly the 2-3 and 1-2-2 zones. By placing a player at the high post (free-throw line) and another on the baseline, this offense forces the defense to collapse inward, creating perimeter shooting opportunities. Conversely, if the defense stretches to cover the wings, the high-low action becomes devastatingly effective. This specific play focuses on rapid ball reversal to shift the defense, followed by a high-low feed to a flashing big man for a high-percentage look at the rim.
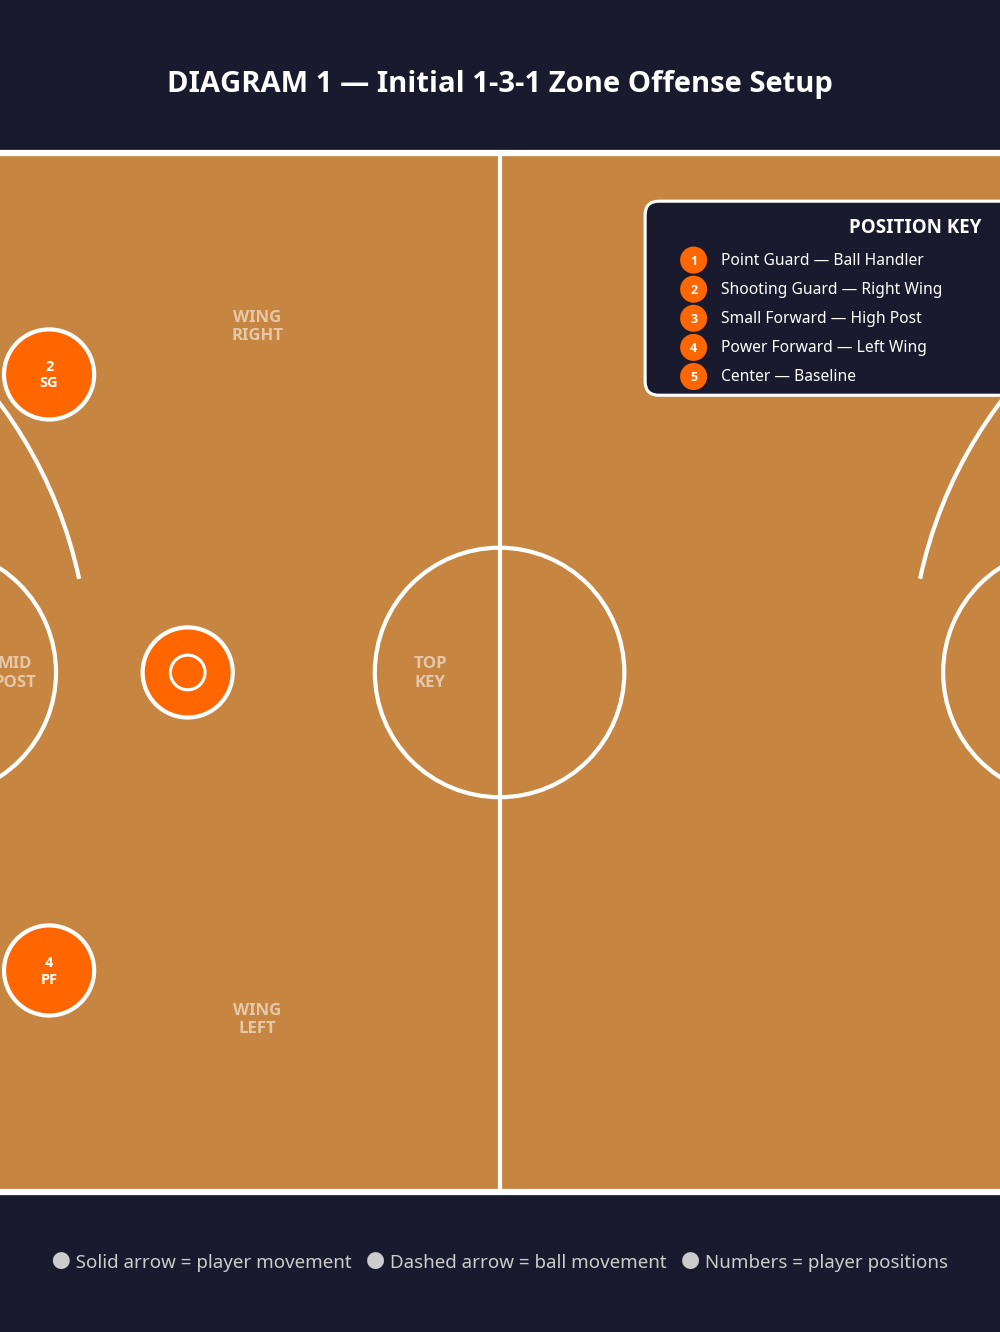
2. Setup
Court Setup: Full half-court (FIBA dimensions: 14m x 15m attacking area).
Equipment: 1 basketball, full court markings.
Player Positions:
- 1 (Point Guard): Top of the key, initiating the offense.
- 2 (Shooting Guard): Right wing, positioned near the three-point line.
- 3 (Small Forward): High post area (free-throw line).
- 4 (Power Forward): Left wing, positioned near the three-point line.
- 5 (Center): Baseline runner, starting on the right side short corner or block.
3. Step-by-Step Instructions
Phase 1: Ball Reversal and Corner Flash
- Entry Pass: The Point Guard (1) initiates the play by passing to the Shooting Guard (2) on the right wing. This forces the zone defense to shift heavily to the right side.
- High Post Reversal: The Shooting Guard (2) immediately looks to the high post and passes to the Small Forward (3). The high post is the most vulnerable area of any zone defense.
- Skip Pass: Upon receiving the ball, the Small Forward (3) pivots and throws a crisp skip pass to the Power Forward (4) on the opposite left wing.
- Baseline Flash: As the ball is in the air to the left wing, the Center (5) sprints along the baseline from the right side, flashing hard to the ball-side (left) low block.
- Spacing: The Point Guard (1) drifts slightly toward the right wing to maintain optimal floor spacing.
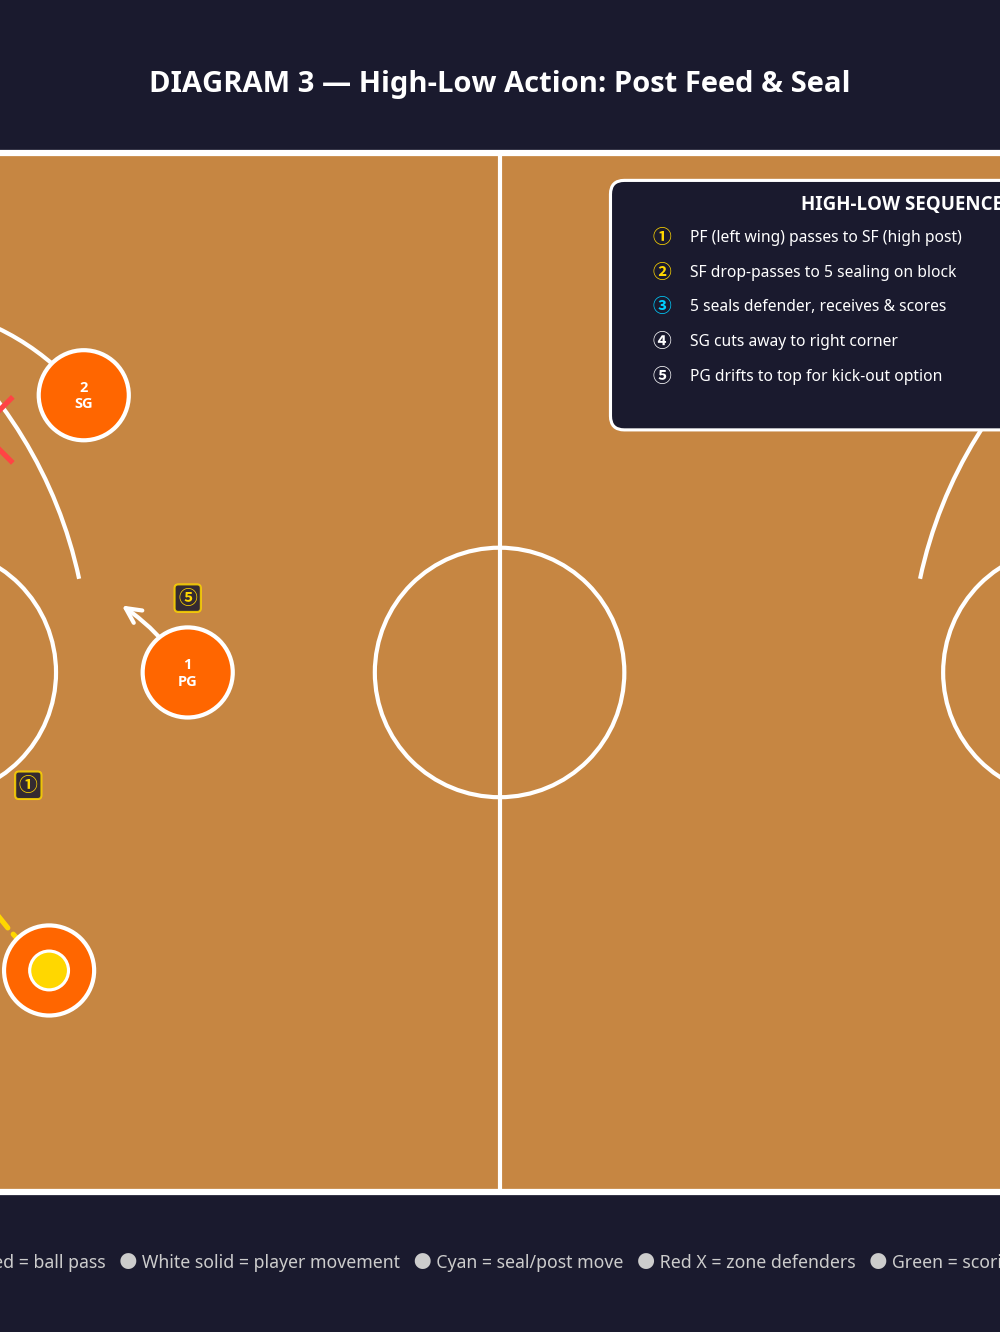
Phase 2: The High-Low Feed
- Re-entry to High Post: If the Power Forward (4) does not have an immediate open shot, they pass the ball back to the Small Forward (3), who has maintained position at the high post.
- The Seal: As the ball goes back to the high post, the Center (5) aggressively seals their defender on the low block, establishing a wide, strong target.
- The Feed: The Small Forward (3) executes a high-low drop pass or a lob over the defense to the Center (5).
- Finish: The Center (5) catches the ball deep in the paint and finishes strong at the rim.
- Safety Valve: If the post feed is denied, the Shooting Guard (2) cuts to the right corner, and the Point Guard (1) drifts to the top of the key for kick-out options.

4. Key Coaching Points
- Patience at the High Post: The player at the high post (3) must catch, face the basket, and survey the floor before making the next pass. Rushing this decision often leads to turnovers.
- Crisp Passing: Zone defenses thrive on slow, looping passes. Ensure all passes—especially skip passes—are thrown with velocity and accuracy to beat the defensive rotation.
- Aggressive Sealing: The baseline runner (5) must do their work before the ball arrives. They need to establish deep post position and hold off the defender with a wide stance.
- Shot Readiness: Perimeter players (2 and 4) must catch the ball shot-ready. If the defense sags to protect the high-low action, the wings must confidently take the open three-pointer.
5. Common Mistakes
- Stagnant Off-Ball Movement: Players standing still while the ball is reversed. The zone defense will easily recover if offensive players do not actively cut and flash to open areas.
- Ignoring the High Post: Skipping the high post and only passing around the perimeter. The ball must touch the high post to force the defense to collapse and create scoring angles.
- Poor Post Entry Angles: Forcing a pass into the post when the defender has fronted the offensive player. The high-low pass must be thrown away from the defender's leverage.
6. Variations & Progressions
- Dribble Penetration: Instead of passing to the high post, the wing player can use a pump fake and attack the gaps in the zone off the dribble, looking to score or kick out.
- Baseline Screen: Have the opposite wing set a back screen on the bottom zone defender to free up the baseline runner for an open corner three-pointer.
7. Age Adaptations
- Under 12: Focus heavily on the basic alignment and the concept of passing rather than dribbling against a zone. Simplify the play to just wing-to-wing reversals.
- Under 14: Introduce the high post flash and emphasize the importance of the high-low pass. Work on basic post-sealing techniques.
- Under 16 & Open: Execute the full play at game speed. Emphasize reading the defense, recognizing when to shoot versus when to pass, and exploiting defensive over-rotations.