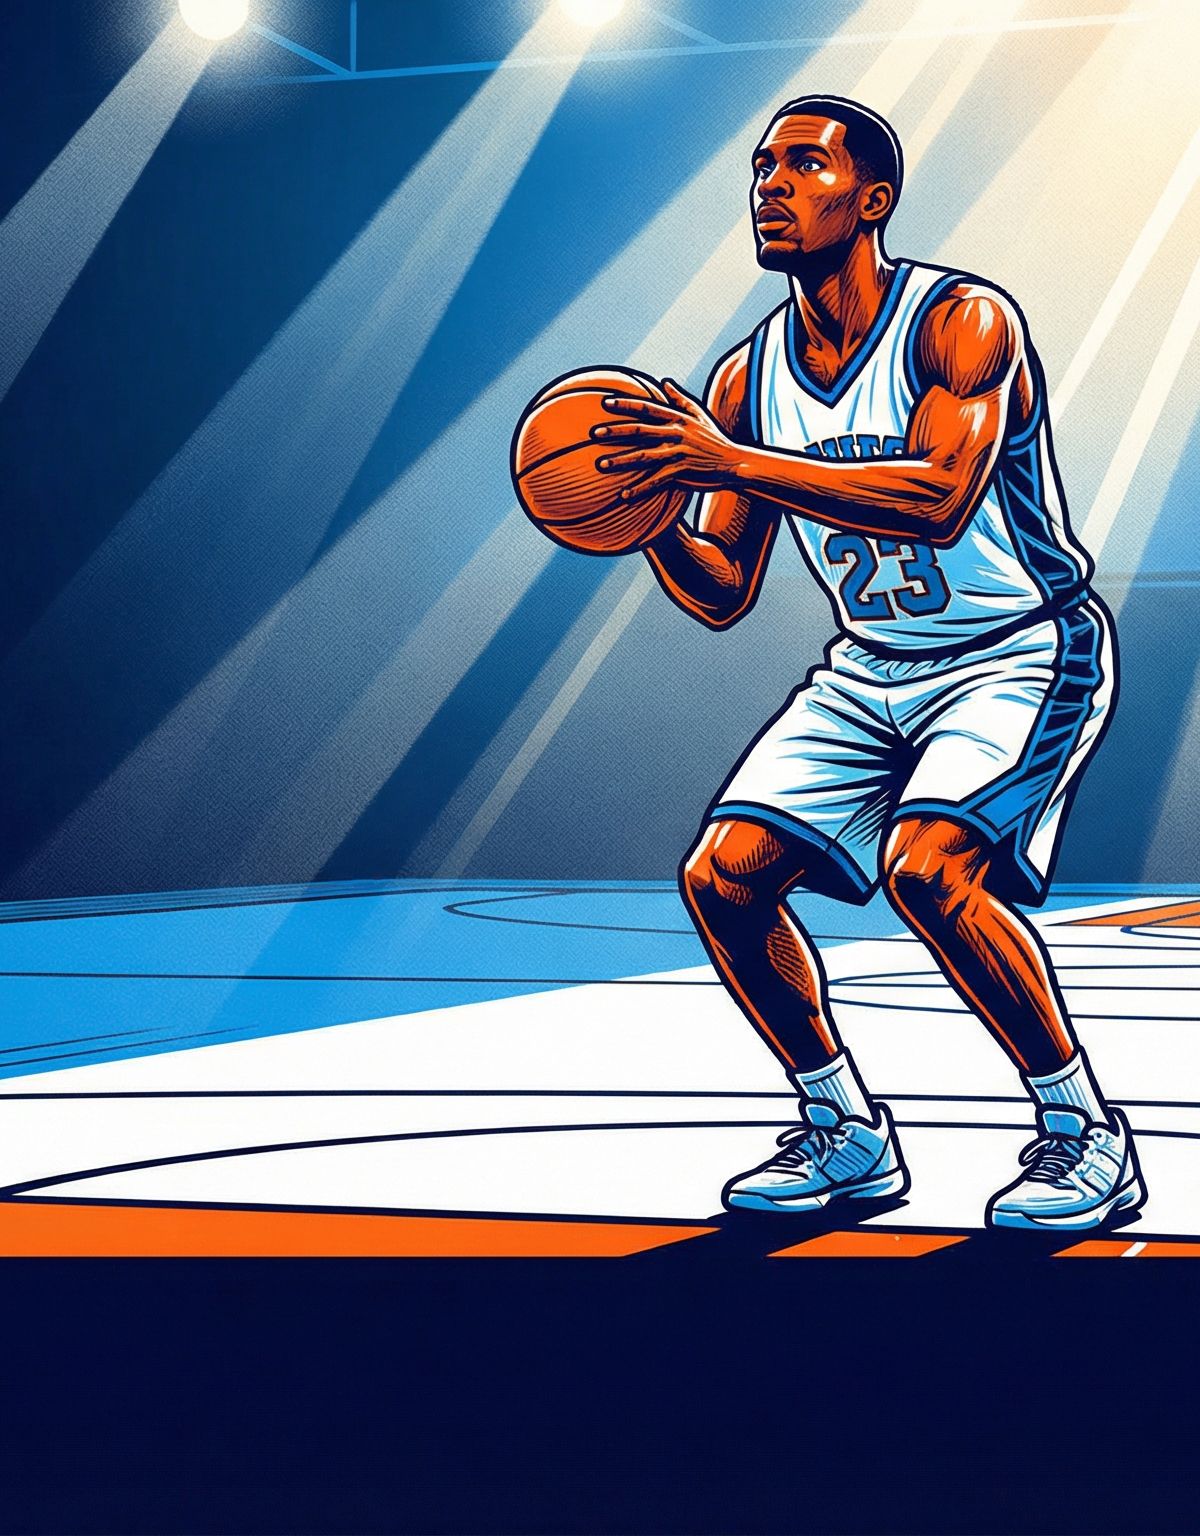
The Clutch Shooter: Building a Bulletproof Free Throw Routine
Develop unshakeable confidence at the line by mastering a consistent, repeatable free throw routine under pressure.
Equipment Needed
Overview
Free throws are often the deciding factor in close games, yet many teams treat them as an afterthought during practice. The "Clutch Shooter" free throw routine is designed to help players build a consistent, repeatable process at the charity stripe. By integrating game-like conditions, structured repetition, and physical conditioning, this drill ensures that your players can execute their mechanics flawlessly even when fatigue sets in. It emphasizes muscle memory, mental focus, and the critical transition phases immediately following the shot.
Setup
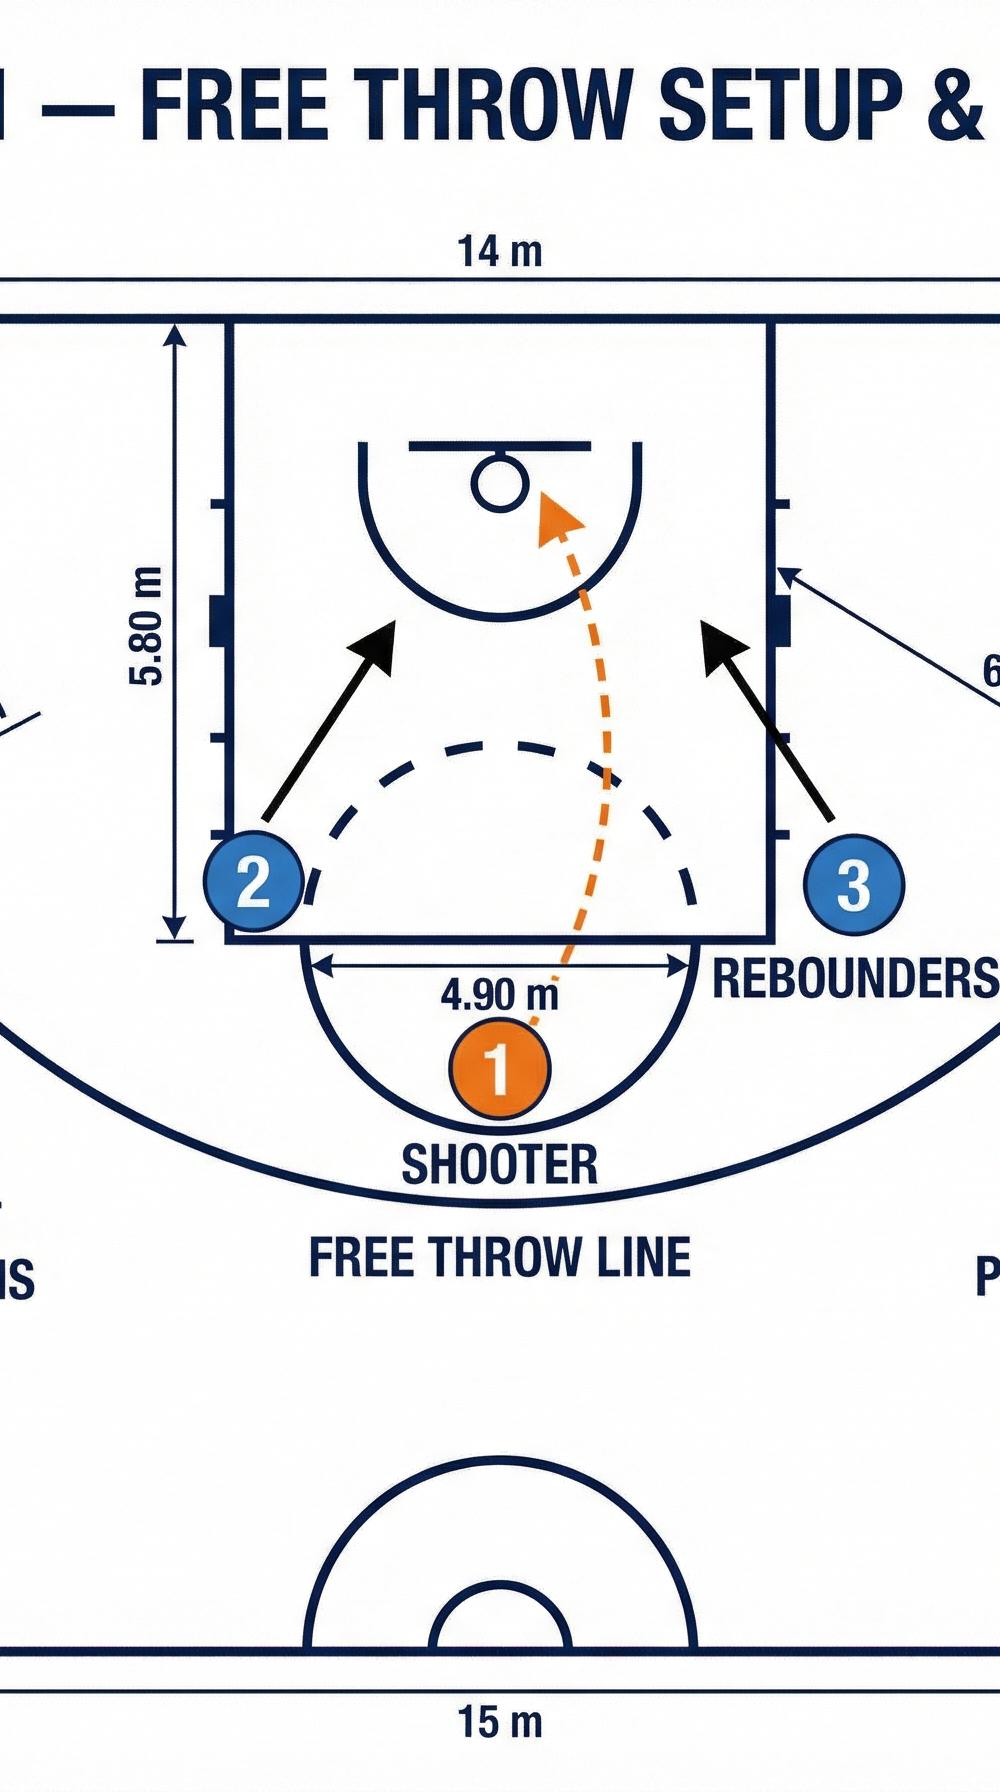
To run this drill effectively, you will need a standard FIBA basketball court (28m x 15m), at least one basketball per shooting group, and a designated coach or manager to monitor mechanics.

- Players Required: 5 players per basket.
- Positions: Player 1 is the designated shooter at the free throw line. Players 2 and 3 occupy the lowest lane spaces as primary rebounders. Players 4 and 5 start on the wings outside the three-point arc (6.75m) to act as outlet options and transition defenders.
Step-by-Step Instructions
- The Approach: Player 1 approaches the free throw line, taking a deep breath and finding the center nail (4.90m from the backboard).

- The Routine: Player 1 executes their personal pre-shot routine (e.g., three dribbles, spin the ball, deep breath). This routine must remain identical on every single attempt.
- The Shot: Player 1 shoots the free throw, holding the follow-through until the ball hits the rim or passes through the net.
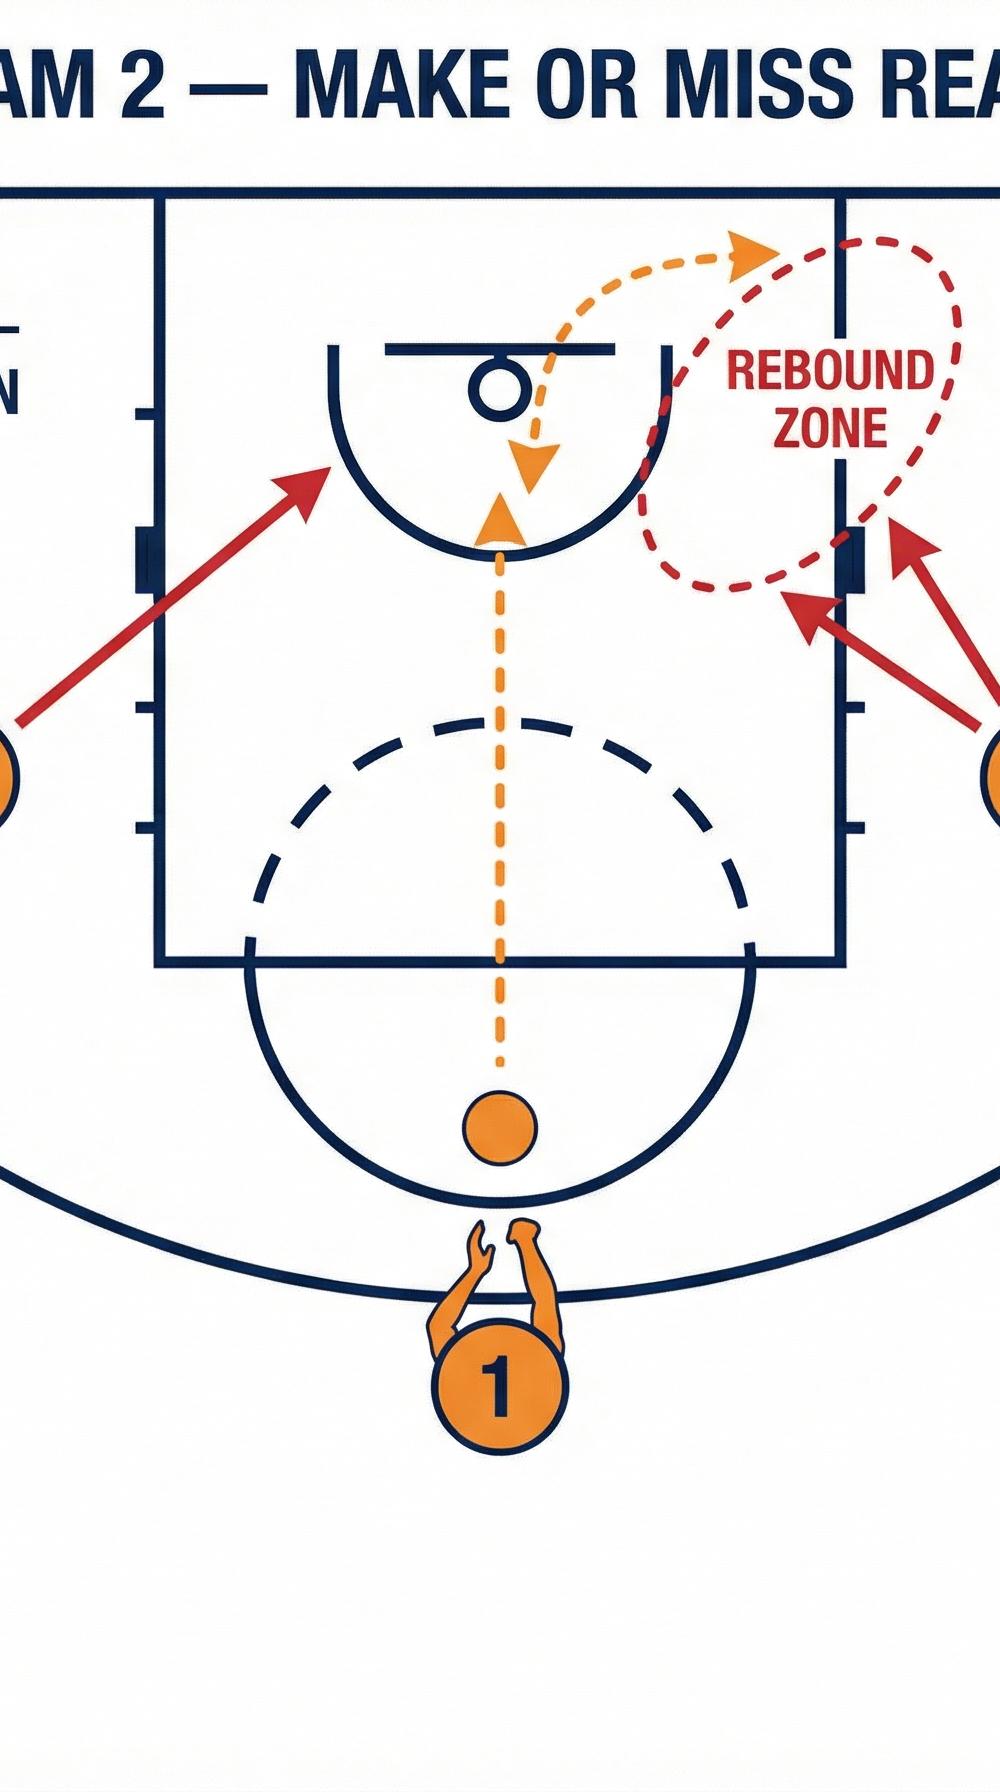
- The Make Reaction: If the shot is made, Players 2 and 3 immediately turn and sprint back on defense. Players 4 and 5 drop into the transition lanes.
- The Miss Reaction: If the shot is missed, Players 2 and 3 crash the boards to secure the rebound. Player 1 must hold their position, while Players 4 and 5 prepare for a defensive transition.
- Rotation: After two consecutive shots, players rotate positions clockwise. The drill continues until every player has completed three sets of two free throws.

Key Coaching Points
- Consistent Routine: Emphasize that the pre-shot routine must be identical every time. Whether it's the first quarter or the final seconds, the physical and mental preparation should not vary.

- Balance and Base: Ensure the shooter's feet are shoulder-width apart, with the shooting foot slightly forward. A strong, balanced base is non-negotiable.
- Follow-Through: Shooters must hold their "gooseneck" follow-through until the ball completes its flight. This reinforces proper release mechanics.
- Game-Like Rebounding: Rebounders must treat every shot as a live ball. Proper boxing out and aggressive rebounding on misses simulate real game scenarios.
Common Mistakes
- Rushing the Shot: Players often hurry their routine, especially when fatigued. Force them to pause and reset if they rush.
- Inconsistent Footwork: Stepping on or over the line, or failing to align properly with the basket.
- Lack of Focus on Rebounding: Lane players standing straight up instead of getting low and preparing for the box out.
Variations & Progressions
- Conditioning Element: Require the shooter to sprint to half-court and back before stepping to the line, simulating late-game fatigue.
- Pressure Free Throws: If the shooter misses both free throws, the entire group must run a baseline sprint.
- Swish Only: Only free throws that pass cleanly through the net without touching the rim count as a "make."
Age Adaptations
- Under 10s: Move the free throw line closer (e.g., 4 meters) and focus entirely on basic mechanics and building a simple, fun routine.
- Under 14s: Introduce the rebounding and transition elements, ensuring players understand their roles upon a make or miss.
- Open / Advanced: Incorporate heavy conditioning and high-pressure consequences for misses to simulate elite game environments.