Mastering the Defensive Closeout and Recovery
Teach your players how to execute high-intensity closeouts, contain the dribble drive, and recover effectively in help-defense scenarios.
Equipment Needed
1. Overview
Closing out under control is one of the most critical defensive fundamentals in modern basketball. The Defensive Closeout and Recovery Drill is designed to teach players how to sprint from a help-side position, close out on an offensive player catching the ball on the perimeter, and immediately transition into on-ball defense to contain the drive or contest the shot.
This drill bridges the gap between individual fundamental technique and live-game defensive rotations. By forcing the defender to read the offensive player's intention upon the catch, it builds the crucial habit of arriving with high hands and choppy steps, while remaining balanced enough to slide and cut off the baseline or middle drive.
2. Setup
- Court Dimensions: Standard FIBA half-court (14m x 15m active area).
- Players: Minimum of 4 players per group (3 Offensive, 1 Defensive).
- Equipment: 1 Basketball per group, optional cones to mark starting spots.
- Positions:
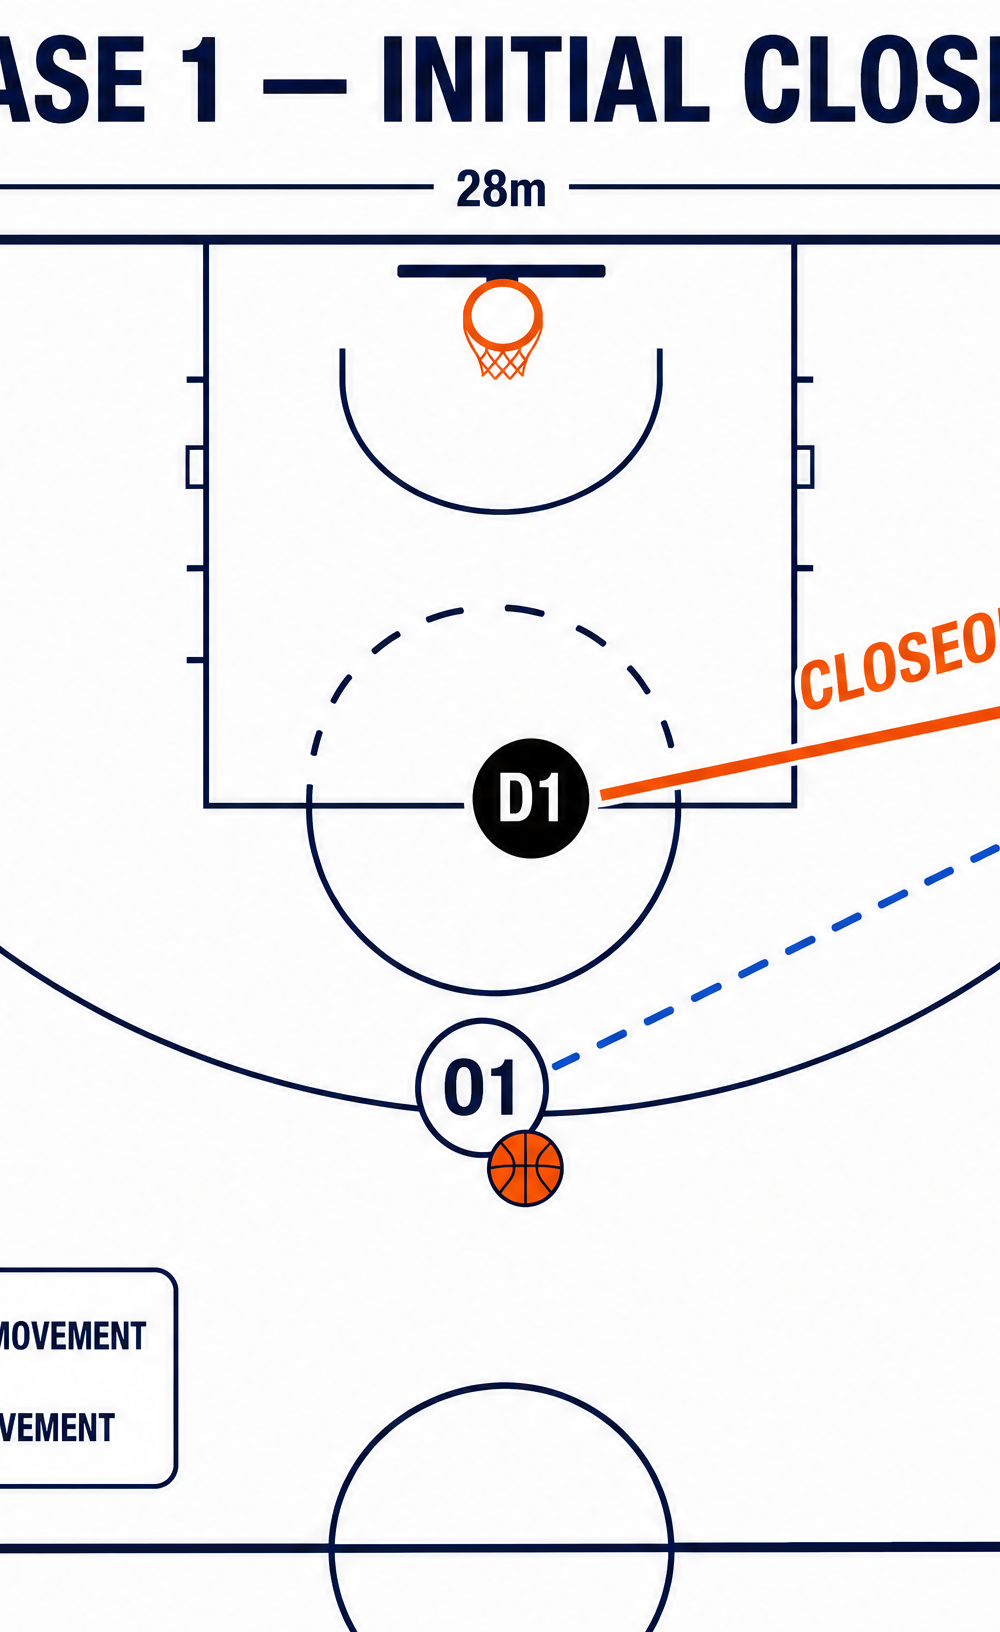
- O1 (Point Guard): Starts at the top of the key with the basketball.
- O2 (Wing): Starts wide on the right wing, just outside the three-point arc.
- O3 (Wing): Starts wide on the left wing, just outside the three-point arc.
- D1 (Defender): Starts in the paint, near the split line/basket area, simulating a deep help position.
3. Step-by-Step Instructions
- The Starting Position: D1 begins in a low, athletic stance in the paint, pointing pistols (one hand pointing to the ball at O1, one hand pointing to their man at O2).
- The Trigger: O1 initiates the drill by making a crisp chest or push pass to O2 on the wing.
- The Sprint: As the ball leaves O1's hands, D1 must immediately sprint out of the paint toward O2. The first two steps must be explosive.
- The Breakdown: As D1 approaches within 1.5 to 2 meters of O2, D1 must break down their sprint into short, choppy steps (stutter steps) to decelerate and establish balance.
- The Closeout Posture: D1 arrives with one hand high (to contest a potential shot) and the other hand low (to trace the ball and deter a crossover), keeping their weight back and hips dropped.
- The Live Read: Once D1 arrives, O2 becomes live. O2 is allowed a maximum of 2-3 dribbles to attack the baseline or middle, or they can shoot.
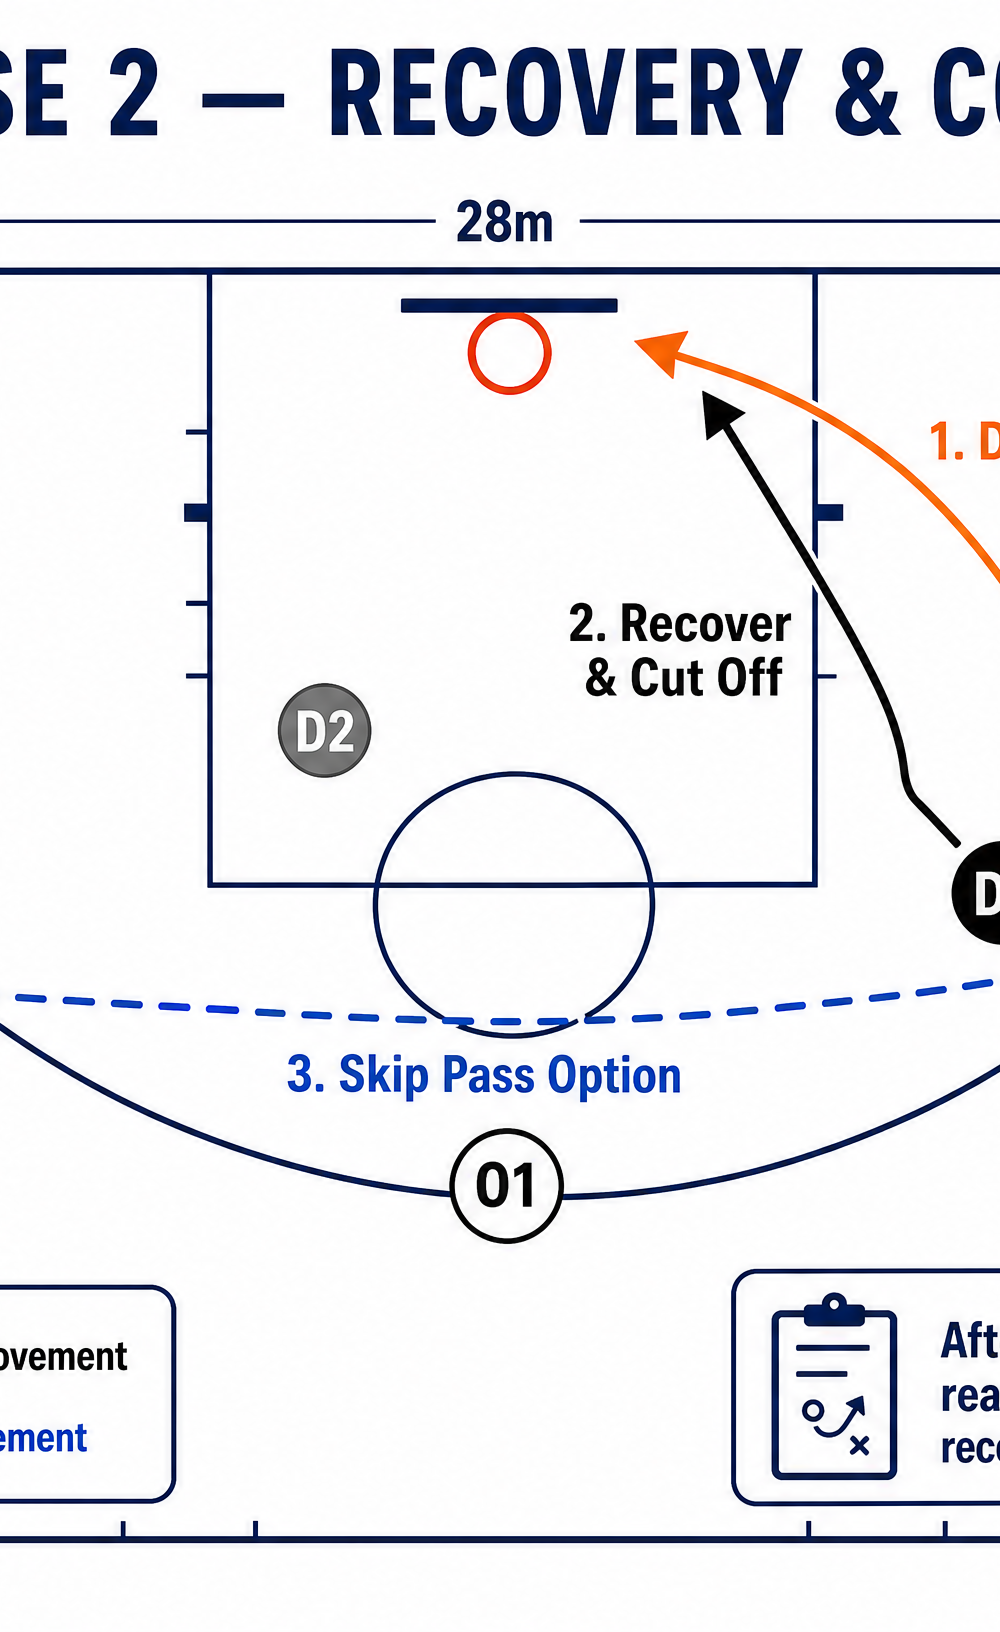
- The Recovery: D1 must react to O2's decision, sliding laterally to cut off the drive and force a contested pickup or pass.
4. Key Coaching Points
- Sprint to the Breakdown: Do not jog. The closeout requires an all-out sprint for the first 60% of the distance, followed by a rapid deceleration for the final 40%.
- High Hands on Arrival: The defender must arrive with at least one hand high to take away the rhythm catch-and-shoot. "Hand down, man down."
- Choppy Steps: Emphasize the sound of squeaking shoes. Short, rapid steps lower the center of gravity and prevent the defender's momentum from carrying them past the offensive player.
- Weight Distribution: Players should keep their weight on the balls of their feet, not their heels, with their chest up and hips dropped. If they lunge forward, they will get beat off the dribble.
- Take Away the Middle: Dictate the closeout angle to force the offensive player toward the baseline/help defense, denying middle penetration.
5. Common Mistakes
- Flying By: Sprinting the entire distance without breaking down, allowing the offensive player to easily pump-fake and drive past the out-of-control defender.
- Closing Out with Low Hands: Arriving in a good stance but failing to raise a hand, giving the shooter a clean look at the basket.
- Hopping into the Closeout: Taking a large jump or hop at the end of the closeout rather than choppy steps. A hop leaves the defender airborne and unable to react to a quick first step.
- Poor Angle: Taking a straight-line angle that allows the offensive player a straight-line drive to the middle of the floor.
6. Variations & Progressions
- Add a Passer/Relay: Have O1 pass to O3, who skips it to O2, forcing D1 to adjust their help position before the long closeout.
- Closeout to 1-on-1 Live: Allow O2 to play fully live 1-on-1 against D1 until a score, defensive stop, or foul occurs.
- Two-Man Closeout (Shell Drill Intro): Add D2 on O3. When O2 drives, D2 must rotate to help, and D1 must recover to the pass out (Skip Pass Option in Diagram 2).
7. Age Adaptations
- Under 10s: Focus purely on the footwork. Remove the ball initially. Have players sprint to a cone and practice the "choppy steps" and "high hand" breakdown.
- Under 12s/14s: Introduce the pass and closeout, but restrict the offensive player to a catch-and-shoot or a simple one-dribble pull-up. Focus on arriving on balance.
- Under 16s/Open: Run the drill at full game speed with live reads. Offensive players should utilize pump fakes, jab steps, and aggressive straight-line drives to challenge the defender's discipline.

