Mastering the Goal Kick Build-Up: A Phase-by-Phase Guide
Learn how to systematically build from the back on goal kicks, creating numerical advantages and progressing through the thirds.

Equipment Needed
1. Overview
Building from the back starting with a goal kick is a foundational element of modern football. The objective is not simply to retain possession, but to draw the opponent's press, create numerical advantages (overloads), and progress the ball cleanly into the midfield and attacking thirds. This set play resource breaks down the goal kick build-up into three distinct phases, offering solutions for short distribution, midfield progression, and exploiting high-pressing teams with a direct option.
By mastering these patterns, your team will develop the confidence to play through pressure and dictate the tempo of the game right from the restart.
2. Setup
- Pitch Dimensions: Full pitch (ideally 100-110m x 64-75m) to ensure realistic spacing and passing distances.
- Equipment Needed: 1 full-size goal, minimum 10 footballs (kept in or near the goal for quick restarts), bibs for two teams (e.g., Blue for attacking, Red for defending/pressing), and flat markers to outline specific zones if needed.
- Player Positions (Attacking Team - 1-4-2-3-1 or 1-4-3-3):
- GK (1): Starting with the ball inside the 6-yard box.
- CB1 (5) & CB2 (6): Split wide, positioned at the edges of the penalty area.
- LB (3) & RB (2): Pushed high and wide, hugging the touchlines near the halfway line.
- CDM (4): Positioned centrally, just outside the penalty arc, ready to drop in or pivot.
- CM (8) & CAM (10): Positioned in the middle third, ready to exploit half-spaces.
- ST (9): High up the pitch, ready to stretch the defensive line.
3. Step-by-Step Instructions

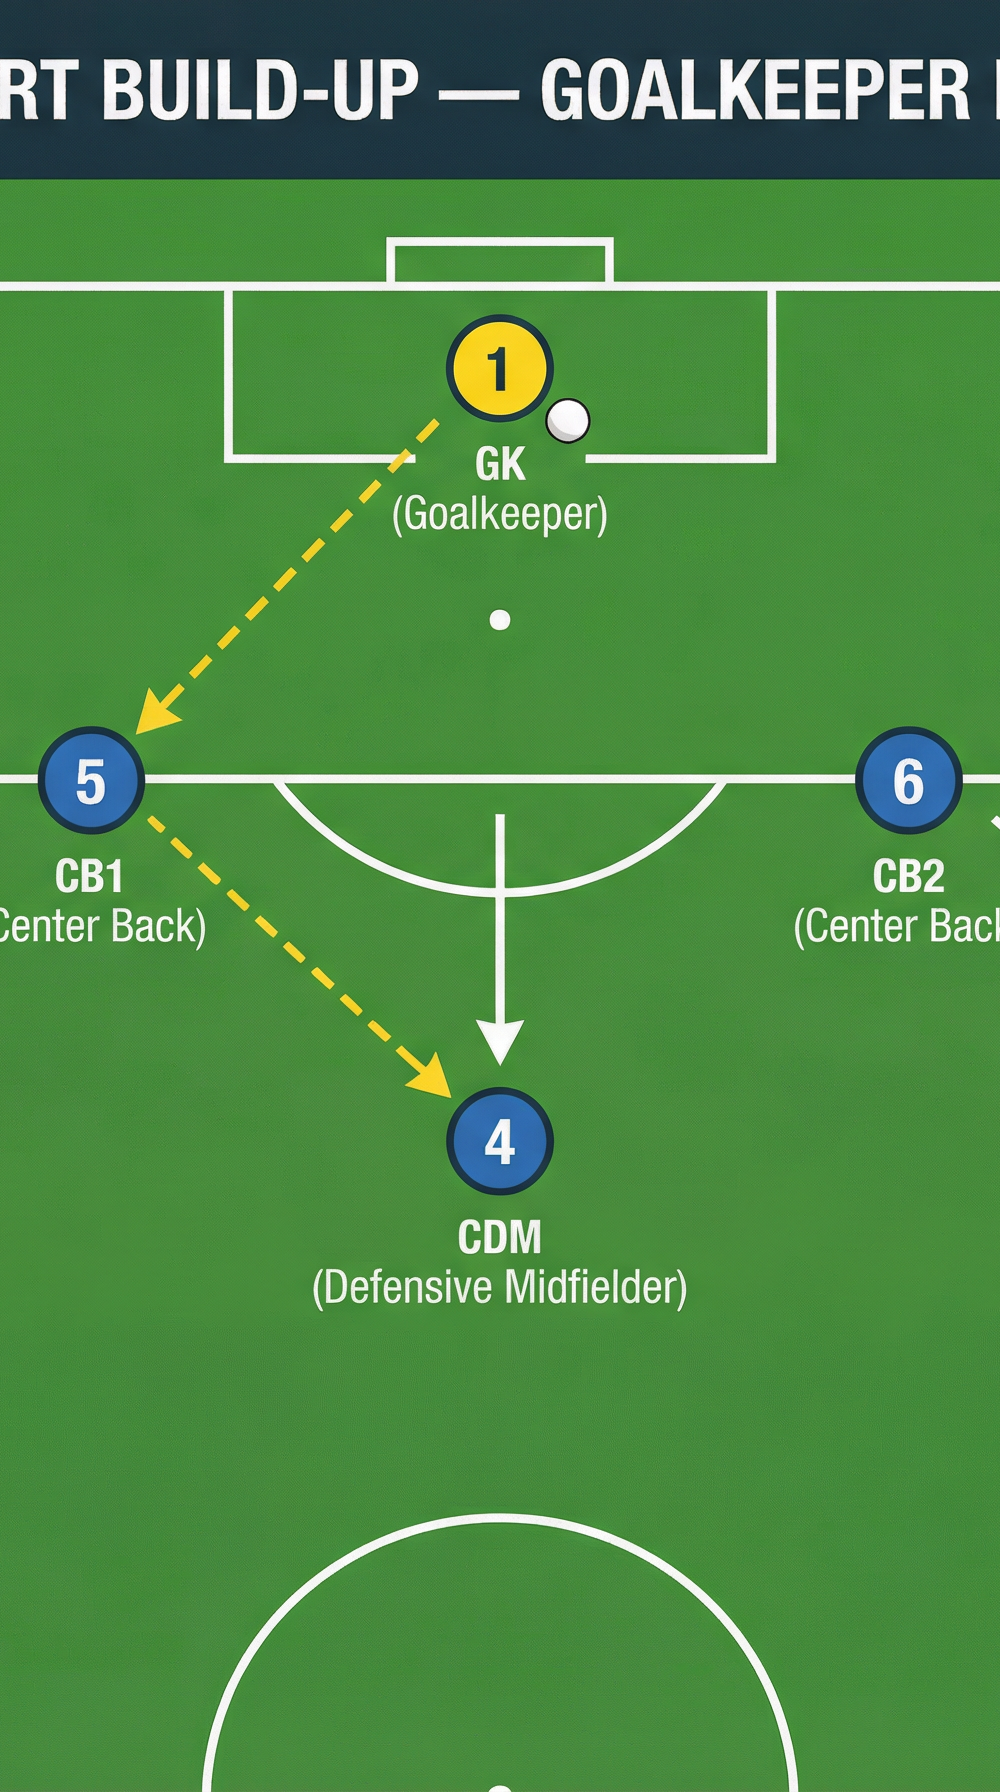
Phase 1: Short Build-Up (Goalkeeper Distribution)

- Starting Position: The GK places the ball centrally or slightly offset within the goal area. CB1 and CB2 split wide to the edges of the 16.5m penalty area. The CDM positions themselves centrally outside the penalty arc.
- The Trigger: As the GK steps to the ball, CB1 and CB2 must open their body shape to the field. The CDM makes a slight checking run to create separation from their marker.
- Execution: The GK plays a firm, flat pass to CB1 (or CB2). The receiving CB must take their first touch forward, inviting pressure from the opponent's first line of defense.
- The Next Action: As the opponent presses the CB, the CDM drops slightly to offer a passing angle. The CB plays a crisp pass to the CDM, breaking the first line of pressure.
Phase 2: Wide Overload and Midfield Progression
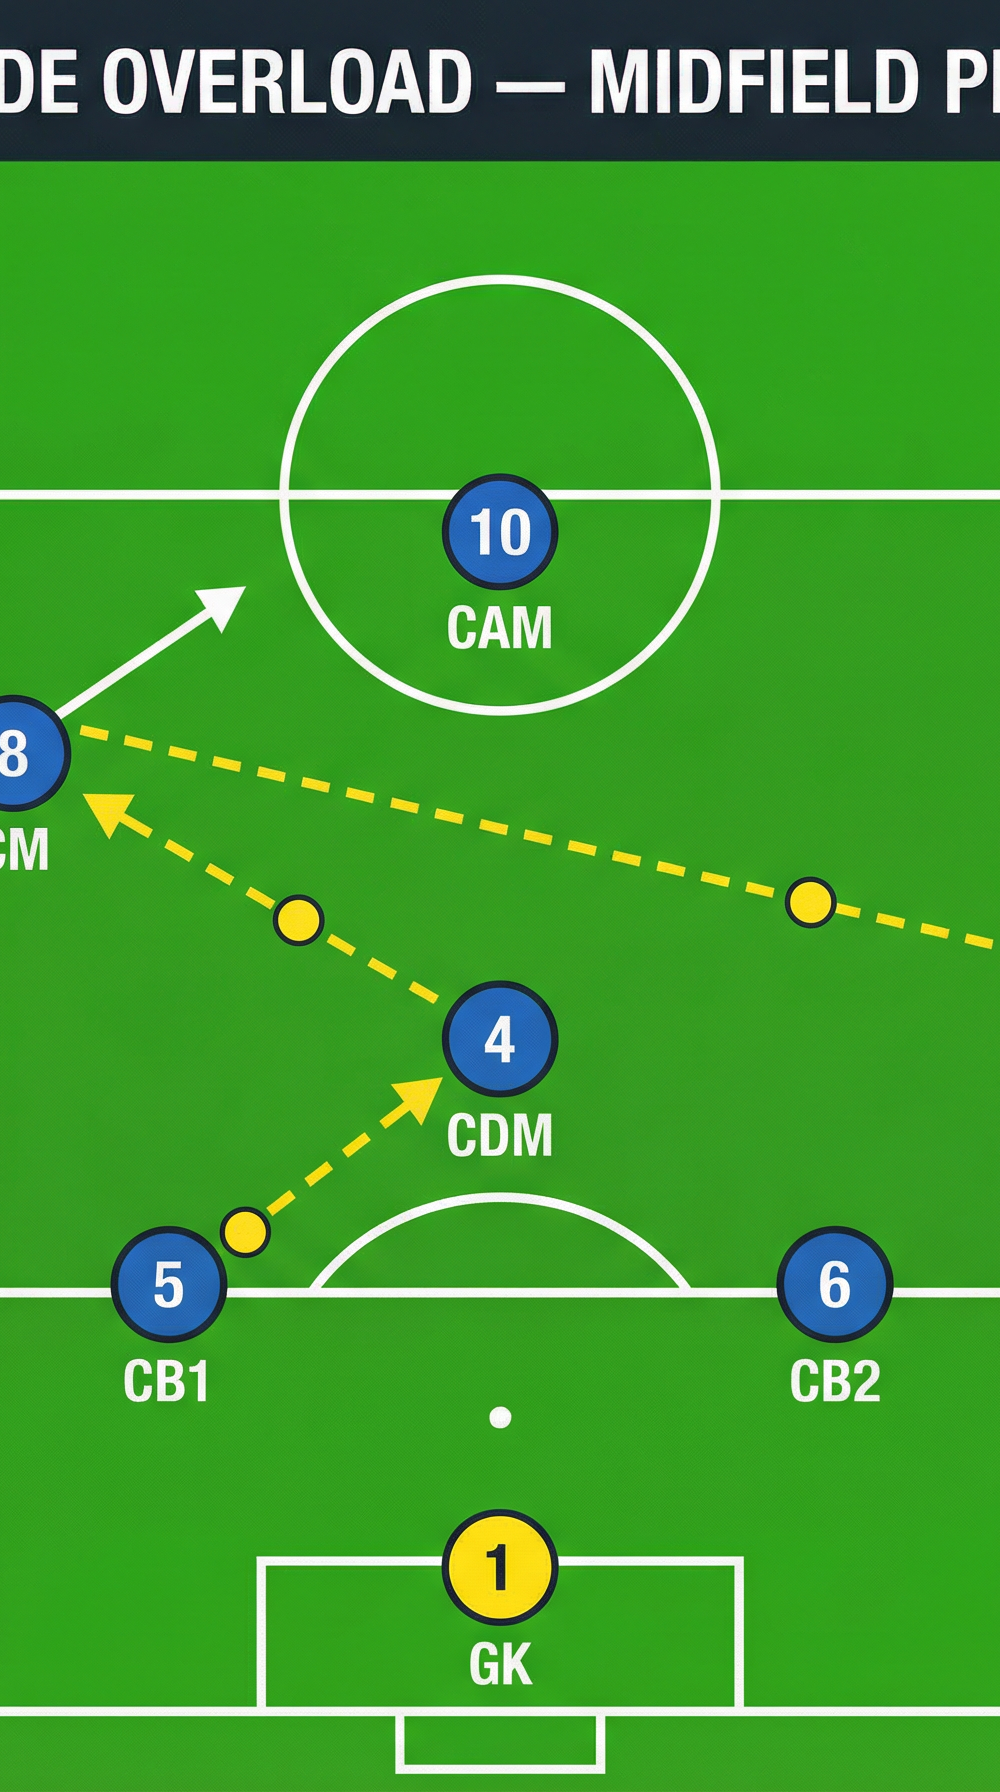
- Creating the Overload: Once the CDM receives the ball, they look to switch the point of attack or progress vertically. In this phase, we target the left flank.
- Player Movement: The CM (8) makes a sharp diagonal run into the left half-space, dragging a defender or finding a pocket of space. Simultaneously, the LB (3) pushes even higher down the touchline.
- Execution: The CDM plays a forward pass to the checking CM (8).
- Progression: The CM now has options: they can play a quick combination with the advancing LB in the 'Overload Zone', or, if the opponent shifts heavily to the left, the CM can switch the play with a longer diagonal pass to the RB (2) who is in acres of space on the opposite flank.
Phase 3: Press Trigger and Long Ball Option

- Recognizing the Press: Sometimes the opponent will commit to a high, aggressive man-to-man press, leaving spaces in behind their defensive line.
- The Trap: The GK and CBs maintain their short build-up shape to bait the press. As the red forwards and midfielders jump to press CB1, CB2, and the CDM, the space behind them opens up.
- The Trigger: The ST (9) recognizes the high line and makes a diagonal run into the 'Target Zone' behind the opponent's defense, usually in the channel between the opposition CB and FB.
- Execution: Instead of playing short, the GK bypasses the press entirely by driving a long, accurate diagonal ball directly into the path of the ST's run.
4. Key Coaching Points

- Body Shape and First Touch: Players must receive the ball on the half-turn (back foot) so they can see the incoming pressure and their next passing option simultaneously.
- Pass Quality: Passes must be firm and to the correct foot (usually the back foot) to dictate the speed of play. Bouncing or slow passes invite unnecessary pressure.
- Scanning: The CDM and CMs must constantly scan their shoulders before receiving the ball to know where the space and pressure are.
- Patience vs. Penetration: Teach players to be patient in possession to draw the press, but ruthless in playing forward once the passing lane opens up.
- GK as an Outfield Player: The Goalkeeper must be comfortable on the ball, acting as an extra center-back to create a numerical advantage (e.g., 3v2 or 4v3) in the first phase.
5. Common Mistakes

- Static Movement: Players standing still waiting for the ball rather than making dynamic checking runs to create passing angles.
- Panic Under Pressure: Forcing passes into heavily marked areas instead of using the GK to recycle possession and switch play.
- Fullbacks Dropping Too Deep: If the LB and RB drop too deep, they compress the space, making it easier for the opponent to press. They must stay high and wide to stretch the pitch.
- Predictability: Always playing the same short pass to the same CB. The GK must mix up their distribution (short, medium, long) to keep the opposition guessing.
6. Variations & Progressions

- Progression 1 (Adding Pressure): Start the drill unopposed to build confidence with the passing patterns. Then, introduce a front three (opponents) who press passively, and finally progress to live, aggressive pressing.
- Variation 1 (The Double Pivot): Instead of a single CDM, drop both the CM and CDM deep to form a double pivot, creating a 4v2 or 4v3 overload centrally to help bypass a two-striker press.
- Variation 2 (The False Fullback): Instruct one of the fullbacks (LB or RB) to invert into the central midfield area during the build-up, confusing the opponent's marking scheme and opening the wide channel for a winger.
7. Age Adaptations

- Under 8 - Under 10: Focus purely on the GK's ability to pass the ball accurately to a teammate in space. Do not worry about complex midfield rotations. Encourage players to spread out and use the whole pitch.
- Under 12 - Under 14: Introduce the concept of the CDM dropping in to receive and the importance of body shape. Begin practicing the long ball option as their physical strength increases.
- Under 16 - Open: Full implementation of all phases. High tactical demand on recognizing pressing triggers, exploiting half-spaces, and executing rapid transitions.