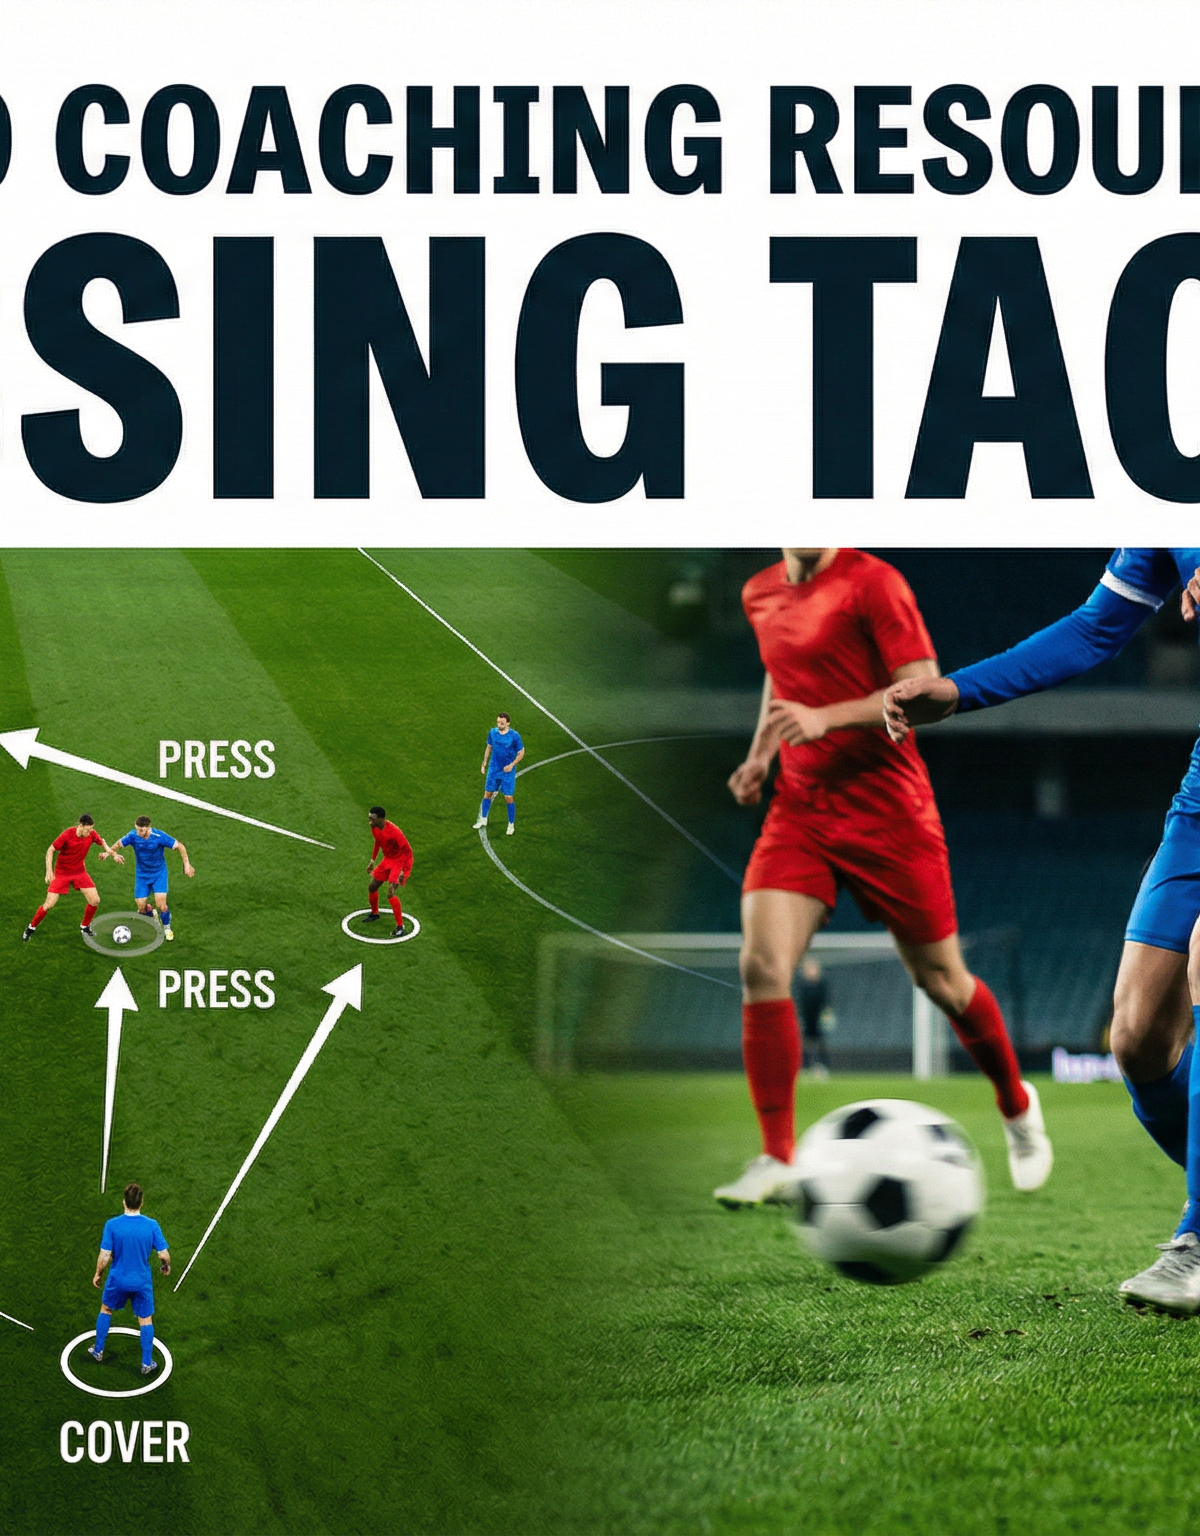
Pressing Trigger & Recovery Drill: Coordinated High Press with Defensive Reset
Teach your team to recognise and explode onto pressing triggers in unison, then recover instantly into a compact defensive block when the press is beaten.
Equipment Needed
Overview
This drill trains two of the most demanding and interconnected defensive skills in the modern game: identifying and reacting to a pressing trigger, and recovering collectively when that press is bypassed. Pressing without a shared trigger is chaotic and costly — players gamble individually, lines break apart, and the team is exposed in transition. This session builds the cognitive and physical habits that turn a group of willing pressers into a coordinated defensive unit.
Use this drill in the defensive organisation phase of your weekly training cycle, ideally two to three days before a match. It is equally effective as a standalone 45-minute session or as the tactical block within a longer double session. The drill is most impactful for teams playing a 4-4-2 or 4-3-3 who want to press from the front with structure, though the principles transfer across all formations.
Setup

Equipment Needed
| Item | Quantity |
|---|---|
| Full-size footballs | 8–10 |
| Bibs (two contrasting colours) | 16 |
| Cones (to mark zones) | 20 |
| Mannequins or poles (optional) | 4 |
| Coaching board or whiteboard | 1 |
Pitch Setup
Use two-thirds of a full-size pitch (approximately 70m x 64–68m), incorporating one full penalty area and the halfway line. Mark a high press zone with cones 35m from the goal line — this is the area in which the press must be triggered and executed. Mark a recovery line 25m from goal using flat cones across the width of the pitch; this is the target depth for the defensive block when recovering.
Player Positions
Organise players into two teams of 10 outfield players plus two goalkeepers (22 players total). If numbers are short, the drill runs effectively with 8v8 plus two goalkeepers.
Pressing Team (RED — 4-4-2):
- GK: Goalkeeper (1)
- RB: Right Back (2), CB: Centre Back (3 & 4), LB: Left Back (5)
- RM: Right Midfielder (7), CM: Central Midfielder (6 & 8), LM: Left Midfielder (11)
- ST: Strikers (9 & 10)
Ball-Playing Team (BLUE — 4-3-3 or 4-4-2):
- GK: Goalkeeper (1)
- RB (2), CB (4 & 5), LB (3)
- Midfield three or four (6, 7, 8, 10)
- Forwards (9, 11)
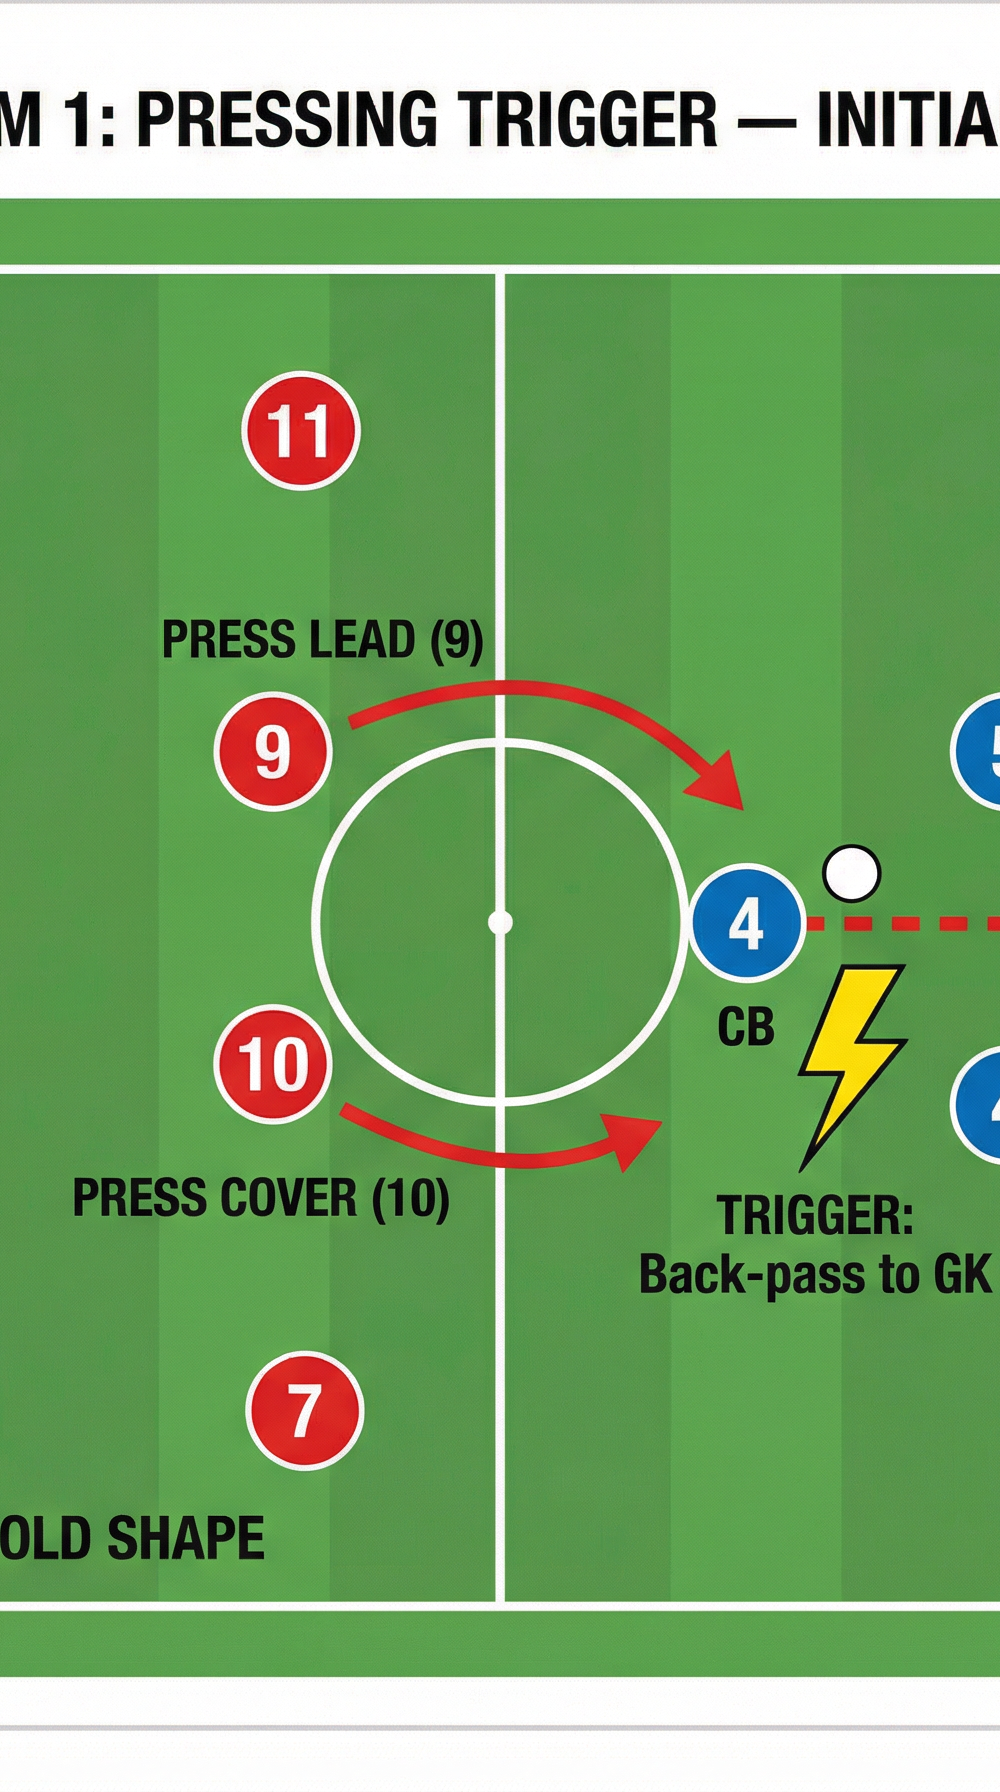
Diagram 1 shows the initial setup and the pressing trigger moment — a back-pass from the blue centre-back (4) to the blue goalkeeper (1) activates the press led by red striker 9, with red 10 providing immediate press cover.
Step-by-Step Instructions
Phase 1 — Trigger Recognition (10 minutes)
Begin with the blue team in possession, playing out from their goalkeeper in a relaxed 4-4-2 shape. The red team holds a mid-block shape, sitting in their 4-4-2 with the two strikers (9 and 10) positioned approximately 35m from the blue goal, cutting off the central passing lanes.
Instruct the red team that there are three agreed pressing triggers they must recognise before committing to a press:
- The blue goalkeeper receives a back-pass.
- A blue centre-back receives the ball under pressure with their back to play.
- A blue full-back receives a misplaced or heavy touch.
When a trigger occurs, red striker 9 leads the press immediately, approaching the ball-carrier at pace but under control, showing the opponent onto their weaker foot or toward the touchline. Red striker 10 simultaneously presses the nearest centre-back, cutting off the most obvious escape pass.
Run this phase as a walk-through at 50% intensity for the first 5 minutes, with you calling out "TRIGGER!" each time one occurs. Then progress to 75% intensity with players self-identifying the triggers.
Phase 2 — Full Team Press Wave (15 minutes)
Once the front two press, the entire team must shift and compress. Red midfielders 6 and 8 push up 8–10m to form a compact second line, cutting off the blue midfield as a passing outlet. Red wingers 7 and 11 tuck inward to block the switch pass to the blue full-backs.
Red defenders 2, 3, 4, and 5 hold a high defensive line (approximately 30m from the blue goal), maintaining compactness and preventing the blue team from playing through the press into a striker's feet.
The objective for the red team is to win the ball within 6 seconds of the trigger, or force the blue team into a long clearance. If the ball is won, red immediately transitions to attack.

Diagram 2 illustrates the coordinated press wave in action — the front four press aggressively while midfielders push up to form a second line, and the defensive line holds high to maintain compactness.
Phase 3 — Recovery When Press Is Beaten (15 minutes)
Instruct the blue team to deliberately beat the press with a long diagonal ball over the red defensive line, played to a blue striker (9) running in behind. This simulates the most common way a high press is bypassed.
The moment the long ball is played, all red players must immediately transition into recovery mode. The nearest red defender to the ball (typically the red CB on the ball-side) becomes the delay player — they must slow the blue striker's progress without diving in, buying time for teammates to recover.
All other red outfield players sprint back to get goal-side and ball-side, aiming to reach the recovery line (25m from goal) within 4 seconds of the ball being played over the top. The red midfielders must sprint back to fill the space vacated by the high defensive line.
Once the recovery block is set, the red team re-establishes their 4-4-2 mid-block shape and the drill resets from the goalkeeper.
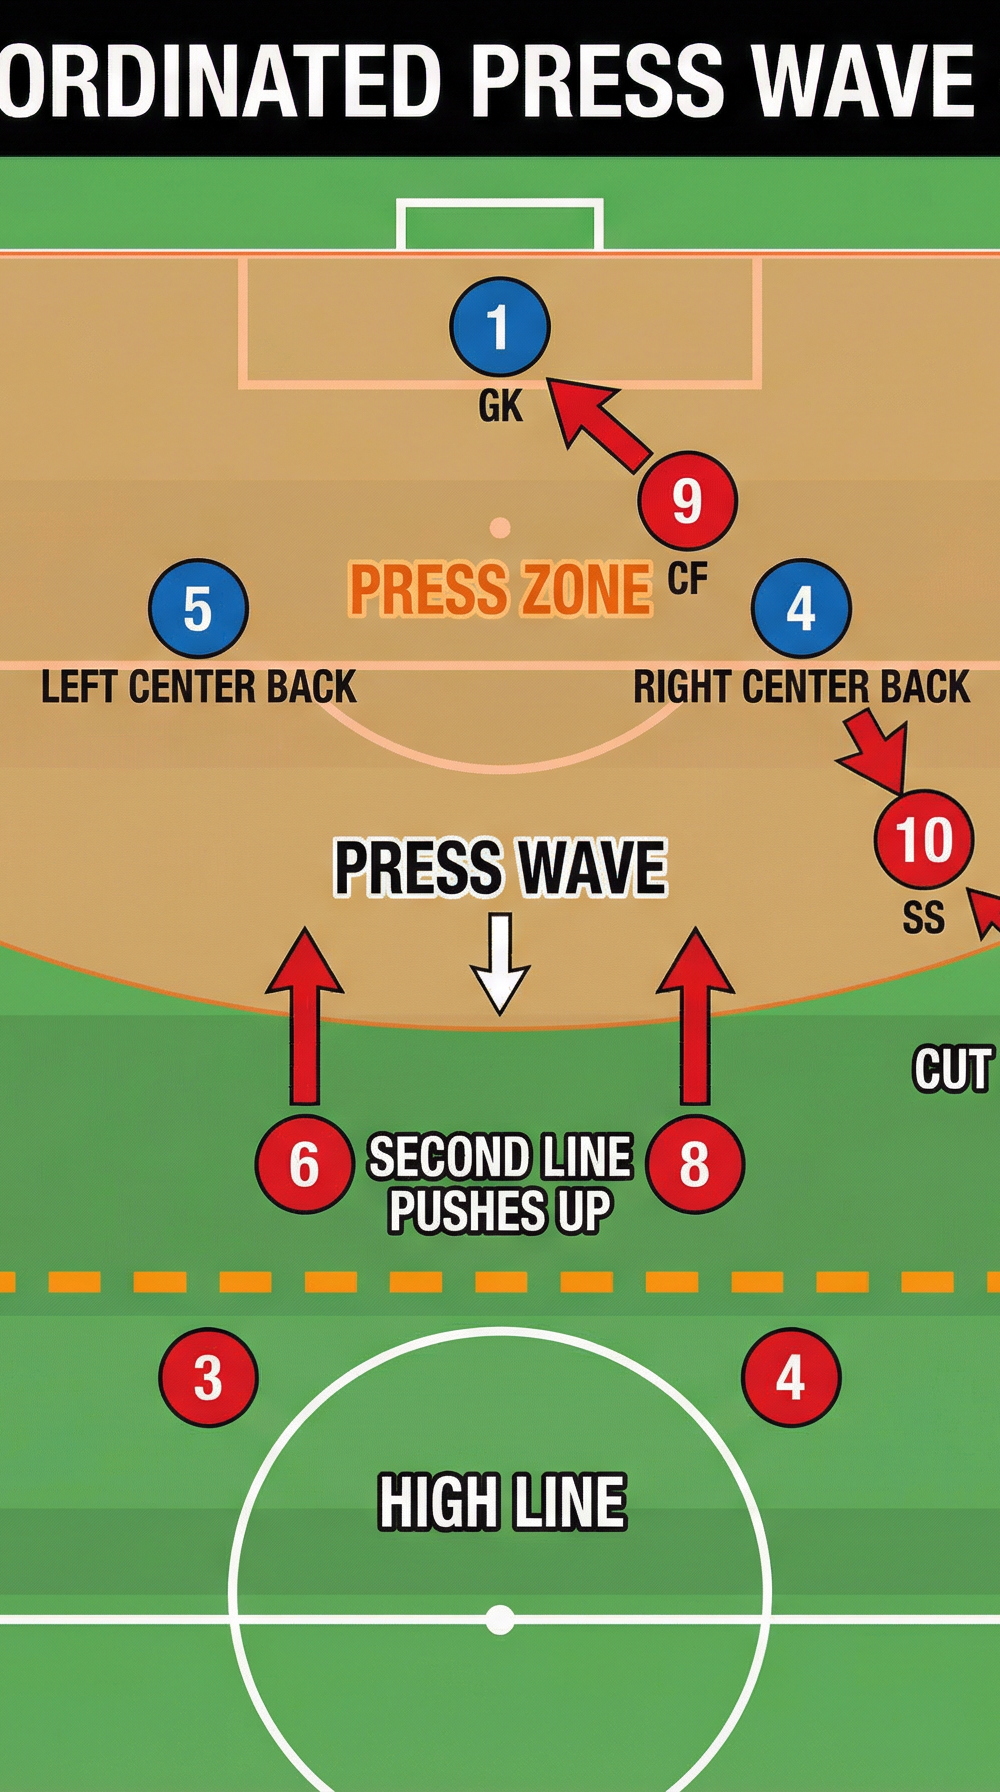
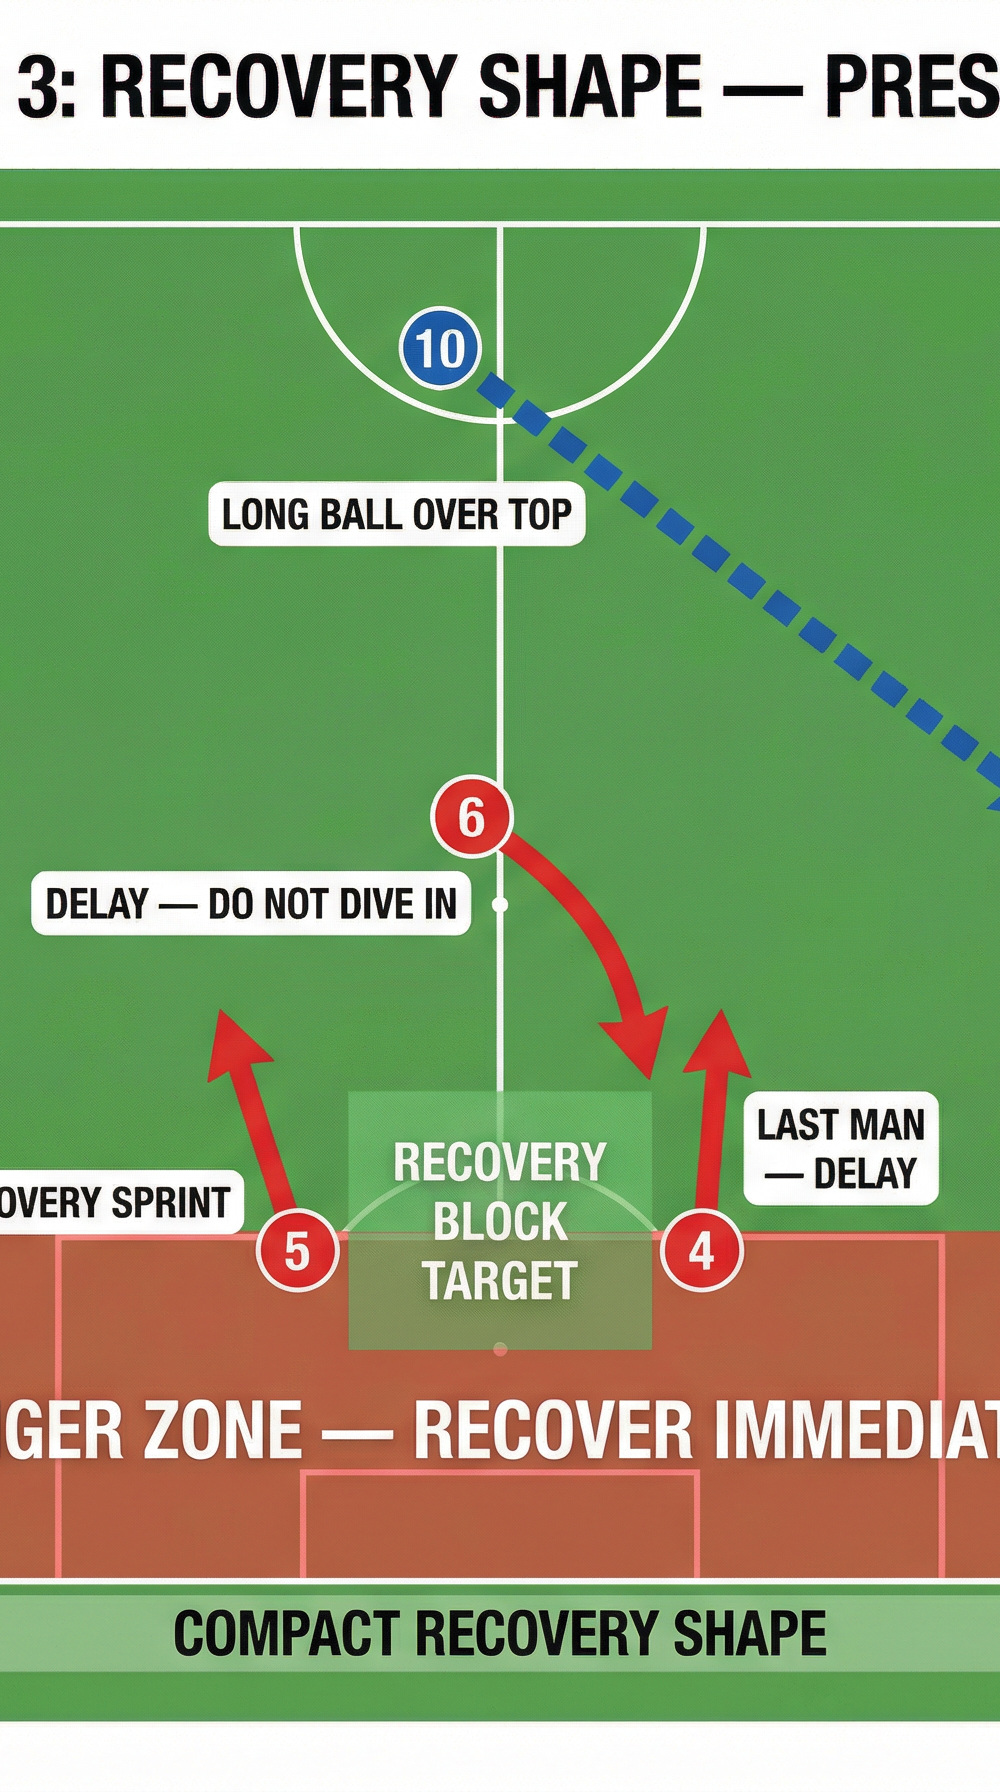
Diagram 3 shows the recovery shape — the blue team has beaten the press with a long ball to striker 9. Red defenders sprint back to the recovery block target, with red 4 acting as the delay player.
Phase 4 — Continuous Live Practice (10 minutes)
- Run the full drill as a live, continuous game with no stoppages. The blue team attempts to play through or over the press; the red team presses on triggers and recovers when beaten. Award the red team 2 points for winning the ball in the press zone and 1 point for a successful recovery block. Award the blue team 2 points for playing through the press and 1 point for scoring after beating the press.
Key Coaching Points

Triggers must be agreed and collective. A press only works when the whole team moves together. If one player presses and others don't react, the pressing player is isolated and the team is exposed. Spend time before the session making sure every player can name the three triggers.
The press leader sets the angle, not just the pace. Red striker 9 must approach the ball-carrier at an angle that cuts off the easy forward pass and channels the opponent toward the touchline or onto their weaker foot. Sprinting straight at the ball is a common error — the approach angle is everything.
Compactness is more important than individual pressing intensity. The value of a press is in the collective reduction of space, not in one player's aggression. Midfielders who push up 8–10m are as important as the striker who leads the press.
Recovery is a sprint, not a jog. When the press is beaten, the transition to recovery must be immediate and explosive. Players who walk or jog back after a failed press are the reason teams concede goals. Demand maximum effort in the recovery sprint.
The delay player must not dive in. When a blue striker is through on goal, the red delay player's job is to slow the attack and buy time — not to win the ball. A rash tackle attempt that fails leaves the goalkeeper exposed. Patience under pressure is a skill that must be coached explicitly.
Communicate constantly. The press leader should call "PRESS!" the moment they identify the trigger. The delay player should call "DELAY!" so teammates know to recover rather than press. Verbal communication reduces reaction time across the whole team.
Common Mistakes
1. Pressing without a trigger (gambling). Players who press on instinct rather than on an agreed trigger will press at the wrong moment, leaving gaps behind them. Stop play immediately when this happens and ask the player: "What was the trigger?" If they cannot name one, reset and walk through the trigger recognition phase again.
2. The second striker ball-watching instead of pressing their man. When red 9 leads the press, red 10 must simultaneously press the nearest centre-back. Coaches frequently see red 10 watching the press unfold rather than executing their role. Use a simple cue: "When 9 goes, 10 goes."
3. Midfielders failing to push up in the press wave. If red midfielders 6 and 8 stay deep when the press is triggered, the blue midfield has a free passing outlet and the press is immediately bypassed. Mark a cone line 10m ahead of their starting position and demand they reach it within 2 seconds of the trigger.
4. Defenders breaking the high line prematurely. Red defenders who drop deep when the press is triggered destroy the compactness that makes the press effective. Reinforce the high line with a cone marker and use offside trap awareness drills if this is a persistent issue.
5. Slow or passive recovery sprint. After a failed press, some players mentally switch off and jog back. This is the most dangerous mistake in the drill. Use a 4-second recovery target as a measurable standard — if the recovery block is not set within 4 seconds of the long ball being played, award the blue team a bonus point.
Variations & Progressions

Progression 1 — Add a Directional Constraint to the Press. Instruct the red press leader (9) that they must always show the blue GK or CB onto their left foot (or right foot, depending on the opponent's weaker side). This adds a game-realistic tactical layer and trains players to press with purpose rather than just pressure.
Progression 2 — Introduce a Time Limit on the Press. Give the red team a strict 5-second window from the trigger to win the ball or force a clearance. If the blue team retains possession after 5 seconds, the red team must immediately drop into their mid-block. This prevents the common error of players continuing to press after the optimal window has closed, which leaves the team stretched and vulnerable.
Progression 3 — Restrict the Blue Team's Long Ball. To force the press to work harder and develop the red team's pressing quality, instruct the blue team that they cannot play a long ball over the top for the first 10 minutes. This means the red team must execute the press correctly to win the ball, as the easy escape route is removed. Reintroduce the long ball option once the press quality is high.
Age Adaptations

Under 12 and Under 14: Reduce the pitch to a 40m x 30m zone and use a 6v6 format. Simplify the triggers to a single cue — the back-pass to the goalkeeper only. Focus exclusively on the press leader and one press support player before introducing the full team press wave. Recovery work should be introduced only once the press trigger recognition is consistent. Use coloured bibs as a visual aid for pressing roles.
Under 16: Run the drill as described at full intensity but with a reduced pitch width of 50m to increase the frequency of press opportunities. Introduce verbal trigger calls and hold players accountable for communication. Begin to introduce the directional press constraint (Progression 1) once the base drill is fluent.
Open Age / Senior: Use the full pitch dimensions (100–110m x 64–75m) and run the drill at match intensity. Introduce all three progressions across the session. Add a goalkeeper distribution element — the blue GK must play short to a centre-back under pressure, increasing the realism of the press trigger scenario. Video analysis of the drill is highly recommended at this level to provide individual and collective feedback.