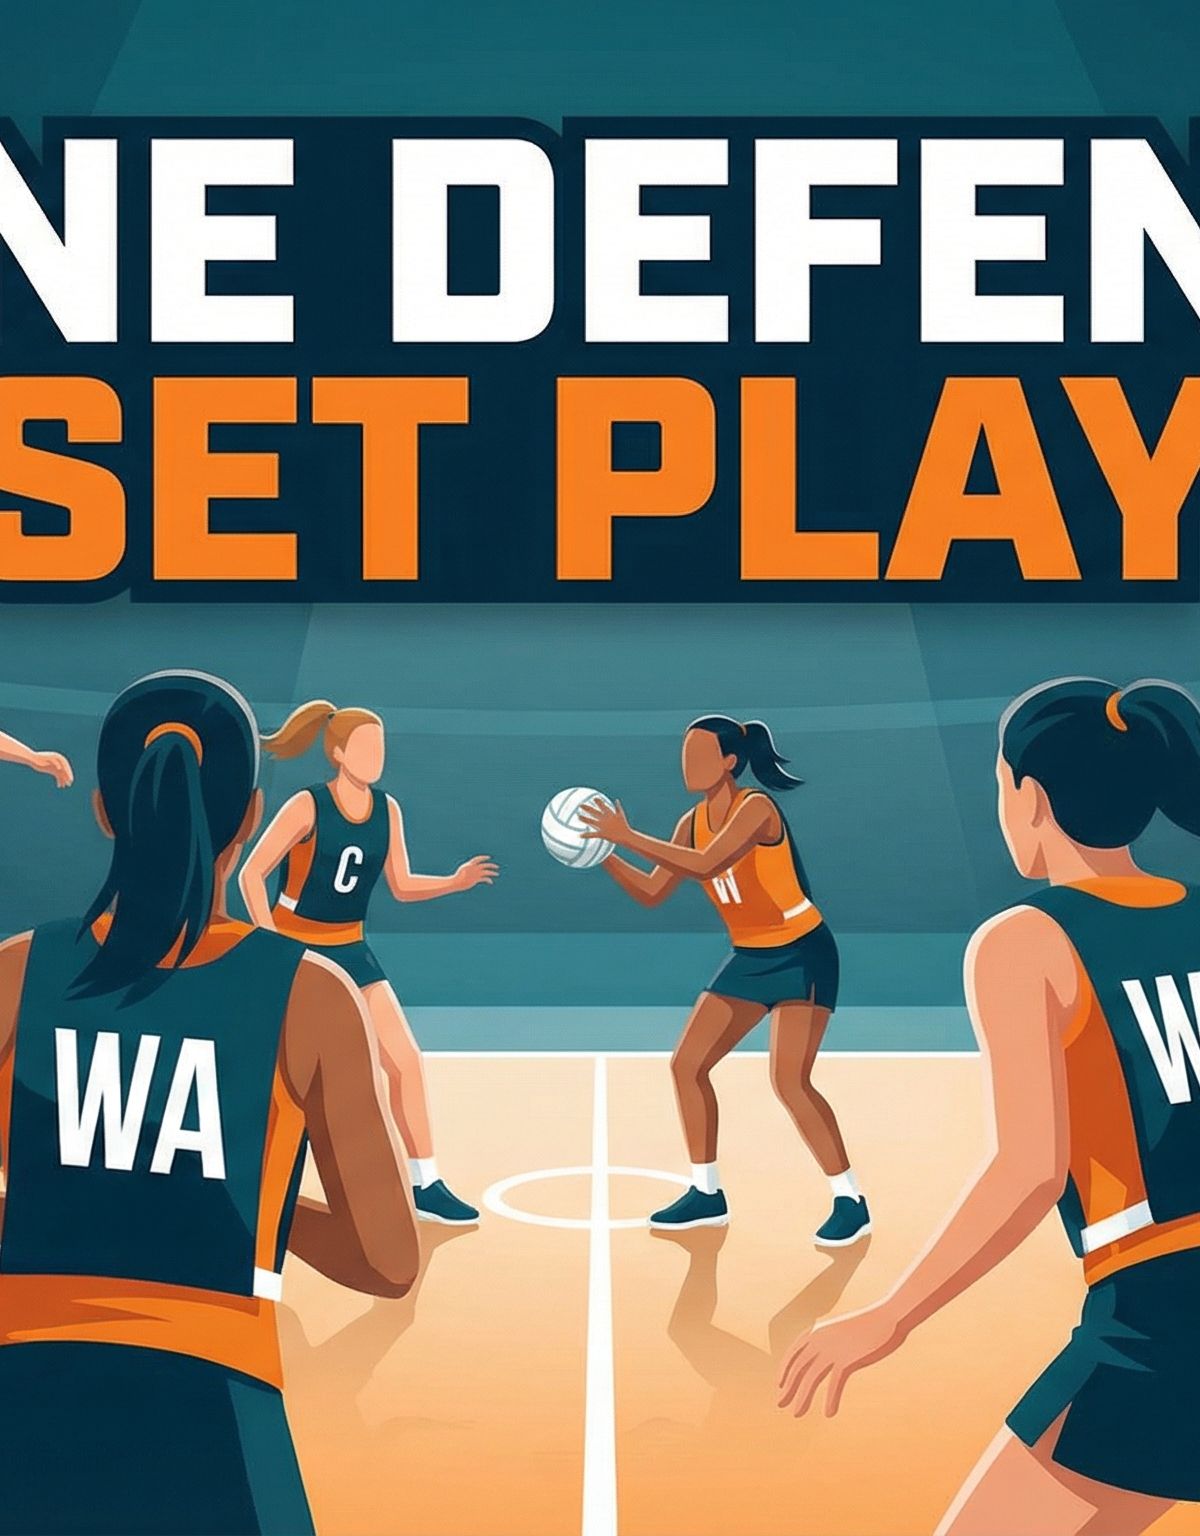
The Goal Third Zone: High-Pressure Defensive Set Play
Master the goal third zone defence to suffocate the opposition's attacking flow, force lateral passes, and create high-percentage interception opportunities.
Equipment Needed
Overview
The Goal Third Zone is a structured defensive set play designed to disrupt the opposition's transition from the centre third into the goal third. Unlike traditional one-on-one (man-to-man) defence, this strategy requires players to defend specific areas of the court rather than individual opponents. By setting up a coordinated wall of defenders, you force the attacking team to make risky, high-looping passes or cross-court laterals, creating prime opportunities for your team to hunt the interception. This set play is particularly effective against teams that rely on fast, direct ball movement down the middle channel.
Setup
Court Dimensions: Standard Netball Court (30.5m x 15.25m)
Players Required: 4 Primary Defenders (C, WD, GD, GK), plus attacking practice squad (WA, GA, GS)
Equipment: 1 Netball, positional bibs, optional flat markers to outline zone areas during early learning phases.
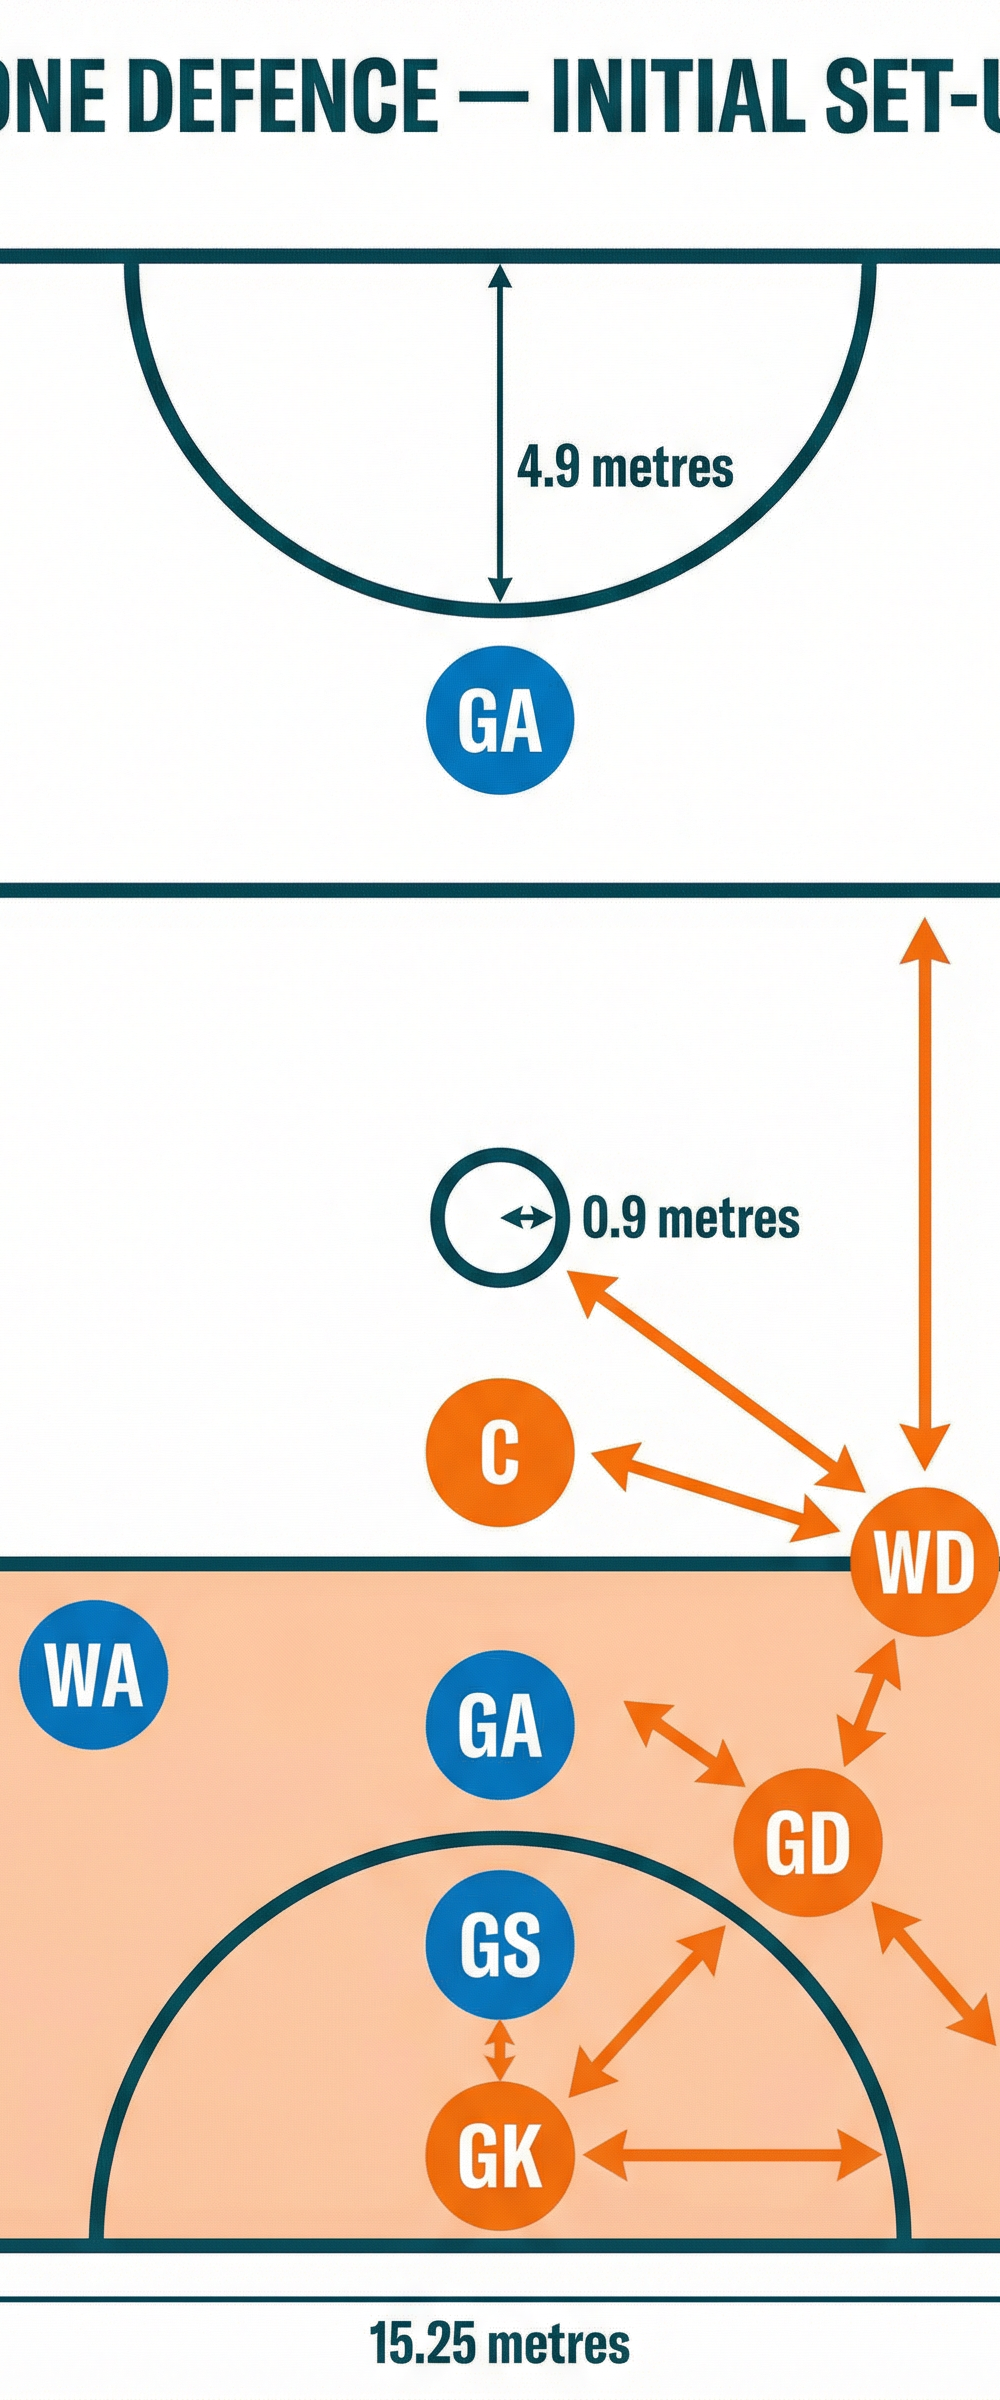
Initial Positioning
To execute the zone effectively, players must take up their starting positions immediately after a turnover or a scored goal.

- Goal Keeper (GK): Positions deep in the goal circle, roughly 0.9 to 1.5 metres off the post. Their primary role is to protect the baseline and anticipate long balls into the Goal Shooter (GS).
- Goal Defence (GD): Sets up on the edge of the goal circle (4.9m radius), ready to slide left or right depending on the ball's position.
- Wing Defence (WD): Drops back from the transverse line into the top of the goal third, sitting slightly wider to protect the channel.
- Centre (C): Hovers in the centre third, just above the transverse line, applying initial pressure on the ball carrier and forcing the pass wide.
Step-by-Step Instructions

Implementing the zone requires precise timing and communication. Follow these steps to drill the movement patterns.
Phase 1: The Initial Wall
- As the opposition brings the ball down the court, the C engages the ball carrier early, forcing them towards the sideline.
- The WD and GD establish a staggered wall across the top of the goal third. They must maintain a distance of roughly 2 to 3 metres between each other to ensure there are no easy passing lanes through the middle.
- The GK holds their deep position, scanning the court and calling out the movements of the GS and GA.
Phase 2: Ball Pressure and Rotation
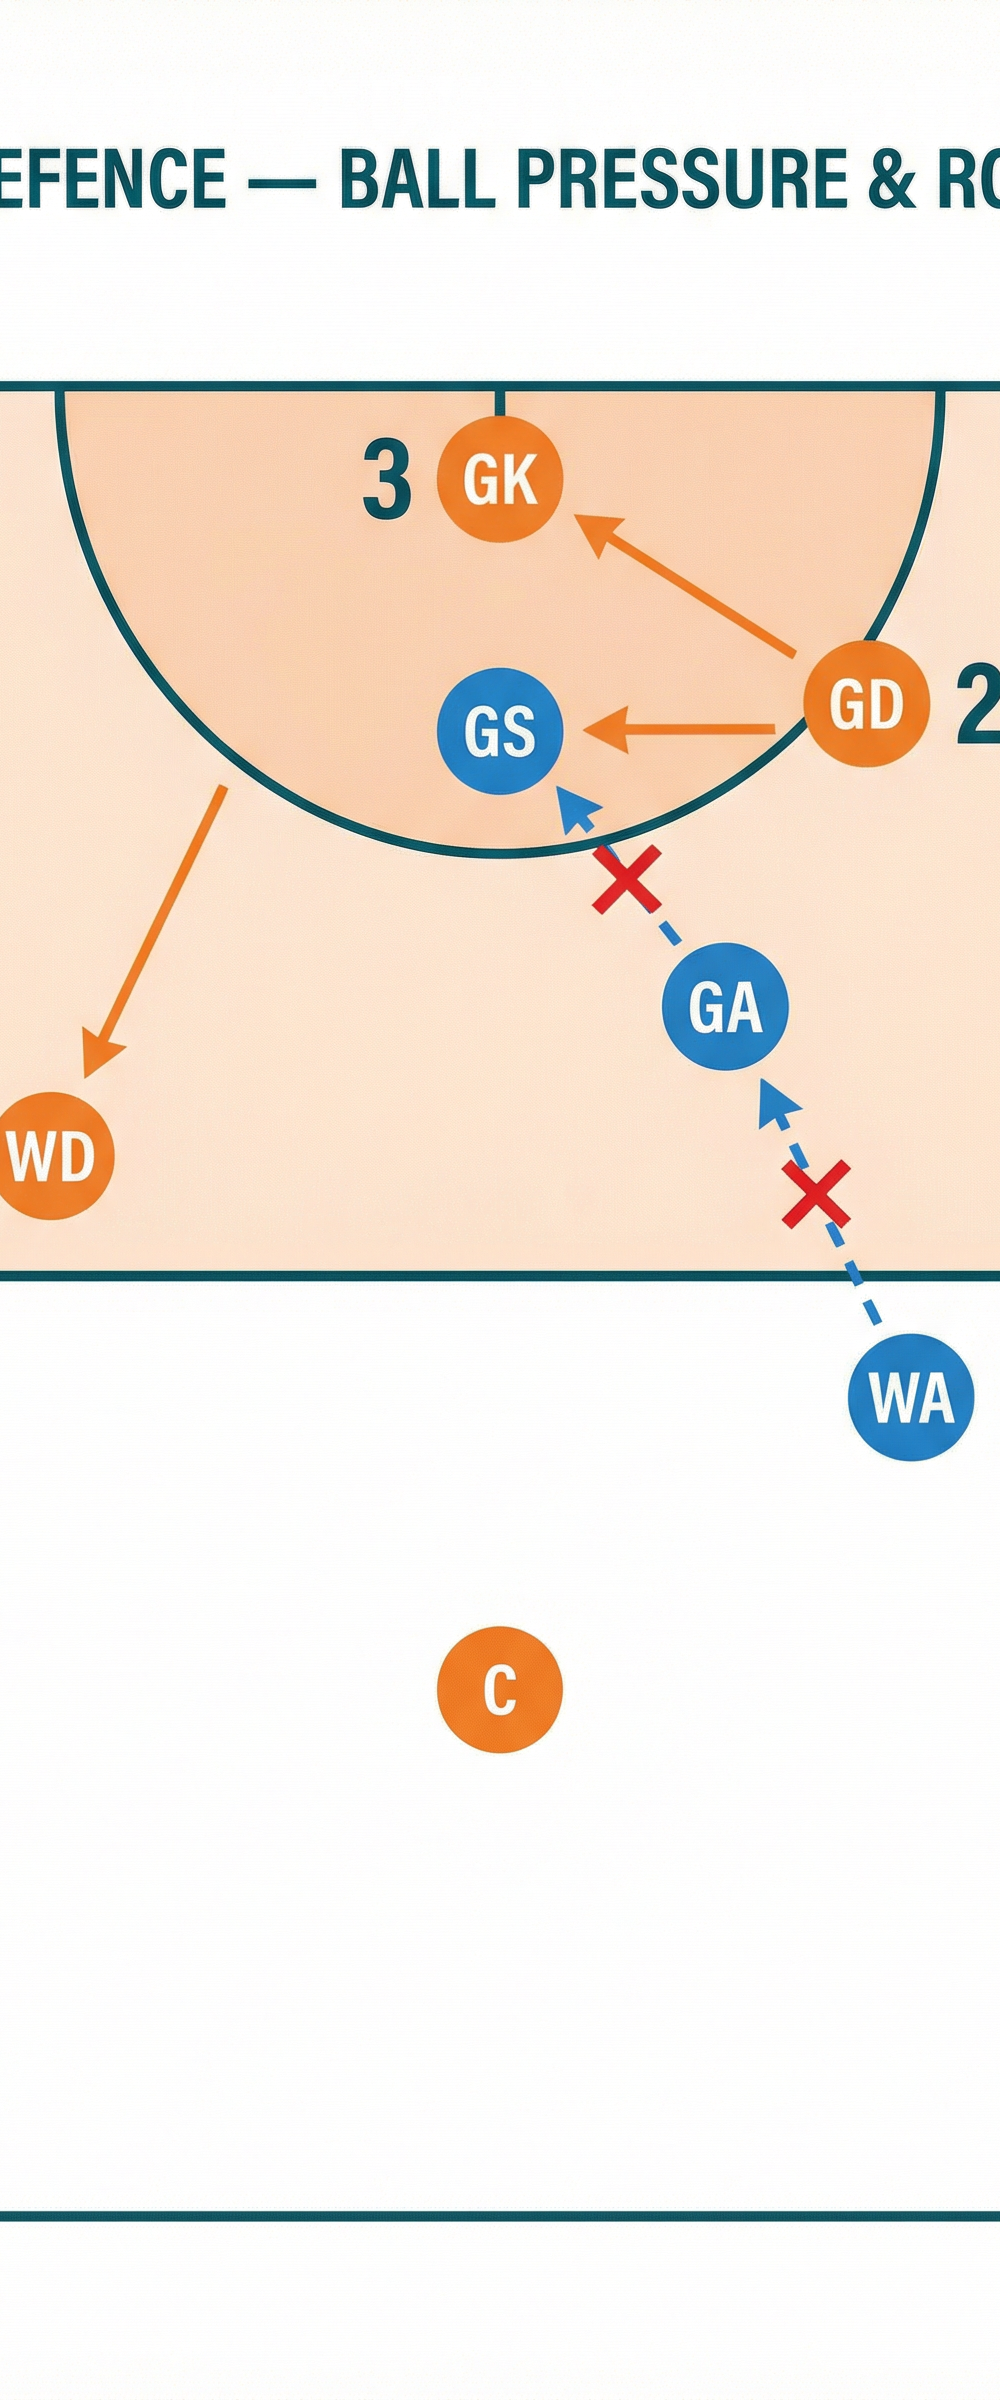
- When the ball is passed to the WA or GA near the transverse line, the closest defender (e.g., WD) steps up to apply immediate three-foot pressure.
- The remaining defenders must rotate and slide to cover the space left behind. If the WD steps up, the GD shifts slightly wider to cover the middle channel, and the GK steps up slightly to cover the top of the circle.
- Defenders must keep their hips open to the ball while maintaining awareness of attackers entering their zone.
Phase 3: The Trap and Interception
- As the attackers become frustrated and attempt a cross-court or high-looping pass, the designated 'hunter' (often the GD or WD) leaves their zone to attack the ball in the air.
- The interception must be decisive. The player should accelerate through the line of the ball, taking it at its highest point.
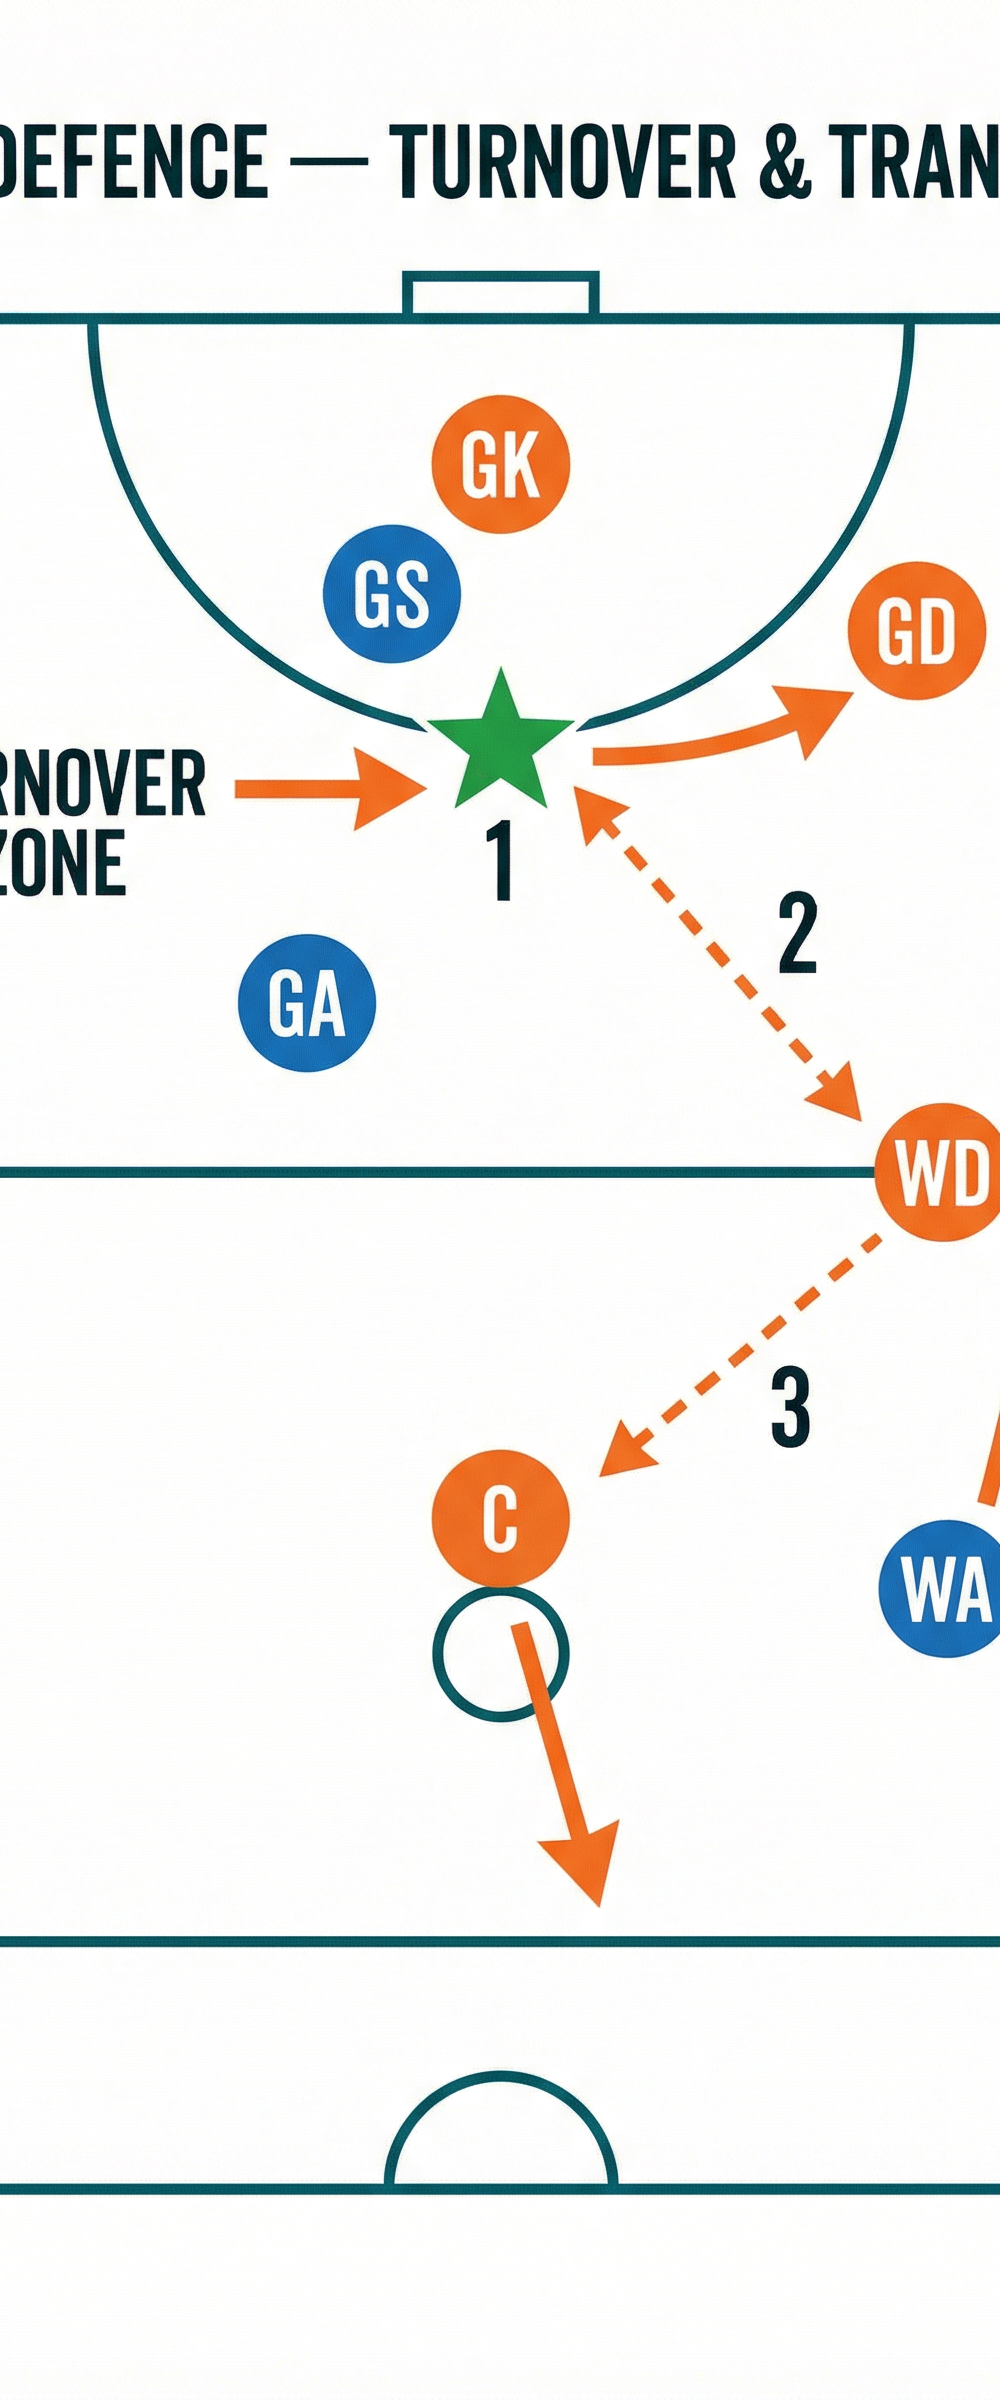
Phase 4: Turnover and Transition

- Upon securing the interception, the team must immediately transition into attack.
- The intercepting player lands safely and pivots to face down the court.
- The C and the non-intercepting wing player sprint down the court to offer wide and central outlet passing options, ensuring the ball is cleared from the defensive third within three seconds.
Key Coaching Points
- Communication is Non-Negotiable: Defenders must constantly talk to each other. Calls like 'Mine,' 'Shift left,' and 'Watch the drive' are essential to maintain the integrity of the zone.
- Keep Hips Open: Defenders should position themselves at a 45-degree angle, allowing them to see both the player with the ball and the attackers moving into their zone.
- Dictate the Space: Do not react to the attackers; make the attackers react to you. Hold your ground and force them into areas where they are uncomfortable.
- Hunting Mentality: The zone is not passive. Players must actively look for triggers (e.g., a poorly balanced thrower, a floating pass) to leave their zone and secure the interception.
- Three-Foot Recovery: When a player steps up to challenge a pass, they must recover quickly to the three-foot distance to avoid obstruction penalties.
Common Mistakes

- Ball Watching: Defenders focus entirely on the ball and lose track of attackers sneaking in behind them on the baseline.
- Breaking the Zone Too Early: A defender leaves their designated area before the pass is released, creating a massive hole for the attackers to exploit.
- Flat Footing: Defenders stand flat-footed rather than staying on the balls of their feet, delaying their reaction time to intercept.
- Lack of Depth: The defensive wall is set too flat across the court, allowing attackers to easily lob the ball over the top.
Variations & Progressions

- Progression 1: Overload the Attack: Practice the zone with 5 attackers against the 4 defenders. This forces the defenders to communicate better and work harder to cover the space.
- Progression 2: Time Limits: Give the attacking team only 10 seconds to score. This simulates game pressure and tests the zone's ability to hold up under fatigue.
- Variation 1: The Trap Zone: Shift the entire zone to one side of the court, actively encouraging the opposition to play down the opposite sideline, where you have set a trap with your best intercepting player.
Age Adaptations

- Under 10s & Under 12s: Focus purely on the concept of 'guarding a space' rather than a player. Use flat markers to physically show them their zones. Keep the rotations simple.
- Under 14s & Under 16s: Introduce the concept of the 'hunter'. Teach them to read the body language of the thrower and anticipate the pass. Focus heavily on communication and sliding as a unit.
- Open / Seniors: Implement complex rotations and traps. The zone should be fluid, constantly shifting to dictate the play and forcing the opposition into high-risk errors.