The Iron Shoulder: Tackle Technique and Body Height Drill
Master the mechanics of a safe, dominant tackle with this progressive drill focusing on body height, approach, and execution.
Equipment Needed
1. Overview
The "Iron Shoulder" Tackle Technique and Body Height Drill is designed to instil the fundamental mechanics of a safe, dominant tackle. In the modern game, getting body height right is not just a tactical advantage; it is a critical safety and disciplinary requirement. This drill isolates the approach, the drop in body height, and the execution of the shoulder strike, ensuring players build muscle memory for a textbook tackle. Use this drill during the early phases of a session to set the physical tone and reinforce core defensive principles before progressing to live, full-contact scenarios.
2. Setup
Pitch Setup:
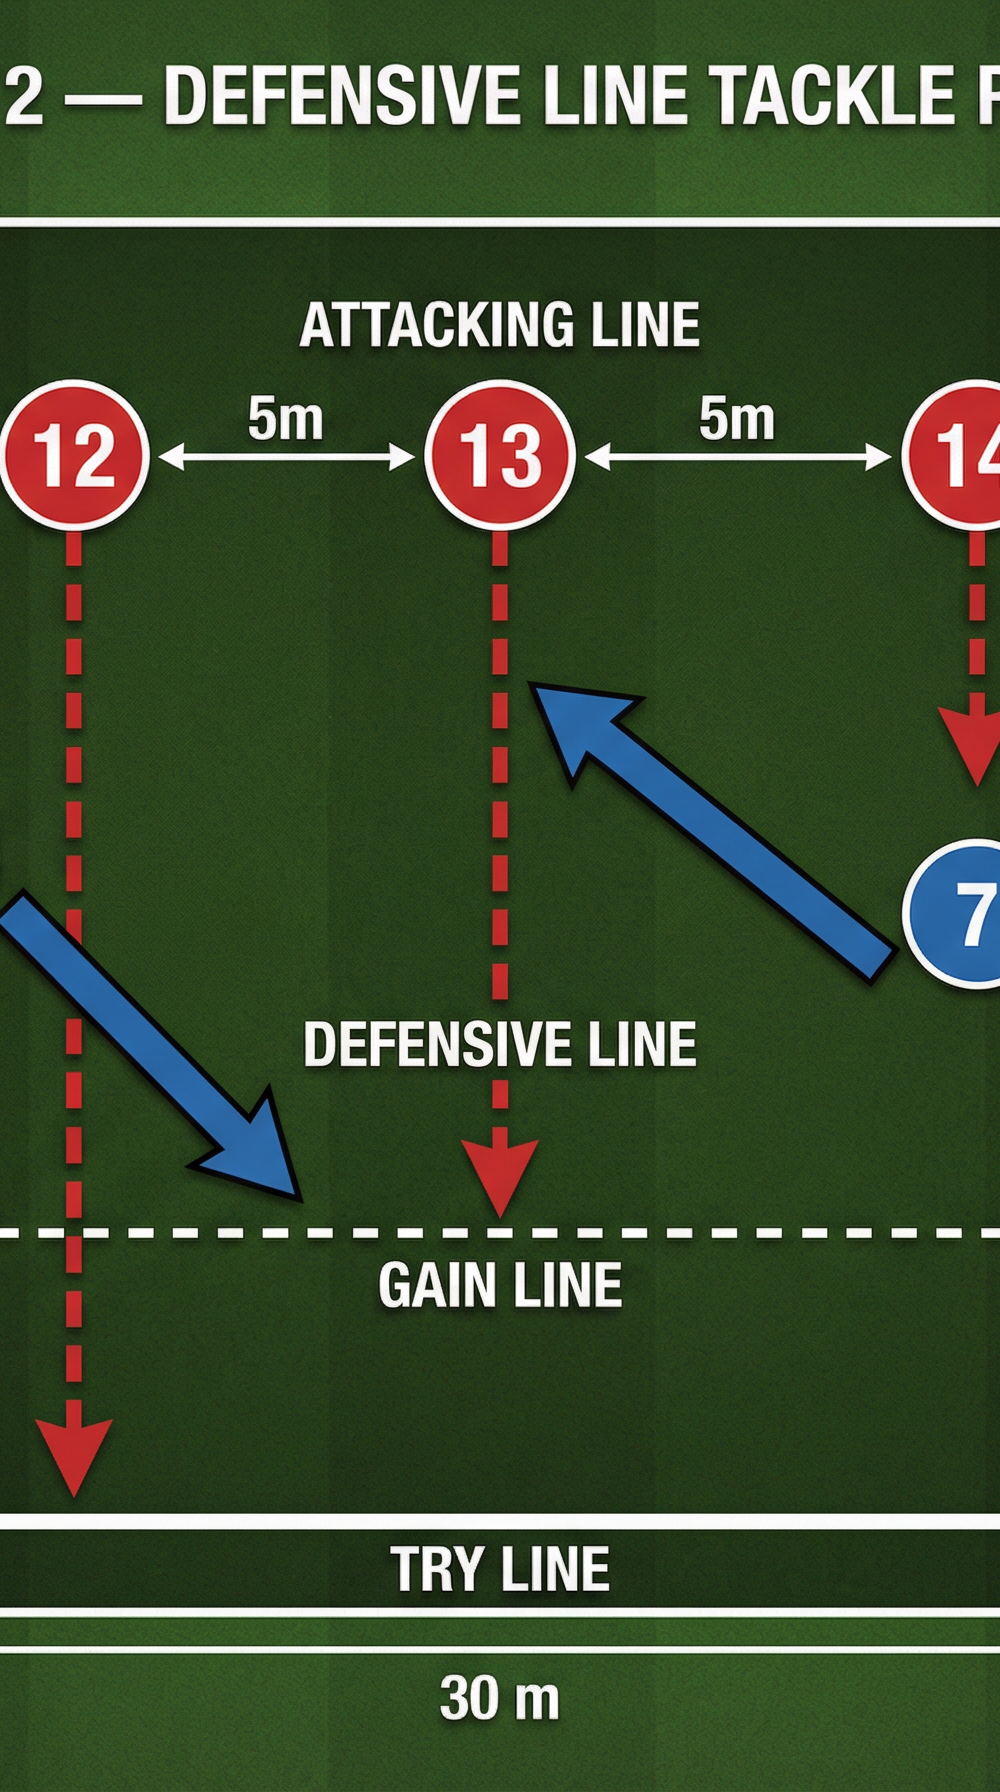
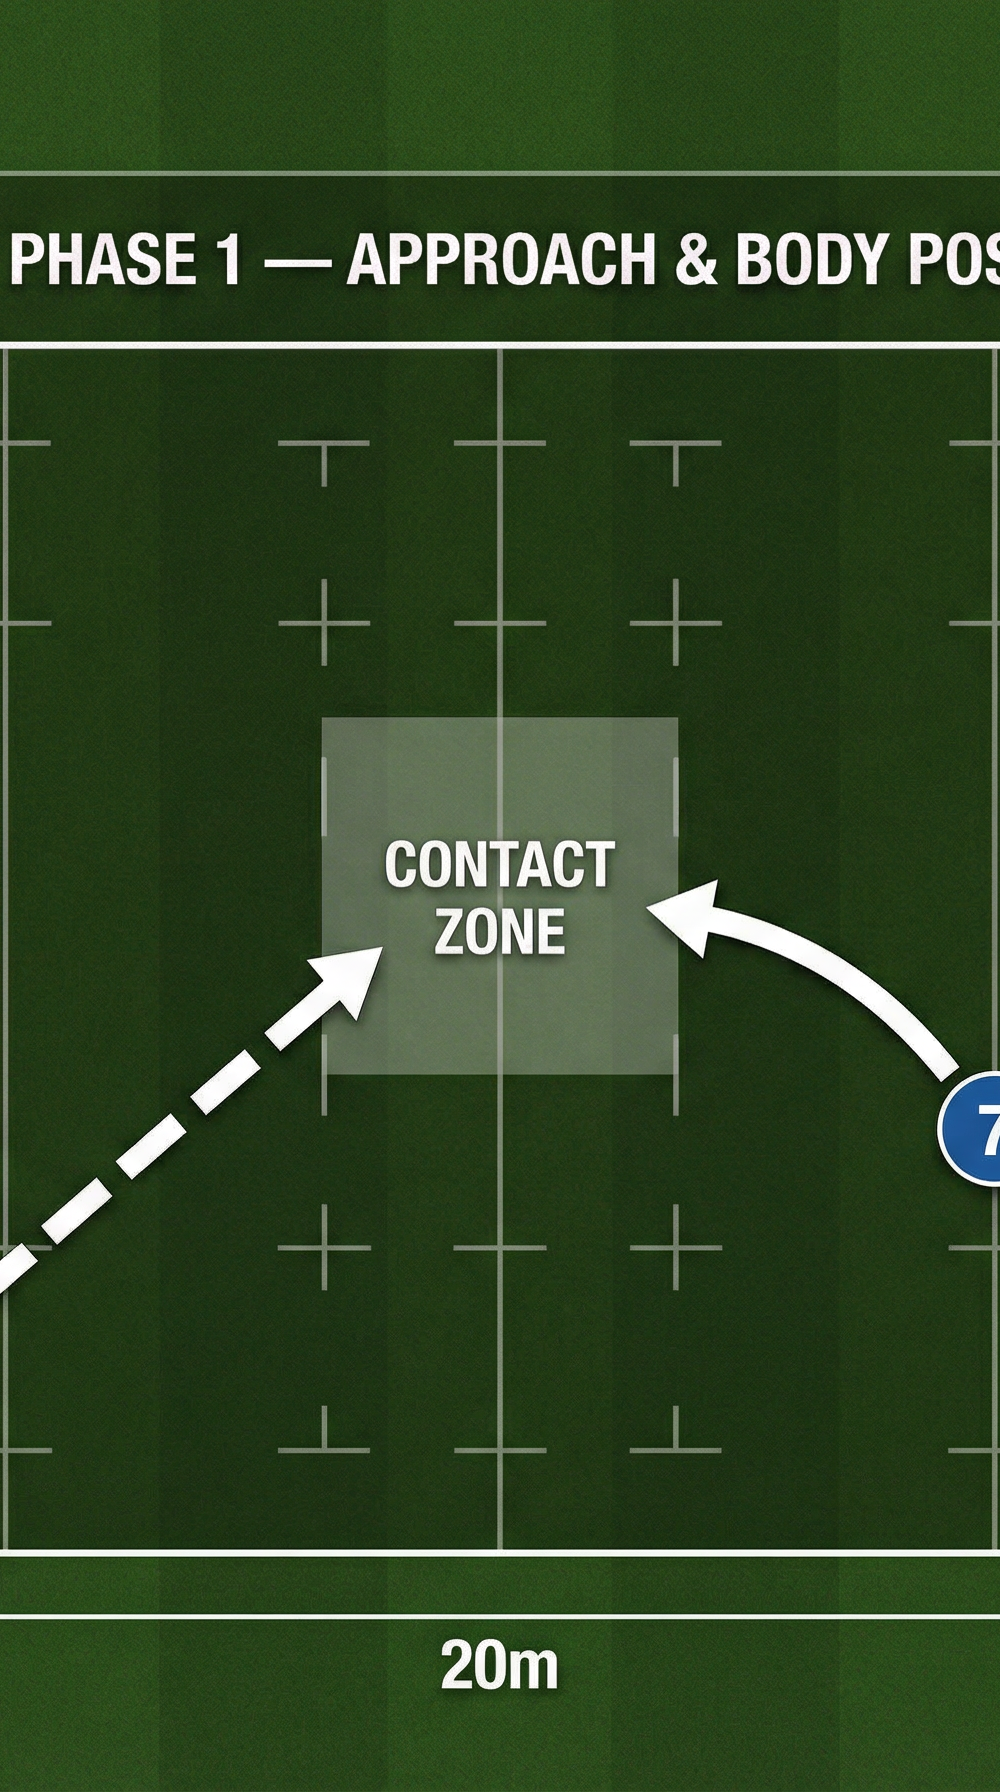
Create a 20m x 15m grid using four cones for Phase 1. For Phase 2, extend the area to a 30m x 20m grid with a designated try line and gain line marked 5m apart.
Equipment Needed:
- 8-10 marker cones (preferably two different colours to mark start lines and boundaries)
- 3-4 standard match rugby balls
- Tackle shields (optional for beginners, but progress to live bodies quickly)
Player Positions:
- Phase 1: One Attacker (13) starting at the bottom left corner, one Defender (7) starting 5m away at a 45-degree angle.
- Phase 2: Three Attackers (12, 13, 14) spread 5m apart along an attacking line. Two Defenders (6, 7) starting 10m back on a defensive line.
3. Step-by-Step Instructions
Phase 1: Approach & Body Position (1v1 Isolation)
- The Start: The Attacker (13) begins with the ball at the start cone and jogs forward at 50% pace in a straight line towards the opposite end of the grid.
- The Approach: The Defender (7) advances from their starting position, closing the space quickly but under control. The defender must track the attacker's inside hip.
- The Drop: As the Defender gets within 2 metres of the Attacker, they must sharply drop their body height—bending at the knees and hips, keeping the back straight and eyes up ("sink to strike").
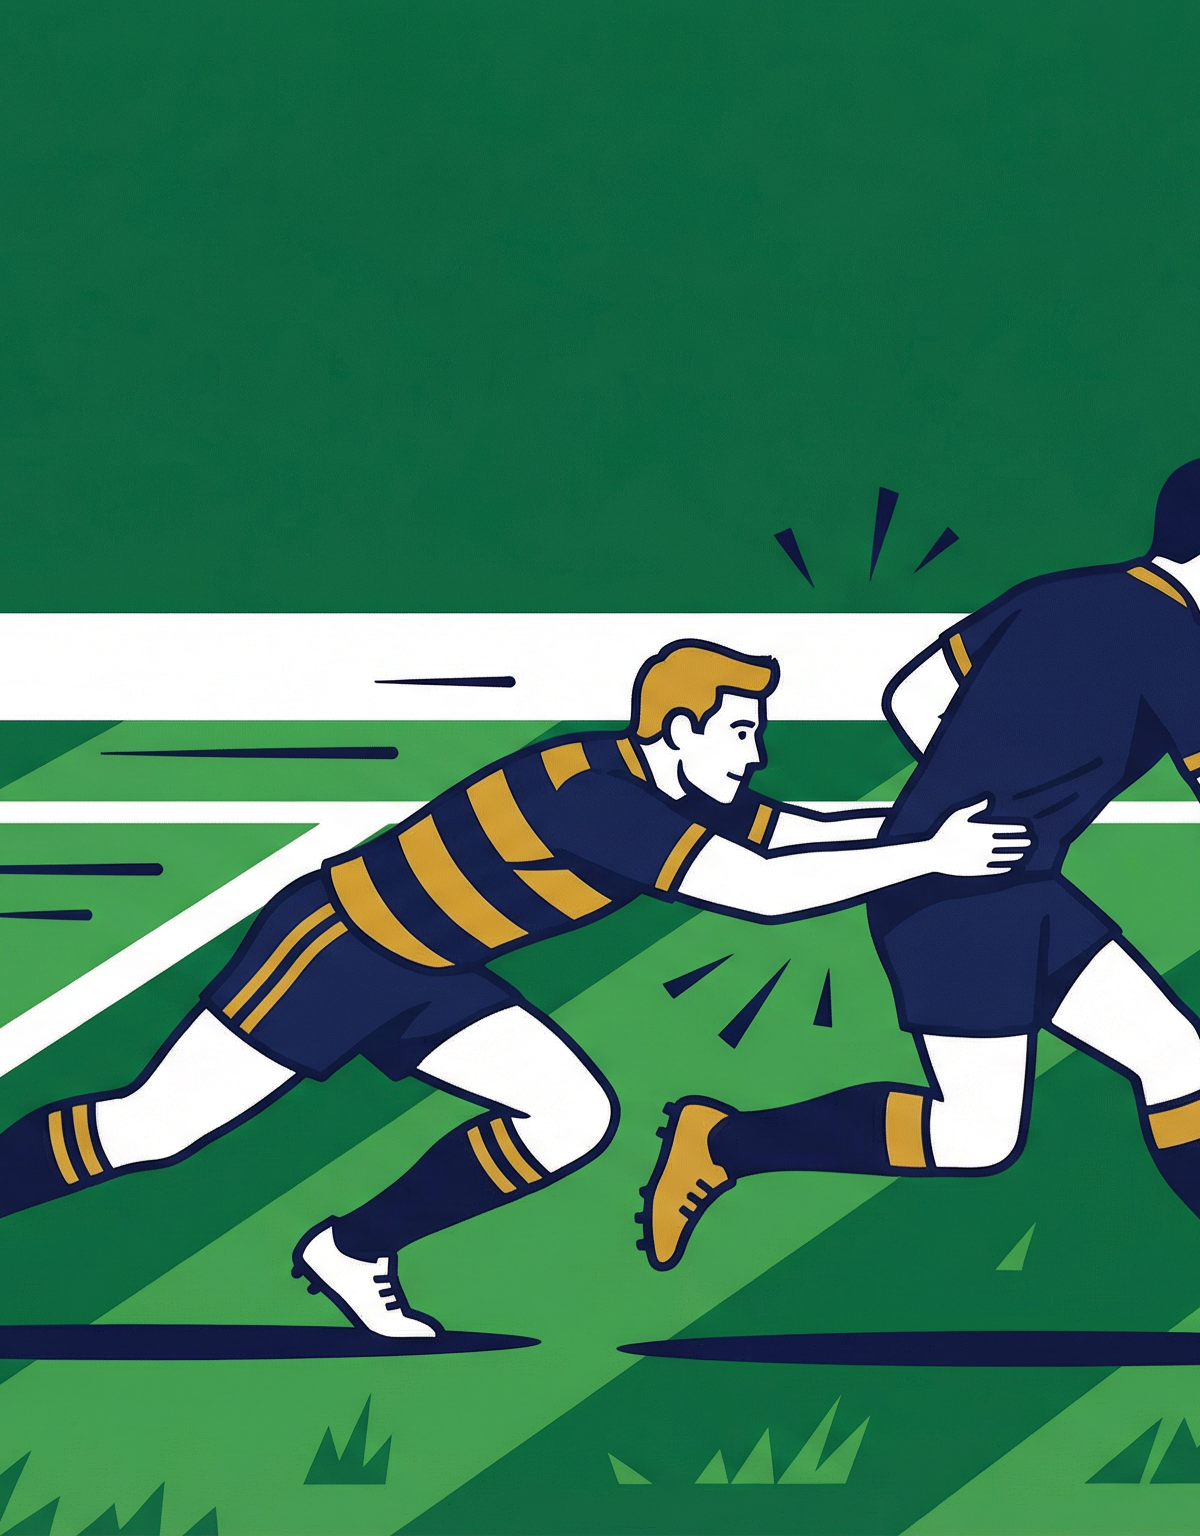
- The Contact: The Defender steps in close with the lead foot (same foot as the tackling shoulder) and makes firm shoulder contact on the Attacker's thighs/hips.
- The Wrap & Finish: The Defender aggressively wraps both arms around the Attacker's legs, squeezing tight, and drives through the contact using leg power to take the Attacker to the ground safely.

Phase 2: Defensive Line Tackle Progression (3v2 Live)
- The Alignment: Attackers (12, 13, 14) align flat, passing the ball down the line. Defenders (6, 7) start on their defensive line, communicating to identify their targets.
- Line Speed: On the coach's whistle, the Defenders press forward together, maintaining a unified defensive line to close down the space before the Attackers reach the gain line.
- Target Identification: Defender 6 tracks Attacker 12, while Defender 7 tracks Attacker 13. The defenders must adjust their running lines to intercept the attackers squarely.
- Execution: Upon reaching the contact zone, both Defenders execute the drop in body height and complete the tackle as drilled in Phase 1. Focus on simultaneous line speed and identical low body height.
- Reset: Once the tackle is complete and the ball is presented, players quickly reset to their starting positions. Rotate attackers and defenders after every 3 repetitions.
4. Key Coaching Points
- Eyes Up, Back Straight: Players must never look at the ground. "See what you hit" to ensure the head is safely positioned on the correct side (behind the ball carrier).

- Foot in the Hoop: The tackler's lead foot must step in close to the ball carrier's feet to generate maximum power and stability.
- Punch and Wrap: The arm wrap must be aggressive. Players should punch their arms through and lock them tightly around the legs to prevent offloads and secure the tackle.
- Drive Through: The tackle does not end at contact. The tackler must continue to pump their legs and drive the ball carrier backwards or safely to the ground.
- Sink Early: Encourage players to lower their centre of gravity early in the approach rather than dropping at the last millisecond, which often leads to high tackles.
5. Common Mistakes
- Hinging at the Waist: Players bending their backs rather than dropping their hips and bending their knees. This leads to weak tackles and potential neck/back injuries.

- Head on the Wrong Side: Placing the head across the ball carrier's body rather than safely behind the glutes/thighs. This is a major safety risk.
- Planting Feet Too Early: Stopping the feet before contact, resulting in an arm-tackle with no driving power.
- Passive Wrap: Failing to grip tightly, allowing the attacker to break the tackle or offload the ball.
6. Variations & Progressions
- Static to Dynamic: Start with the attacker walking, then jogging, and finally running at full game pace to gradually increase the difficulty and confidence of the tackler.

- Add a Decision-Making Element: Have the attacker decide whether to step left or right at the last moment, forcing the defender to adjust their feet and track the hips dynamically.
- Fatigue Factor: Introduce a 10-metre sprint and down-up (burpee) for the defender before they enter the grid to practice executing perfect technique under physical fatigue.
7. Age Adaptations
- Under 8s - Under 10s: Focus entirely on the "hug" tackle. Use tackle rings or soft pads instead of live bodies. Emphasise cheek-to-cheek contact (tackler's cheek to attacker's thigh) and a tight squeeze. No driving to the ground; just stop the momentum.

- Under 12s - Under 14s: Introduce live tackling at walking/jogging pace. Emphasise the "foot in the hoop" and correct head placement. Begin teaching the leg drive post-contact.
- Under 16s - Open: Full game-pace execution. Focus on line speed, aggressive shoulder strikes, dominating the collision, and quick recovery to contest the breakdown.