The 'Iron Wall' 22m Exit Strategy: Secure, Carry, and Clear
Master a structured, low-risk exit strategy from your own 22, combining secure ball retention, a gain-line forward carry, and a territorial clearance kick.
Equipment Needed
1. Overview
Exiting your own 22-metre zone safely is one of the most critical aspects of Rugby union. A botched exit often leads directly to opposition points. The 'Iron Wall' exit strategy is designed to provide a structured, low-risk method to clear your lines after receiving a kick, winning a turnover, or securing a lineout deep in your own territory.
This play focuses on three phases: securing the initial ball, executing a strong forward pod carry to reset the defensive line and generate quick front-foot ball, and finally executing a territorial kick to touch or a contestable up-and-under to relieve pressure.
By running a forward pod carry before kicking, you force the opposition defence to retreat, creating more time and space for your kicker (usually the Fly-half or Fullback) to execute a high-quality clearance.
2. Setup

Equipment Needed:
- 1 Rugby ball (minimum, 5+ recommended for reps)
- 10-15 cones to mark the 22m line, 10m line, and target kick zones
- Ruck pads (optional, for defensive simulation)
Pitch Setup:
- Use a standard 100m x 70m rugby pitch.
- Mark a clear 'Target Kick Zone' between the opposition 10m line and halfway line, near the touchline.
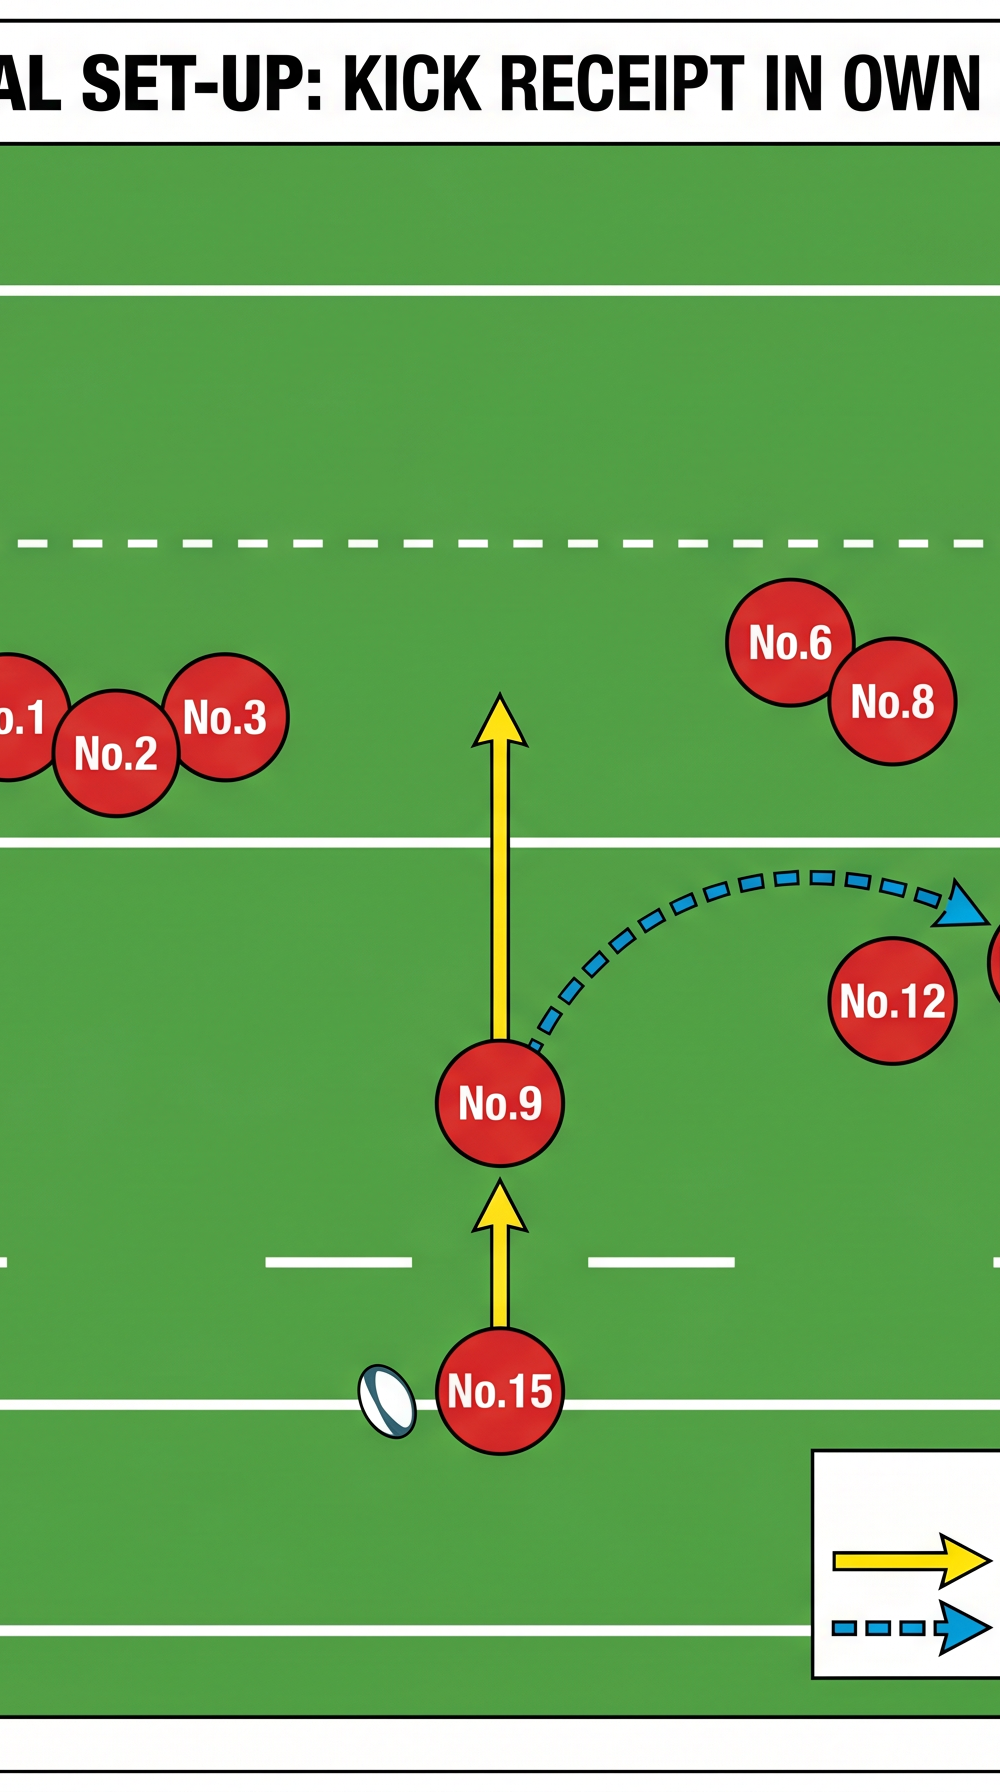
Player Positions:
- No.15 (Fullback): Deep to receive the initial kick.
- No.9 (Scrum-half): Tracking the ball to secure the base.
- No.10 (Fly-half): Positioned at first receiver, ready to distribute or kick.
- Forwards (Pod of 3): Positioned flat and hard, ready to carry over the gain line.
- Wingers (No.11 & No.14): Holding width, ready to chase the clearance kick.
3. Step-by-Step Instructions
Phase 1: The Receipt and Setup
- Secure the Ball: The Fullback (No.15) catches the ball cleanly. Communication is key here; they must call "Mine!" early and loud.
- Set the Target: The Fullback runs forward aggressively, aiming to take the tackle on their own terms, ideally making 5-10 metres.
- Secure the Ruck: The nearest support players (often the wingers or loose forwards) must secure the ruck immediately. The Scrum-half (No.9) arrives to distribute.
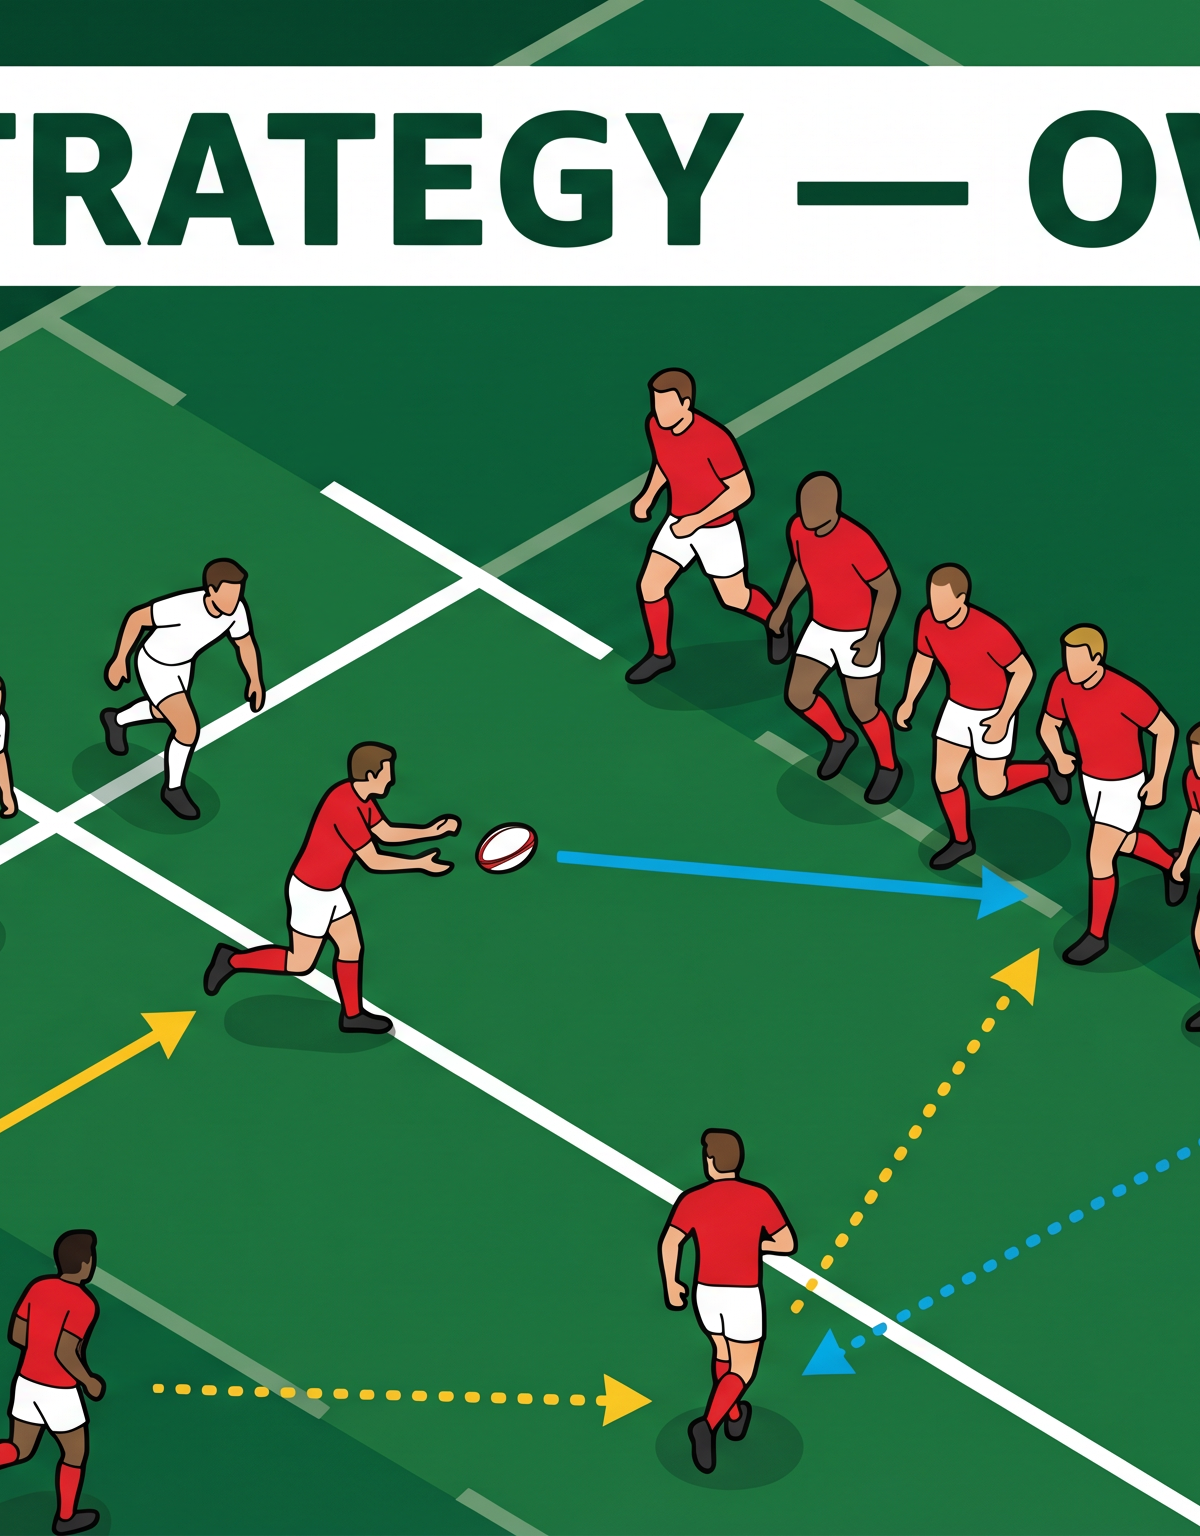
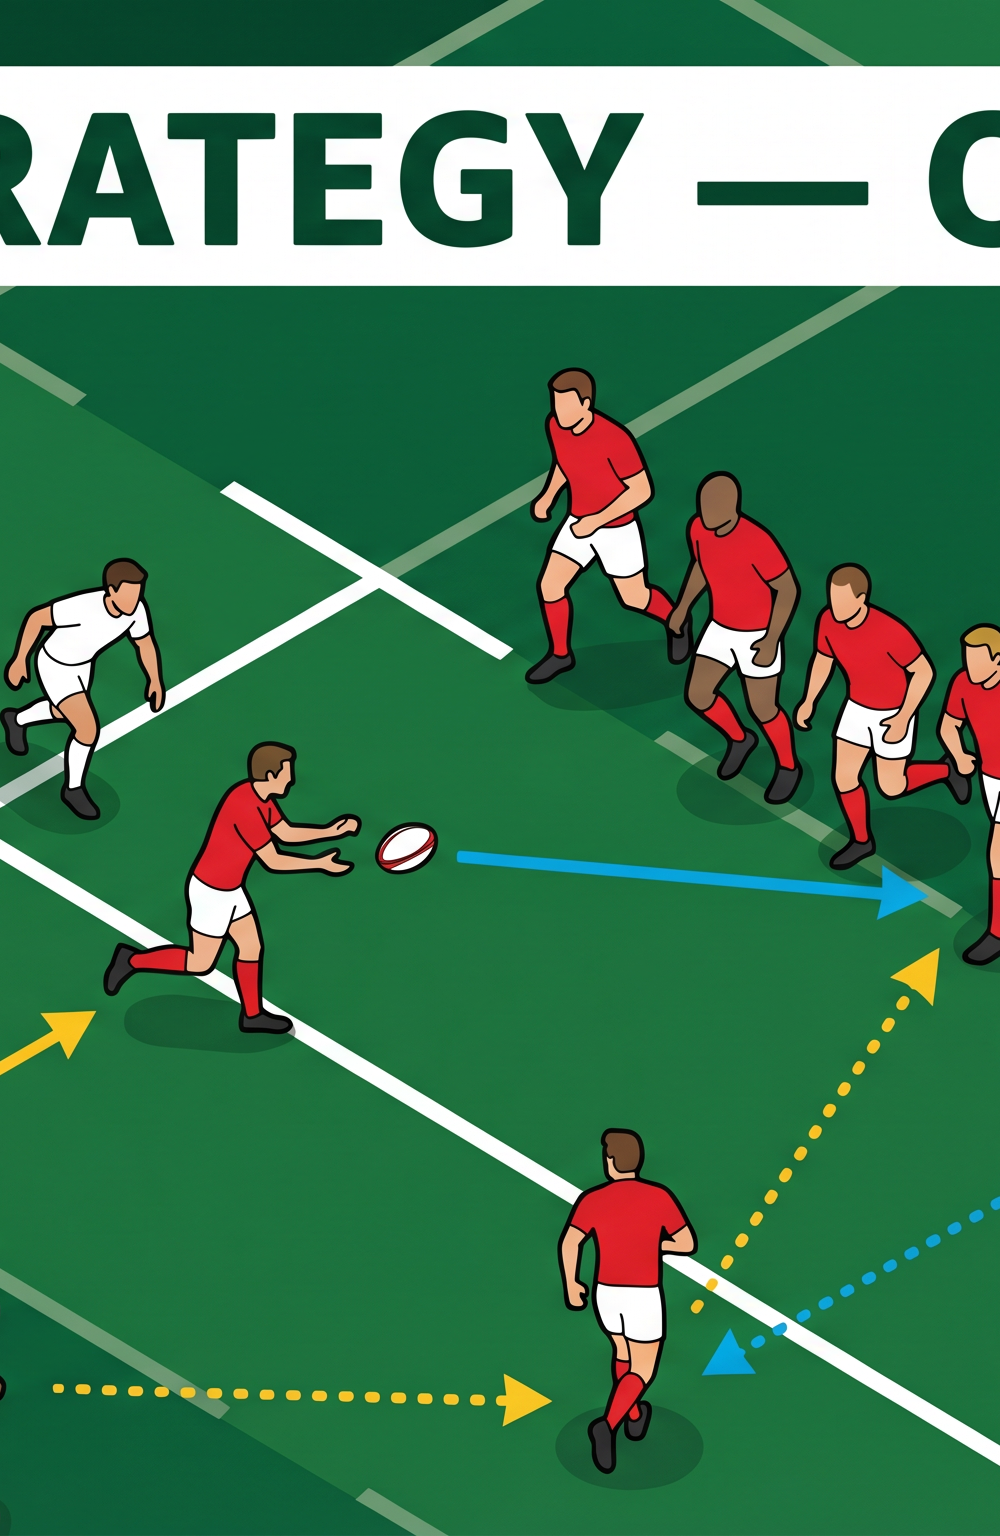
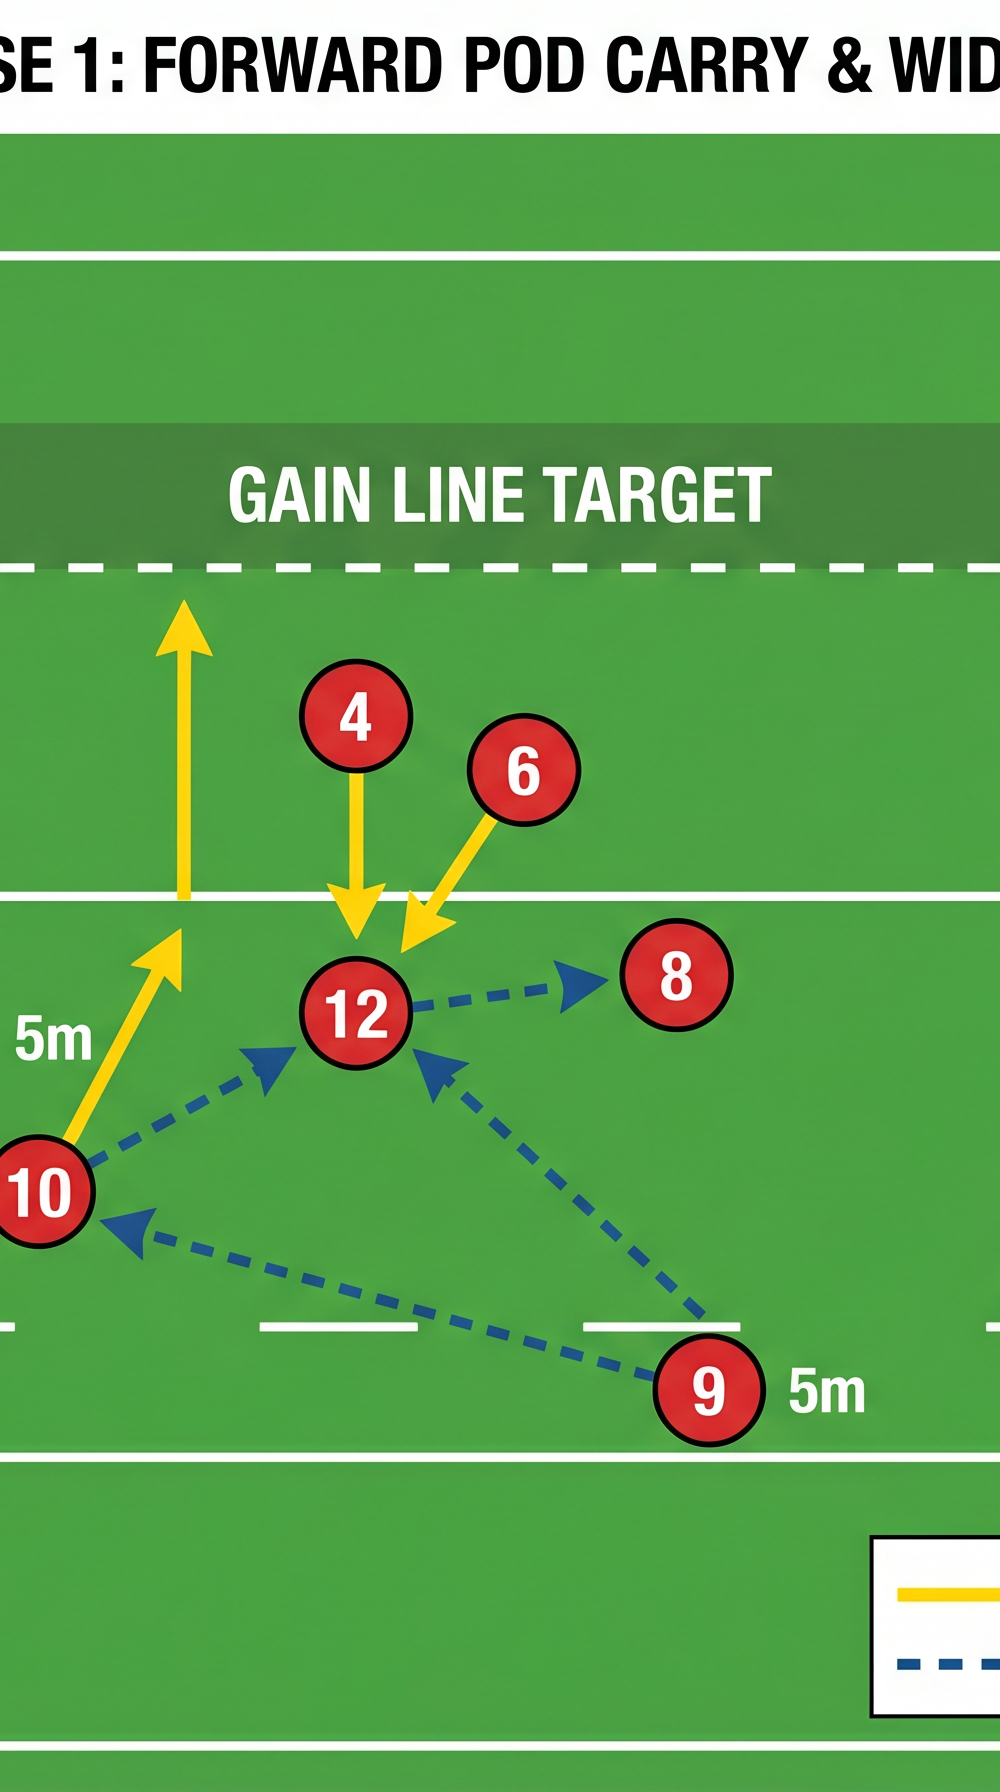
Phase 2: The Forward Carry (The 'Iron Wall')
- Distribute to the Pod: The Scrum-half passes to the Fly-half (No.10) or directly to a forward pod (e.g., No.4, No.6, No.8) positioned flat.
- Punch the Line: The designated ball carrier hits the defensive line hard and low, aiming to cross the gain line (or at least get back to the 22m line if the catch was deep). The two support forwards latch on or clear the ruck aggressively.
- Lightning Quick Ball (LQB): The goal of this ruck is to produce ball in under 3 seconds. The Scrum-half must be ready the moment the ball is available.
Phase 3: The Clearance Kick and Chase
- The Kick: With the opposition defence retreating from the forward carry, the Scrum-half passes back to the Fly-half (No.10) who has dropped into the pocket.
- Execution: The Fly-half executes a territorial kick aiming for the 'Target Kick Zone' (touch near halfway) or a high contestable kick if the backfield is empty.
- The Chase: The Wingers (No.11, No.14) and Outside Centre (No.13) form a disciplined chase line, sprinting to put pressure on the receiver or contest the ball.
4. Key Coaching Points
- Communication on Receipt: The back three must communicate clearly on who is taking the high ball to avoid collisions and knock-ons.
- Body Height in the Carry: The forward pod must carry with low body height and leg drive. A high carry risks a choke tackle and a turnover maul.
- Ruck Speed: The success of the kick depends entirely on the speed of the ruck from the forward carry. Slow ball allows the defence to charge down the kick.
- Kicker's Depth: The Fly-half must ensure they are deep enough in the pocket to avoid charge-downs, but not so deep that they lose distance on the kick.
- Disciplined Chase: A kick is only as good as its chase. The chase line must remain connected and avoid being stepped easily.
5. Common Mistakes
- Isolated Catcher: The Fullback catches the ball but has no support, resulting in an immediate holding-on penalty.
- Static Forward Pod: The forwards receive the ball standing still, allowing the defence to dominate the collision and slow the ball down.
- Kicking Off Slow Ball: The Fly-half attempts the clearance kick despite a slow ruck, leading to a charged-down kick and panic in the 22.
- Fractured Chase Line: Players chase the kick individually rather than as a wall, creating dog-legs for the counter-attacker to exploit.
6. Variations & Progressions
- Variation 1 (The Box Kick): Instead of passing to the Fly-half, the Scrum-half executes a box kick directly from the base of the ruck following the forward carry. This is excellent for contestable exits.
- Variation 2 (Wide Shift): If the defence over-commits to the forward pod, the Fly-half can bypass them and pass wide to the centres to run the ball out if a clear overlap exists.
- Progression 1 (Live Defence): Introduce 5-7 defenders with ruck pads, then progress to full contact to test decision-making under pressure.
7. Age Adaptations
- Under 10s/12s: Focus heavily on the safe catch and the first strong carry. Kicking from hand may be limited by skill or local rules, so emphasize running to space and supporting the ball carrier.
- Under 14s/16s: Introduce the structured forward pod and the concept of 'buying time' for the kicker. Focus on the mechanics of the clearance kick and the discipline of the chase line.
- Open/Seniors: Expect high-speed execution, complex pod structures (e.g., 1-3-3-1), and precise kicking to specific zones. The chase line must be aggressive and coordinated.