Kick-Off Reception and Counter-Attack Play
Master the crucial transition from kick-off reception to a devastating wide counter-attack to catch the defense unorganised.

Equipment Needed
Kick-Off Reception and Counter-Attack Play
A well-executed kick-off reception sets the tone for the entire match. This comprehensive set play resource outlines a structured approach to securing the ball from a restart and immediately launching a coordinated counter-attack to exploit unorganised defensive lines.
1. Overview
The primary objective of this set play is twofold: first, to safely secure possession from the opposition's kick-off; second, to rapidly transition into an attacking shape before the kicking team can establish a set defensive line. By drawing the initial chasers into a central ruck and quickly shifting the ball wide, your team can exploit the inevitable spaces on the edges.
This play is highly effective when used against teams that employ a narrow, aggressive chase. It requires strong communication, precise lifting techniques (if applicable to the age grade), and rapid realignment from the backline.
2. Setup

Pitch Setup and Equipment
- Pitch Dimensions: Standard 100m x 70m rugby pitch.
- Equipment: 4-5 match balls, 10-12 training cones to mark starting zones and target attack channels, and colored bibs to distinguish the kicking team (defenders) from the receiving team.
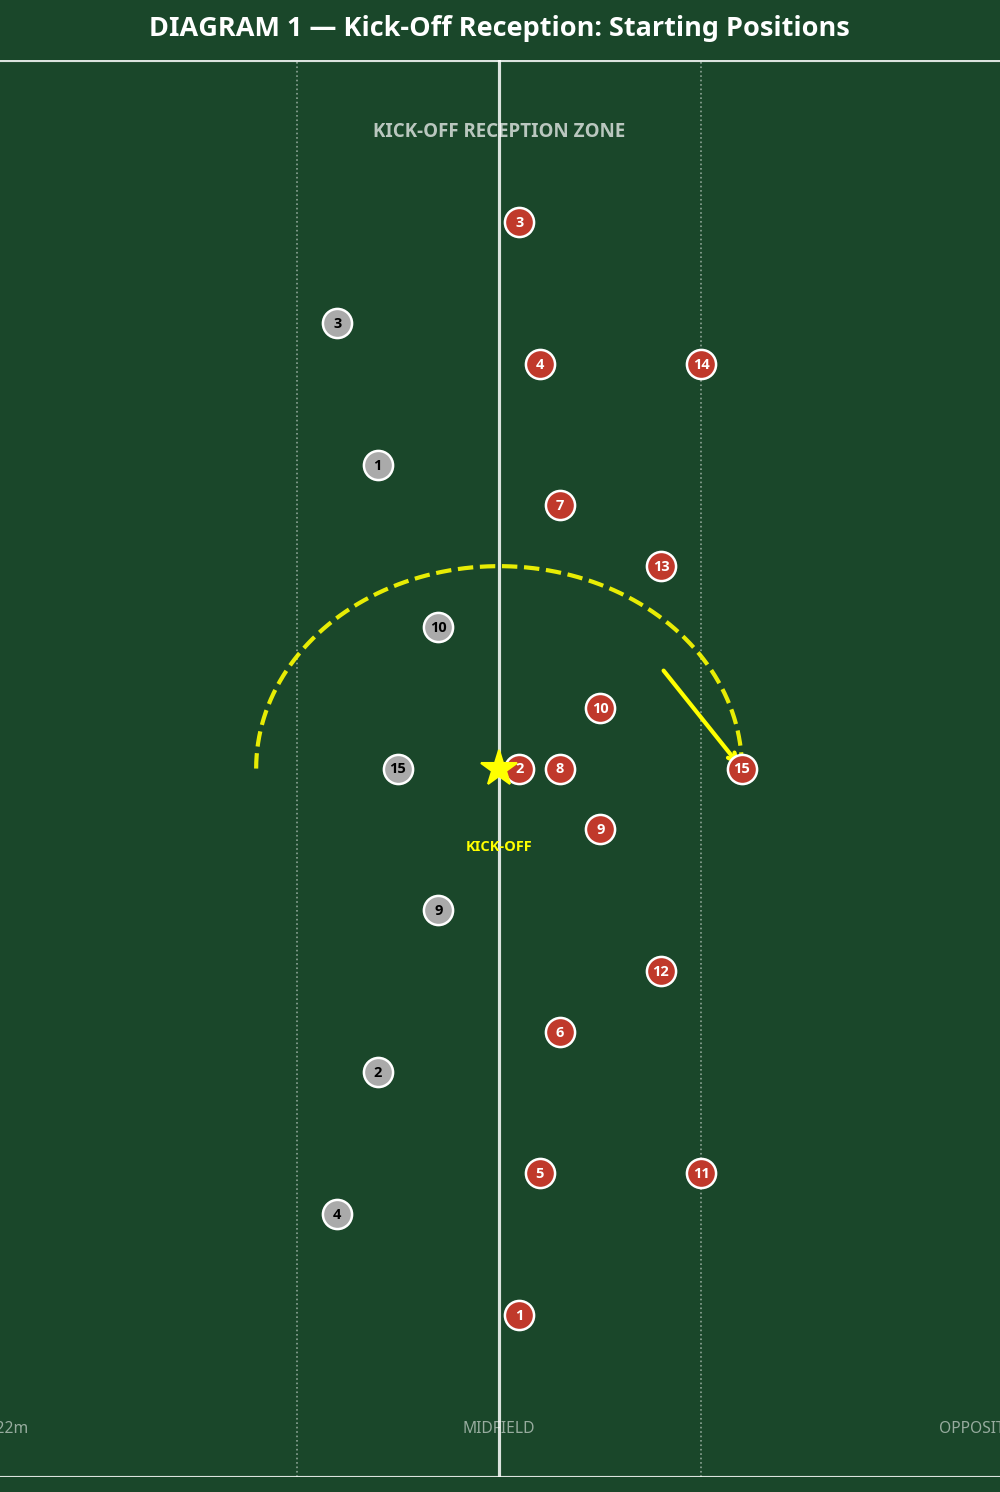
- Starting Position: The receiving team sets up in their standard kick-off reception formation between the 10m line and their own 22m line.
Player Positions
The alignment requires a balanced spread across the pitch to cover all kick variations.
- Front Pods (Props, Locks, Back Row): Positioned between the 10m and 22m lines, ready to lift or support the primary catchers.
- Primary Catchers (Typically 8, 4, 5, or 15): Positioned in the highest probability drop zones.
- Organisers (9 and 10): Positioned centrally to dictate the play post-catch.
- Outside Backs (11, 12, 13, 14): Spread wide, ready to cover deep kicks or initiate the counter-attack.

3. Step-by-Step Instructions

- The Catch and Secure: As the ball is kicked, the designated catcher calls for the ball early and loudly. The supporting forwards (6, 7, and 8) immediately converge on the catcher.
- Establishing the Ruck: Upon catching the ball, the catcher drives forward into the initial contact. Support players bind tightly, driving past the ball to secure a clean, fast ruck.
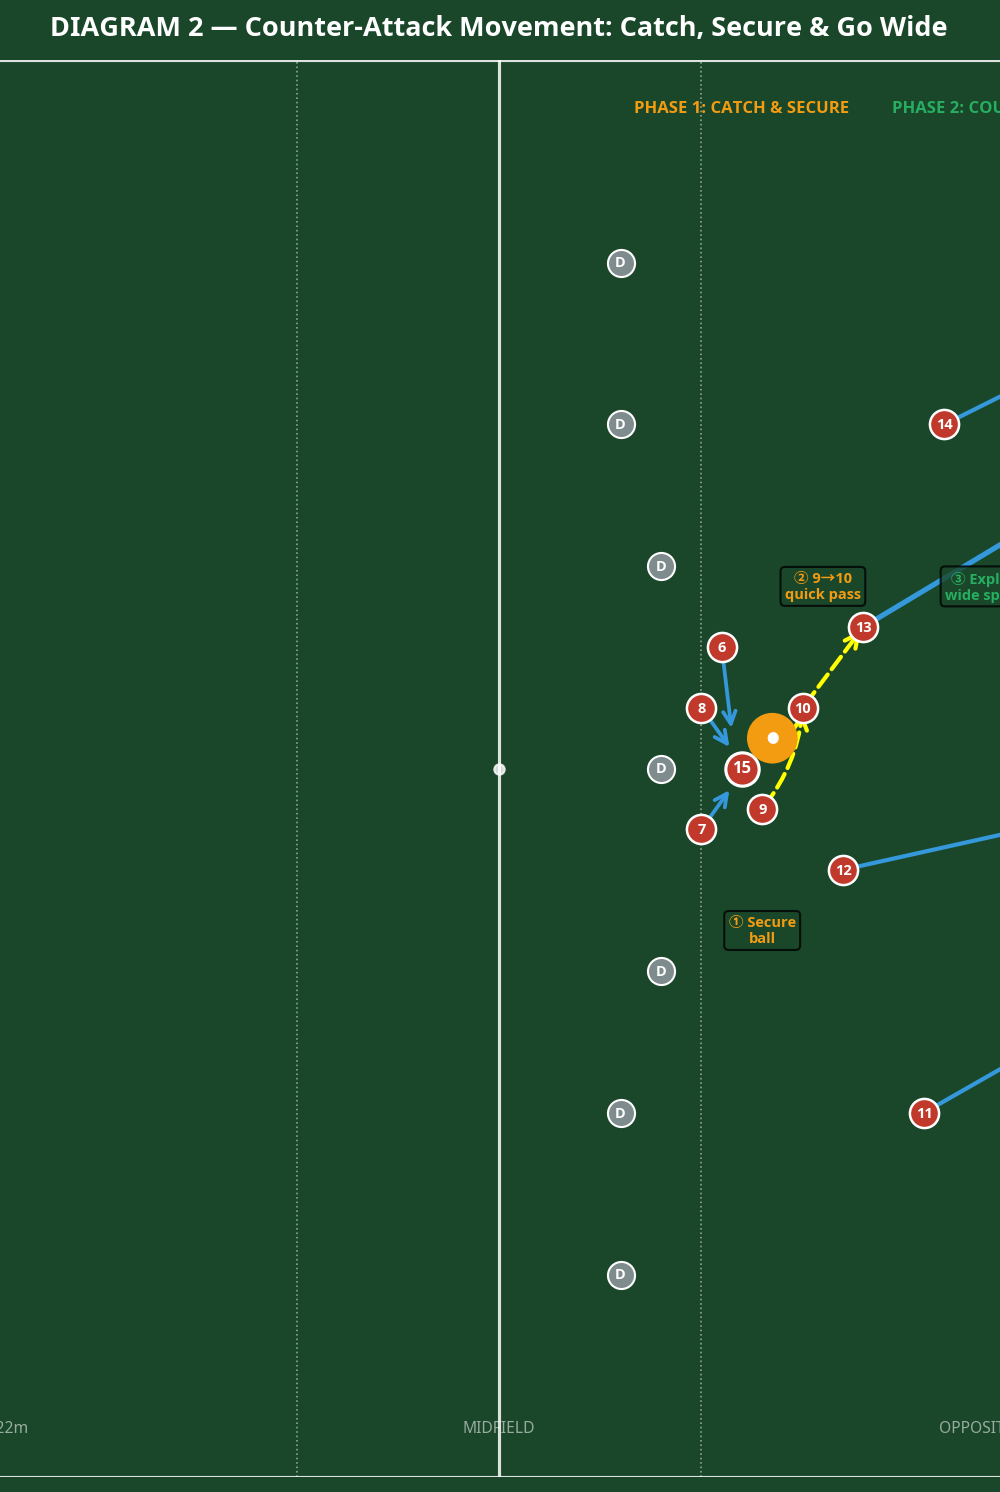
- The Clearing Pass: The Scrum-half (9) arrives rapidly at the base of the ruck and delivers a swift, flat pass to the Fly-half (10), who is positioned on the move.
- The Wide Shift: The Fly-half (10) engages the first defender before executing a quick pass to the Inside Centre (12) or directly to the Outside Centre (13).
- Exploiting the Space: The Outside Centre (13) and Wing (14) accelerate into the wide channels. 13 draws the final defender and offloads to 14, who breaks down the touchline.
4. Key Coaching Points
- Early Communication: The catcher must claim the ball loudly and early to avoid collisions.
- Aggressive Support Lines: Support players must react instantly, arriving at the catcher simultaneously with the opposition chasers.
- Body Height in Contact: The catcher must lower their body height before contact, presenting the ball cleanly for the Scrum-half.
- Speed of Delivery: The Scrum-half must clear the ball from the base of the ruck within 3 seconds.
- Running onto the Ball: The backline must be moving forward as they receive the pass, attacking the gain line.
5. Common Mistakes
- Waiting for the Ball: Players standing flat-footed, allowing chasers to tackle them immediately upon catching.
- Isolation: The catcher running away from support, resulting in a turnover or holding-on penalty.
- Slow Ruck Speed: Forwards failing to clear out beyond the ball, allowing the defense to spread.
- Drifting Sideways: The backline running laterally across the pitch rather than fixing defenders with straight hard lines.
6. Variations & Progressions

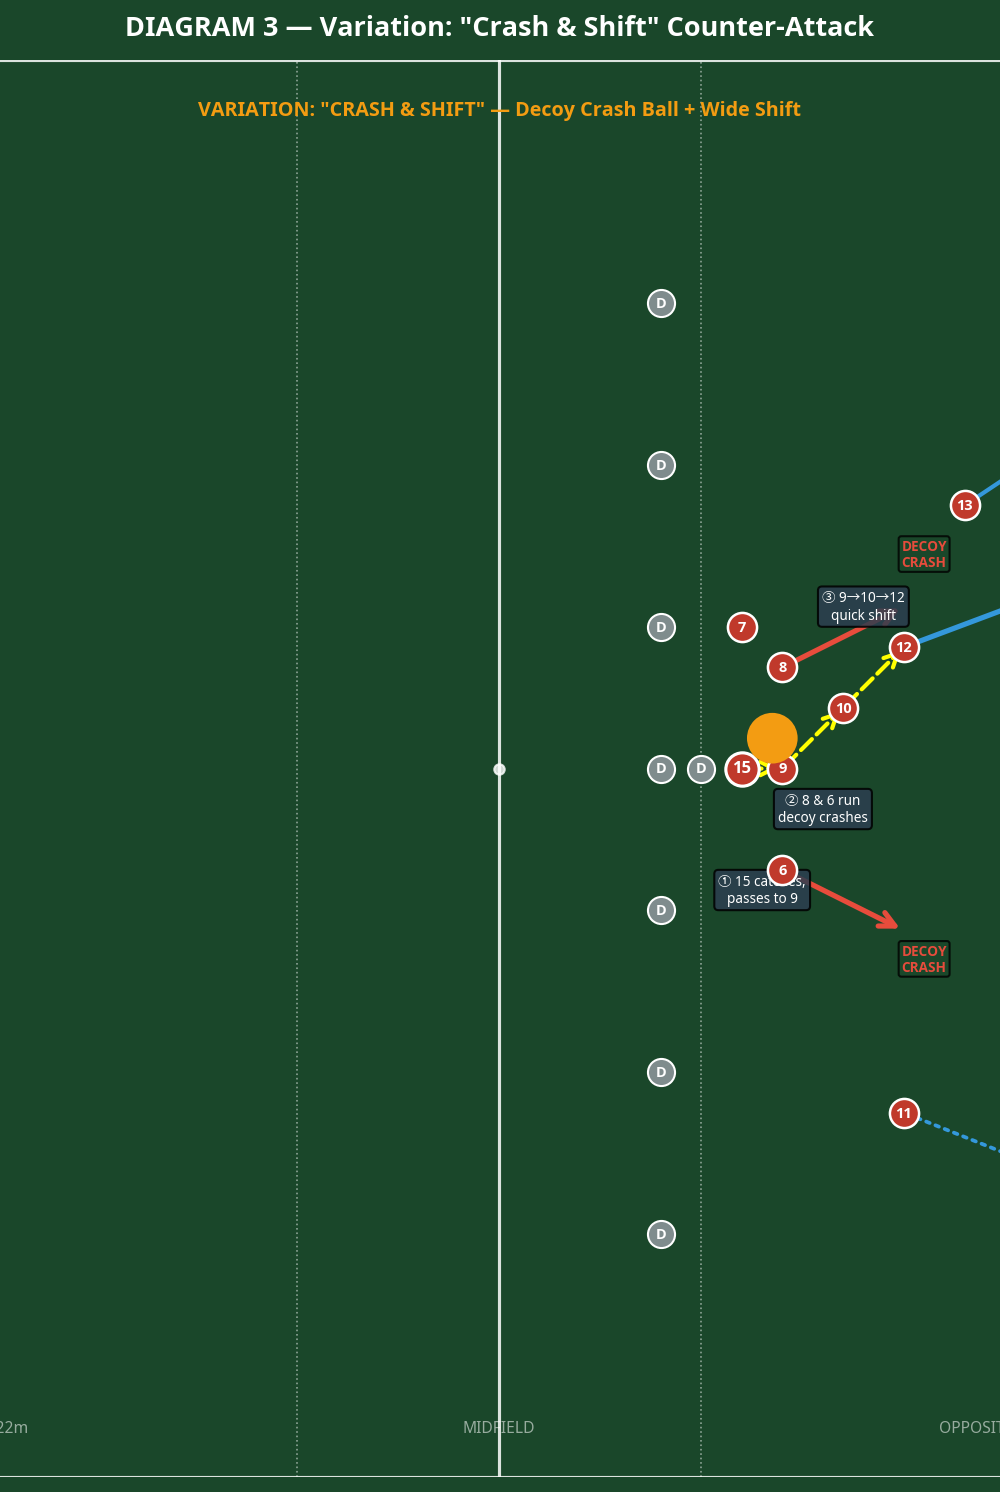
Variation: "Crash & Shift"
The Scrum-half (9) passes to a heavy forward (No.8) running a hard decoy crash line. This draws the defense inward. The Fly-half (10) then wraps around or takes a secondary pass to launch the wide attack.

Progression: Kicking Option
If the defense drops back quickly to cover the wide shift, the Fly-half (10) or Fullback (15) executes a tactical kick (grubber or high up-and-under) into the space behind the rushing defensive line.
7. Age Adaptations

- Under 10s / Minis: Focus entirely on safe catching and basic support structure. Remove the complex wide shift.
- Under 12s - Under 14s: Introduce quick ball delivery from the Scrum-half and basic passing down the backline.
- Under 16s - Open Grade: Implement lifting at the kick-off (where laws permit). Focus on transition speed, decoy runners, and exploiting defensive mismatches.