The Launchpad: Elite Kick-Off Reception and Counter-Attack
Transform defensive kick-off receptions into devastating attacking platforms with this structured counter-attack system.
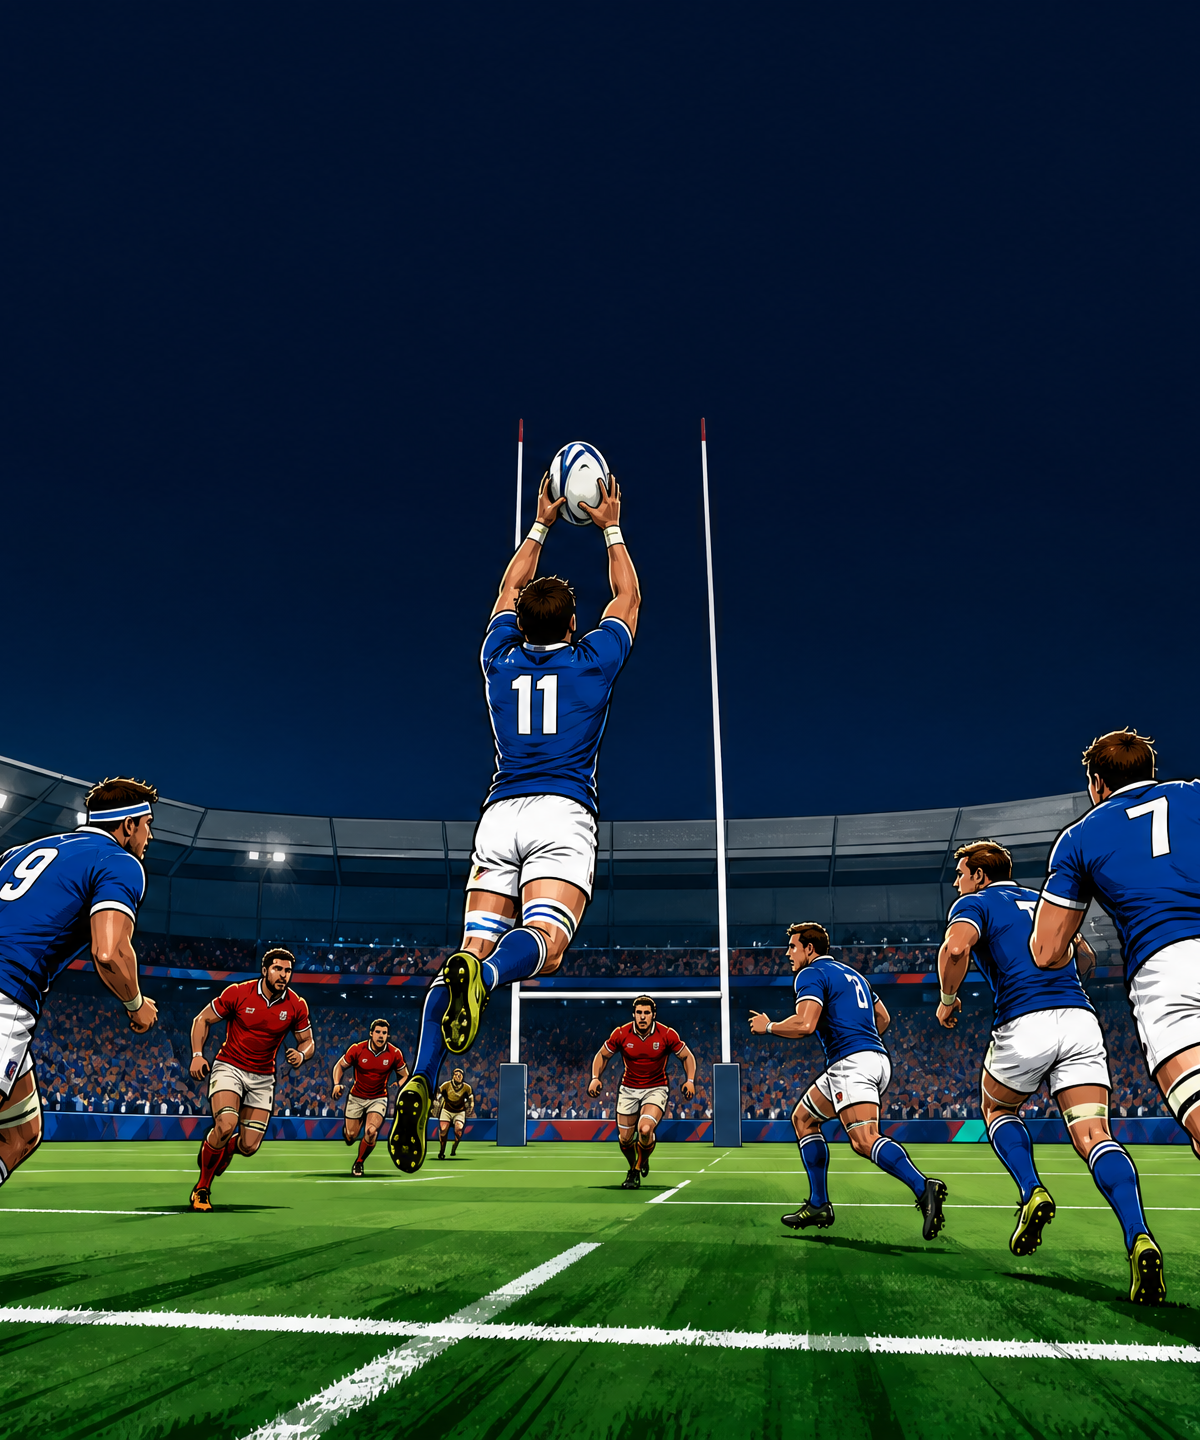
Equipment Needed
1. Overview
The kick-off reception is often viewed purely as a defensive chore—a moment to secure possession and kick the ball back to safety. However, elite teams treat the kick-off reception as a prime attacking opportunity. The "Launchpad" system is designed to secure the ball safely, manipulate the chasing defense, and launch a structured counter-attack before the opposition defensive line can set.
By utilizing pre-determined pods, decoy runners, and sharp decision-making from the spine of the team (9, 10, 15), coaches can turn the opponent's restart into a line-break opportunity. This play is best used when you have confident catchers, mobile forward pods, and when the opposition tends to over-commit chasers to the breakdown.
2. Setup
Equipment Needed:
- 1 full-size Rugby pitch (100m x 70m)
- 4–5 Rugby balls
- Cones to mark starting positions and target channels
- Bibs (15 for attacking team, 7–10 for defending chasers)
Pitch Setup & Player Positions:
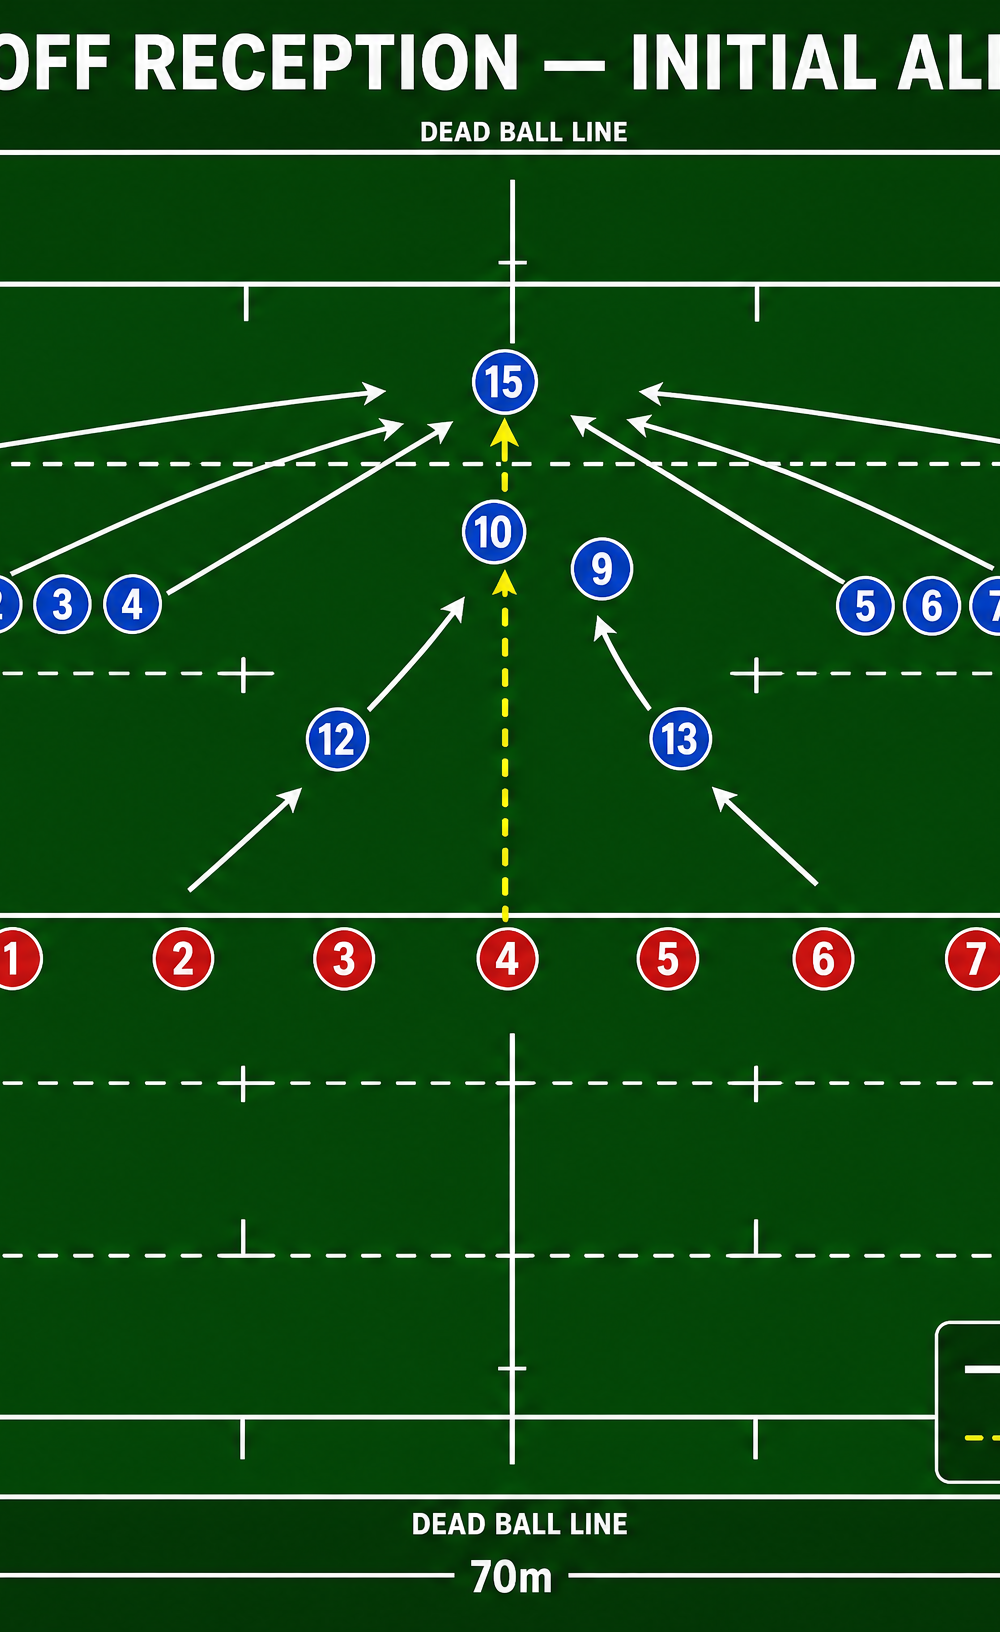
- #15 (Fullback): Positioned centrally, just behind the 10m line. Primary catcher.
- #11 & #14 (Wingers): Holding width on the 10m line as secondary catchers and wide outlets.
- #10 (Fly-half): Positioned 5m behind #15 to organize the attack and act as the first receiver if #15 doesn't run.
- #9 (Scrum-half): Positioned 2m to the right of #10, ready to sweep to the breakdown or receive an immediate offload.
- #12 & #13 (Centres): Positioned either side of #10 at 15m depth, ready to run hard support lines.
- Forwards (#1–#8): Split into two pods of four, positioned near the 10m line on either side of the centre channel.
3. Step-by-Step Instructions
Phase 1: The Catch and Secure
- As the kicker approaches the ball, the forward pods read the trajectory. If the kick is short, designated lifters elevate the primary jumper.
- For a deep kick, #15 tracks the ball, calling "MINE" early and loudly. #10 and #9 move into support positions 5m behind #15.
- #15 catches the ball at its highest point, turning slightly side-on to protect the ball from the immediate chase.
Phase 2: The Launch (Standard Counter)
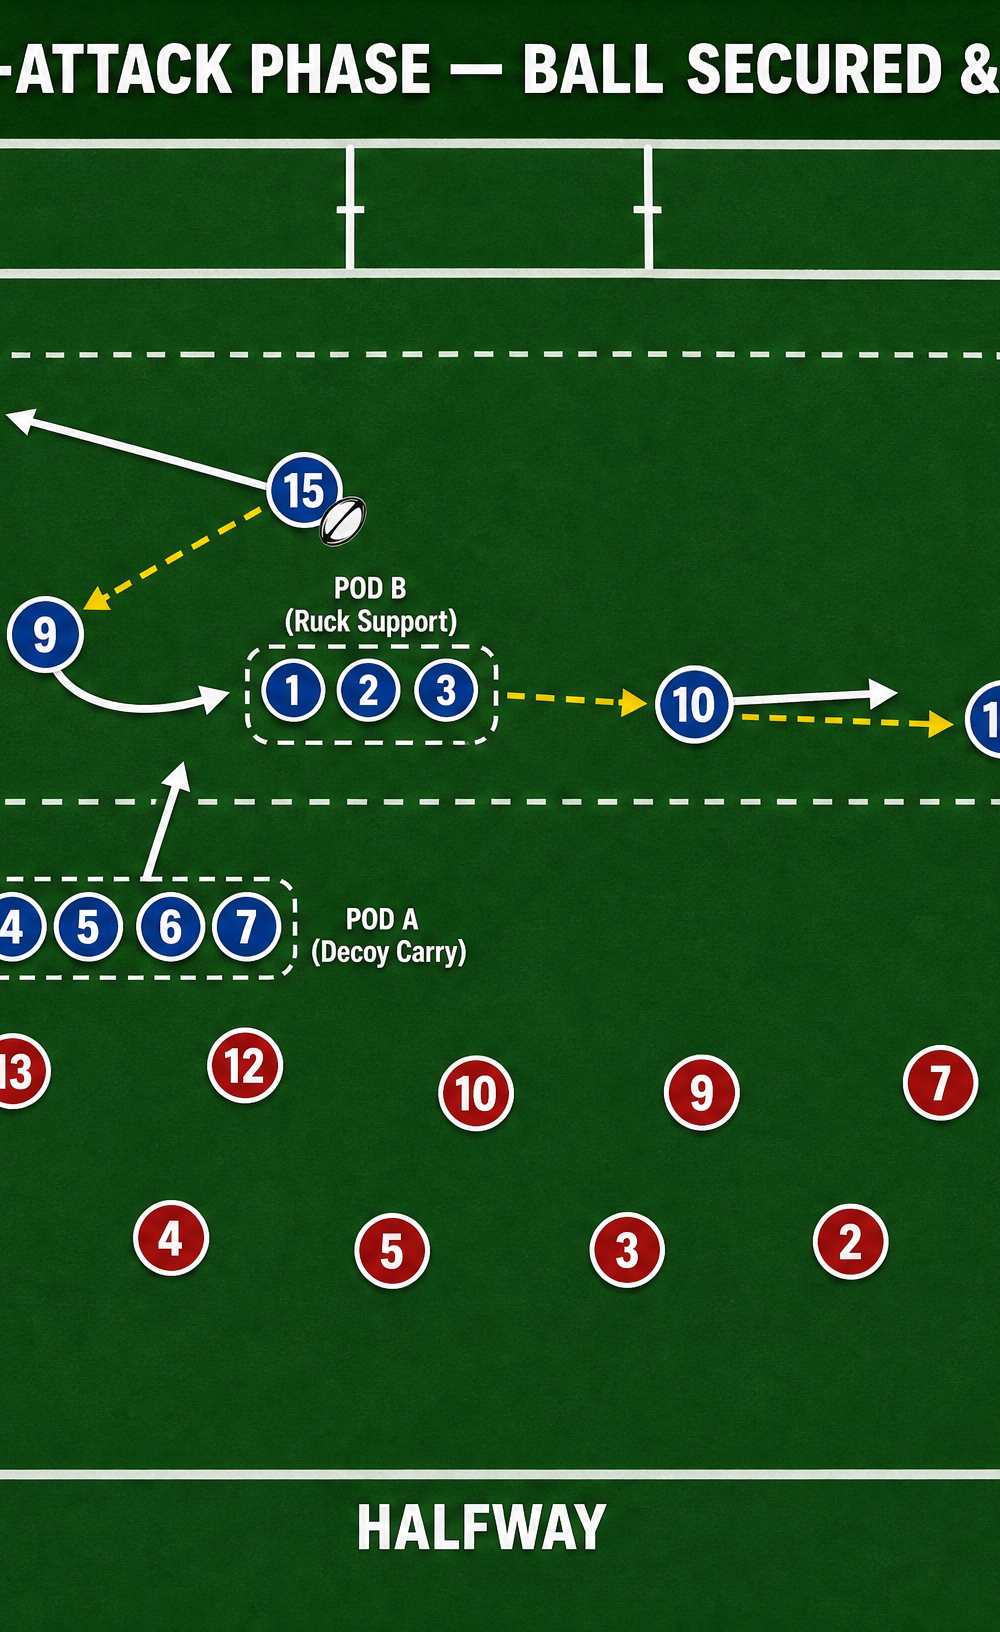
4. Upon landing, #15 assesses the chase. Instead of taking contact, #15 runs a hard angle to the left, drawing the first wave of chasers.
5. #15 passes back inside to #9, who has looped around.
6. #9 immediately fires a flat pass to #10, who is attacking the line on the right side.
7. Pod A (Left Forwards) drives forward 10m as a decoy, holding the inside defenders.
8. #10 engages the defensive line and passes to #12, running a hard line 5m outside.
9. #14 (Right Winger) sprints into the wide channel, looking for the final pass from #12 to break the line.
4. Key Coaching Points
- Communication is Non-Negotiable: The catcher must claim the ball early. Silence leads to collisions and knock-ons.
- Catch on the Move: The catcher should be moving forward to meet the ball, not waiting flat-footed. This generates immediate momentum.
- Decoy Lines Must Be Credible: Forward pods running decoy lines must sprint as if they are receiving the ball, with hands up and calling for it. This freezes the interior defense.
- Depth on the Counter: #10, #12, and #13 must maintain sufficient depth. If too flat, the scrambling defense will easily drift and shut down the play.
- Scan the Chase: The playmaker (#10 or #15) must keep their eyes up. If the defense floods one side, they must instantly communicate the switch to the blindside.
5. Common Mistakes
- Isolation of the Catcher: The catcher takes the ball into contact without support, leading to an immediate turnover or penalty.
- Static Support Lines: Backs receiving the ball while standing still, allowing the defense to make dominant tackles.
- Ignoring the Blindside: Failing to recognize when the defense has over-committed to the open side, missing massive overlaps on the short side.
- Poor Lifting Technique: Forwards failing to secure the jumper on short kicks, leading to contested balls in the air.
6. Variations & Progressions
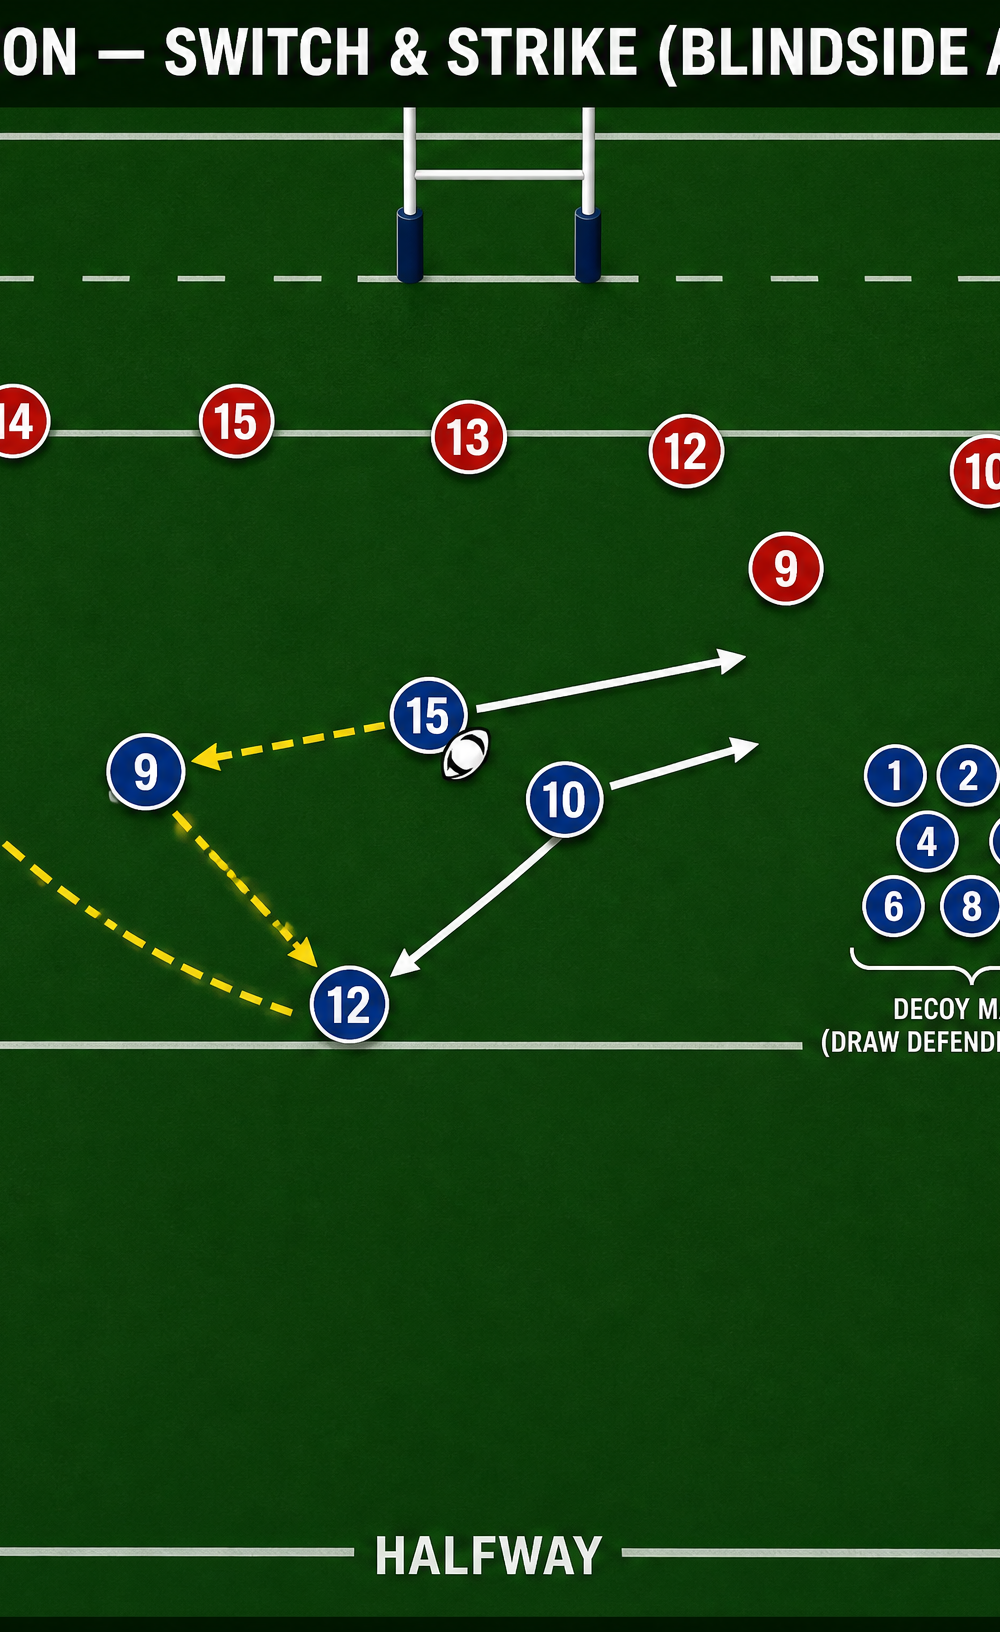
Variation: Switch & Strike (Blindside Attack)
If the opposition chasers consistently flood the open side, use the "Switch & Strike":
- #15 catches centrally and runs hard right.
- #15 passes inside to #9, who hits #12 running a sharp switch line back to the left (blindside).
- #12 attacks the gap and hits #11, who is holding width on the left touchline, for a clean break.
Progression 1: Contested Air
Introduce a live chasing team with tackle shields. Chasers are allowed to contest the ball in the air (safely) to pressure the catcher and lifters.
Progression 2: Unstructured Decision Making
The coach calls out a specific defensive alignment mid-flight (e.g., "Heavy Left!"). The spine (9, 10, 15) must instantly communicate and execute the correct variation based on the call.
7. Age Adaptations
- Under 10s / Under 12s: Remove lifting completely. Focus entirely on the technique of catching the high ball (cradle catch) and immediate presentation. The counter-attack should be a simple one-pass play to the fastest runner.
- Under 14s / Under 16s: Introduce basic lifting pods (if local regulations allow). Focus on the 15-to-9-to-10 passing chain and maintaining depth. Emphasize communication.
- Open / Senior: Full implementation including complex decoy lines, reading the defensive press, and executing the blindside switch variation at full speed.

