Master the Crease: Comprehensive Batting Stance & Footwork Drill
Build a rock-solid foundation for your batsmen with this multi-station drill focusing on stance balance, weight transfer, and precise footwork patterns.
Equipment Needed
1. Overview
A solid batting stance and precise footwork are the foundation of successful run-scoring in cricket. This drill is designed to help players develop a balanced setup at the crease and groove the essential forward and backward movements required to play both spin and pace bowling effectively. By breaking down the mechanics into shadow batting and cone-guided footwork, coaches can isolate technical flaws before introducing a moving ball. This is an excellent early-season or warm-up drill for players of all levels.

2. Setup
- Equipment Needed: 15–20 marker cones (preferably in multiple colors), cricket bats (pads and helmets optional for shadow batting but recommended for game realism), chalk or spray paint to mark creases if not on a formal pitch.

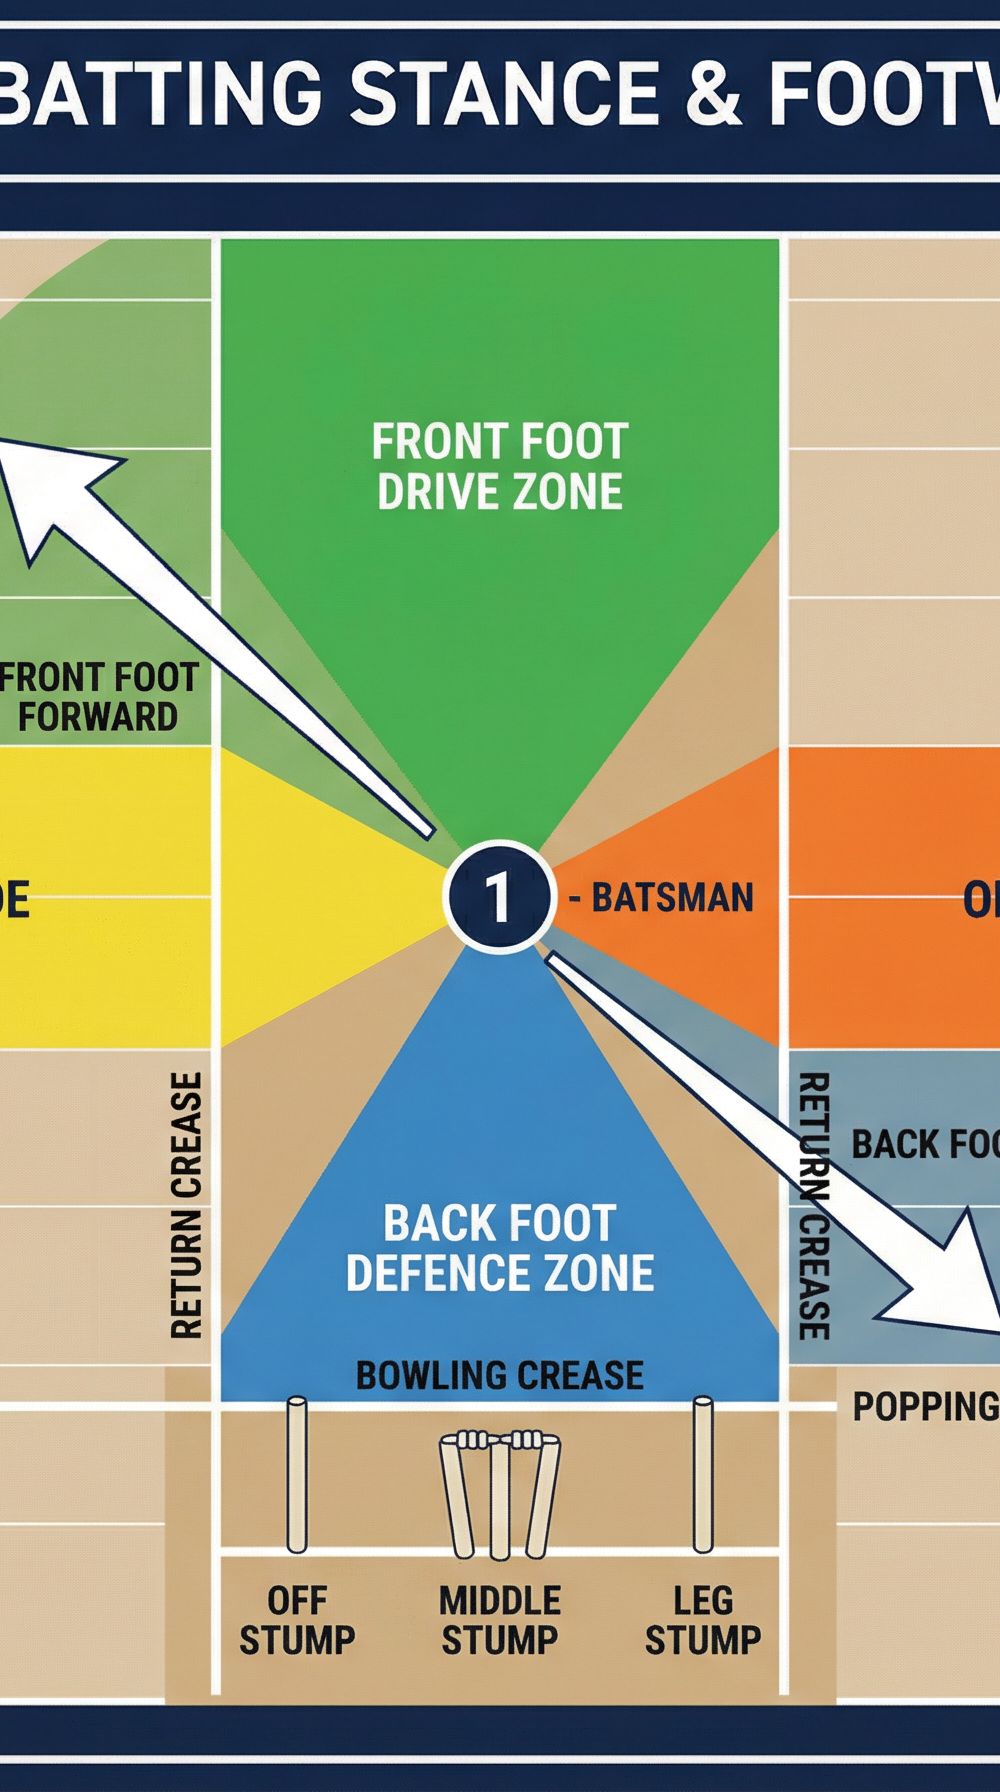
- Pitch/Field Setup: Utilize a standard 22-yard cricket pitch or a flat outfield area. Mark out the popping crease, bowling crease, and return creases clearly.
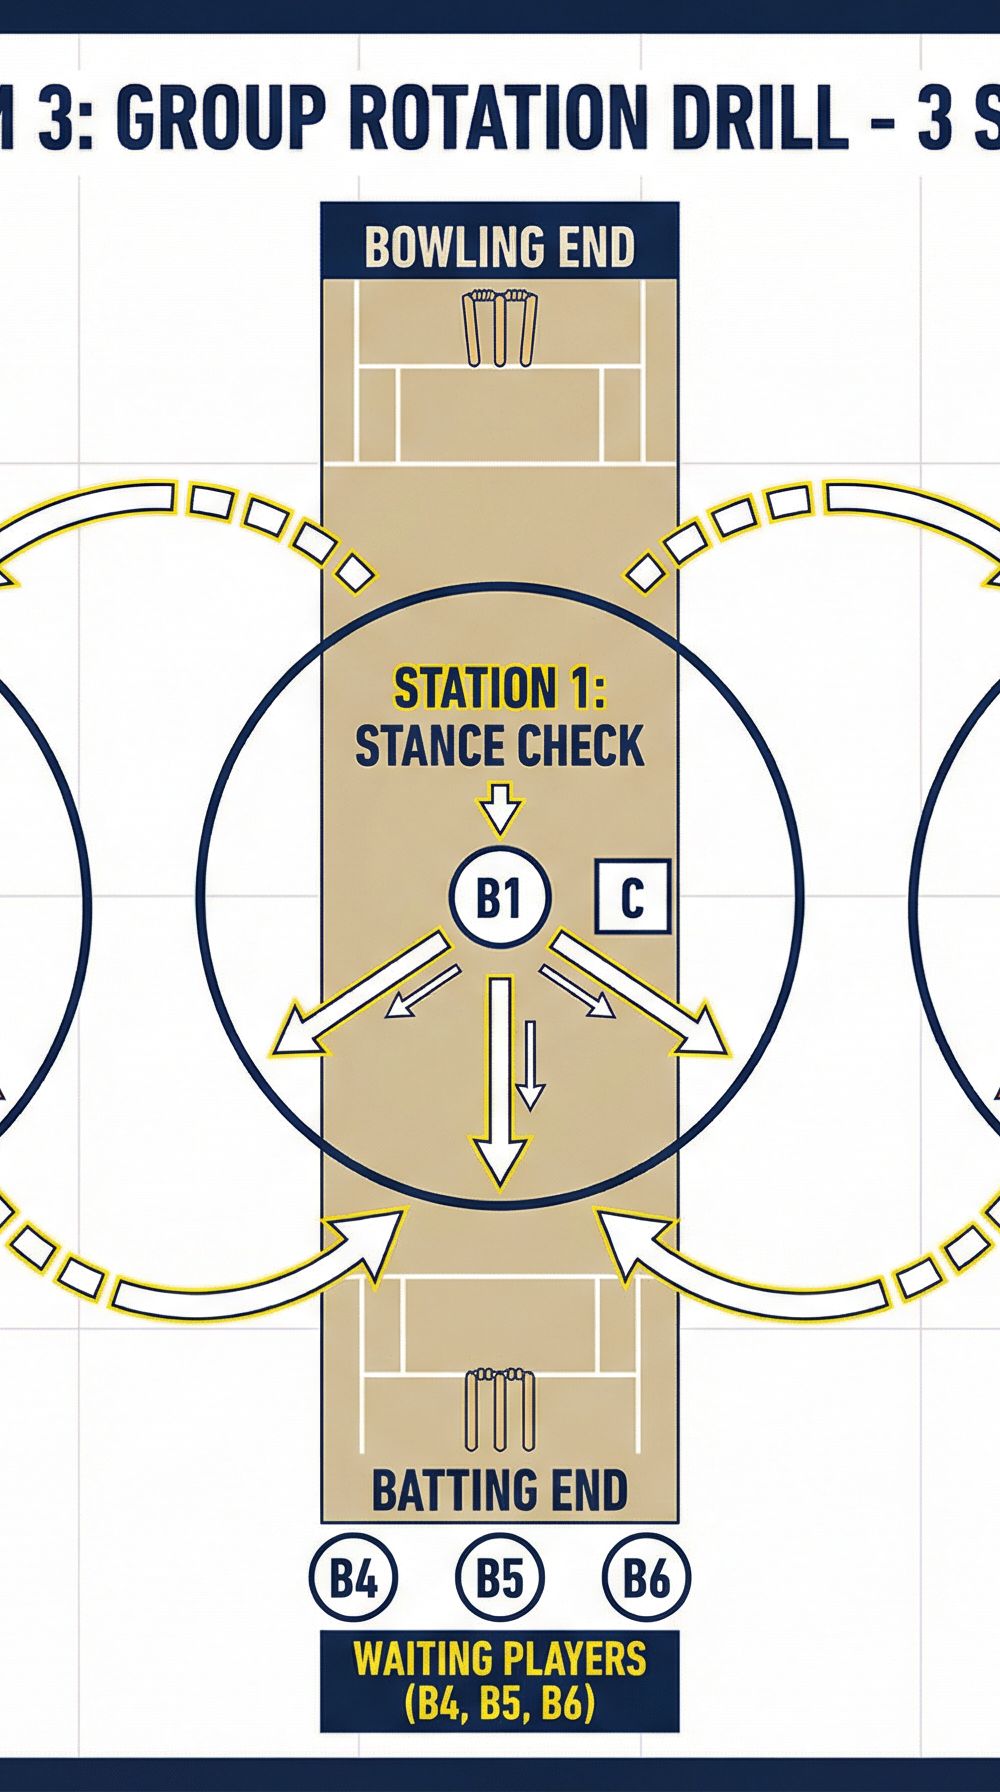
- Player Positions: Divide your squad into groups of 3–4 players per station to ensure high repetition rates and minimal standing around.
3. Step-by-Step Instructions

Station 1: The Stance Check
- The batsman (B1) takes guard at the popping crease.
- The coach (C) stands side-on — at square leg or point — to evaluate the batsman's base.
- On the coach's call of "Set", the batsman taps the bat and settles into their stance.
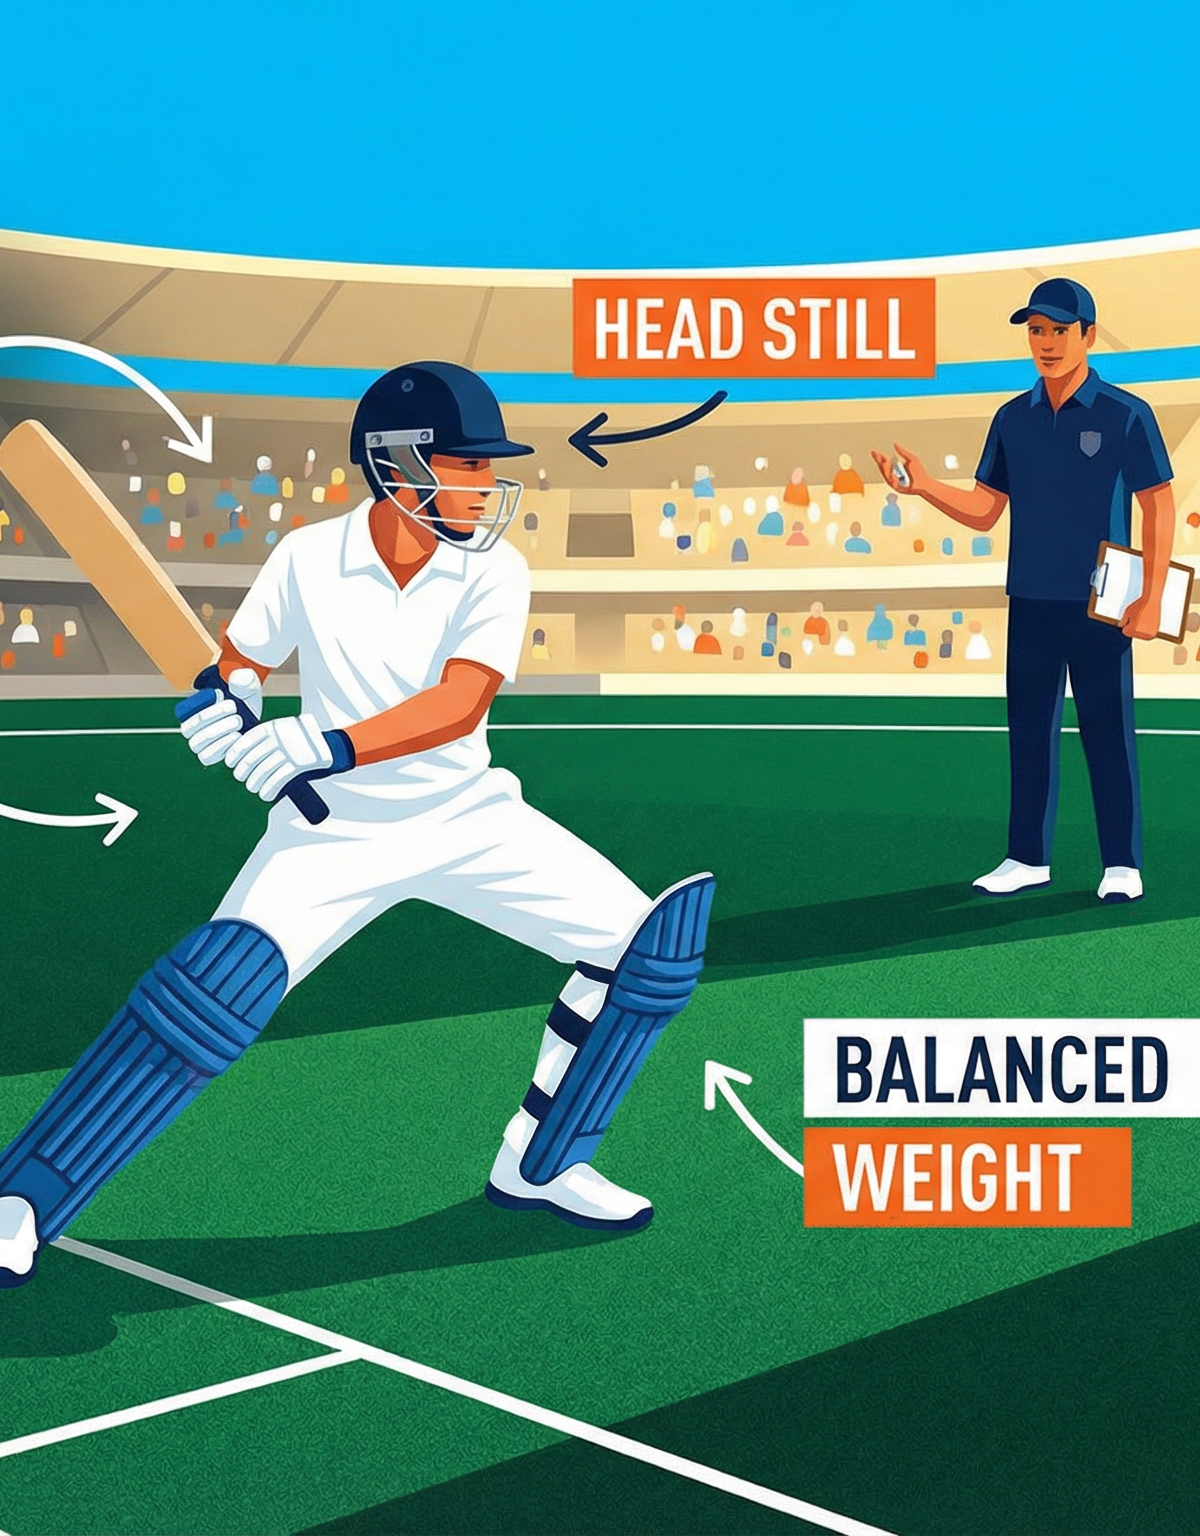
- The coach checks for shoulder alignment, head position (eyes level), and weight distribution (slightly forward on the balls of the feet).
Station 2: Front Foot Shadow Drives
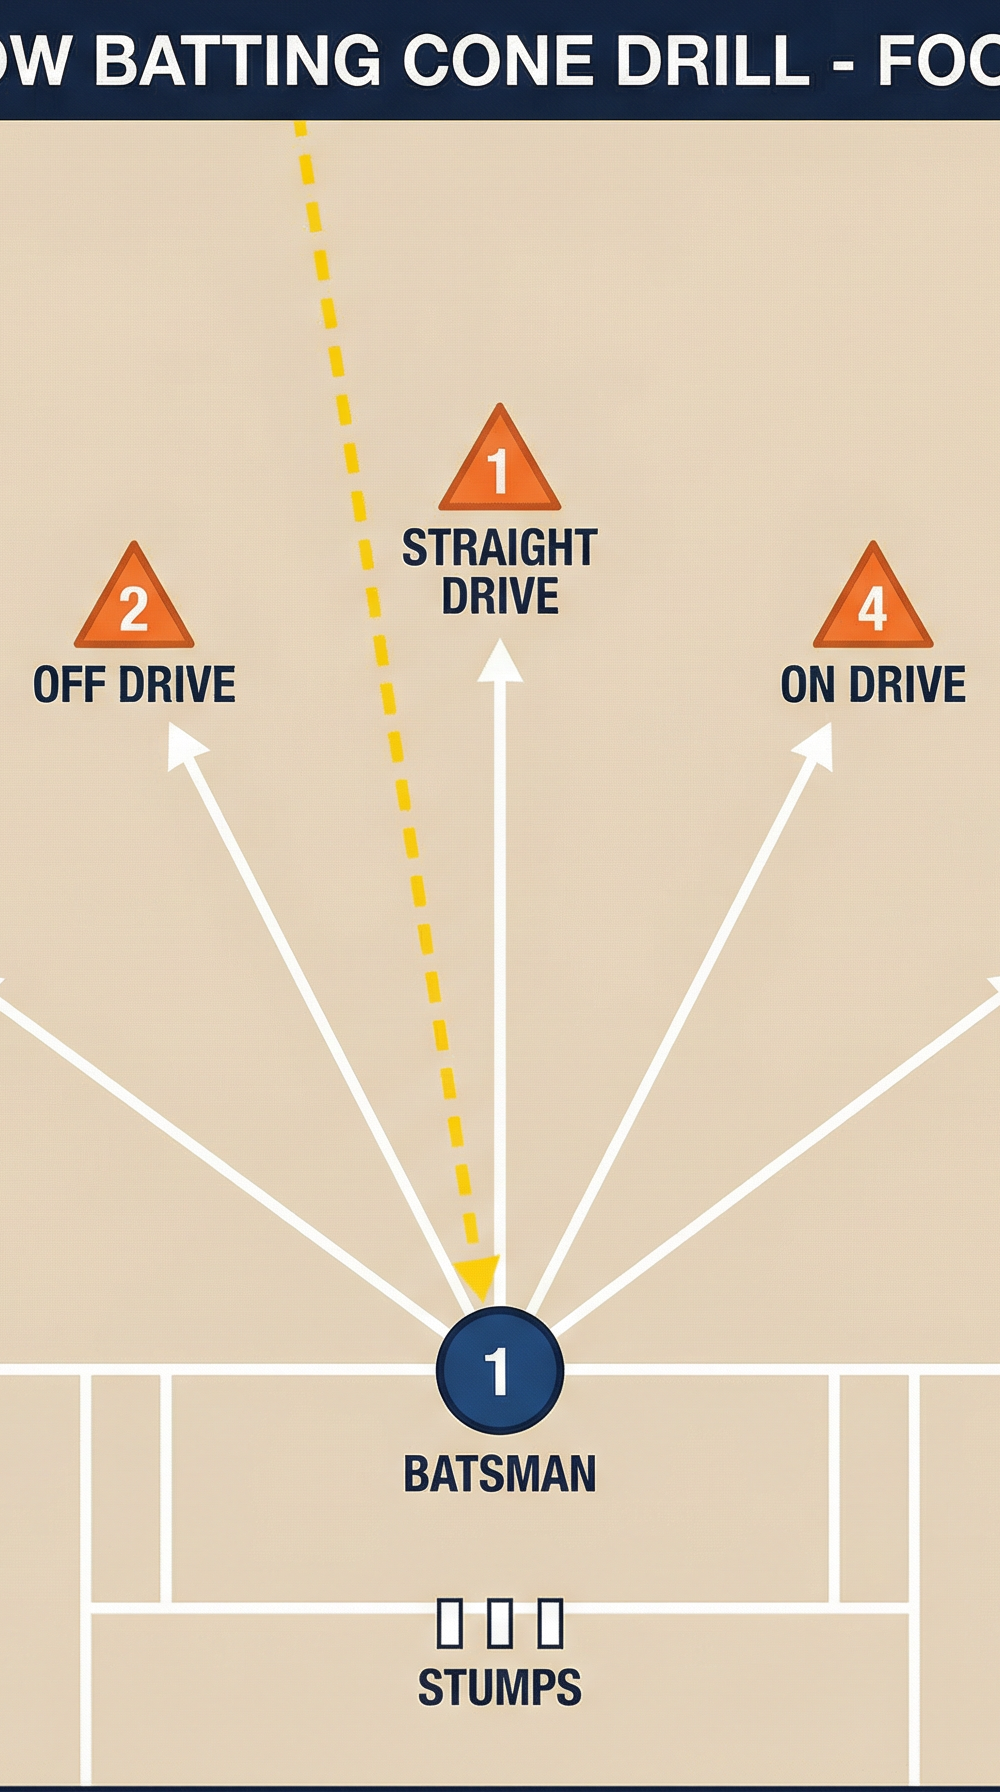
- Set up five cones in a semi-circle 3–4 yards in front of the popping crease, representing the straight, off, cover, on, and square drive zones.
- The batsman (B2) starts in their stance.
- The coach calls out a cone number or color.
- The batsman strides forward, leading with the head and front shoulder, planting their front foot next to the designated cone, and executes a shadow drive.
- The batsman holds the pose for 3 seconds to ensure balance before returning to the stance.

Station 3: Back Foot Shadow Defence & Cuts
- Set up cones behind the popping crease to simulate back-and-across movements.
- The batsman (B3) starts in their stance.
- On the coach's command, the batsman pushes back off the front foot, moving deep into the crease.
- The batsman executes a shadow back-foot defensive shot or a square cut, depending on the cone called.
- Players rotate through the stations clockwise every 3–4 minutes.

4. Key Coaching Points
- Head Stillness: The head must remain as still as possible during the movement. The head leads the feet, not the other way around.

- Base of Support: In the stance, feet should be roughly shoulder-width apart to provide a stable base without restricting mobility.
- Weight Transfer: For front foot shots, ensure the weight transfers fully over the bent front knee. The back foot should drag slightly or pivot on the toe.
- Shoulder Alignment: The front shoulder should point down the pitch towards the bowler to maintain a side-on position for as long as possible.
- Bat Path: Ensure the bat comes down straight from the backlift, brushing the pads on the way through for straight and defensive shots.
5. Common Mistakes
- Falling Over: Batsmen falling towards the off-side during their trigger movement, usually caused by the head falling outside the line of the front foot.
- Planting Too Early: Committing the front foot before the ball is released, leaving the batsman vulnerable to changes in length.
- Weight on Heels: Sitting back on the heels in the stance, which severely delays forward movement and traps the batsman on the crease.
- Bottom Hand Dominance: Gripping too tightly with the bottom hand, causing the bat face to close early and hit the ball in the air.
6. Variations & Progressions
- Progression 1 — Drop Ball: Once the shadow footwork is grooved, the coach stands 2 yards away and drops a tennis ball or soft cricket ball onto the cone for the batsman to hit.
- Progression 2 — Underarm Feeds: Move the coach back to 10 yards and provide underarm feeds on different lines and lengths to test decision-making and footwork.
- Variation 1 — Blindfold Stance: Have the batsman take their stance with eyes closed to feel their balance and weight distribution, then open them to check alignment.
7. Age Adaptations
- Under 8s / Under 10s: Focus purely on a comfortable stance and stepping towards the ball. Use larger, brightly colored cones and remove the back-foot station entirely. Keep technical instructions to one or two simple cues (e.g., "Head to the ball").
- Under 12s / Under 14s: Introduce the back-and-across movement. Emphasize holding the shape of the shot for 3 seconds to build core stability and balance.
- Under 16s / Open: Increase the speed of the calls. Introduce a trigger movement before the coach calls the cone. Use heavier balls for drop feeds to simulate realistic impact.