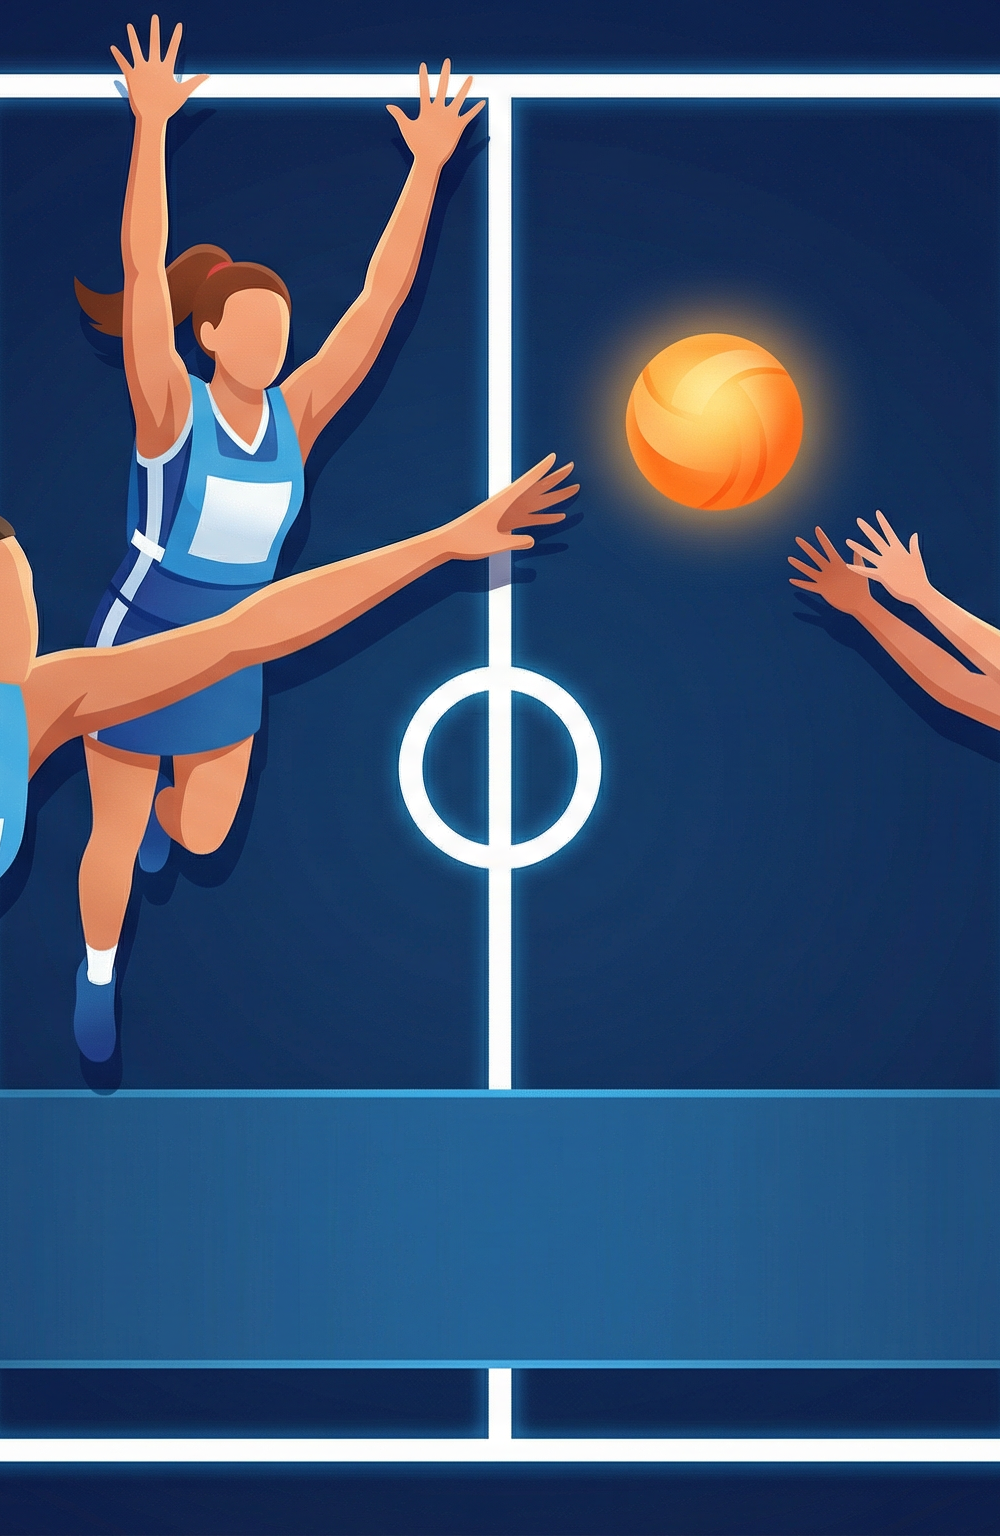
Mastering the Defensive Zone Intercept: A Complete Netball Drill
Equip your team with the tactical awareness and explosive movement required to dominate the defensive third through coordinated zone intercepts.

Equipment Needed
Overview
The Defensive Zone Intercept drill is a fundamental tactical exercise designed to transition your defensive unit from passive marking to active, anticipatory ball-winning. In modern netball, waiting for an attacker to make a mistake is rarely sufficient; defenders must proactively create pressure and force errors. This drill teaches players how to read the play, communicate effectively, and time their movements to secure crucial interceptions within a structured zone defence.
By practising this drill, your team will develop a cohesive defensive structure that can stifle attacking momentum and turn defensive pressure into scoring opportunities. It is particularly effective for teams looking to implement a more aggressive, front-foot defensive style.
Setup

To run this drill effectively, you will need the following equipment and court setup:
- Equipment: 1 Netball, 4–6 marker cones, bibs for two distinct teams (Attackers and Defenders).
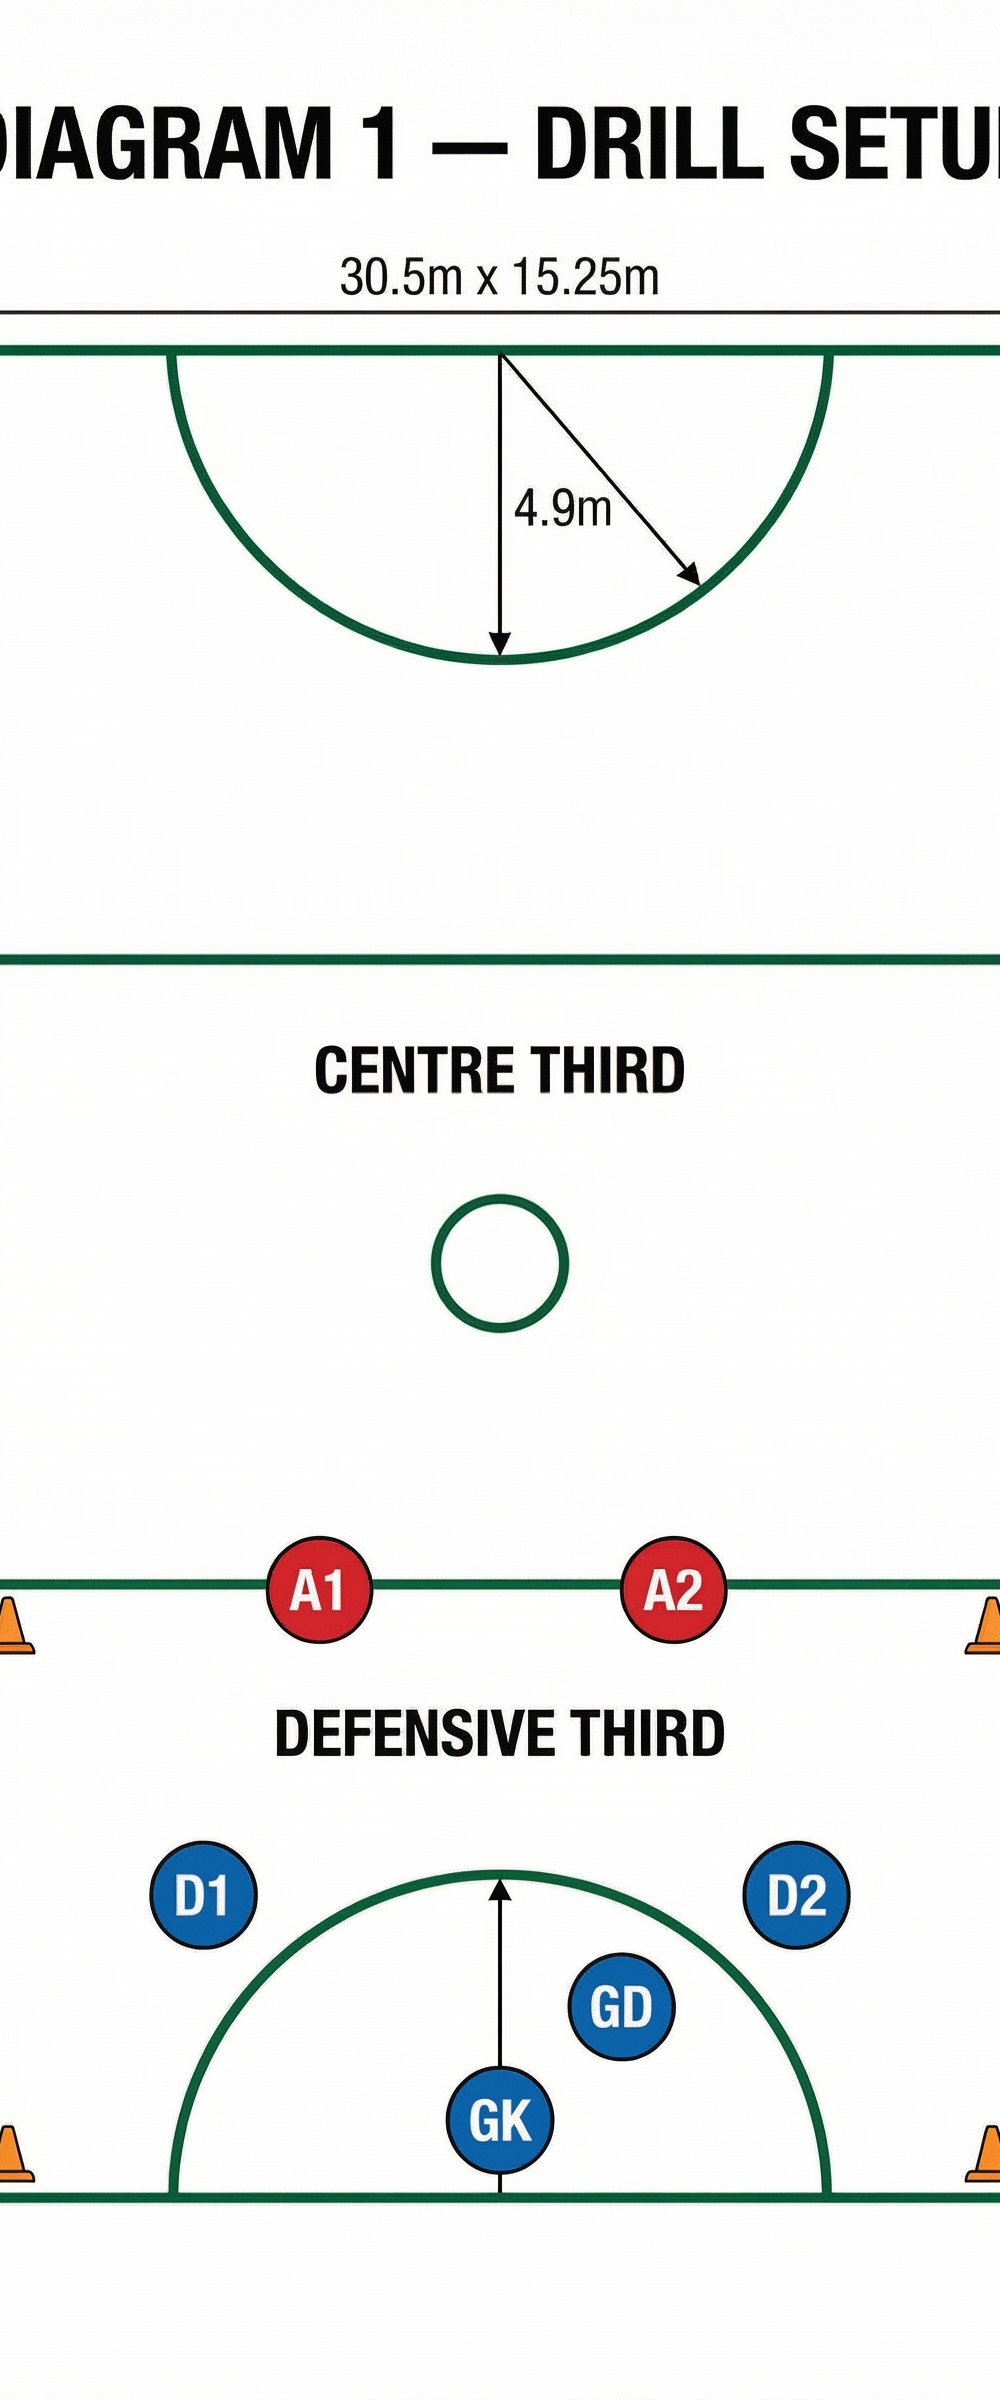
- Court Setup: The drill takes place primarily in the defensive third of a standard netball court (30.5m x 15.25m). Use cones to clearly demarcate the boundaries of the working area if necessary, though the standard court lines (transverse line, sidelines, goal line) are usually sufficient.
- Player Positions:
- Defenders (Blue): Goal Keeper (GK), Goal Defence (GD), and Wing Defence (WD).
- Attackers (Red): Goal Attack (GA) and Wing Attack (WA).
As shown in Diagram 1, the initial setup requires the defensive unit (GK, GD, WD) to position themselves in a triangular or 'V' formation within the defensive third. The attackers (GA, WA) begin near the transverse line, ready to initiate the play.
Step-by-Step Instructions

- Initial Positioning: The drill begins with the attackers (WA or GA) in possession of the ball near the transverse line. The defensive unit (GK, GD, WD) sets up in their designated zone formation, ensuring they are communicating and maintaining visual contact with both the ball and their direct opponents.
- Initiating the Play: The attacker with the ball initiates the drill by attempting a pass to their teammate. The objective for the attackers is to successfully penetrate the defensive zone and deliver the ball into the goal circle.
- Reading the Cue: The defenders must actively read the visual cues of the ball carrier — body angle, eye contact, and ball position — to anticipate the direction and timing of the pass. This is the critical phase where anticipation translates into action.
- The Intercept Move: Once the pass is released, the designated intercepting defender (e.g., the GD) explodes from their position to cut off the passing lane. This movement must be decisive, fast, and angled correctly to meet the ball at its highest or most vulnerable point.
- Covering the Space: Simultaneously, the remaining defenders (GK, WD) must adjust their positioning to cover the space vacated by the intercepting player. This coordinated movement ensures that if the intercept fails, the defensive structure remains intact and secondary passing options are limited.

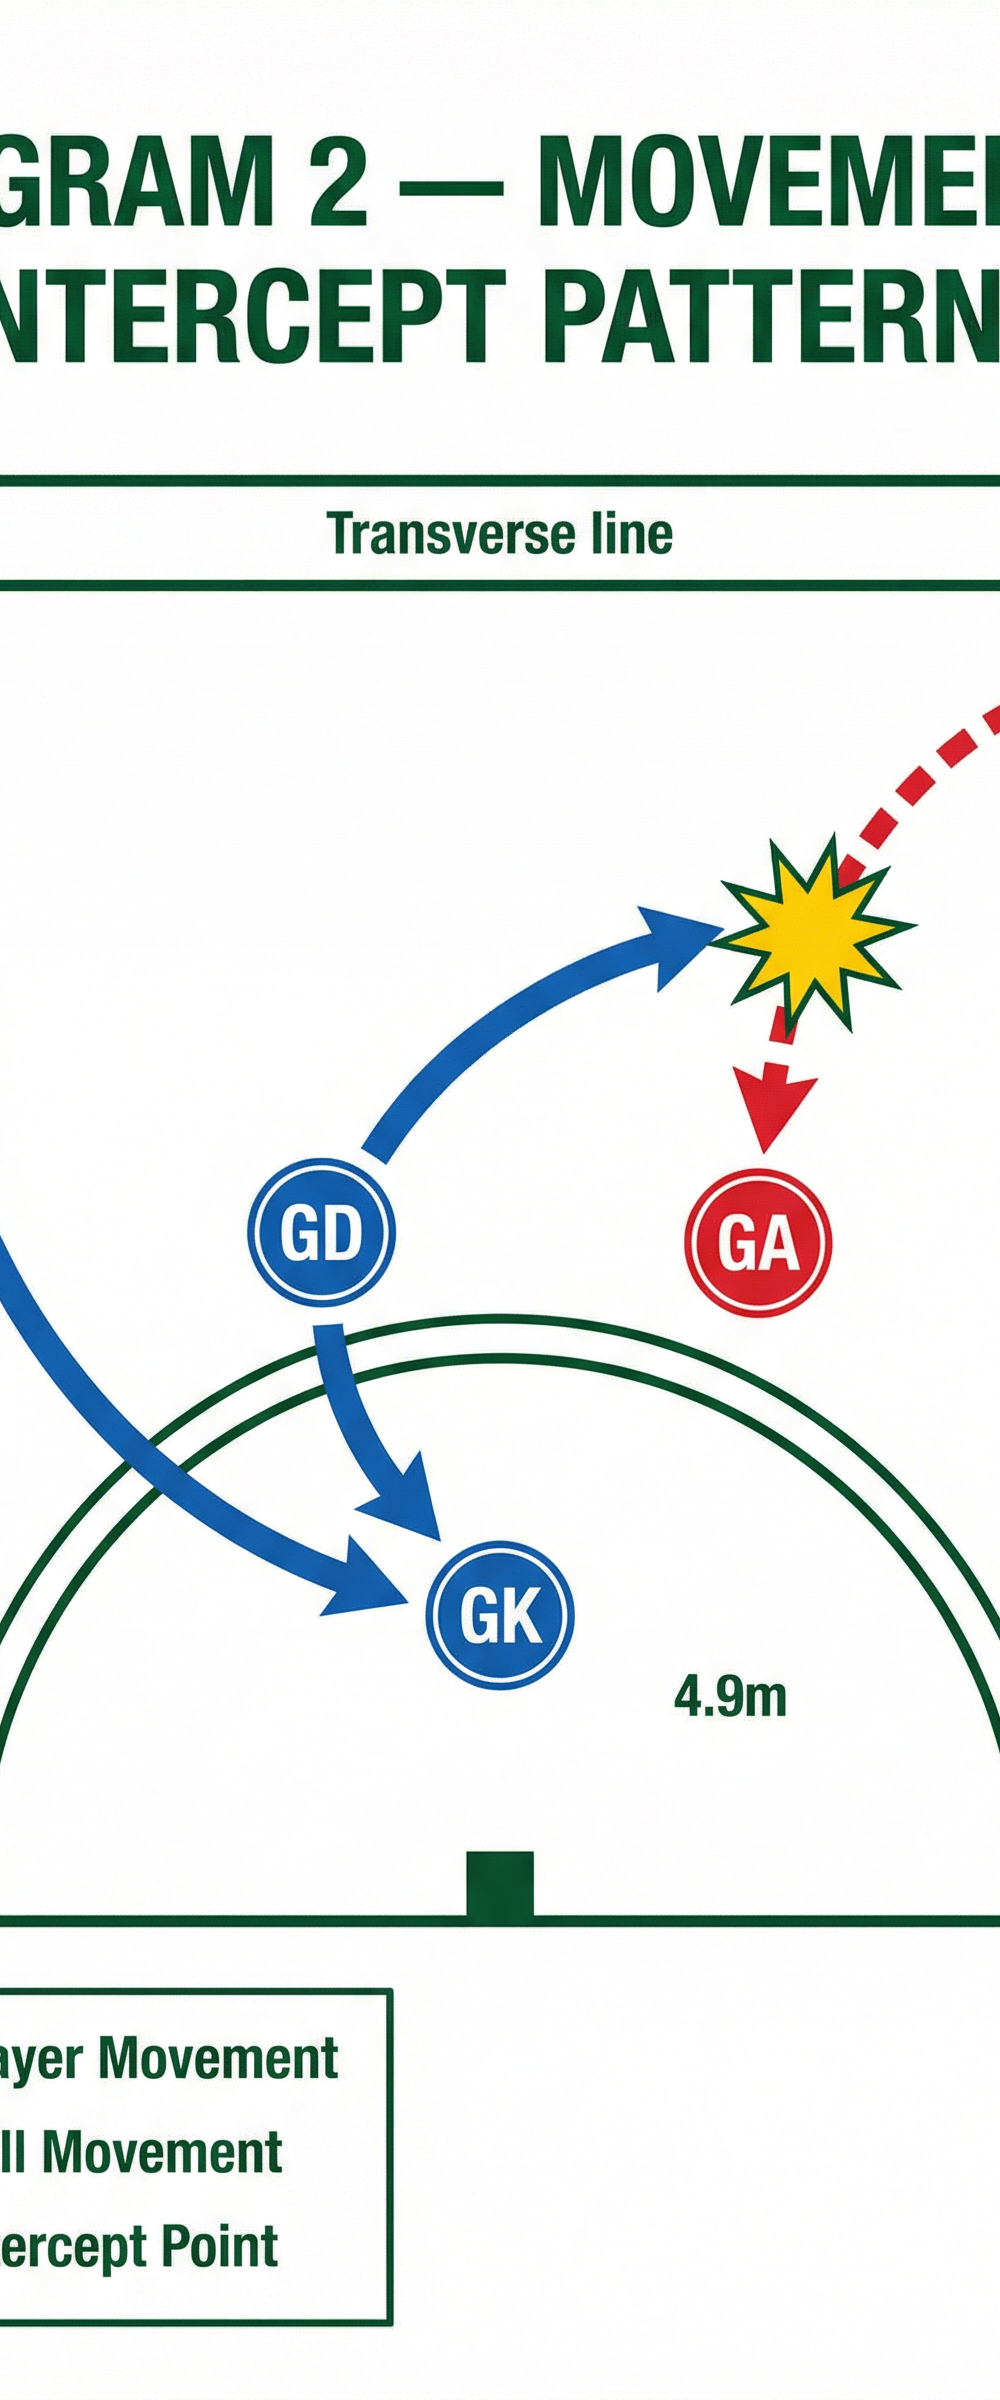
Diagram 2 illustrates the dynamic movement patterns. The solid blue arrows demonstrate the coordinated shift of the defensive unit, with the GD driving towards the interception point (marked by the yellow star), while the WD and GK adjust to maintain zone integrity.
- Securing the Ball and Transition: Upon a successful interception, the defender must secure the ball cleanly and immediately look for a transition pass. The drill concludes with the defensive team successfully transitioning the ball out of the defensive third.
- Reset and Repeat: If the attackers successfully complete the pass, or if a penalty occurs, the drill is reset to the starting position. Rotate players through different positions to ensure all team members understand the various roles within the zone structure.
Key Coaching Points
- Active Vision: Players must maintain 'split vision', constantly scanning between the ball carrier and the potential receivers. Staring solely at the ball will result in missed cues and delayed reactions.
- Explosive First Step: The success of an intercept relies heavily on the defender's ability to generate immediate power and speed off the mark. Encourage players to stay light on their feet, with weight slightly forward on the balls of their feet.
- Angle of Intercept: Defenders must attack the ball at an angle, driving through the passing lane rather than running parallel to it. This increases the chances of securing the ball cleanly and minimises the risk of contact penalties.
- Communication is Non-Negotiable: A successful zone defence is built on constant, clear communication. Defenders must call out screens, switches, and the movement of attackers to ensure the unit operates cohesively.
- Commitment: When a player decides to go for the intercept, they must commit fully. Hesitation often leads to being caught out of position and allowing an easy pass.
Common Mistakes
- Ball Watching: Defenders become fixated on the ball carrier and lose track of the attackers moving into their zone, allowing easy passes behind them.
- Late Reactions: Failing to read the cues of the passer results in the defender reacting only after the ball is released, which is usually too late to make a successful intercept.
- Poor Angles: Running directly at the receiver rather than attacking the path of the ball, which often leads to contact penalties or missed intercepts.
- Lack of Cover: When one defender commits to an intercept, the others fail to adjust and cover the vacated space, leaving the team vulnerable if the intercept is missed.
Variations & Progressions
To continually challenge your players, introduce these variations once they have mastered the basic drill:
- Add a Goal Shooter (GS): Introduce a GS into the goal circle to increase the complexity for the GK and GD. This forces the defenders to manage an additional threat and requires more sophisticated communication and switching.
- Time Limits: Introduce a shot clock or a time limit for the attackers to score. This increases the pressure on both the attackers to execute quickly and the defenders to force errors under time constraints.
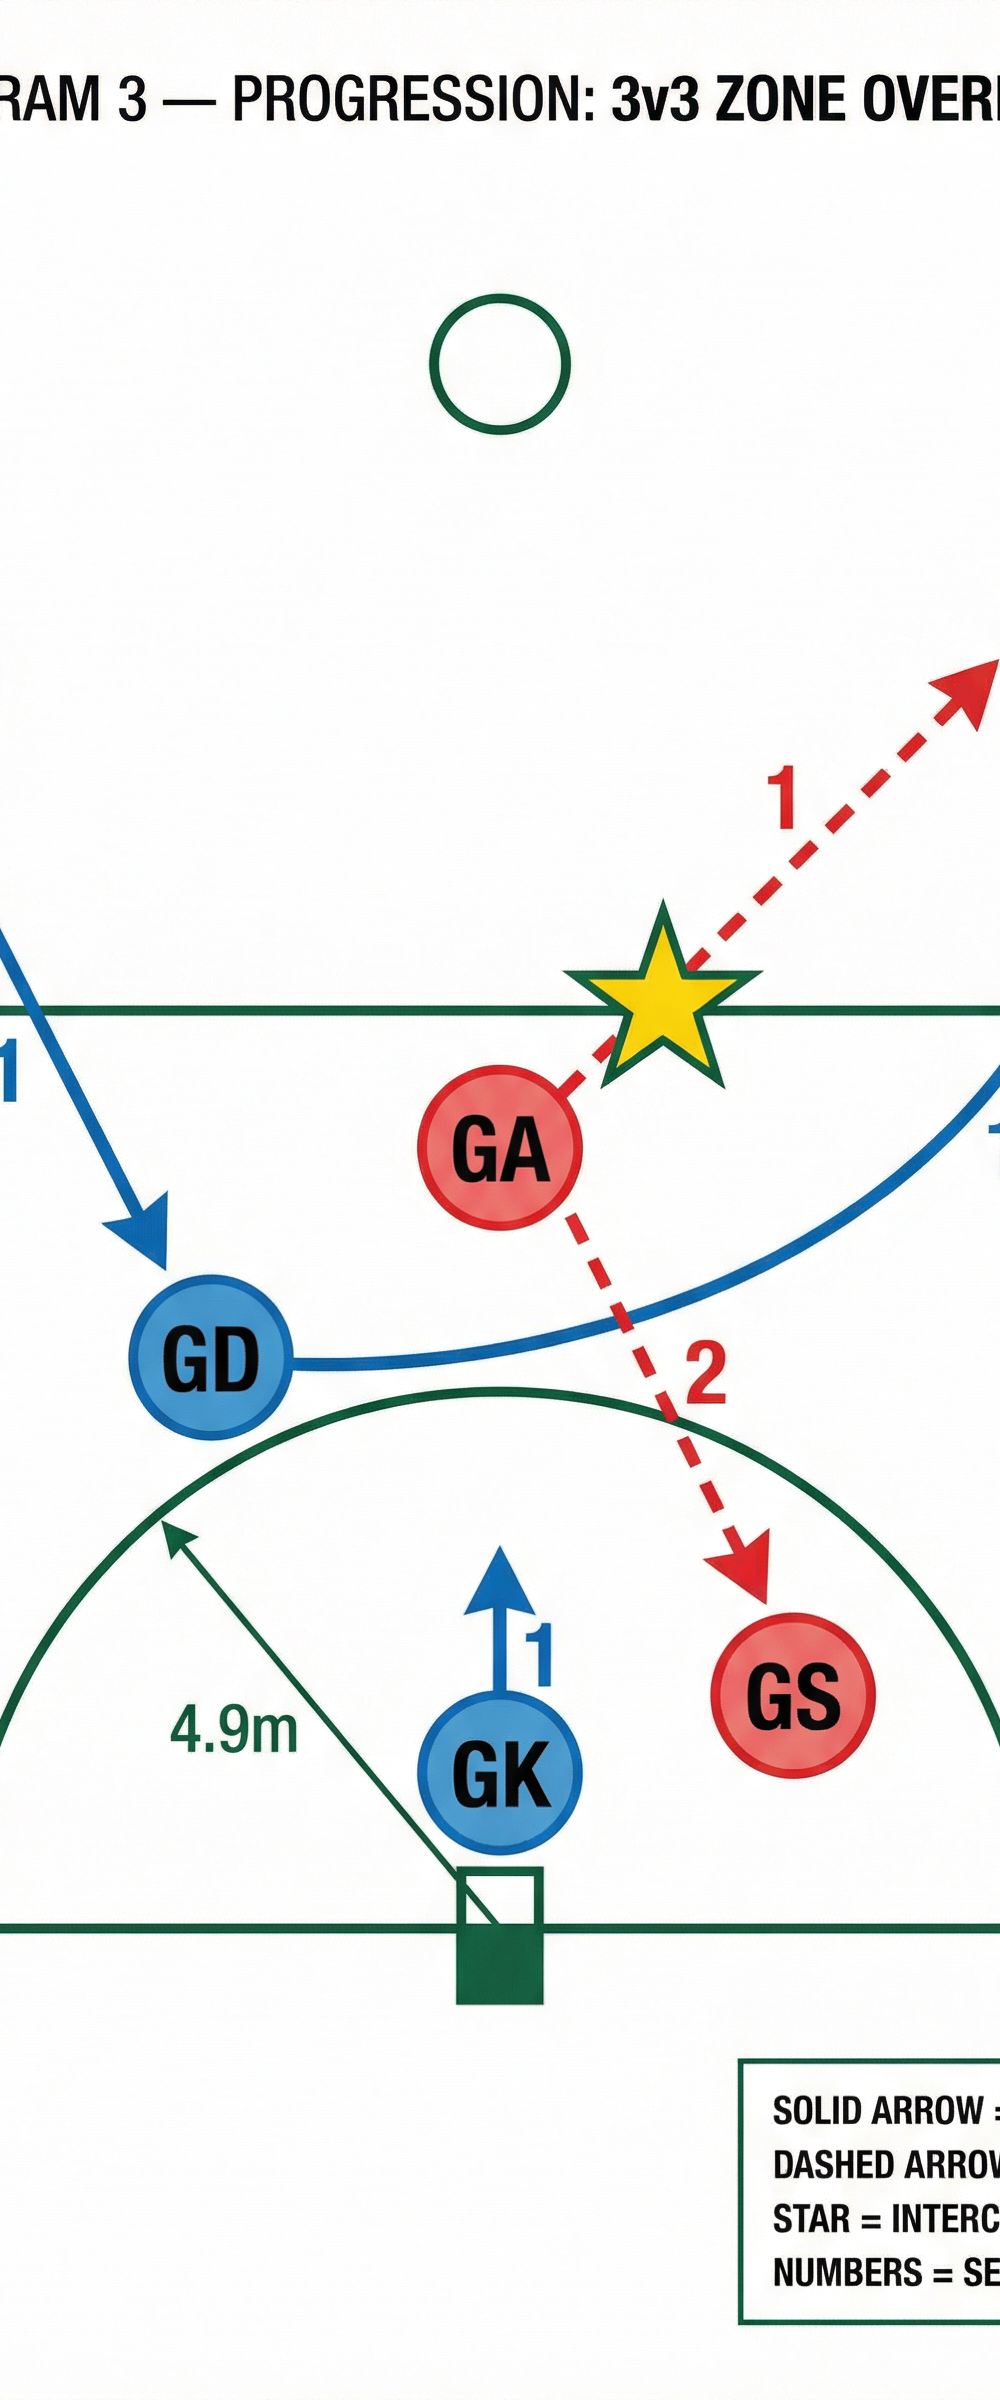
- 3v3 Zone Overload:

As shown in Diagram 3, progress to a 3v3 scenario by adding a Goal Shooter (GS). This requires the defensive unit to manage multiple threats and execute more complex rotations. The GD might need to shift wide to cover the WA, while the WD drops to cover the GA, and the GK holds the post against the GS. This progression demands high-level communication and rapid decision-making.
Age Adaptations

| Age Group | Focus | Key Modifications |
|---|---|---|
| Under 10s / Under 12s | Fundamental mechanics of the intercept | Smaller area, slower passes, focus on clean catching |
| Under 14s / Under 16s | Basic zone concepts and communication | Introduce reading cues, emphasise calling and switching |
| Open / Advanced | Full zone structures and complex variations | High-speed execution, 3v3 overload, seamless transitions |