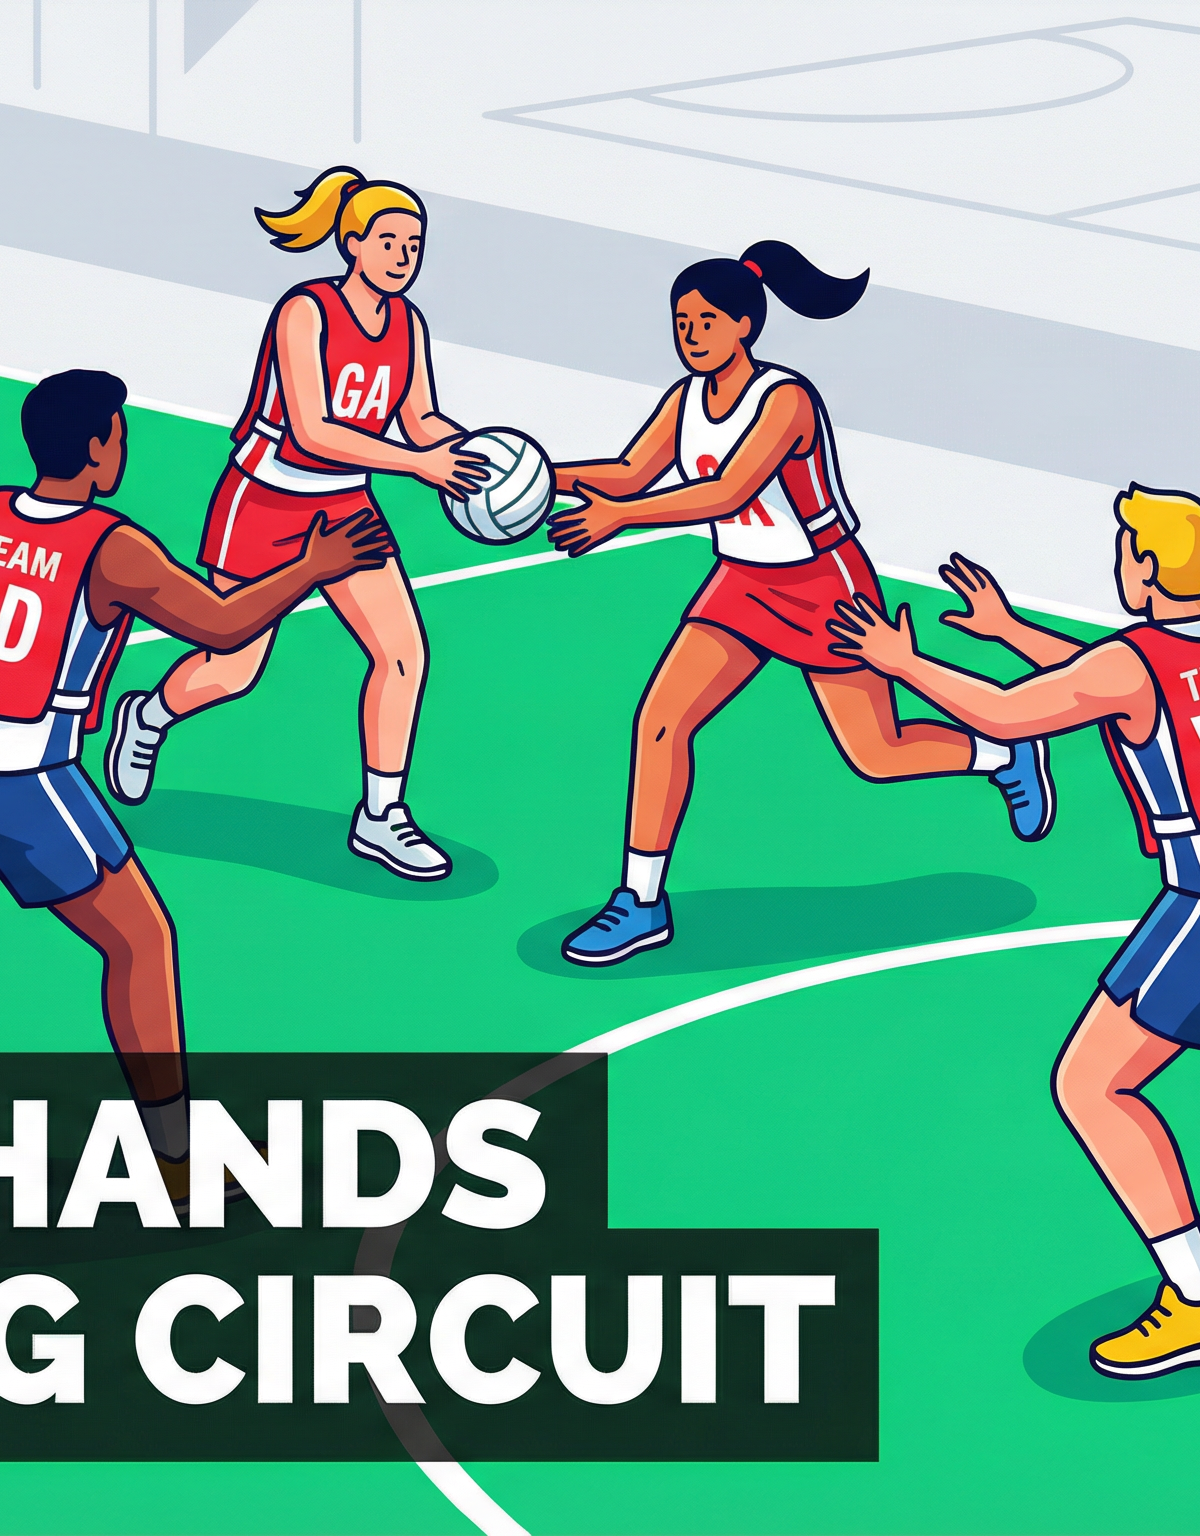
Quick Hands Passing Circuit: Mastering Speed and Accuracy
Develop lightning-fast ball movement and precision passing under pressure with this essential high-intensity circuit drill.
Equipment Needed
1. Overview
The Quick Hands Passing Circuit is a high-intensity, fundamental drill designed to enhance passing speed, accuracy, and decision-making under pressure. In modern netball, the ability to release the ball quickly while maintaining control is paramount to breaking down tight defensive structures. This drill focuses on developing the neuromuscular pathways required for rapid catch-and-pass execution, ensuring players can transition the ball swiftly through the midcourt and into the shooting circle. It is an excellent warm-up progression or a core conditioning component for teams looking to improve their offensive flow and spatial awareness.
2. Setup
To run this drill effectively, ensure you have the correct equipment and court setup. The standard netball court dimensions are 30.5m long by 15.25m wide, and utilizing these spaces accurately is crucial for game-realistic practice.
Equipment Needed:
- 2-3 Netballs (size 5 for standard play)
- 6-8 Marker cones
- Contrasting training bibs (e.g., Blue for Attackers, Red for Defenders)
Court Setup & Player Positions:
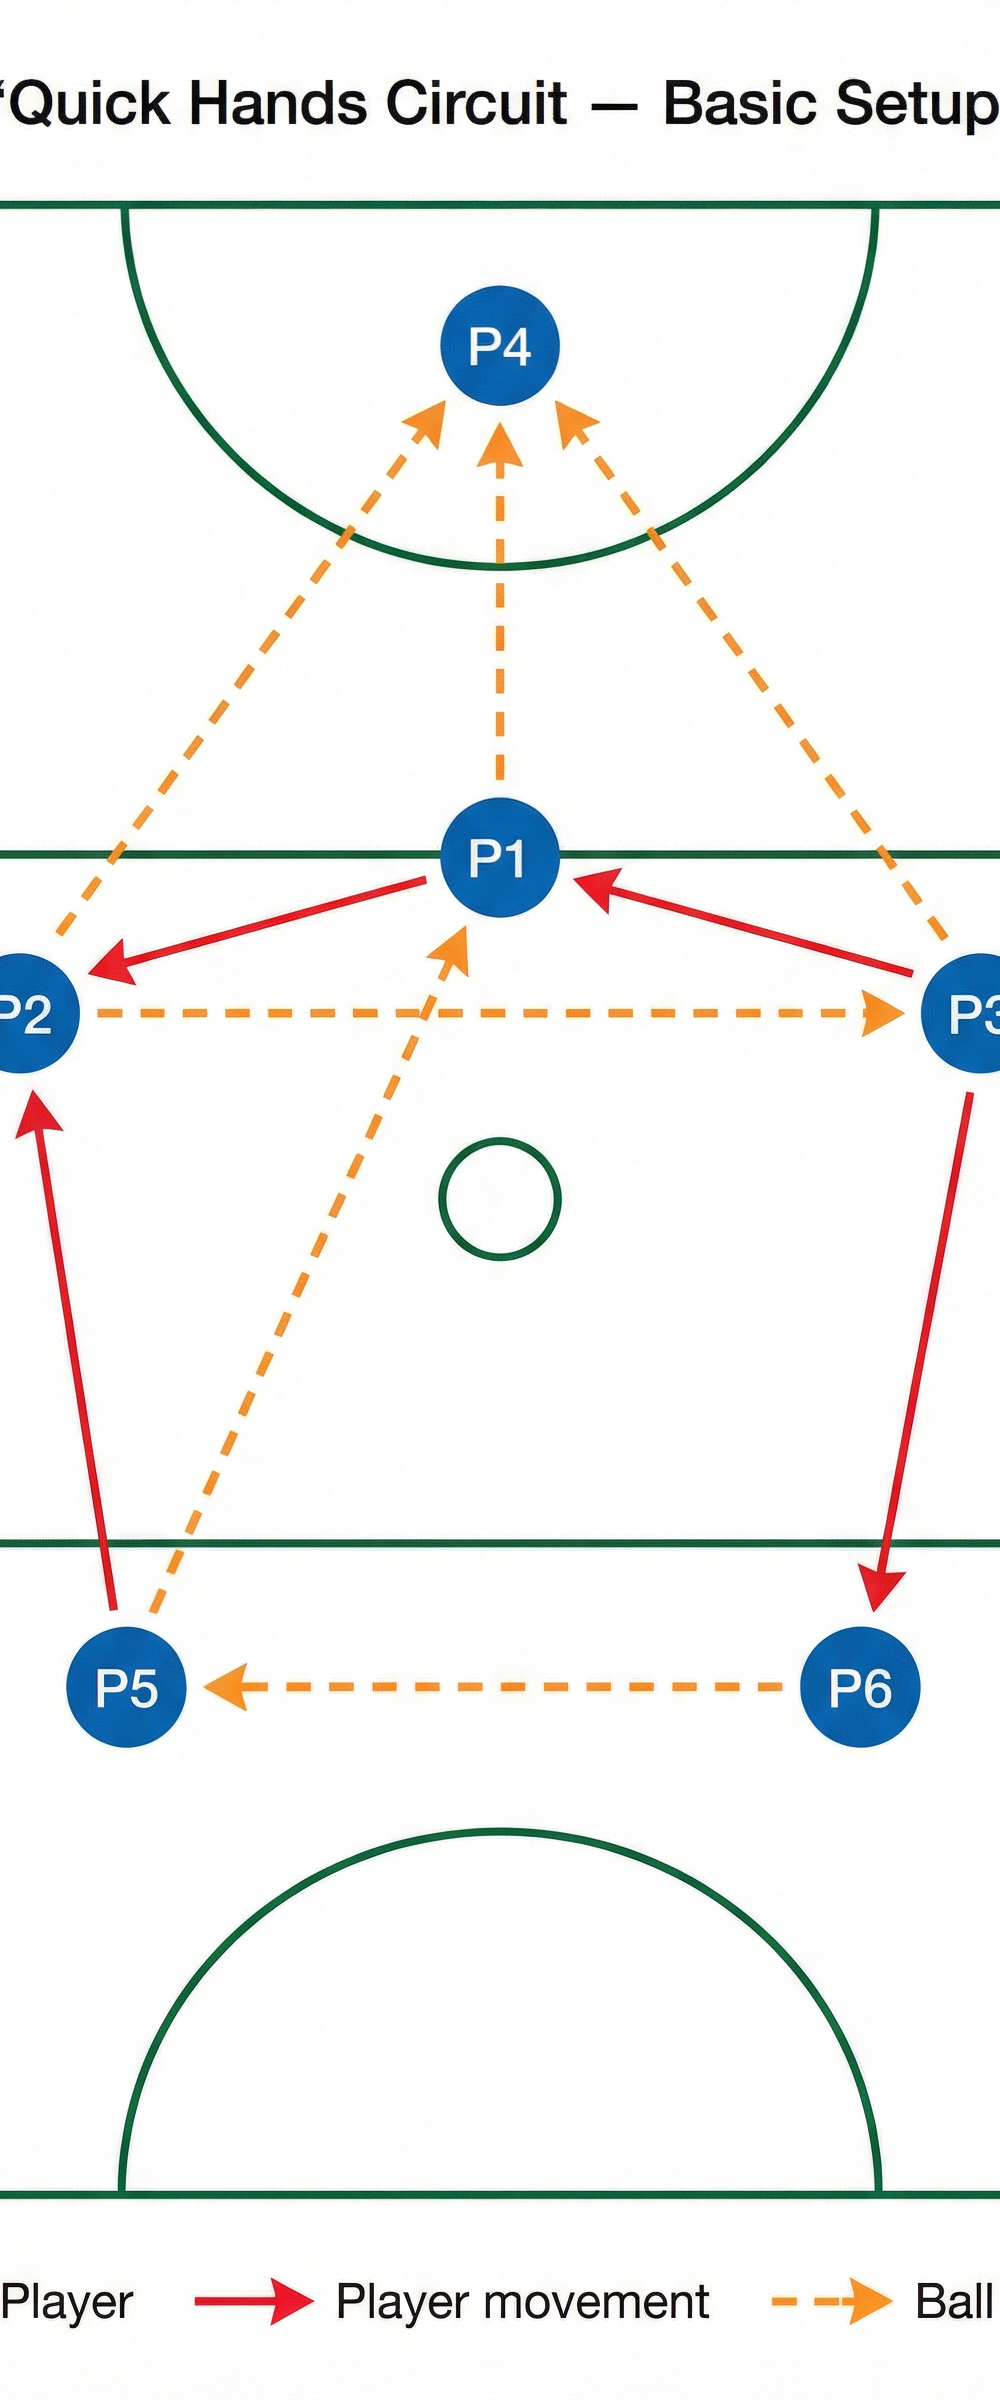
Set up the circuit primarily in the centre third and the top of the goal third.
- Place marker cones to define the passing stations if players need visual cues, though experienced players should use court lines.
- Player 1 (P1): Positioned at the top of the centre circle.
- Player 2 (P2): Positioned at Left Wing Attack (WA).
- Player 3 (P3): Positioned at Right Wing Attack (WA).
- Player 4 (P4): Positioned at Goal Attack (GA) at the top of the shooting circle.
- Player 5 (P5): Positioned at Left Wing Defence (WD).
- Player 6 (P6): Positioned at Right Wing Defence (WD).
3. Step-by-Step Instructions
Follow these steps to execute the basic circuit. Ensure players maintain a high work rate and focus on technique.
- Initiate the Drill: Player 1 (P1) starts with the ball at the top of the centre circle.
- First Pass: P1 executes a strong, flat chest pass to Player 2 (P2) moving onto the ball at the Left WA position.
- Cross-Court Movement: As soon as P2 receives the ball, Player 3 (P3) drives towards the centre from the Right WA position. P2 delivers a sharp pass to P3.
- Feeding the Circle Edge: P3 immediately pivots and passes to Player 4 (P4), who has driven to the top of the goal circle (GA position).
- Reset and Recycle: P4 receives the ball and executes a long, clearing pass back down the court to Player 5 (P5) at the Left WD position.
- Completing the Circuit: P5 passes across to Player 6 (P6) at Right WD, who then passes back to P1 to restart the cycle.
- Continuous Flow: The ball should move continuously. Once the pattern is established, introduce a second ball to increase the cognitive load and speed of the drill.
4. Key Coaching Points
To maximize the effectiveness of this drill, coaches must reinforce the following technical elements:
- Strong, Flat Passes: Emphasize chest and shoulder passes. The ball should travel in a straight line with power, minimizing the time it spends in the air.
- Catch and Release: Players must practice "soft hands" to cushion the catch, immediately transitioning into the passing motion. The goal is to release the ball within 1-2 seconds of receiving it.
- Meeting the Ball: Receivers must aggressively drive towards the ball. Waiting for the pass allows defenders to intercept.
- Footwork and Balance: Ensure players are landing on their outside foot to open their hips to the court, allowing for a quicker and more accurate next pass.
- Communication: Players must call for the ball loudly and clearly, using names or directional cues to maintain the flow of the circuit.
5. Common Mistakes
Watch for these frequent errors and correct them immediately to prevent bad habits:
- Floating Passes: Lobbing the ball or using soft, loopy passes slows down the circuit and invites interceptions. Correction: Reinforce stepping into the pass and snapping the wrists.
- Static Receiving: Players standing flat-footed waiting for the ball. Correction: Demand a preliminary movement (a dodge or sprint) before receiving.
- Poor Body Angle: Catching the ball facing away from the next target, requiring a full body turn. Correction: Coach players to angle their bodies towards the next passing station before they receive the ball.
- Rushing the Pass: Throwing the ball before securing the catch, leading to fumbles. Correction: Remind players: "Catch first, pass second."
6. Variations & Progressions
Once the basic circuit is mastered, introduce these progressions to simulate match conditions.
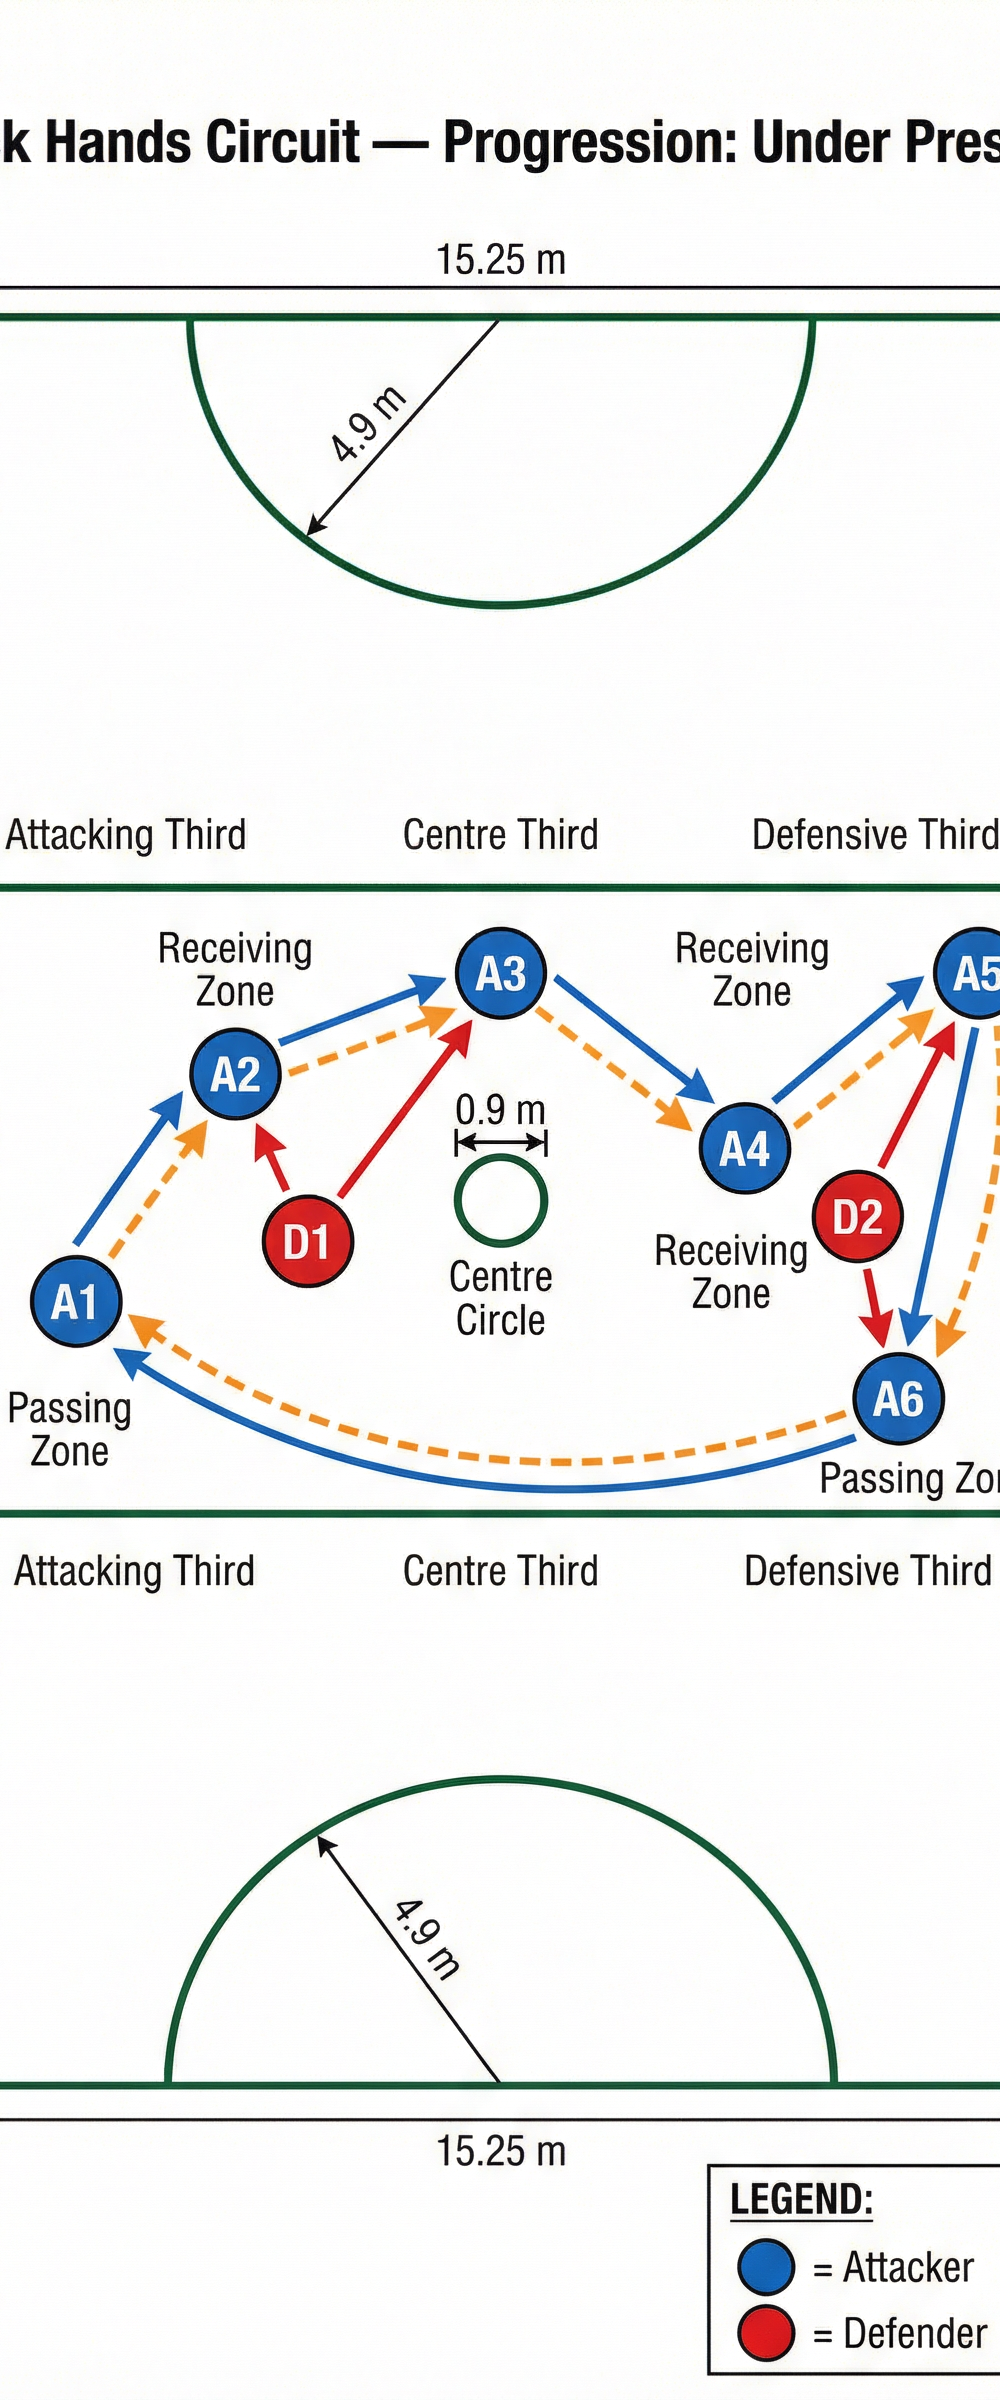
Progression 1: Adding Defensive Pressure
Introduce 2-3 defenders (D1, D2) inside the circuit. The defenders do not go for full interceptions initially but apply physical and visual pressure (arms up, shadowing the receiver) to force the attackers to adjust their passing angles and speed.
Progression 2: The Reversing Circuit
On the coach's whistle, the direction of the ball movement instantly reverses. This forces players to quickly re-orientate their body positioning and decision-making.
Variation: Pass Types
Specify that only certain passes can be used (e.g., all bounce passes, or alternate between chest and shoulder passes) to develop a wider passing repertoire.
7. Age Adaptations
Tailor the drill to suit the developmental stage of your players.
- Under 8 / Under 10: Reduce the distance between players. Focus purely on the correct technique of the chest pass and catching the ball cleanly. Do not use defenders. Use a size 4 netball.
- Under 12 / Under 14: Introduce the second ball to challenge their concentration. Emphasize driving onto the ball and correct landing footwork. Add passive defenders.
- Under 16 / Open: Run the drill at maximum match intensity. Implement all progressions, including active defenders going for interceptions. Focus on peripheral vision and split-second decision making.