Drills & Plays
Expert coaching drills and set plays with tactical diagrams, step-by-step instructions, and coaching tips

Defensive Heading and Clearing: Dominating the Aerial Battle
Master the art of defensive heading and clearing to ensure your backline dominates aerial duels and neutralizes crossing threats effectively.
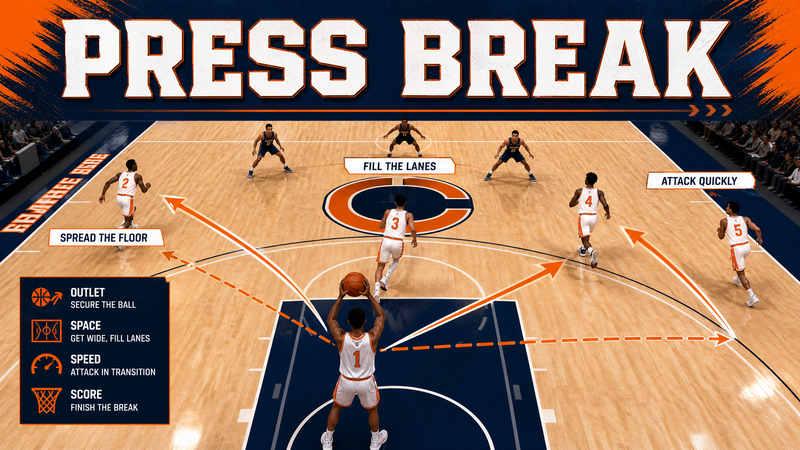
The 'Diamond' Full Court Press Break
Master the Diamond press break to confidently beat full-court pressure, create high-percentage transition scoring opportunities, and turn defensive traps into offensive advantages.

Mastering the Goal Kick: Playing Out from the Back
A comprehensive guide for coaches on how to successfully build out from the back starting with a goal kick, bypassing the opposition press to create attacking opportunities.

Blindside Strike: Number 8 Pick & Go with Flat Support
Exploit the narrow channel from a 5m scrum with this aggressive blindside attack, utilizing your Number 8 and a flat-running blindside flanker to break the gain line and set up a wide second phase.
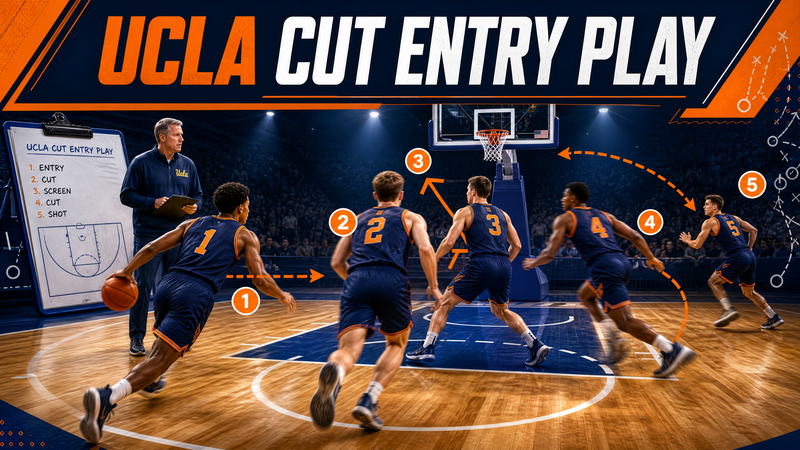
Mastering the UCLA Cut: A Fundamental Entry Play for All Levels
Learn how to execute the classic UCLA Cut, a highly effective entry play that creates immediate scoring opportunities and flows seamlessly into continuity offenses.

Dynamic Crossing & Finishing: Tri-Zone Attack Drill
Master the art of wide service and penalty box movement with this high-intensity crossing and finishing drill designed to develop timing, technique, and tactical awareness in the final third.

Fast Bowler's Run-Up Alignment Channel Drill
A fundamental coaching drill to correct fast bowler run-up deviation, improve momentum transfer, and ensure consistent legal foot placement at the crease.
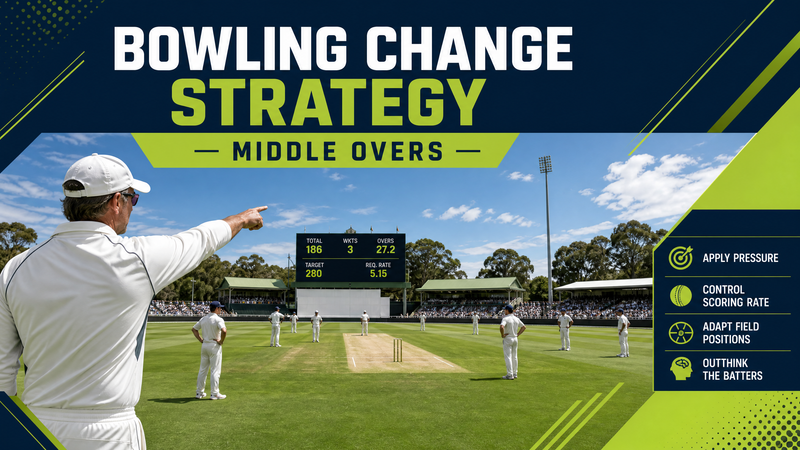
Mastering the Middle Overs: Strategic Bowling Changes & Field Placements
Learn how to dictate the pace of the game between overs 11-35 by deploying effective bowling changes, setting strategic fields, and executing the perfect containment strategy.
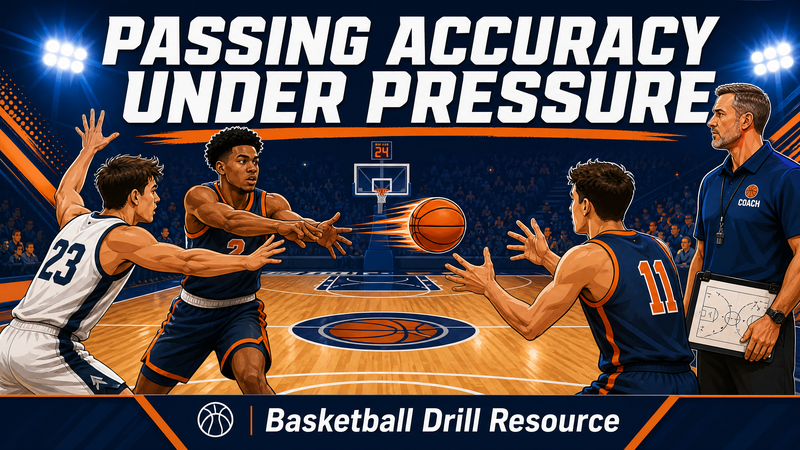
Passing Accuracy Under Pressure: The Gauntlet Drill
Develop your players' ability to make crisp, accurate passes while absorbing defensive pressure and reading defensive rotations.

4v4 Transition Chaos: High-Intensity Small-Sided Game
Master the critical moments of transition with this fast-paced 4v4 small-sided game designed to improve reaction speed, pressing, and counter-attacking efficiency.

Mastering the Middle Overs: The 'Strike & Rotate' Run Chase Strategy
Equip your batters with the tactical framework to dominate the middle overs (overs 15-40) through intelligent strike rotation, exploiting field gaps, and minimizing dot balls without taking undue risks.
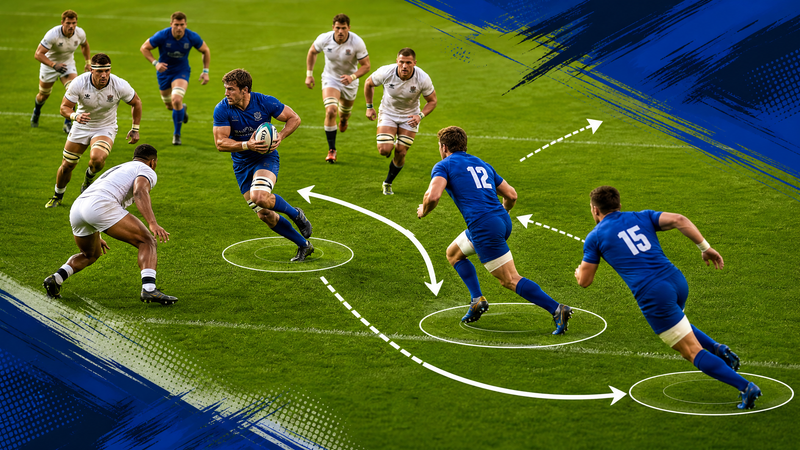
Mastering Support Angles: The 3v2 Wave Attack Drill
Develop your players' ability to run aggressive, late support angles that manipulate defenders and create line breaks in live game scenarios.
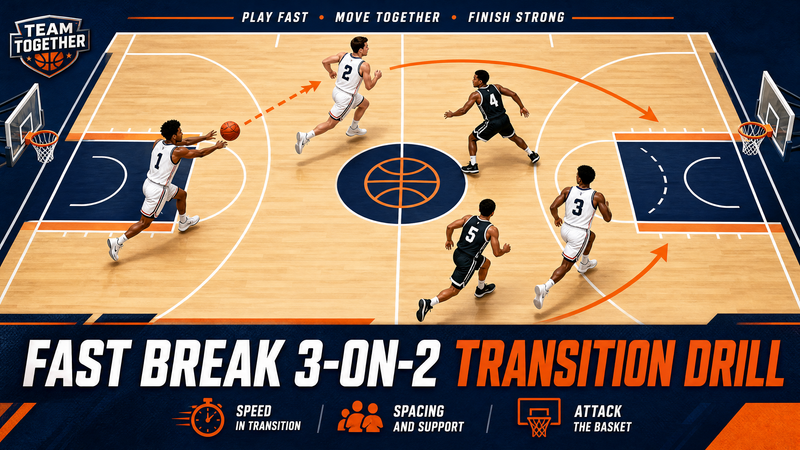
Mastering the Fast Break: 3-on-2 Continuous Transition Drill
Develop elite decision-making, optimal spacing, and high-percentage finishing in transition with this essential 3-on-2 fast break drill.
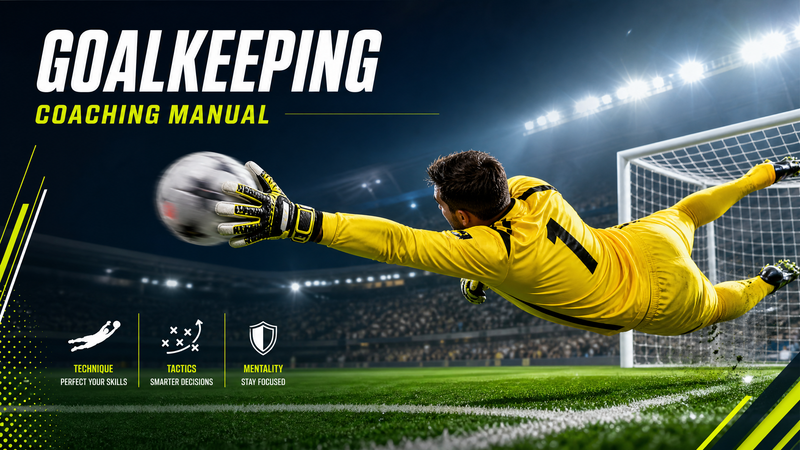
The Ultimate Goalkeeper Shot-Stopping & Recovery Drill
Develop elite shot-stopping reflexes, rapid recovery mechanics, and second-ball awareness in this high-intensity goalkeeping drill.
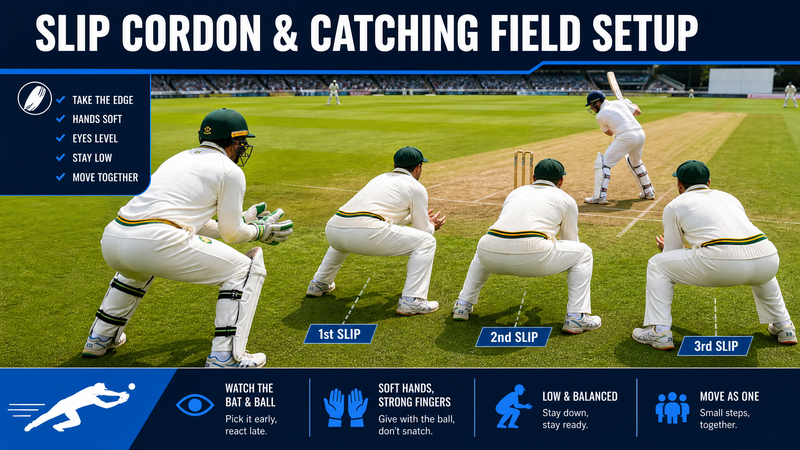
Mastering the Slip Cordon: Positioning, Stance, and Catching Field Setup
A comprehensive guide to setting up an effective slip cordon, focusing on correct spacing, depth, body mechanics, and synchronized movement to maximize catching opportunities behind the wicket.

Red Zone Dominance: The 'Tap & Strike' Penalty Corner Attack
A multi-phase set piece designed to manipulate defensive lines near the try line, creating immediate momentum before exploiting wide overlaps or close-quarter mismatches.

Mastering the Defensive Spin Field: Choking Runs & Building Pressure
Learn how to deploy a defensive field for spin bowlers that cuts off boundaries, controls the strike rate, and forces batters into high-risk shots.

Wide Overlap Play from Lineout: The 'Sweep' Move
Learn how to manufacture a 3v2 wide overlap off first-phase lineout ball using a sweeping fullback line to outflank the defense.
Mastering the Defensive Closeout and Recovery
Teach your players how to execute high-intensity closeouts, contain the dribble drive, and recover effectively in help-defense scenarios.
High-Intensity Counter-Press: The Touchline Trap
Master the art of immediate ball recovery by suffocating the opposition against the touchline the moment possession is lost.
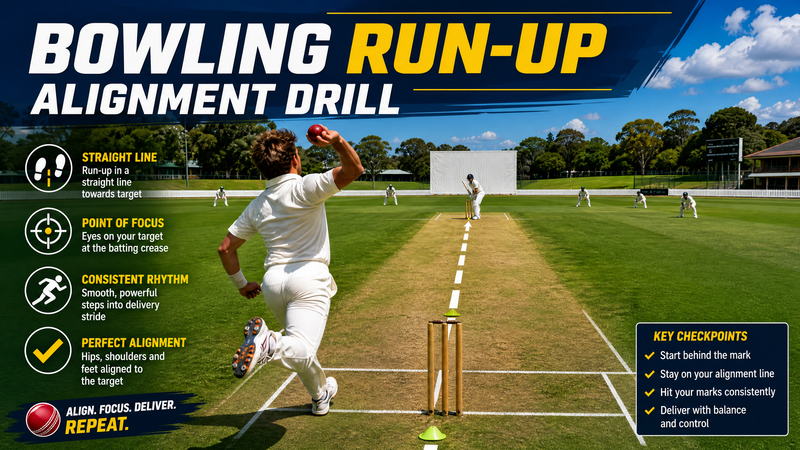
Bowling Run-Up Alignment & Crease Positioning Drill
A foundational fast bowling drill designed to correct run-up deviation, ensure a straight approach to the crease, and establish consistent foot placement in the delivery stride.

Scrum Play: The Blindside Strike
Exploit the narrow channel with this devastating 8-9-11 blindside attack off a solid scrum platform, designed to isolate the defending winger and create line breaks.
Mastering the Free Throw: Pressure Shooting Routine
Develop a consistent, pressure-tested free throw routine that translates directly to game-winning moments.

The Ultimate Dual-Channel Crossing & Finishing Masterclass
A high-intensity, match-realistic drill designed to perfect wide delivery, synchronized box runs, and clinical finishing under pressure.
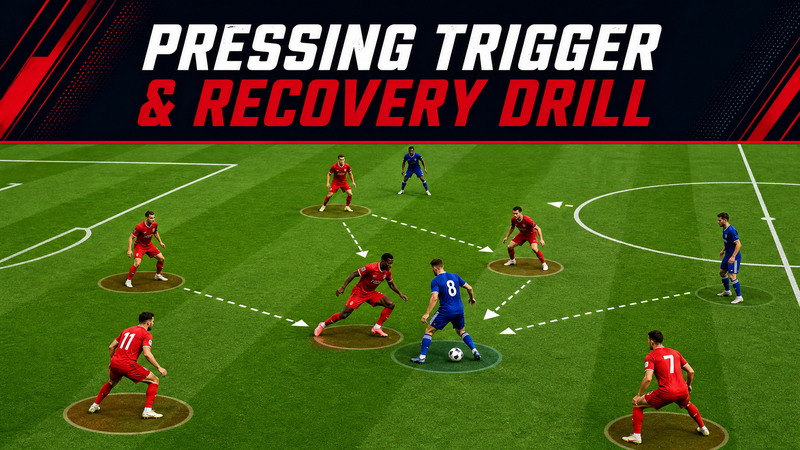
Pressing Trigger and Recovery Drill: Mastering the Mid-Block Press
Teach your players how to recognize pressing triggers, execute a coordinated mid-block press, and rapidly recover shape when the press is broken.

Death Overs Mastery: The Ultimate Bowling & Field Placement Plan
Equip your fast bowlers with a comprehensive tactical blueprint to restrict scoring, execute variations under pressure, and close out the innings effectively during the critical death overs.

Box Kick Chase and Press Play: Mastering the Aerial Contest
Equip your team with a highly effective exit and attacking transition strategy by mastering the box kick chase, organized press, and subsequent turnover attack.
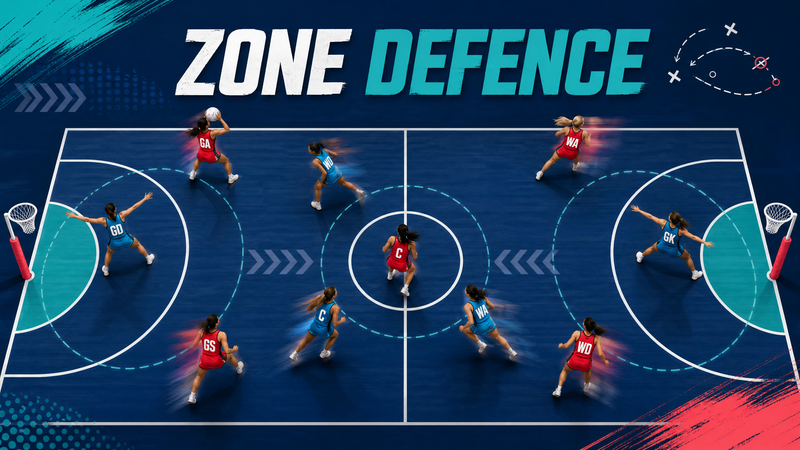
Mastering the 2-3-1 Zone Defence
Learn how to disrupt the opposition's attacking flow, force errors, and create interception opportunities with a structured 2-3-1 zone defence.
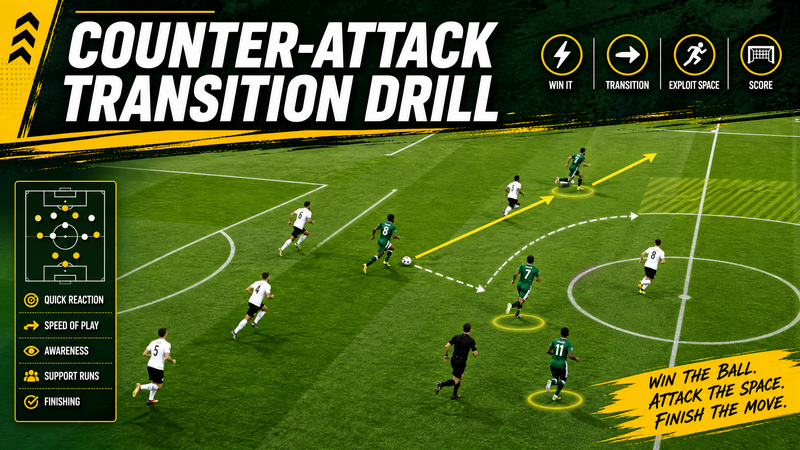
High-Speed Counter-Attack: The 8v5 Transition Drill
Master the art of rapid transitions with this game-realistic 8v5 drill designed to teach quick distribution, exploiting wide overloads, and ruthless finishing.

4-Out 1-In Motion Offense Continuity Play
Master a versatile 4-Out 1-In motion offense continuity that creates constant movement, spacing, and scoring opportunities through backdoor cuts and ball screens.
Showing 30 of 30 drills