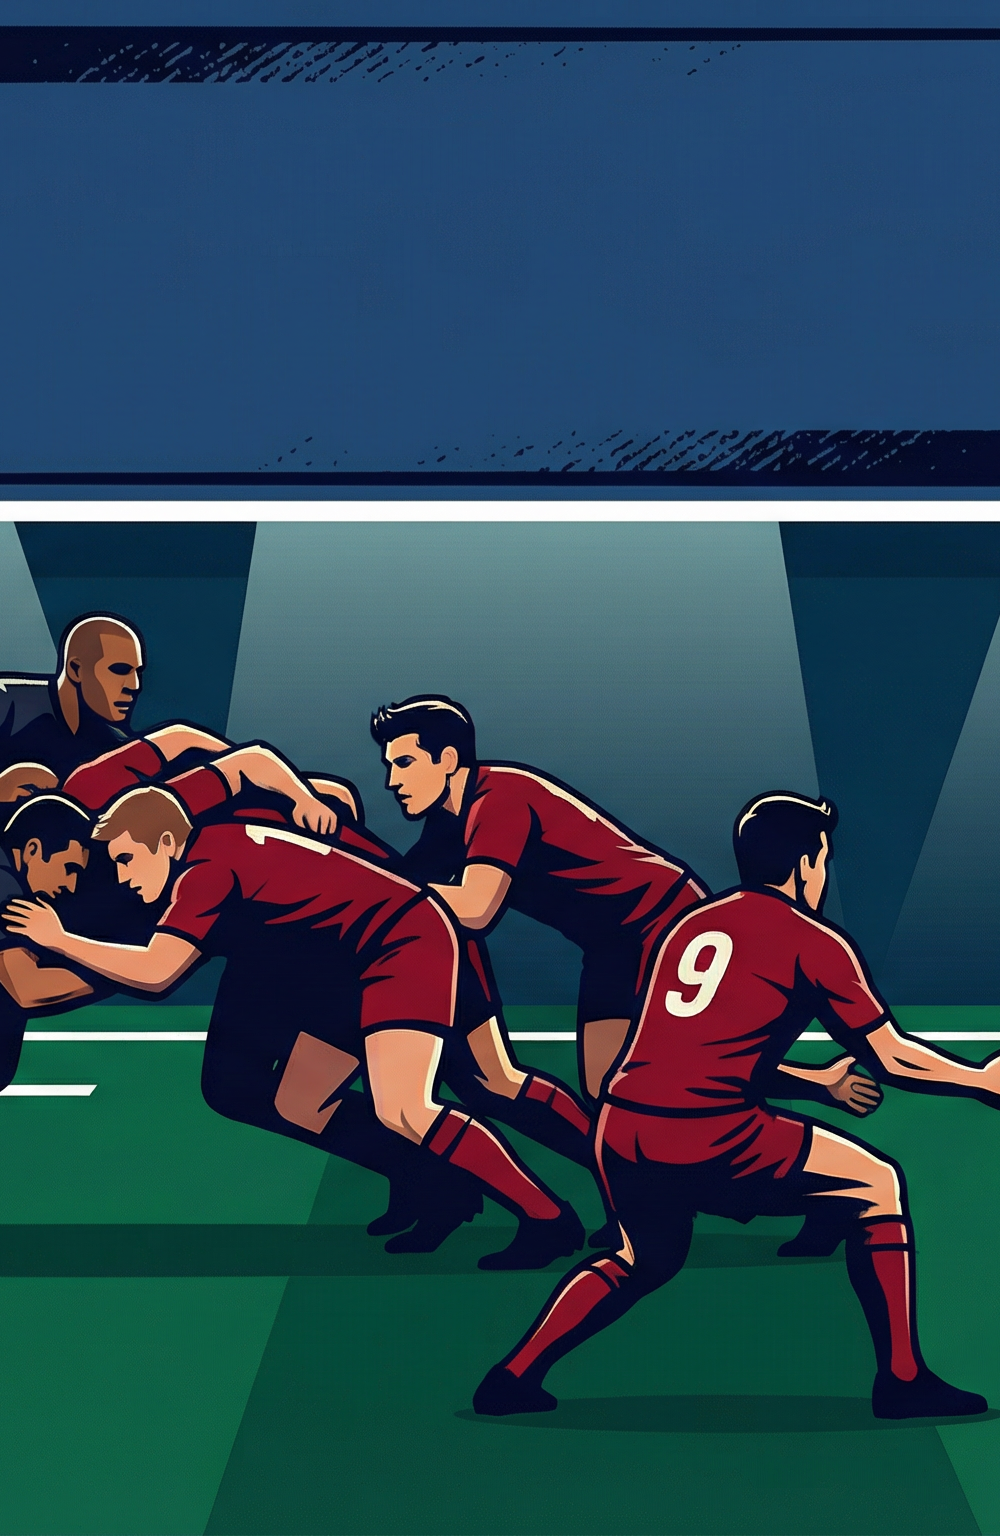
Blindside Strike: The 8-9-11 Scrum Play
A devastatingly simple yet effective blindside scrum attack designed to isolate the defending winger and create a two-on-one overlap in the 15-metre channel.

Equipment Needed
1. Overview
The 'Blindside Strike' is a targeted set-piece attack designed to exploit space in the narrow channel (usually the 15-metre zone) from a scrum. When a scrum is set close to the touchline, the defending team often commits heavily to the openside, leaving their blindside winger isolated. This play aims to create a rapid two-on-one situation (our 9 and 11 versus their 11) or a three-on-two if their blindside flanker detaches late. It is highly effective when executed with speed and precision, particularly in the attacking half where a line break often results in a try.
2. Setup
Pitch Setup:
Set up a scrum approximately 15 metres infield from the left touchline on a standard 100m x 70m pitch. This creates a defined 'blindside' channel on the left and a massive 'openside' on the right.
Player Positions:
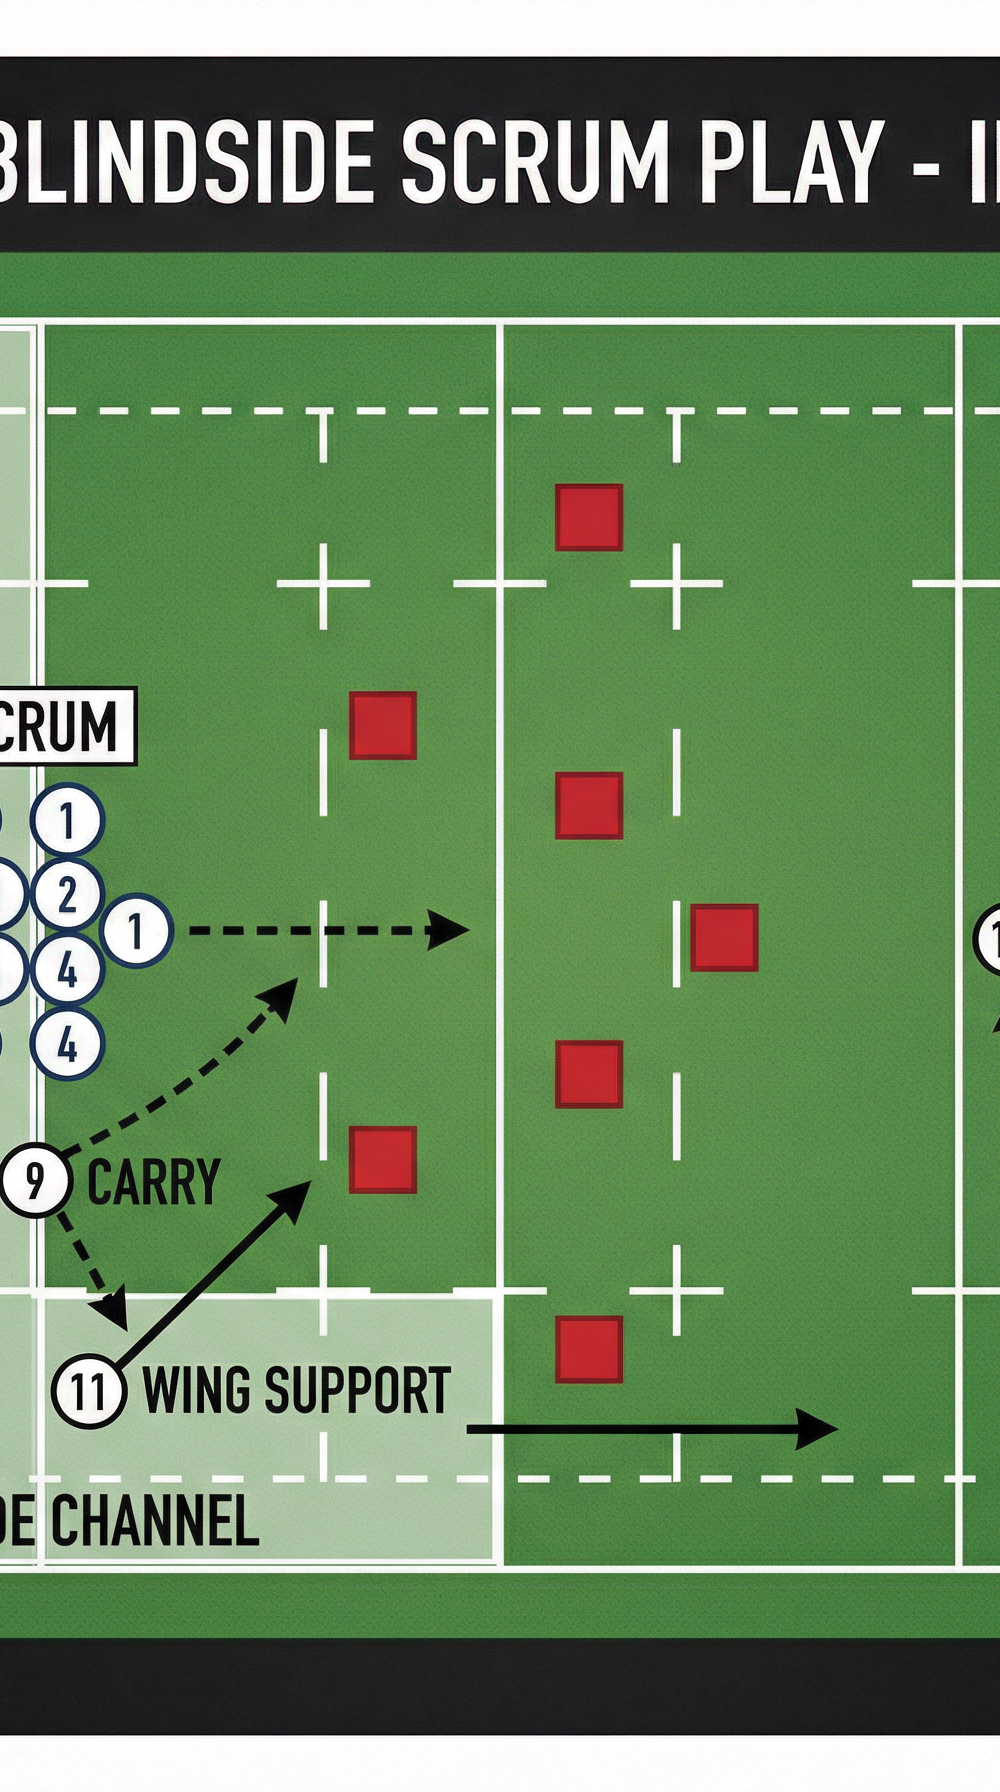
- Forwards (1-8): Standard scrum formation. The Number 8 must have solid control of the ball at the base.
- Scrum-half (9): Positioned on the blindside (left) of the scrum, ready to receive or clear the ball.
- Blindside Wing (11): Positioned approximately 5 to 7 metres deep and hugging the touchline, ready to hit the line at pace.
- Fullback (15): Positioned centrally but shading the blindside, acting as a secondary support runner or decoy.
- Fly-half (10) & Centers (12, 13): Positioned wide on the openside to hold the opposition defense.
3. Step-by-Step Instructions
- The Set: The pack engages and secures the ball. The Number 8 controls the ball at their feet, keeping the scrum stable.
- The Call: The scrum-half (9) makes the visual or verbal call for the blindside strike, ensuring the wing (11) is ready.
- The Pick and Clear: As the ball is ready, the 9 taps the 8. The 8 leaves the ball for the 9, who scoops it up cleanly while moving aggressively toward the blindside touchline.
- Drawing the Defender: The 9 runs hard at the outside shoulder of the defending blindside flanker or the inside shoulder of the defending winger. The goal is to force the defending winger to make a decision—step in to tackle the 9, or stay wide on the 11.
- The Pass: As the defending winger commits to the 9, the 9 delivers a crisp, flat pass to the 11, who is running a hard, straight line down the touchline.
- The Finish: The 11 catches the ball at top speed, exploiting the space created. If the fullback (15) has tracked across, the 11 can either take them on the outside or chip ahead.

4. Key Coaching Points

- Scrum Stability: The foundation of this play is a solid scrum. If the scrum is going backward, the 9 will be under immediate pressure from the opposing flanker, killing the play before it starts.
- Speed of the 9: The scrum-half must clear the ball and accelerate instantly. Any hesitation allows the defense to slide and cover the space.
- Fixing the Defender: The 9 must genuinely threaten the line. If they drift sideways without moving forward, the defending winger can easily cover both the 9 and the 11.
- Timing of the Run: The 11 must time their run to hit the ball at full pace just as the 9 commits the defender. Arriving too early kills the space; arriving too late allows the defense to recover.
- Communication: Non-verbal cues between the 8, 9, and 11 are crucial to ensure everyone is synchronized without alerting the opposition.
5. Common Mistakes

- Drifting Sideways: The 9 runs laterally toward the touchline instead of attacking the gain line, pushing the 11 out of bounds.
- Poor Ball Control at the Base: The Number 8 fails to secure the ball, leading to a messy clearance by the 9 and allowing the defense time to press.
- Winger Starting Too Flat: The 11 starts too close to the gain line, forcing them to catch the ball while standing still or overrunning the pass.
- Ignoring the Flanker: The 9 fails to account for the opposing blindside flanker breaking early, resulting in a tackle behind the gain line.
6. Variations & Progressions

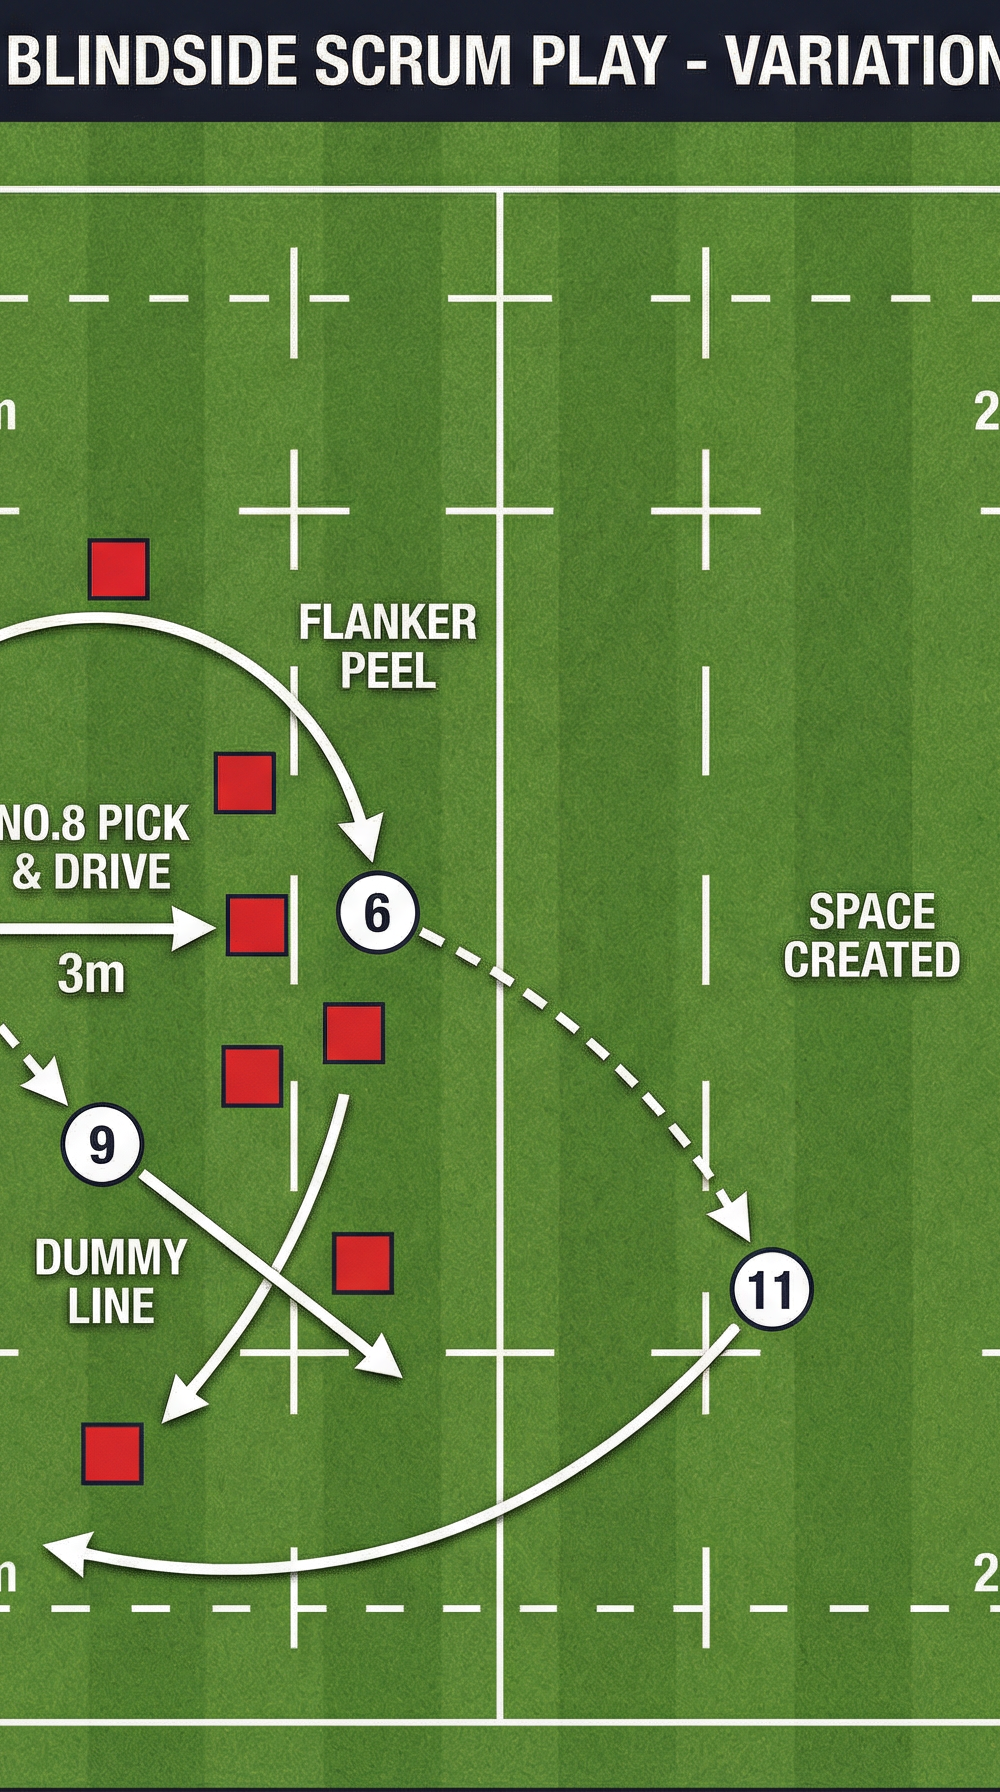
- The 8 Pick (Variation): Instead of the 9 clearing, the Number 8 picks the ball and drives hard at the blindside flanker. The 9 loops around the 8 to receive an offload, then passes to the 11. This commits the back row more heavily.
- The Inside Ball (Progression): If the defending winger starts cheating wide to cover the 11, the 9 can dummy the pass and cut back inside through the gap left by the winger.
- Adding the Fullback (Progression): The 15 joins the line outside the 11, creating a three-on-two. The 9 passes to the 11, who immediately draws the fullback and passes to the 15 on the touchline.
7. Age Adaptations

- Under 10s / Under 12s: Focus purely on the 9 passing to the 11. Emphasize catching on the run and running straight. Keep the defensive pressure light during practice.
- Under 14s: Introduce the concept of the 9 'fixing' the defender. Teach the 9 how to read the defending winger's hips to decide whether to run or pass.
- Under 16s & Open: Implement the full variations, including the 8-pick and the inside ball. Defenses will be faster and smarter, so execution speed and decision-making under pressure become paramount.