Mastering the Box Kick: A Coach's Guide to the Chase and Press
A detailed guide for Rugby coaches on executing the perfect box kick chase and press, designed to create turnover opportunities and win the territorial battle.
Equipment Needed
1. Overview
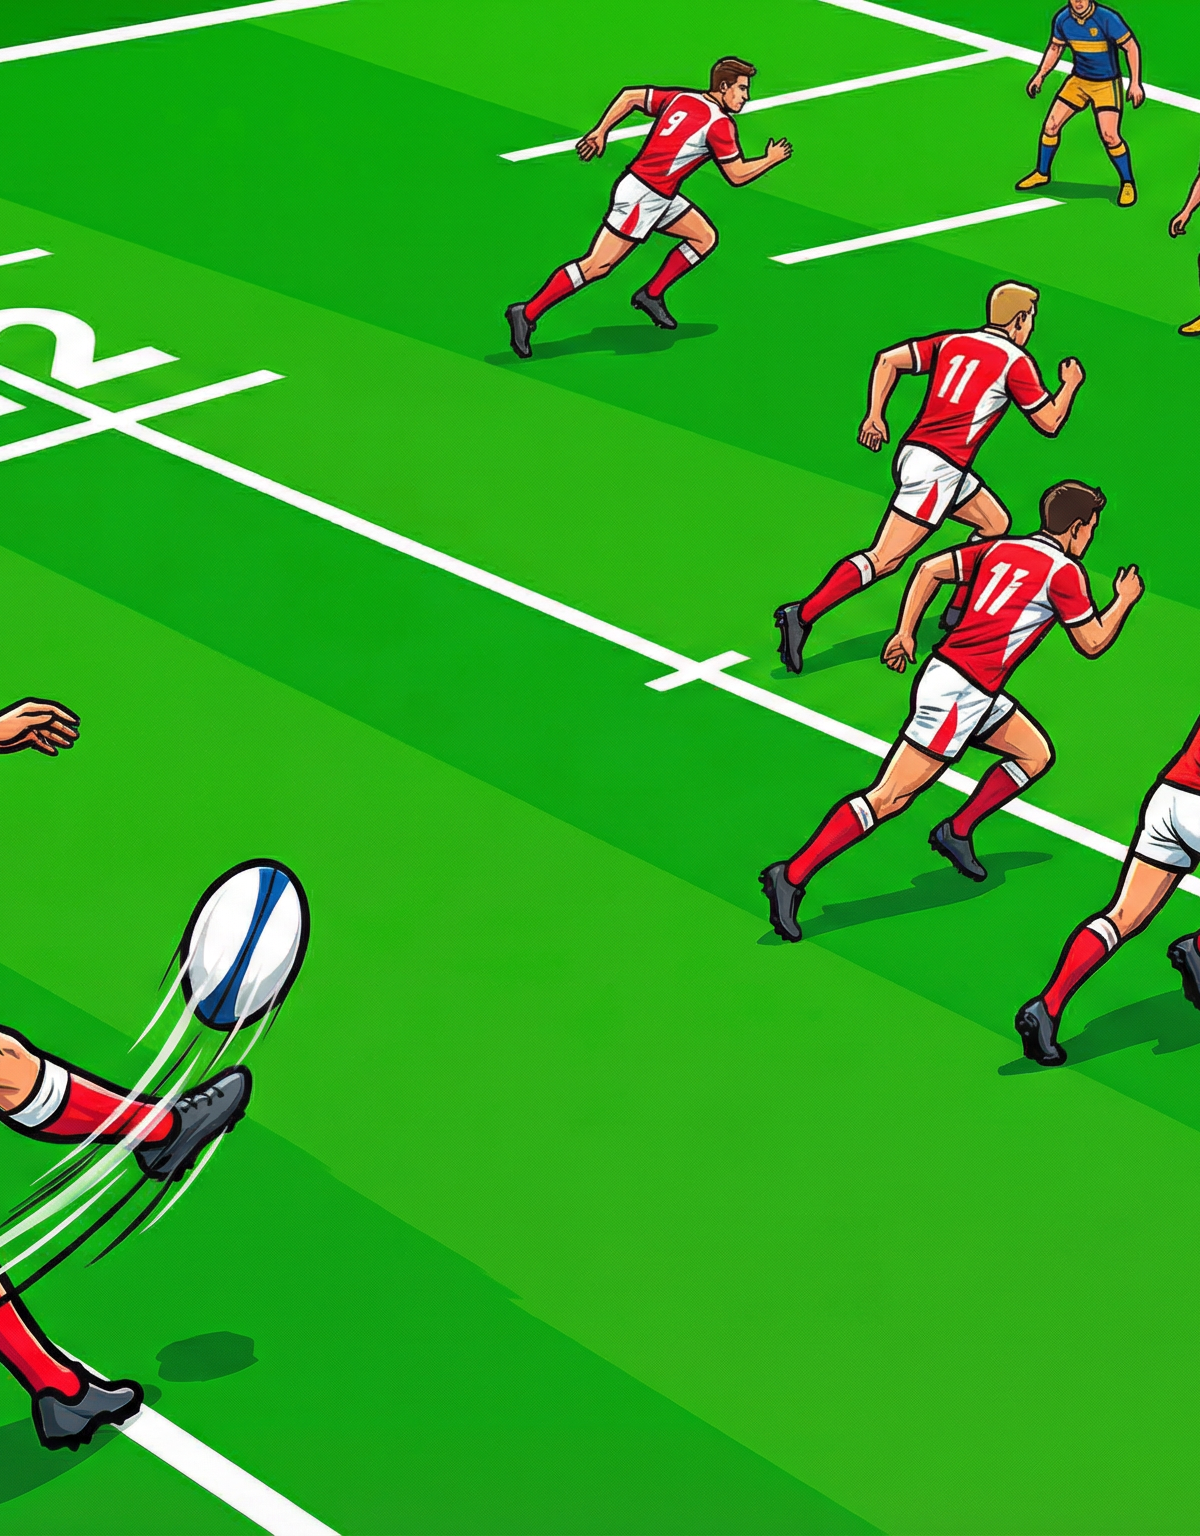
The box kick is a fundamental tactical tool in modern Rugby, used to exit your own half, apply territorial pressure, and create opportunities to regain possession in advantageous positions. This set play is not simply about kicking the ball away; it is a calculated attacking maneuver designed to force errors from the opposition and win the ball back. When executed correctly, the "Box Kick Chase and Press" turns a seemingly neutral situation into a significant attacking advantage. It is most effective when launched from a stable ruck platform, typically between your own 10-metre line and the opposition's 10-metre line, creating a contest for the ball deep inside their territory.
2. Setup

To run this play effectively in a training session, a clear and accurate setup is crucial for players to understand their roles and the spatial dynamics of the play.
- Equipment: A good supply of Rugby balls, and a set of cones or markers to delineate chase lanes and landing zones.
- Pitch Setup: The drill should be run on a full-sized pitch (100m x 70m). Place a ruck or a static ball marker approximately 15-20 metres in from the touchline, around the halfway line. This starting position provides a realistic scenario for a box kick.
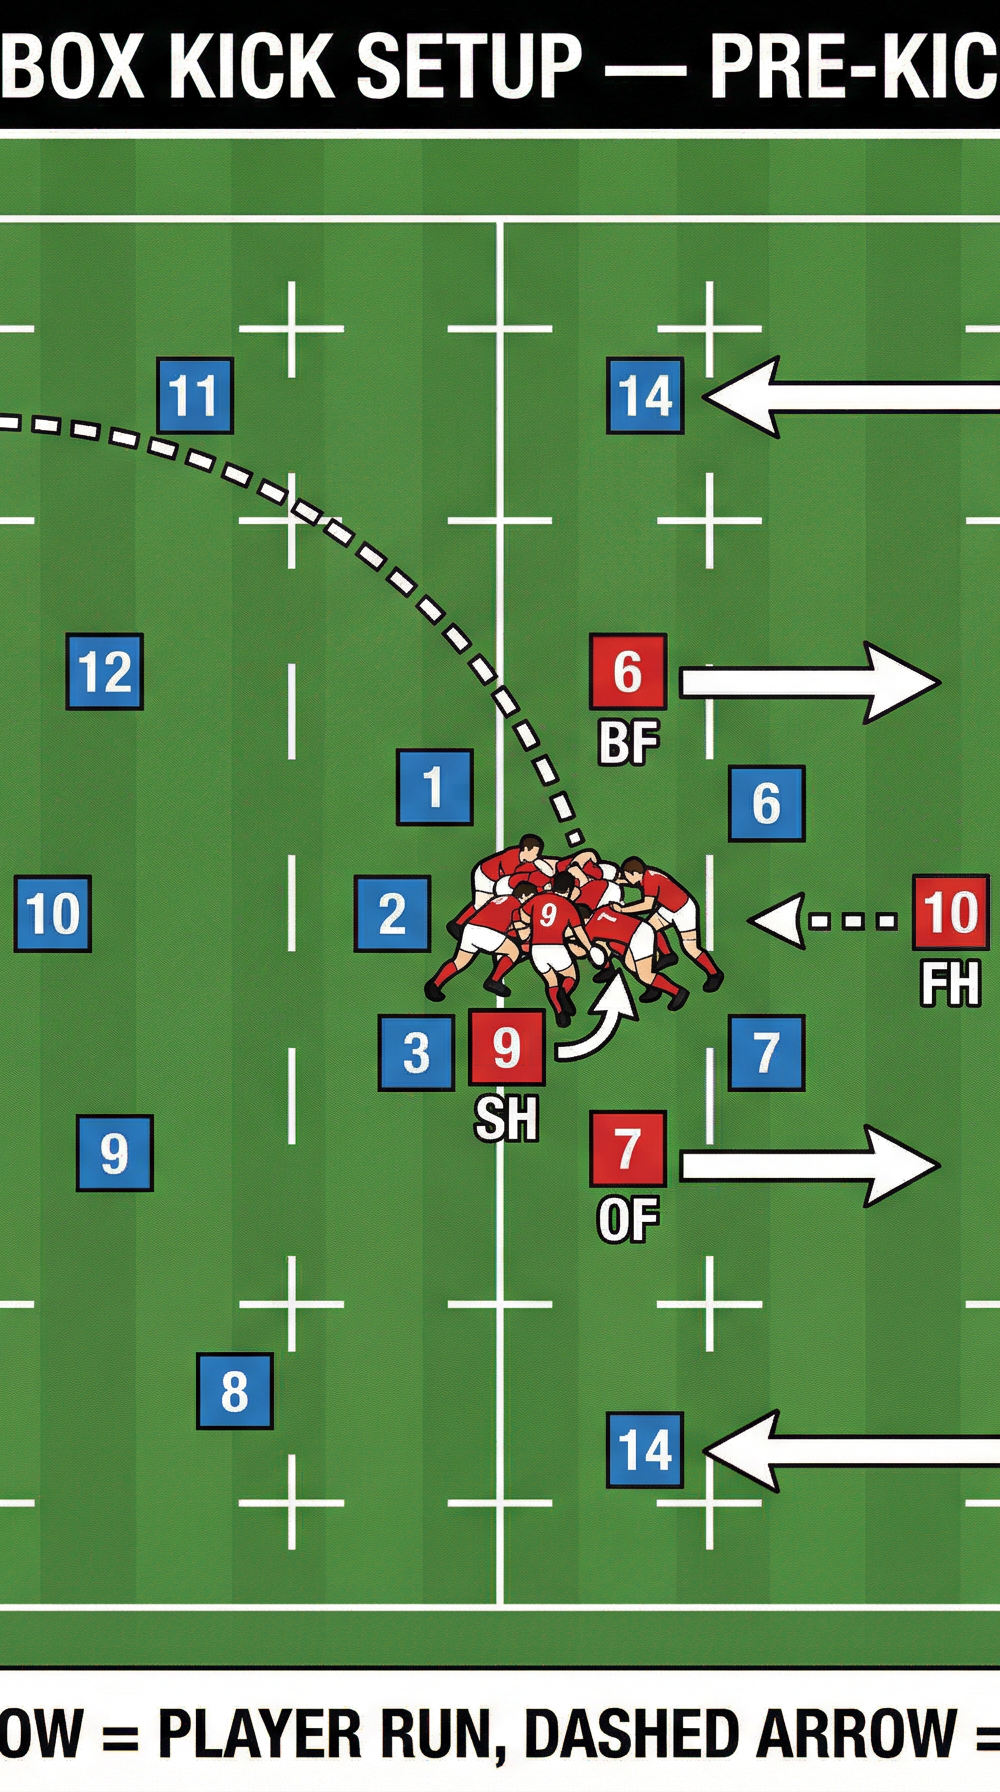
- Player Positions:
- 9 (Scrum-half): Positioned at the base of the ruck, on the side of the intended kick.
- Forwards (6, 7, 8): Secure the ruck. The flankers (6 and 7) are the first players to release and form the core of the chase.
- Wingers (11 and 14): These are the primary chasers. They should be positioned on or just behind the offside line, ready to sprint the moment the ball is kicked.
- 10 (Fly-half): Holds a deeper position, acting as a decoy runner initially and then transitioning to a sweeper role to cover any potential counter-attack.

3. Step-by-Step Instructions

- Secure the Ruck & Communicate: The play begins with the forwards securing possession at the ruck. The scrum-half (9) must clearly communicate the call, e.g., "BOX KICK! BOX KICK!", to ensure all players are aware. The quality of the ruck protection is paramount to giving the kicker time and space.
- The Kick: The scrum-half (9) lifts the ball from the base and executes the box kick. The kick's objective is height and distance (a hang-time of 4-5 seconds is ideal), aiming for a landing zone approximately 25-30 metres upfield and towards the touchline. This forces the receiving player into an isolated position.
- The Chase: The moment the ball leaves the kicker's foot, the chase is initiated. The wingers (11 and 14) and the flankers (6 and 7) sprint forward in organized lanes. It is crucial that chasers remain onside until the kick is made.
- Wingers (11, 14): Their goal is to arrive at the landing zone at the same time as the ball, contesting directly with the catcher.
- Flankers (6, 7): They provide the second wave of pressure, aiming to tackle the catcher immediately or contest for the ball if it goes to ground.

- The Press & Contest: As the chasers converge on the landing zone, they form a press. The primary goal is to legally contest for the ball in the air. If the opponent secures the catch, the immediate goal is to execute a dominant tackle, preventing any forward momentum and creating an opportunity for a turnover at the ensuing ruck.
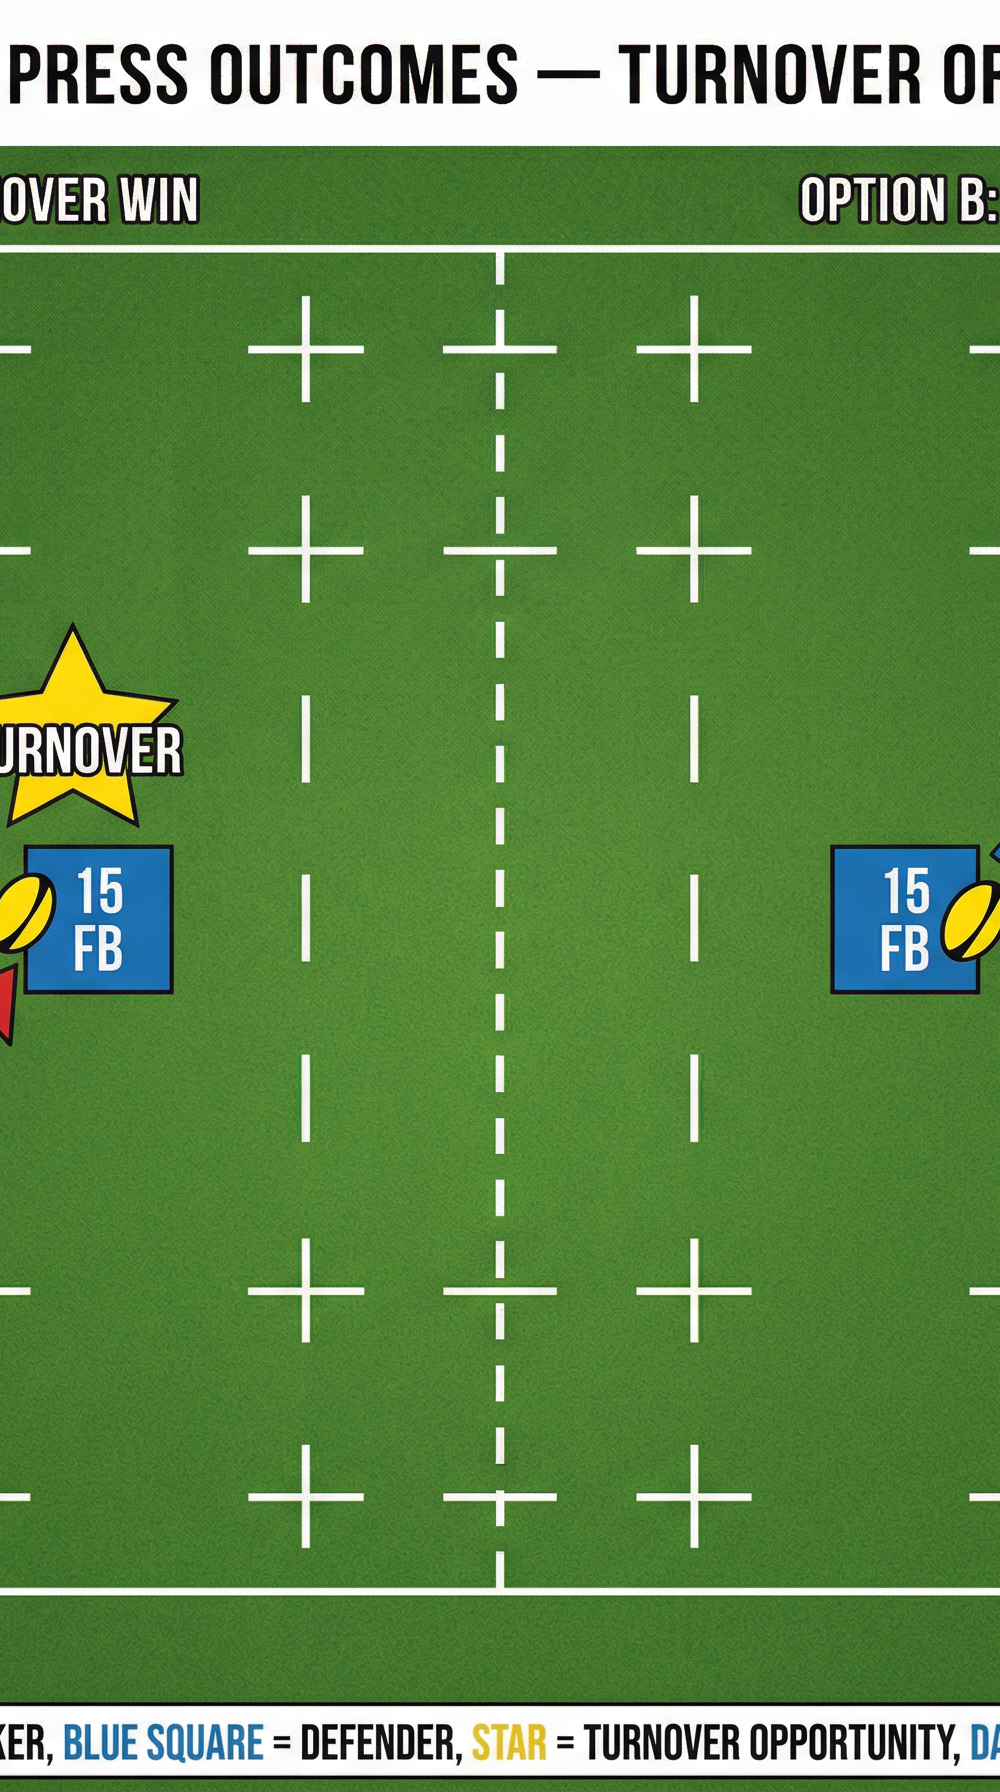
- Secure the Outcome: Depending on the result of the contest, the team transitions to the next phase.
- Turnover Won: If the chasers successfully regain possession, the team immediately transitions into an attacking pattern, exploiting the disorganized defense.
- Territory Gained: If the opponent catches the ball but is forced to kick under pressure, the team will have gained significant territory, often resulting in a lineout in an attacking area.

4. Key Coaching Points
- The Kick's Quality: Emphasize the importance of a high, contestable kick. It's not about distance alone. A 4-second hang time is the minimum target. Coach the scrum-half to focus on a consistent technique.
- The Onside Line: Drill the chasers relentlessly on holding the offside line until the ball is kicked. Any player starting in front of the kicker will concede a penalty, nullifying the entire effort.
- Organized Chase Lanes: Players must sprint in defined lanes to cover the width of the landing area and prevent the opposition from finding easy gaps for a counter-attack.
- Communication is Key: The scrum-half's call, the chasers' communication to organize the press, and the sweeper's instructions from the back are all vital for success.
- Contest, Don't Just Tackle: Coach the chasers to have the mindset of winning the ball back, not just making a tackle. This means attacking the ball in the air and being aggressive at the breakdown.
- The Second Effort: The work of the supporting players (the flankers) is just as important as the primary chasers. They must be coached to anticipate the outcome and be in a position to win the turnover.
5. Common Mistakes
- Kicking Too Long or Too Short: A kick that is too long gives the receiver too much time, while a kick that is too short doesn't gain enough territory. This is a technique and decision-making flaw.
- Chasers Offside: A common and costly error, often due to impatience or a lack of discipline. Use an assistant coach to monitor the offside line during drills.
- Disorganized Chase: Players running in the same lane or leaving large gaps allows the opposition to easily evade the press and launch a counter-attack.
- Not Competing in the Air: Chasers who slow down and wait for the catcher to land are being passive. They must be coached to jump and contest for the ball.
- No Support for the Chaser: If the first chaser makes the tackle but has no support, the opposition can easily secure the ball and retain possession. The second and third players arriving are crucial.
6. Variations & Progressions

- Progression 1 (Easier): Start with an unopposed chase. The focus is purely on the kick quality, the timing of the chase, and maintaining organized lanes. Use cones to mark the landing zone.
- Progression 2 (Harder): Introduce a full backfield of defenders (e.g., a full-back and two wingers). This forces the chasers to make decisions based on the defenders' positioning and creates a more realistic contest.
- Variation 1: Run the same play but from a lineout. This changes the starting positions and the timing of the release for the chasers.
- Variation 2 (Advanced): Introduce a "double kick" option, where the scrum-half fakes the box kick and passes to the fly-half (10), who then executes a different kick. This is used to manipulate the defensive backfield.
7. Age Adaptations

- Under 12: Focus on the kicking technique itself. The chase should be unopposed, with the goal being for players to understand the concept of chasing a kick in a group. Use softer balls.
- Under 14: Introduce a single chaser and a single receiver. This creates a 1-on-1 contest and teaches the fundamentals of timing and competing for the ball in the air. The concept of onside is critical at this age.
- Under 16: Progress to a 3-on-2 situation (three chasers vs. a full-back and a winger). This introduces the need for organized chase lanes and communication. The full laws regarding the aerial contest should be coached and refereed.
- Open Age/Senior: The full 15-on-15 set play should be practiced at match intensity, with a focus on the speed of the press and the clinical execution of the turnover.