Crash Ball with Decoy Runners: Dominating the Gain Line
Master the crash ball play with coordinated decoy runners to punch through the defensive line, create second-phase momentum, and unlock the wide channels for your backs.
Equipment Needed
Overview
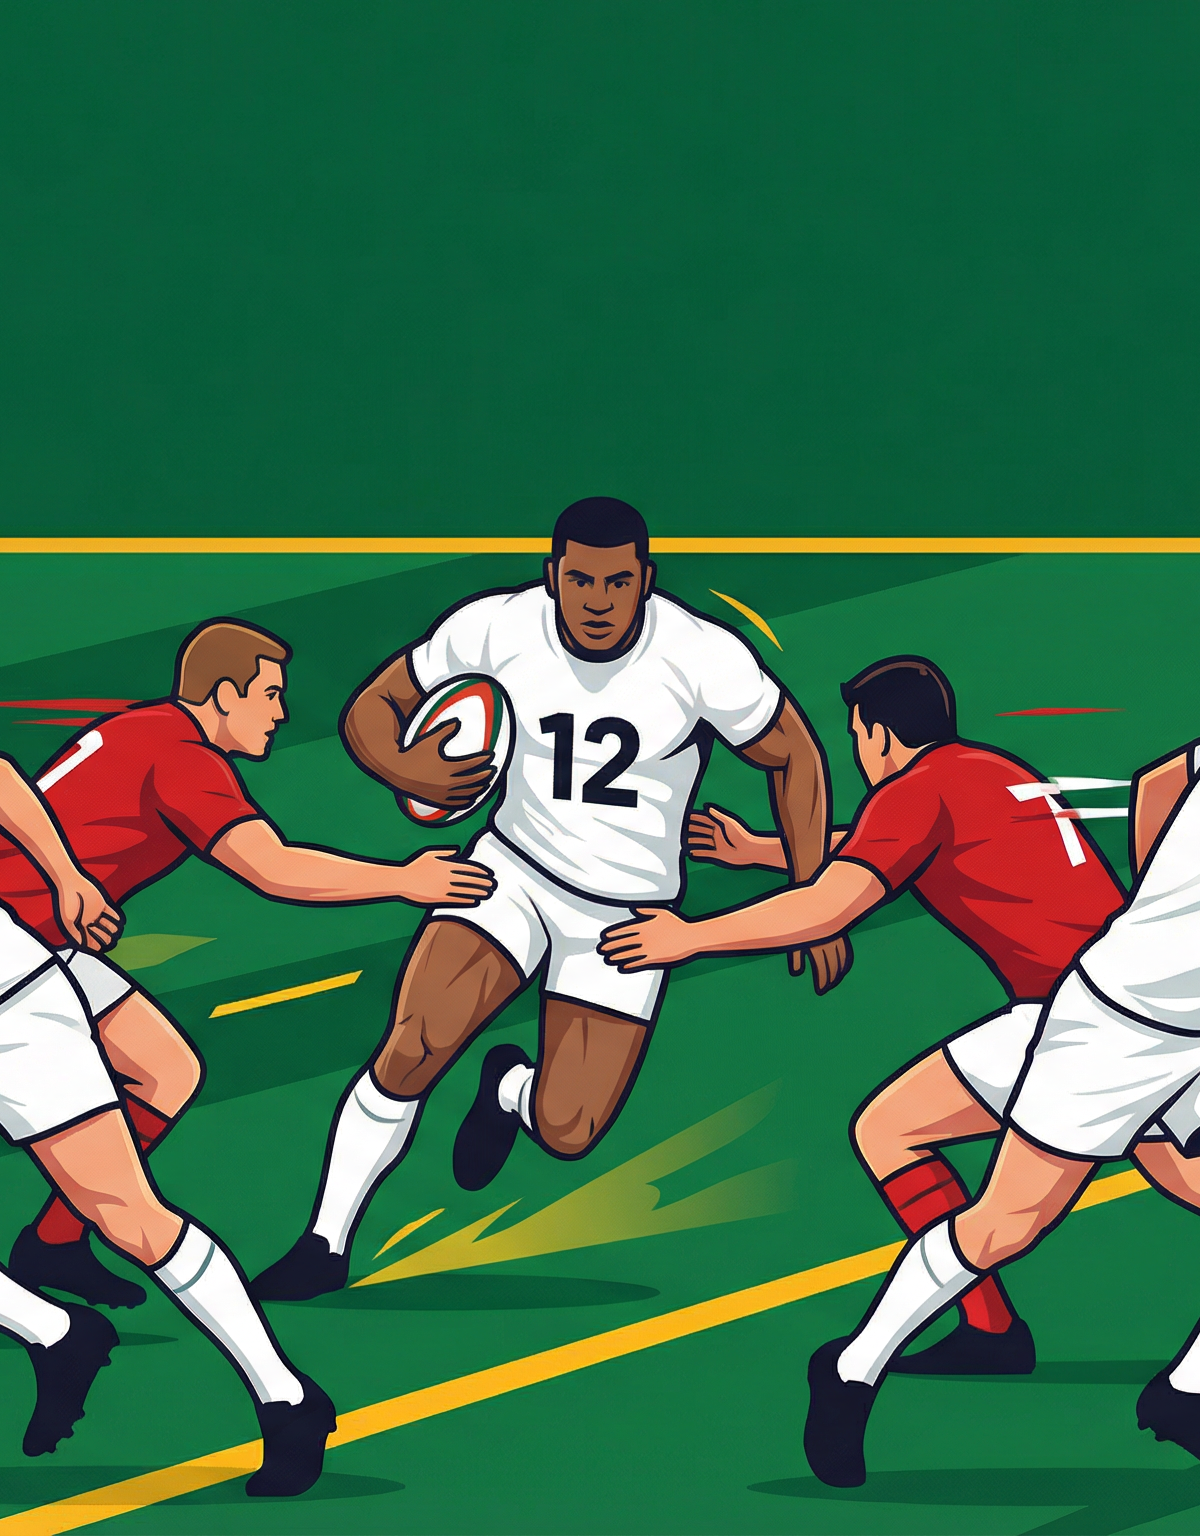
The crash ball with decoy runners is one of the most reliable and physically dominant set plays in attacking rugby. At its core, the play uses your Inside Centre (12) as a hard-running ball carrier who drives directly into the defensive line — the "crash ball" — while your Winger (11) and Outside Centre (13) execute crossing decoy runs in front of the ball carrier to freeze, manipulate, and split the defensive line before contact is made.
This play is most effective when used from a set piece (scrum or lineout) on the opposition's 22m line, or from a ruck positioned 5–15m from the touchline where the defence has been pulled wide. The primary objective is not necessarily to break the line on first contact, but to gain 3–5m of territory, create a quick recycled ruck, and launch a second-phase attack into the space created by the decoys pulling defenders out of position.
Use this play when your 12 has a clear size or pace advantage over the opposing inside defender, when the defensive line is flat and rushing up, or when you need a reliable "go-to" play to reset momentum in a tight game.
Setup

Pitch Reference: Standard 100m × 70m rugby pitch. This play is designed to operate in a 30m wide channel between the 15m line and the far touchline, typically in the attacking half.
Equipment Required: 8 cones (to mark ruck position, defensive line, and channel boundaries), 1 rugby ball, training bibs in two colours (attackers vs defenders), and a whiteboard or cone grid for pre-session walk-through.
Player Positions for This Play:
| Position | Number | Role in Play |
|---|---|---|
| Scrum Half | 9 | Ball delivery from ruck; recycles to breakdown |
| Fly Half | 10 | First receiver; fixes inside defender; passes to 12 |
| Inside Centre | 12 | Primary crash ball carrier |
| Outside Centre | 13 | Decoy runner — crosses behind 11 in front of 12 |
| Left Wing | 11 | Decoy runner — crosses in front of 12 from the blind side |
| Number 8 | 8 | Lead support runner — hits the breakdown from depth |
| Blindside Flanker | 6 | Second support runner — arrives on the far side of the ruck |
| Right Wing | 14 | Holds width; second-phase strike option |
| Fullback | 15 | Deep second-phase option or counter-attack safety |

Diagram 1: Initial setup showing backline alignment, decoy runner lines (11 and 13), and the crash ball carrier (12) driving straight onto the pass from 10.
Step-by-Step Instructions

Step 1 — Establish the Ruck (0–2 seconds)
The play begins from a controlled ruck. Your forwards must secure a clean, quick ball. The ruck should be set with the ball on the attacking team's side, no more than 1m back from the offside line. The Scrum Half (9) communicates the call — a pre-agreed signal such as "CRASH LEFT" — as the ball is secured.
Step 2 — Scrum Half Delivery (2–3 seconds)
The Scrum Half (9) delivers a fast, flat pass to the Fly Half (10). The pass should be off the ground within 2 seconds of the ruck being won. Speed of delivery is critical — a slow pass allows the defensive line to reset and eliminates the timing advantage of the decoy runners.
Step 3 — Fly Half Fixes the Inside Defender (3–4 seconds)
The Fly Half (10) receives the ball running at pace at a depth of 3–4m behind the gain line. Their job is to hold the ball for a fraction of a second longer than normal — just enough to draw the attention of the opposition's Fly Half or inside defender — before delivering a sharp pass to the Inside Centre (12). The 10 must not drift wide; they must stay on a straight running line to genuinely threaten the defence.
Step 4 — Decoy Runners Execute Crossing Lines (3–4 seconds)
Simultaneously with Step 3, the Left Wing (11) runs a hard flat line from the blind side, crossing in front of the Inside Centre (12) at a depth of approximately 1–2m. The Outside Centre (13) runs a mirrored line from the open side, also crossing in front of 12. These two runners must time their runs to arrive at the crossing point just as the ball reaches 12 — not before, not after. The crossing lines force the defensive 12 and 13 to make a decision: do they follow the decoys or hold for the ball carrier?
Step 5 — Inside Centre Hits the Crash Ball (4–5 seconds)
The Inside Centre (12) receives the ball from 10 at pace, running at full speed onto a flat pass. The 12 must aim to hit the gap between the opposition's 12 and 13 — a gap that the decoy runners have created by pulling those defenders' eyes and feet out of position. The 12 should carry the ball in two hands until the last moment, presenting the threat of an offload, then tuck the ball and drive through contact with a low body position, pumping legs hard.
Step 6 — Support Runners Arrive at the Breakdown (5–7 seconds)
The Number 8 (8) and Blindside Flanker (6) must be running hard support lines 2–3m behind the ball carrier. The first support runner (8) hits the breakdown immediately on the near side, clearing out any defender who has made the tackle. The second support runner (6) arrives on the far side, sealing the ruck. The Scrum Half (9) loops around to the breakdown to receive the recycled ball within 3 seconds.
Step 7 — Second Phase Launch (7–10 seconds)
With the ruck secured and the defensive line disrupted, the Scrum Half (9) delivers quickly to the Fly Half (10), who now has the option to attack the wide channels with the Right Wing (14) and Fullback (15) in space. The decoy runners (11 and 13) have reset to wide positions, providing strike options across the full width of the 70m pitch.
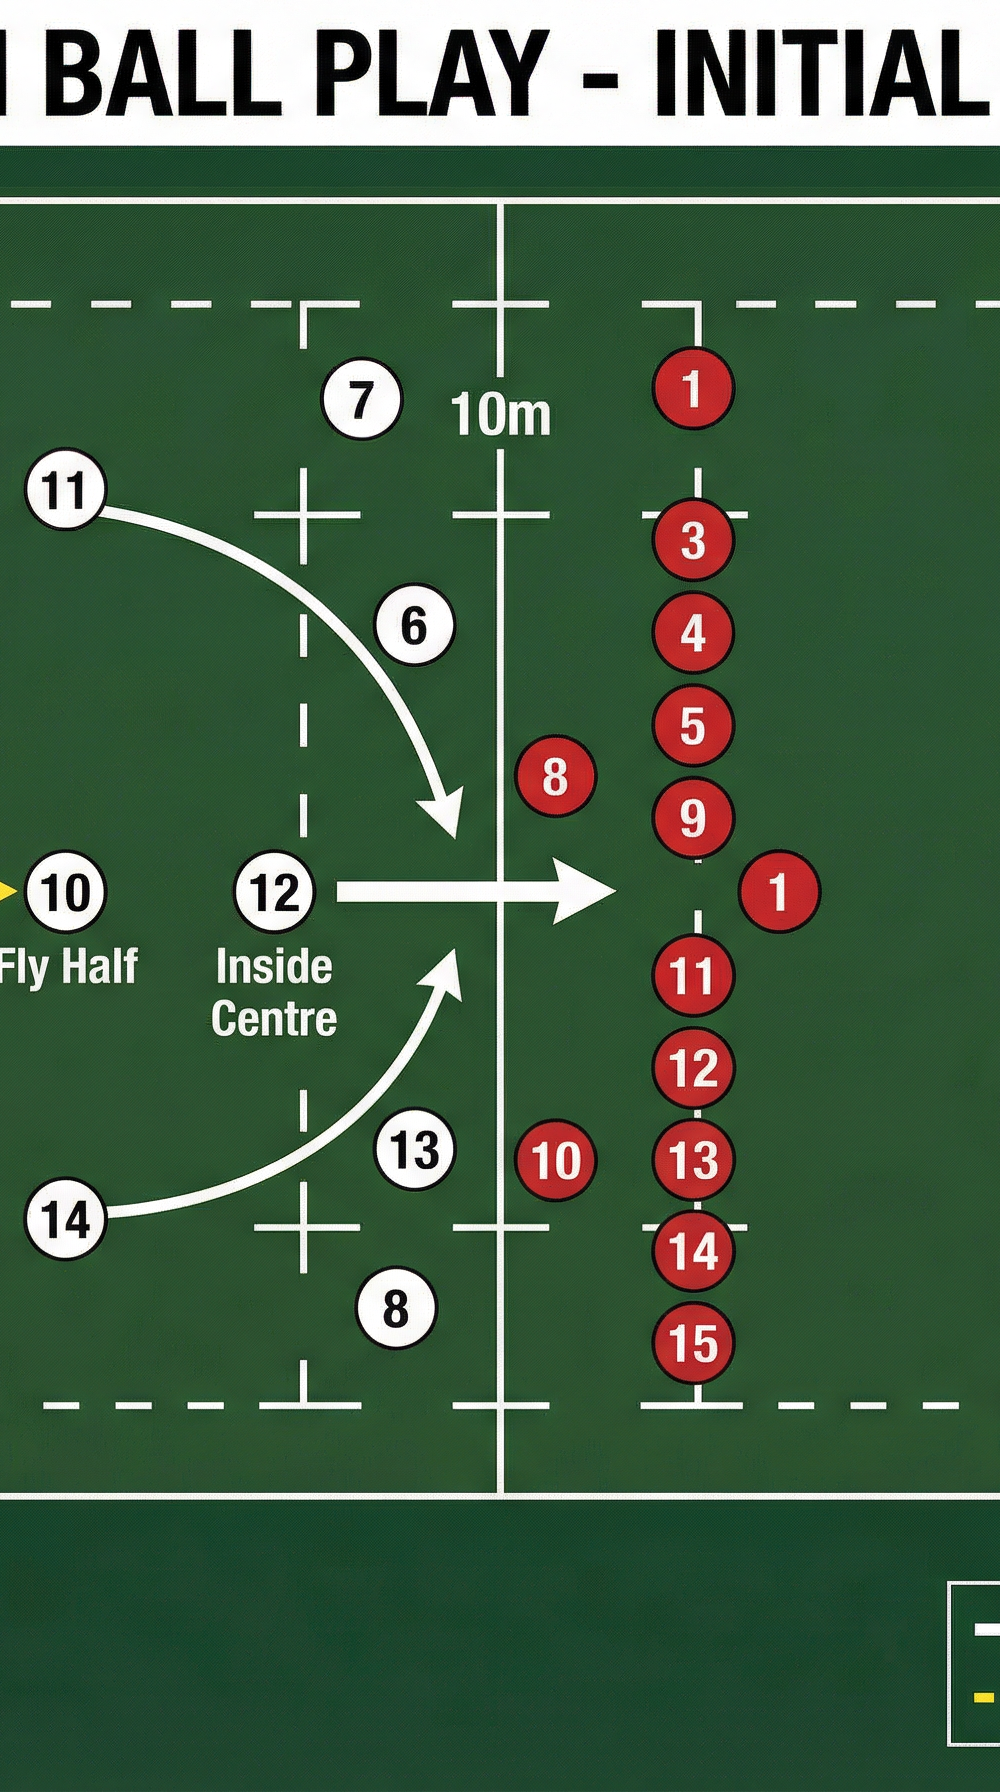
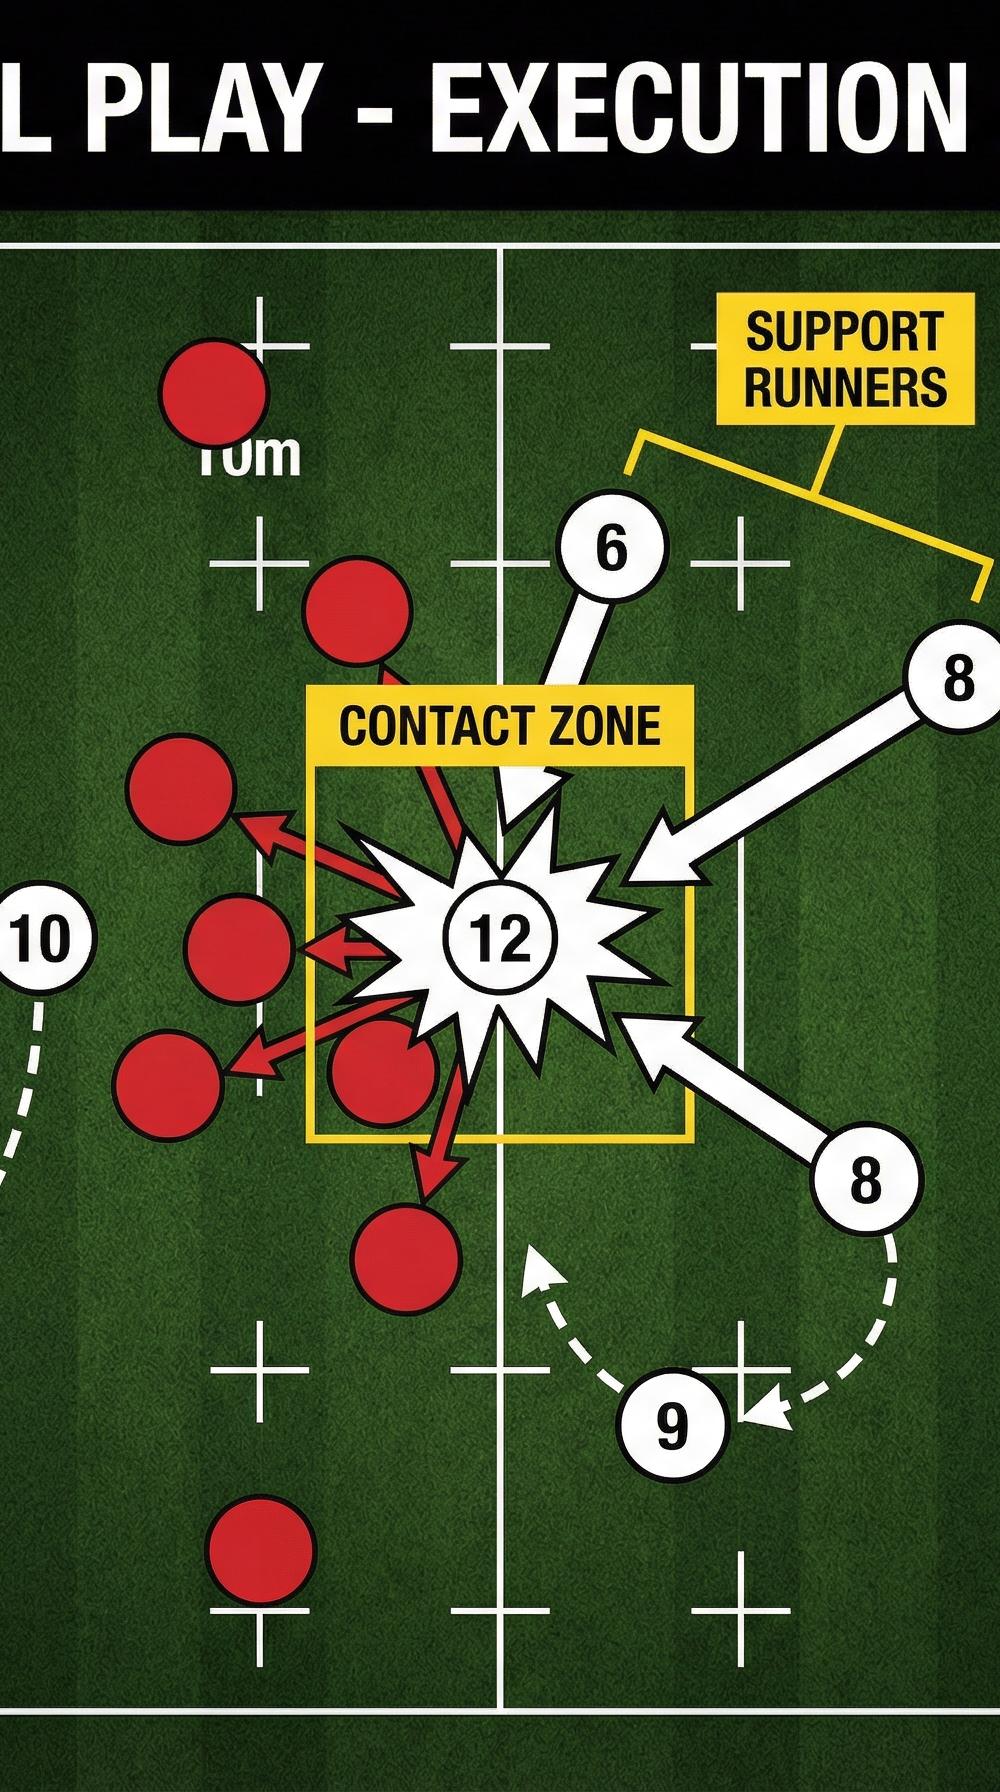
Diagram 2: Execution phase showing the contact zone, support runners (6 and 8) arriving at the breakdown, Scrum Half (9) recycling, and second-phase options spread wide for 11, 13, 14, and 15.
Key Coaching Points
1. Timing is Everything — The Decoys Must Arrive at the Right Moment
The entire play depends on the decoy runners arriving in front of the crash ball carrier at precisely the right time. Too early and the defence has time to reorganise; too late and the crossing lines have no effect. Drill this timing in isolation — walk it through at half speed before building to full pace.
2. The Fly Half Must Be a Genuine Threat
If the Fly Half (10) telegraphs the pass to 12 too early, the defensive 12 will not be drawn in and the gap will not open. Coach your 10 to hold the ball on a straight running line, eyes up, presenting the genuine threat of a break before releasing. A lazy or drifting 10 kills the play.
3. The Crash Ball Carrier Runs Straight — No Drifting
The Inside Centre (12) must run a dead-straight line onto the ball. Any drift to the outside telegraphs the play and allows the defence to drift with them. The power of the crash ball comes from running directly into the space between defenders, not around them.
4. Body Position at Contact — Low and Powerful
Coach the 12 to lower their hips in the final two strides before contact, driving through the tackle with a powerful leg drive. The aim is to gain 3–5m beyond the gain line, not to break the line completely. A controlled, dominant carry that goes to ground quickly is better than an ambitious run that results in a turnover.
5. Support Runners Must Be On Their Feet and Arriving Fast
The breakdown is only as good as the support runners who arrive at it. The Number 8 and Flanker must be running at pace from depth — not standing and watching. Coach them to read the crash ball carrier's line and anticipate the contact point, arriving within 1–2 seconds of the tackle being made.
6. Width in the Backline Creates the Second-Phase Opportunity
The Winger (14) and Fullback (15) must hold their width throughout the play. The temptation is to drift inward to watch the crash ball, but their value is in being available wide for the second-phase attack. Coach them to maintain their positions 10–15m from the ruck and be ready to receive the ball at pace.
Common Mistakes

Mistake 1 — Decoy Runners Slowing Down or Pulling Out of Their Lines
This is the most common error at all levels. When players sense they are not receiving the ball, they instinctively slow down or veer off their running line. This completely removes the deception element of the play. Emphasise that the decoy runners must run as hard and as convincingly as if they are definitely receiving the ball — right through the contact zone and beyond.
Mistake 2 — The Fly Half Passing Too Early or Too Flat
A pass delivered before the 10 has engaged the inside defender gives the defensive 12 time to step across and cover the crash ball carrier. Equally, a pass that is too flat and behind the running 12 forces them to check their stride and take the ball off their hip, killing their momentum. Work on pass timing and depth in isolation drills before combining with the full play.
Mistake 3 — The Crash Ball Carrier Going to Ground Too Easily
Some players, particularly younger or less experienced players, go to ground at first contact rather than driving through it. This results in a ruck being formed too far behind the gain line, negating the territory gained. Coach the 12 to stay on their feet for at least 1–2 strides after initial contact, driving hard before presenting the ball cleanly.
Mistake 4 — Support Runners Arriving Too Late or Out of Position
If the Number 8 and Flanker are not in the correct starting positions — within 3–5m of the ruck at depth — they will not arrive at the breakdown in time to secure quick ball. A slow ruck gives the defence time to reset and the second-phase opportunity is lost. Use a stopwatch in training: the ruck must be secured within 3 seconds of the tackle being made.
Mistake 5 — Calling the Play Too Predictably
If you run the crash ball from the same position on the pitch every time, or always from the same ruck count, the opposition will read it quickly. Mix the play into your attacking game plan at varied moments — from set piece, from phase play, from different field positions — so it remains unpredictable and effective.
Variations & Progressions

Variation 1 — Double Crash Ball (Increased Complexity)
Instead of a single crash ball carrier, the Number 8 (8) also runs a crash ball line 2m outside the Inside Centre (12). The Fly Half (10) now has two crash ball options plus the decoy runners, forcing the defence to cover an even wider area. This is a more complex call requiring clear pre-agreed signals between 9, 10, 12, and 8.
Variation 2 — Crash and Offload (Advanced)
Once the crash ball carrier (12) has mastered the basic carry-and-present technique, introduce the offload option. If the 12 beats the first defender or finds themselves in a one-on-one tackle, they have the option to offload to a support runner (8 or 6) before going to ground. This turns a reliable gain-line play into a potential line-break. Only introduce this variation once the basic version is consistently executed.
Progression 1 — Walk-Through to Full Speed
Begin every session introducing this play at walking pace — no defenders — so all players understand their roles, timing, and running lines. Progress to jogging pace with passive defenders (defenders hold their positions but do not tackle), then to full contact. This three-stage progression ensures the play is understood before physical intensity is added.
Progression 2 — Add a Defensive Pressure Condition
Once the play is running well against a static defence, introduce a rushing defensive line — defenders who step up aggressively. This forces the attacking team to execute the play under time pressure, replicating match conditions. Reward the attacking team with a point for every metre gained beyond the gain line.
Age Adaptations

Under 12 and Below — Simplified Version
Remove the decoy runners entirely and focus solely on the crash ball carry and support running. At this age, the priority is teaching body position at contact, leg drive, and clean ball presentation. Use touch or tag rugby rules to build confidence before introducing contact. Reduce the pitch width to 40m to keep distances manageable.
Under 14 — Introduce One Decoy Runner
At Under 14, introduce a single decoy runner (the Outside Centre, 13) running a crossing line in front of the crash ball carrier. This introduces the concept of deception without the complexity of two simultaneous crossing lines. Focus on the timing relationship between the Fly Half (10), the decoy runner (13), and the crash ball carrier (12).
Under 16 and Open Age — Full Play with Variations
At Under 16 and above, the full play with both decoy runners, support runners, and second-phase options can be introduced. Open-age players should also begin learning the offload variation and the double crash ball option. Introduce defensive pressure conditions and game-situation scenarios — for example, running the play from a scrum on the opposition's 22m line with a score differential to manage.