Mastering the High Ball: The Ultimate Kick Chase and Catch Drill
Develop aerial dominance, coordinated chasing, and secure catching under pressure with this essential high ball drill.

Equipment Needed
1. Overview
The Kick Chase and Catch Drill is a foundational exercise designed to simulate game-realistic high ball scenarios. It focuses on developing a coordinated kick chase, creating pressure on the receiving player, and executing a safe, effective catch under intense competition. This drill is essential for establishing aerial dominance and ensuring your team can effectively transition from defense to attack, or maintain pressure in the opposition's half. Use this drill to sharpen communication between the kicker and chasers, and to build the receiver's confidence under the high ball.
2. Setup
To run this drill effectively, you will need the following setup:

- Pitch Area: Use a full 100m x 70m pitch or a half-pitch if space is limited. The key areas are the kicker's position near the halfway line and the receiver's position deep in the 22-metre area.
- Equipment: 4-6 rugby balls, cones to mark starting positions and the landing zone, and bibs to differentiate the attacking (chasing) and defending (receiving) teams.
- Player Positions:
- Attacking Team (Blue): A kicker (usually a 10 or 9), and 2-3 chasers (wingers, centers, or loose forwards) positioned onside, ready to sprint.
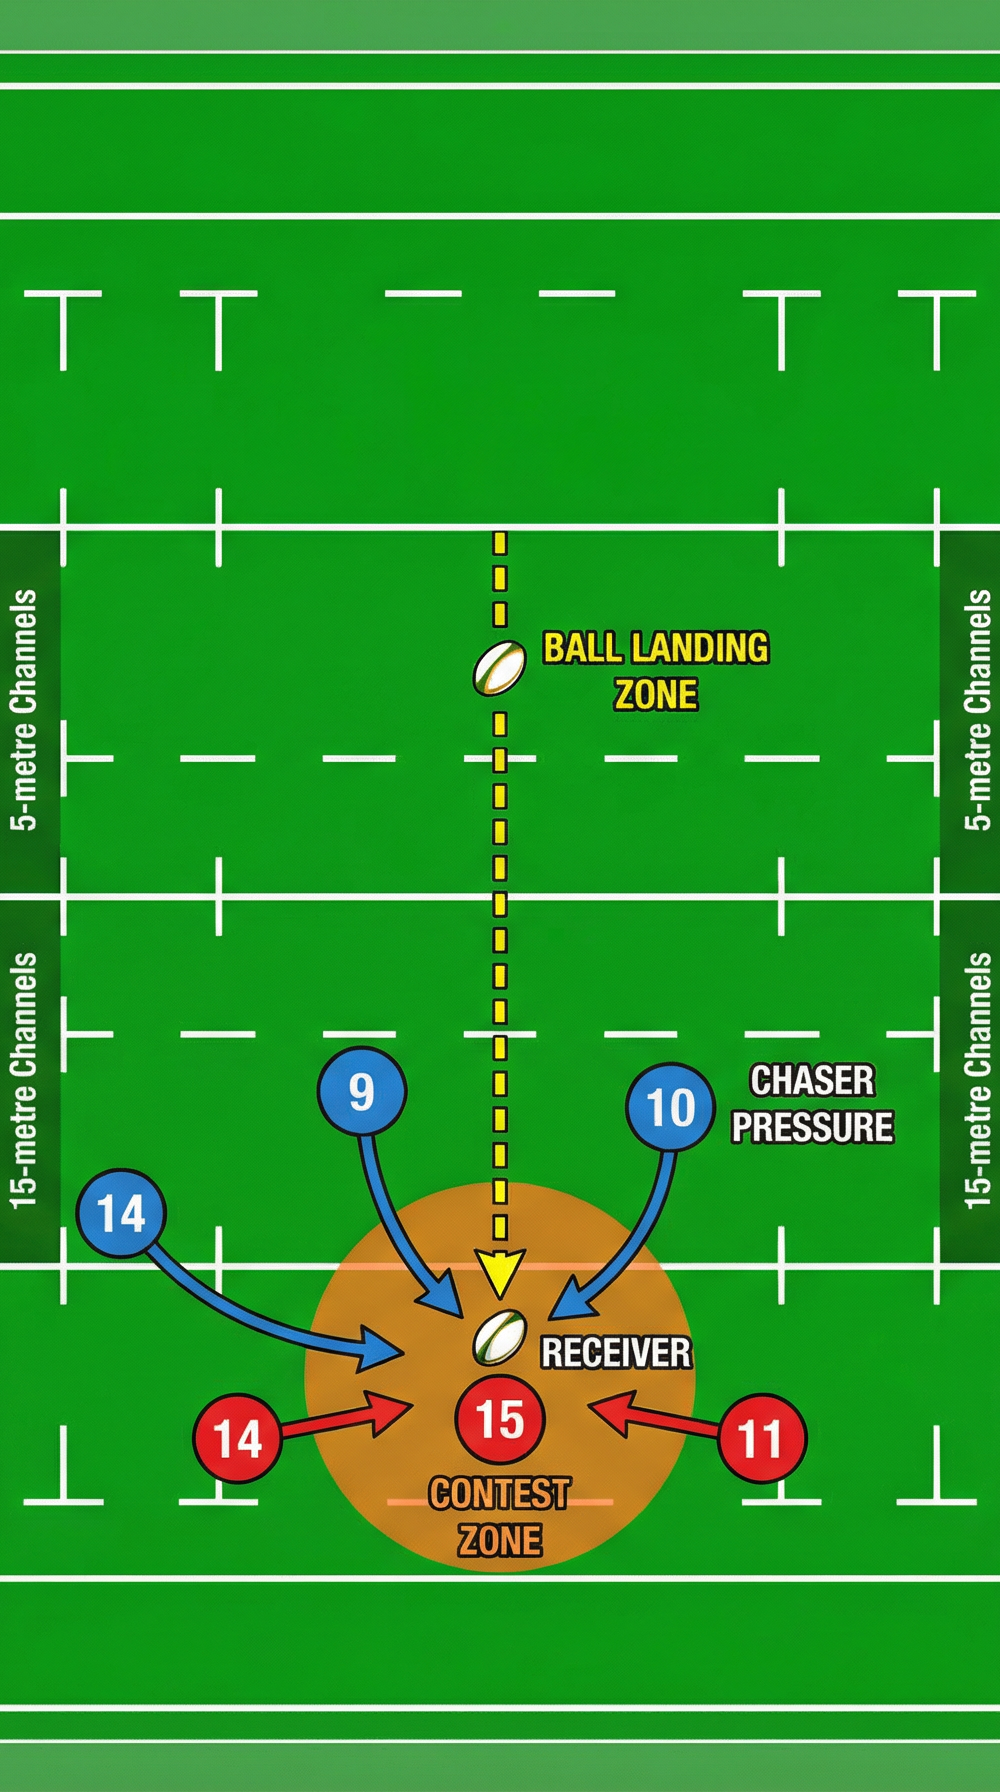
- Defending Team (Red): A primary receiver (usually a 15) positioned deep, with 1-2 supporting players (11 and 14) nearby to provide protection or options.

3. Step-by-Step Instructions
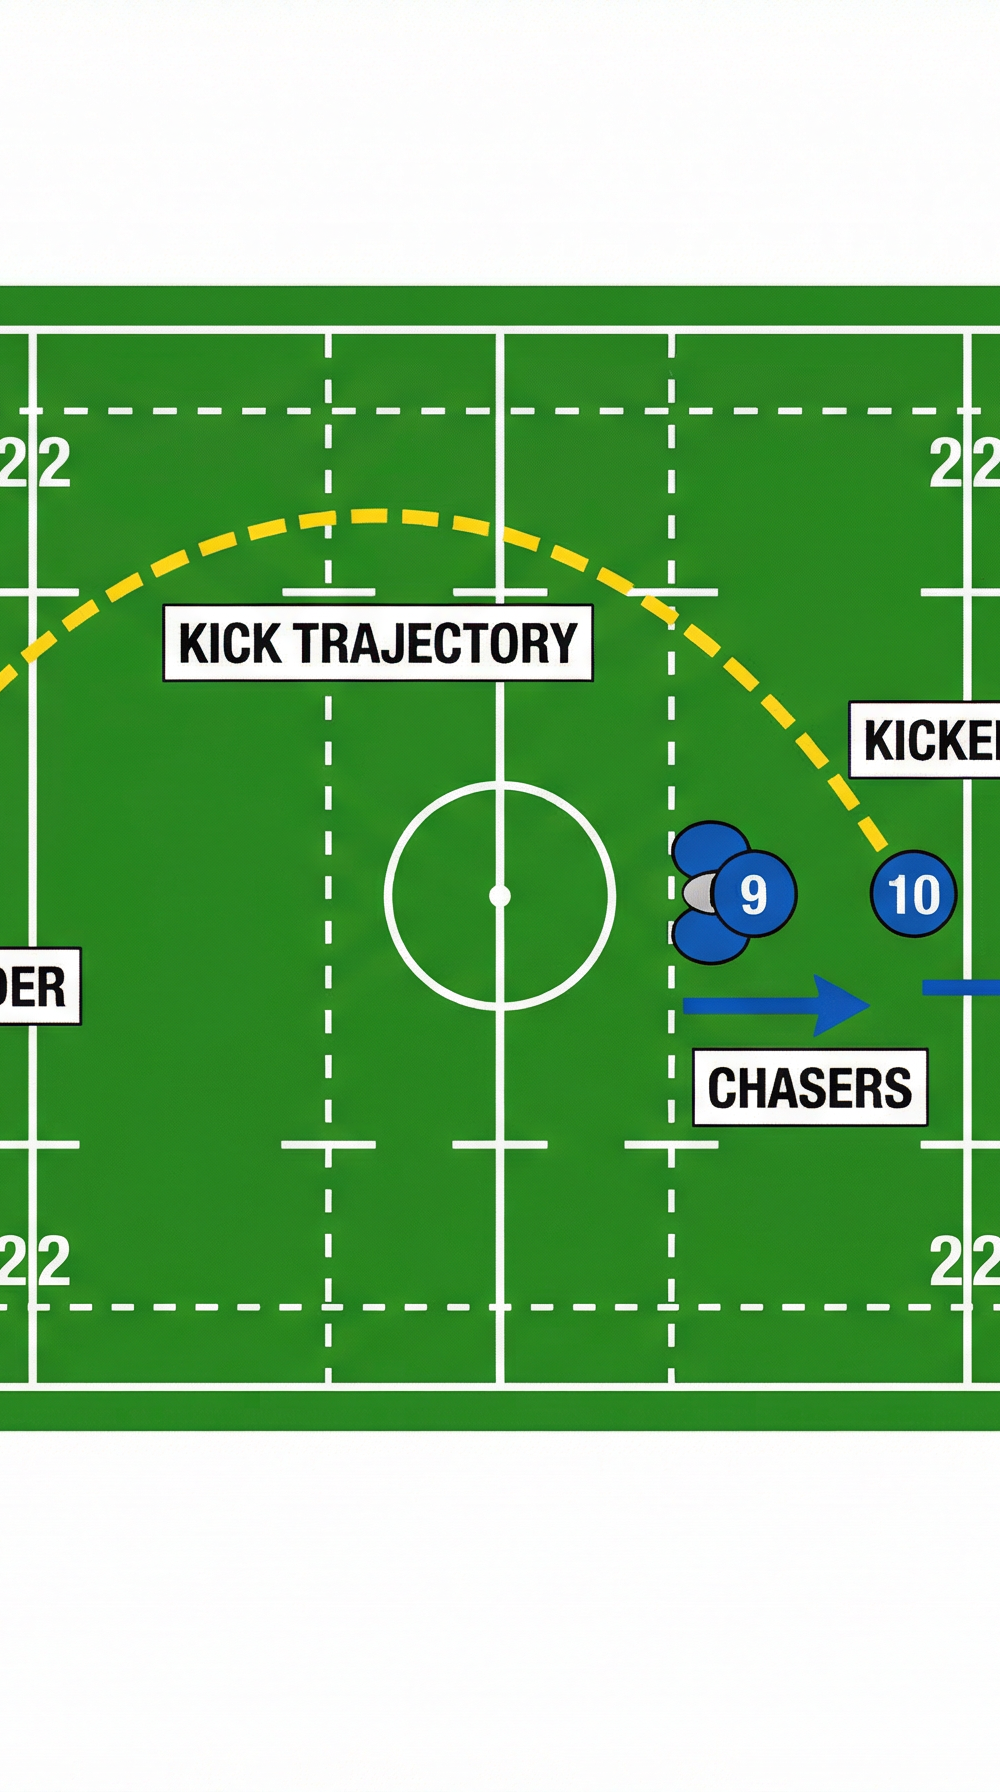
- Starting Position: The kicker (10) stands near the halfway line with the ball. The chasers align themselves just behind the kicker to ensure they are onside. The receiver (15) positions themselves deep in their own 22-metre area.
- The Kick: On the coach's whistle, the kicker executes a high, hanging kick (a "bomb" or "up-and-under") aimed toward the receiver's zone. The goal is to maximize hang time to allow the chasers to arrive simultaneously with the ball.
- The Chase: Immediately as the ball is struck, the chasers sprint forward. They must communicate to maintain a coordinated line, ensuring they don't overrun the ball or leave gaps.
- The Catch: The receiver (15) tracks the ball, calls "Mine!" clearly, and moves into position. They must jump to catch the ball at its highest point, turning their body slightly to protect themselves from the oncoming chasers.
- The Contest: The chasers arrive just as the receiver is catching the ball. They must either compete for the ball in the air (if realistic and safe) or immediately tackle the receiver upon landing to prevent any counter-attack.
- Reset: Once the play is completed (tackle made or ball secured), the players reset to their starting positions. Rotate players so everyone gets a chance to kick, chase, and catch.

4. Key Coaching Points
- Hang Time Over Distance: Emphasize to the kicker that hang time is more important than pure distance. The chasers need time to get under the ball.
- Onside Discipline: Chasers must hold their run until the ball is kicked. Being offside negates the entire effort.
- Communication: Both the chasing line and the receiving group must communicate loudly and clearly. The receiver must call their catch early.
- Catching Technique: The receiver should form a 'W' with their hands, keep their eyes on the ball, and jump to take it at the highest possible point.
- Chaser Alignment: Chasers should form an arrowhead or a flat line, avoiding clustering together to cover more ground and prevent easy escapes by the receiver.
5. Common Mistakes
- Kicking Too Long: Kicking the ball too far with insufficient hang time allows the receiver to catch the ball unopposed and launch a counter-attack.

- Chasers Overrunning: Chasers sprinting past the landing zone, leaving the receiver with an easy catch and a clear path to run.
- Receiver Staying Flat: The receiver waiting for the ball to come to them instead of attacking the ball in the air, making them vulnerable to the chasers.
- Lack of Support: The receiver's teammates failing to drop back and provide protection or an offload option.
6. Variations & Progressions
- Add Defenders: Introduce active defenders in the chasing line to block or disrupt the chasers, simulating a more realistic game scenario.
- Restricted Catching Zone: Limit the area where the receiver can catch the ball, forcing the kicker to be more accurate and the receiver to adjust their positioning quickly.
- Live Play Transition: Once the catch or tackle is made, allow the play to continue for 2-3 phases to practice the transition from the kick chase into structured attack or defense.
7. Age Adaptations
- Under 10s: Focus heavily on the catching technique without the pressure of chasers. Use softer balls if necessary to build confidence.
- Under 12s/14s: Introduce the chase but restrict contact to two-handed touch or grab. Focus on the timing of the run and the positioning under the ball.
- Under 16s/Open: Full contact. Emphasize the physical contest in the air and the immediate tackle upon landing. Incorporate complex variations and live play transitions.