Red Zone Dominance: The 'Tap & Strike' Penalty Corner Attack
A multi-phase set piece designed to manipulate defensive lines near the try line, creating immediate momentum before exploiting wide overlaps or close-quarter mismatches.

Equipment Needed
1. Overview
The 'Tap & Strike' is a high-tempo, multi-phase attacking structure designed to be launched from a penalty awarded in the opposition's 'Red Zone' (typically within 15 meters of the try line and 15 meters from the touchline). This set play achieves two critical objectives: first, it immediately engages the defense with a physical, direct carry to suck in defenders; second, it rapidly recycles the ball to exploit the resulting disorganization either out wide or through a tightly bound forward pod.
This play is highly effective when the opposition defense is scrambling to retreat 10 meters, capitalizing on their lack of set defensive shape and communication.
2. Setup
Pitch Setup:
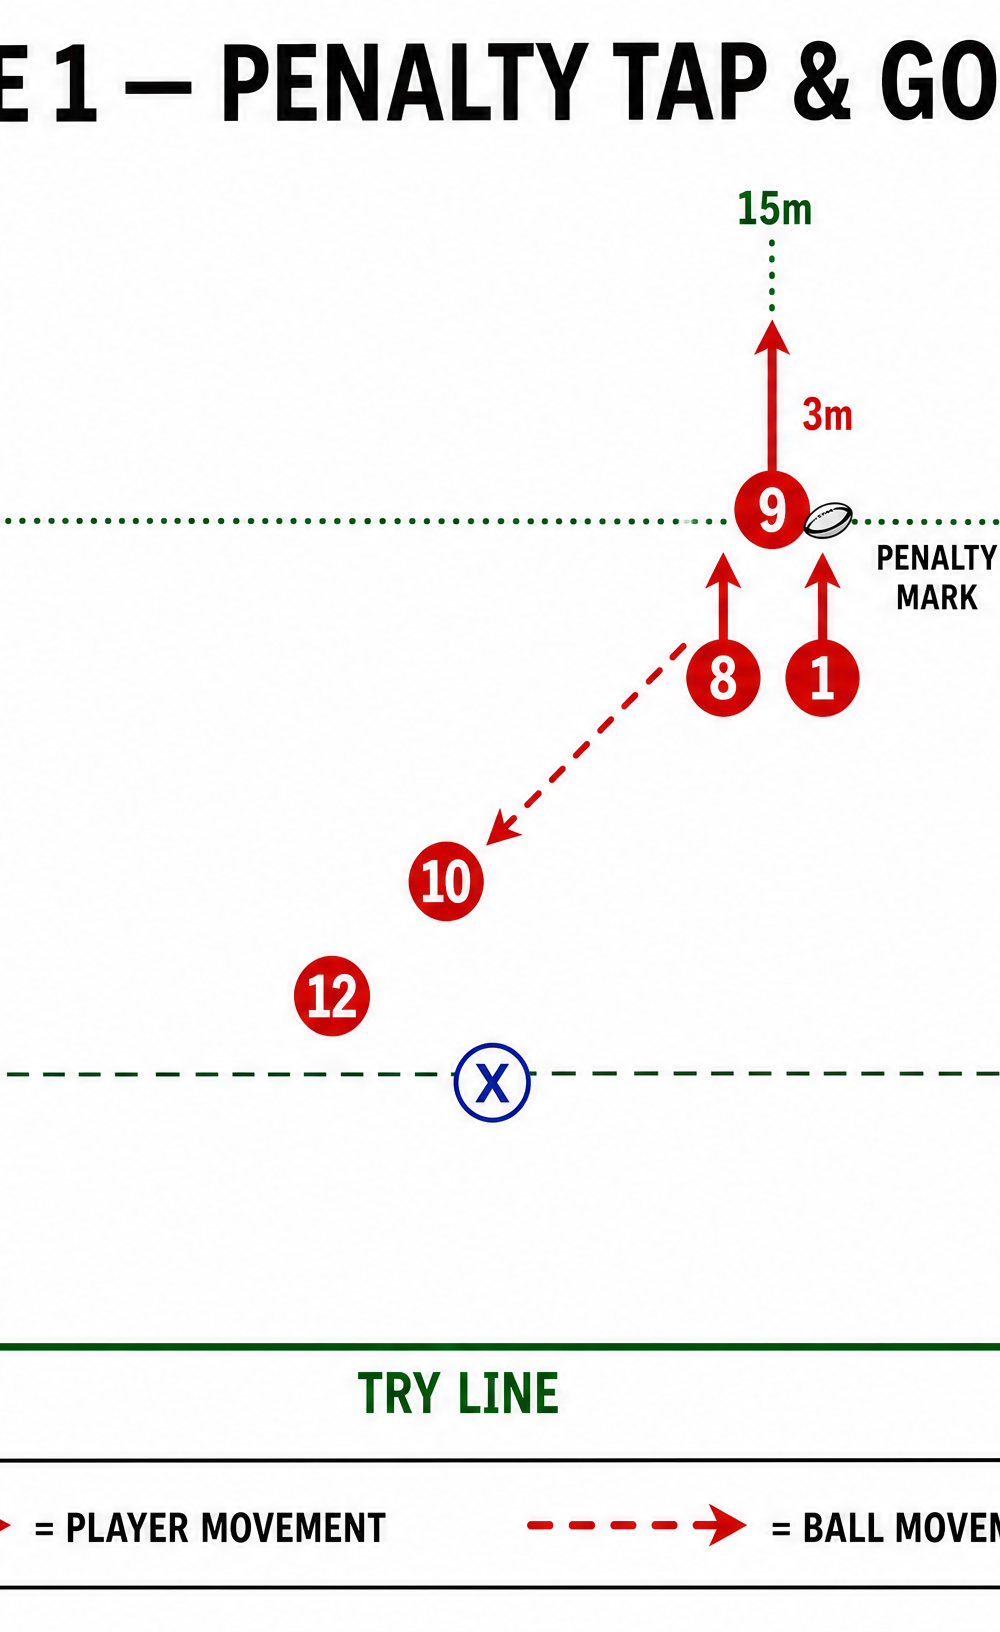
- Location: Penalty mark approximately 10-15m from the touchline, and 5-15m from the try line.
- Dimensions: Standard Rugby pitch (100m x 70m).
Player Positions & Roles:
- No.9 (Scrum-half): The instigator. Must tap the ball quickly and accurately, then drive forward to set the target.
- No.1 (Loosehead) & No.8 (Number Eight): The 'Hammer Pod'. Positioned 2-3 meters behind the No.9. Their role is to latch onto the No.9 immediately after the tap, driving him through the first contact and securing rapid ball.
- No.10 (Fly-half): The primary playmaker. Positioned flat, about 5m back and 5m infield from the penalty mark, ready to receive fast ball from the resulting ruck.
- No.12 (Inside Centre): The 'Crash' decoy. Runs a hard, flat line off the No.10's shoulder to hold the inside drift defense.
- No.13 (Outside Centre) & No.11 (Left Wing): The 'Strike' runners. Positioned wide, ready to execute an overlap play if the defense compresses.
3. Step-by-Step Instructions
Phase 1: The Tap & Go Setup
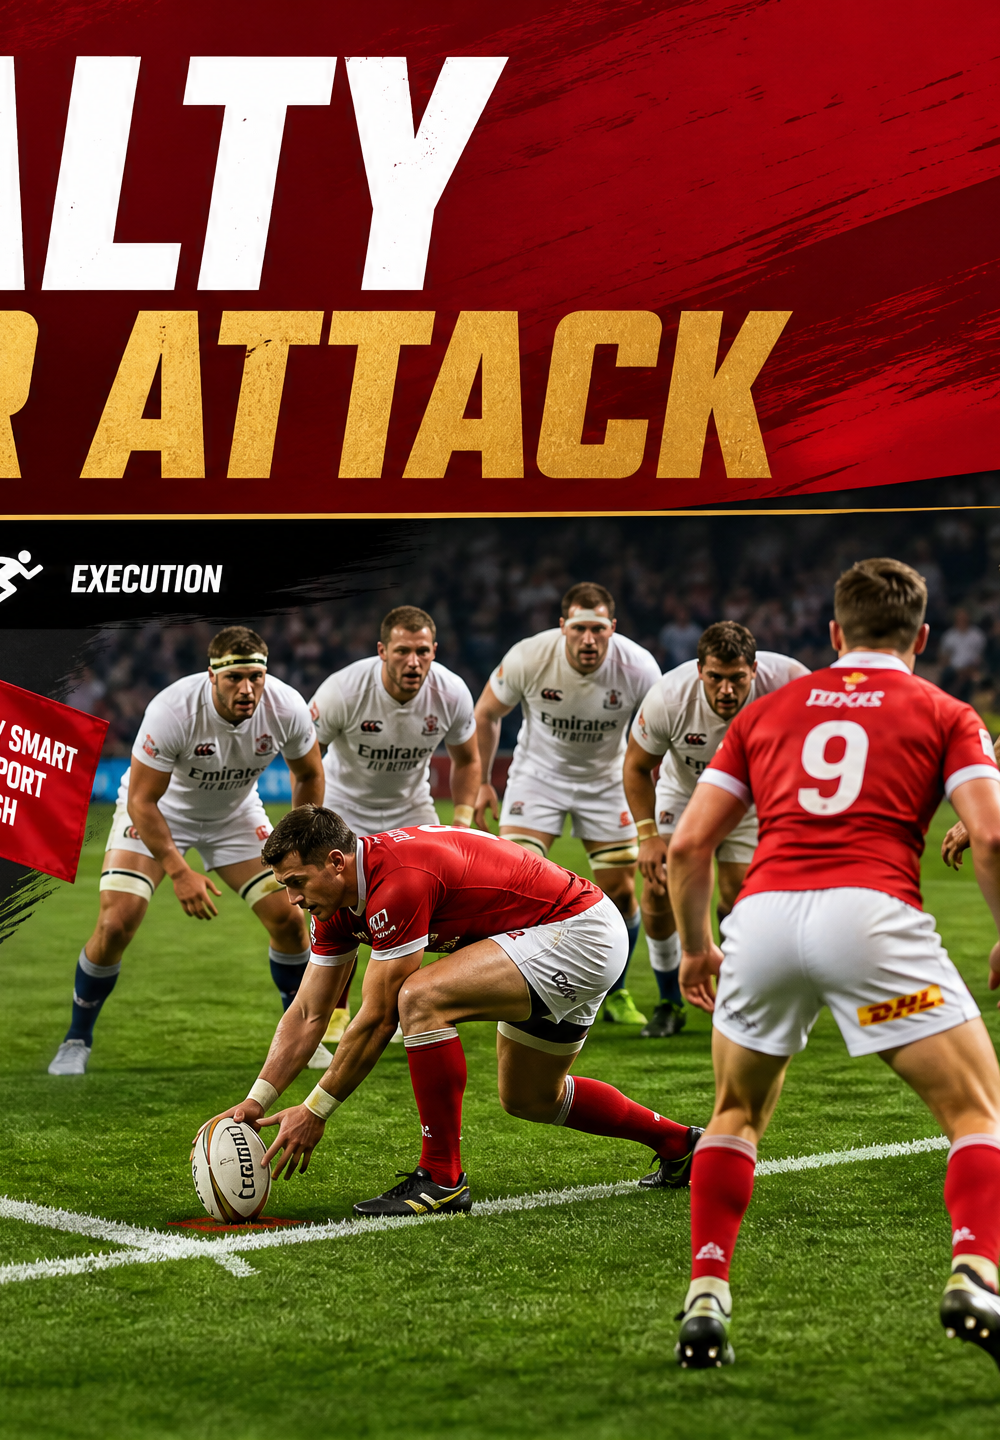
- The Call: The captain or playmaker calls the 'Tap & Strike' play immediately upon the penalty being awarded.
- The Setup: No.9 stands over the mark. No.1 and No.8 form a tight pod 3m directly behind him. The backline aligns flat and wide.
- The Tap: On the referee's whistle, No.9 taps the ball clearly through the mark, secures it, and drives aggressively straight ahead into the retreating defensive line.
- The Latch: As No.9 makes contact, No.1 and No.8 hit the breakdown dynamically, latching onto No.9 to drive him forward and immediately clear out any defensive threats to ensure lightning-fast ball (under 3 seconds).
Phase 2: Wide Strike & Overlap Option
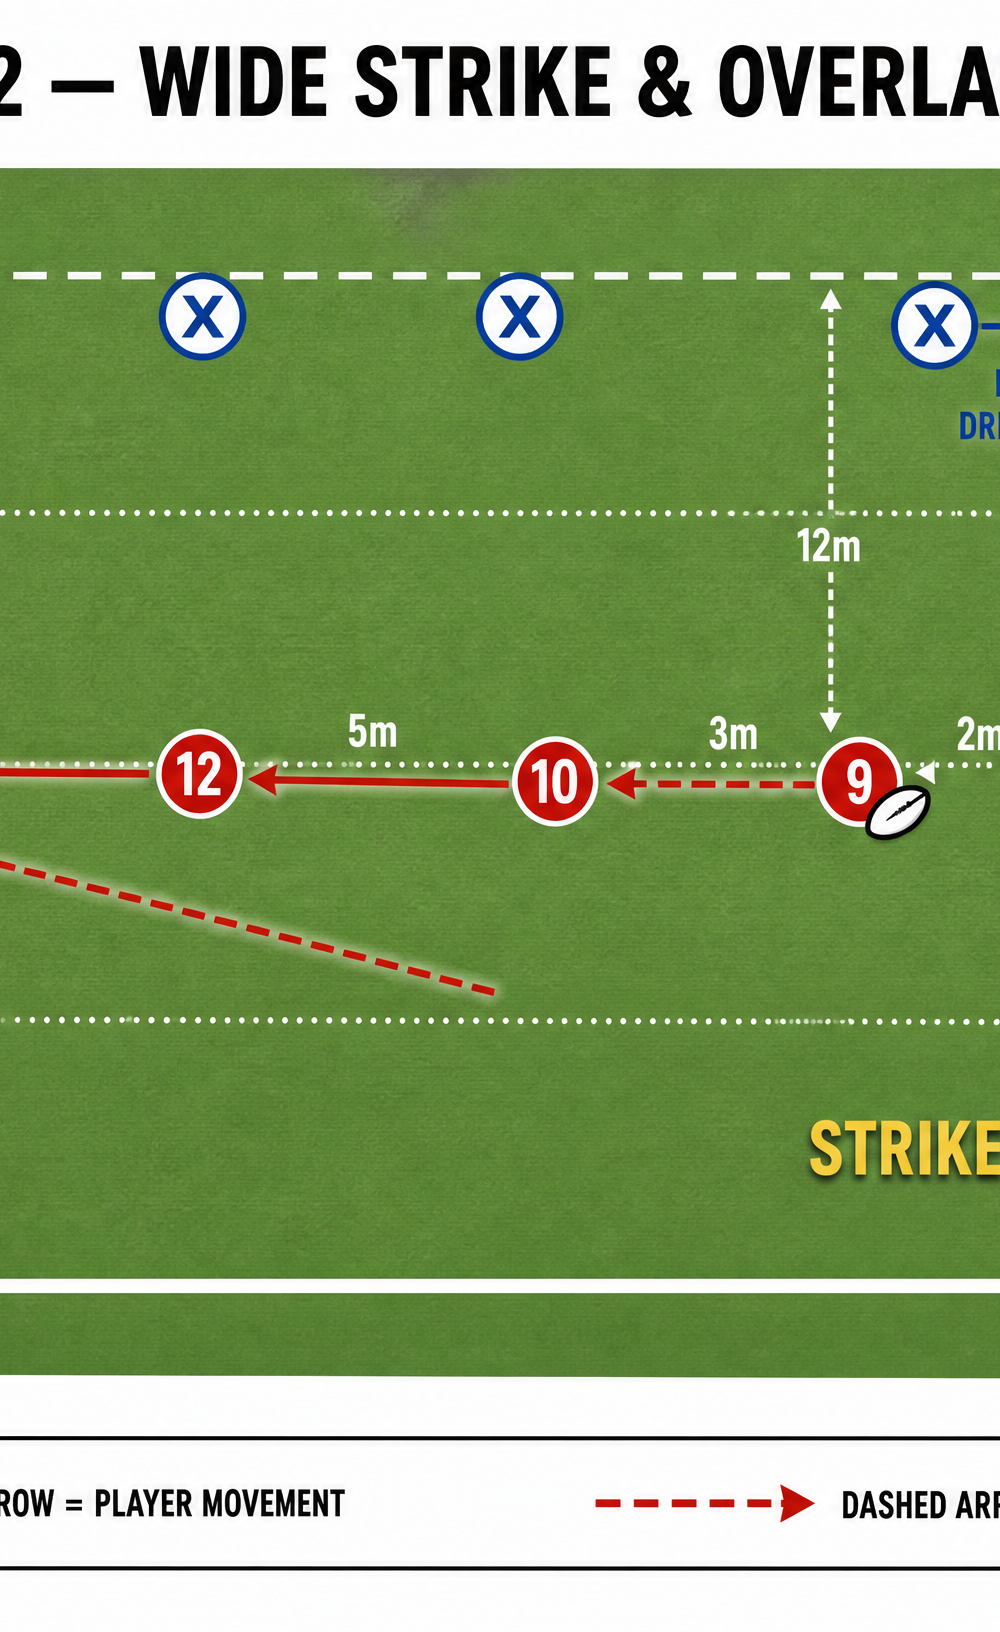
- The Delivery: As soon as the ball is available, No.9 fires a crisp, flat pass to No.10.
- The Decoy: No.12 runs a hard, direct line back against the grain or straight at the inside shoulder of the drifting defender, forcing them to commit.
- The Execution: Seeing the defense compress to stop the forward momentum and the No.12 crash, No.10 throws a skip pass to No.13.
- The Finish: No.13 draws the final defender and puts No.11 away in the corner for the try.
Variation: Pick & Drive Pod Option
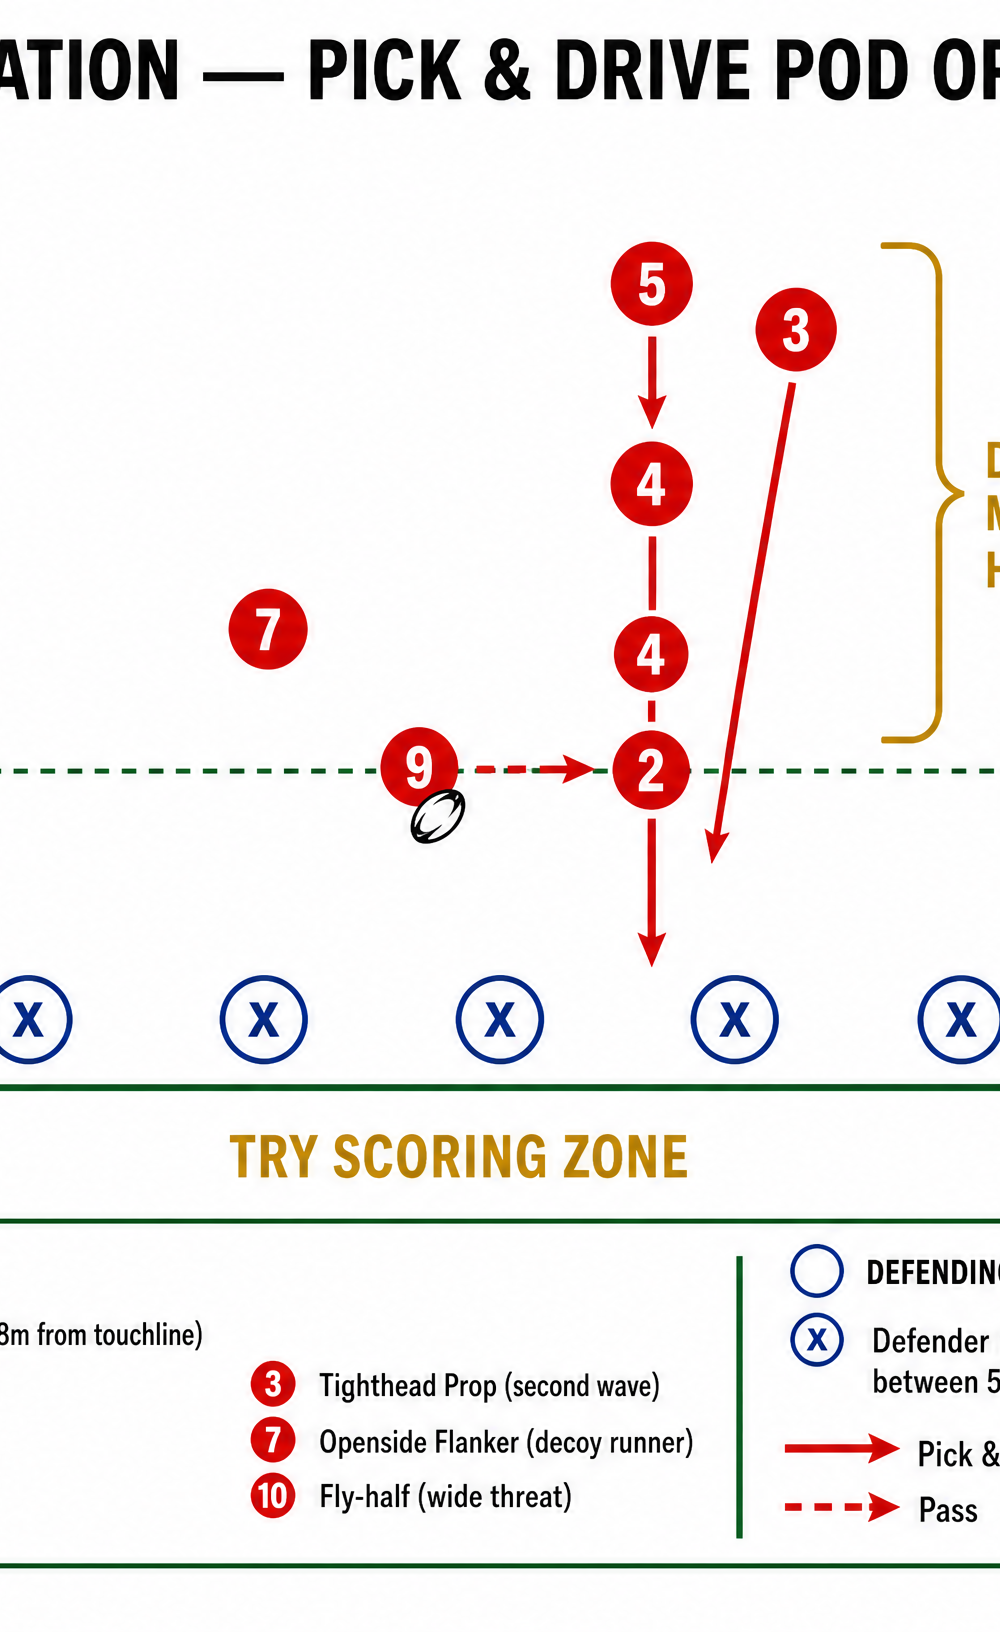
If the defense spreads too early anticipating the wide strike, the play shifts to the forwards.
- The Adjustment: No.9 recognizes the wide defense and keeps the ball tight.
- The Pick: No.2 (Hooker) picks the ball from the base of the ruck and drives low and hard directly at the try line.
- The Support: No.4 and No.5 immediately bind onto No.2, forming a dynamic mini-maul or driving pod to power over the line.
4. Key Coaching Points
- Speed of Execution: The entire success of Phase 1 relies on the No.9 tapping the ball before the defense is fully set. Urgency is paramount.
- Body Height in Contact: The No.9 and the supporting 'Hammer Pod' (No.1 & No.8) must enter contact with low body height to win the collision and guarantee quick ball presentation.
- Deception: The No.12 must run their decoy line with 100% conviction. If they don't look like they are getting the ball, the defense will simply drift past them.
- Communication: No.10 must scan the defense during Phase 1 and communicate the decision (Wide Strike or Pick & Drive) clearly to the No.9 and the forward pods.
5. Common Mistakes
- Slow Tap: Waiting for everyone to be perfectly set allows the defense to organize and get off the line.
- Poor Latching: If No.1 and No.8 are too slow to support No.9, the ball will be slowed down or turned over, killing the momentum required for Phase 2.
- Drifting Attack: No.10 and No.12 catching the ball while running sideways. They must attack the line squarely to fix the defenders.
6. Variations & Progressions
- Progression 1 (The Inside Ball): If the defense starts drifting heavily to cover the wide strike, No.10 can pop a short pass to No.12 running a hard line back against the grain.
- Progression 2 (The Cross-Kick): If the defensive winger comes up flat to shut down the overlap, No.10 can execute a precise cross-field kick to the No.11 waiting in the in-goal area.
7. Age Adaptations
- Under 12s: Focus heavily on the speed of the tap and the safety of the body height in the initial contact. Simplify the backline move to a basic hands down the line rather than skip passes.
- Under 14s/16s: Introduce the 'Hammer Pod' concept and emphasize the decision-making of the No.10 based on defensive alignment. Practice the execution of the skip pass under pressure.

