Basketball
Drill
intermediate
under 14
Mastering the Free Throw: Pressure Shooting Routine
Develop a consistent, pressure-tested free throw routine that translates directly to game-winning moments.
Jul 15, 20265 min read15 min drill5 players
Equipment Needed
2-3 Basketballs per basket
Cones (optional)
1. Overview
Free throws often decide the outcome of close games. However, many players struggle to replicate their practice percentage during actual games due to fatigue and pressure. This comprehensive routine is designed to help players develop a consistent, repeatable mechanical process while introducing elements of conditioning and mental pressure to simulate game-like conditions. By incorporating this drill into your regular practice plan, you'll build players who step to the line with confidence, regardless of the score or the time left on the clock.
2. Setup
- Equipment Needed: 2-3 basketballs per basket, cones (optional for marking spots).
- Court Setup: Use a standard FIBA half-court (28m x 15m). The primary focus is the free throw lane and the mid-range areas at the elbows.
- Player Positions: This drill works best with groups of 3-5 players per basket to maintain a high work rate while allowing brief recovery, simulating the flow of a game.
3. Step-by-Step Instructions
Phase 1: The Baseline Routine (Form & Rhythm)
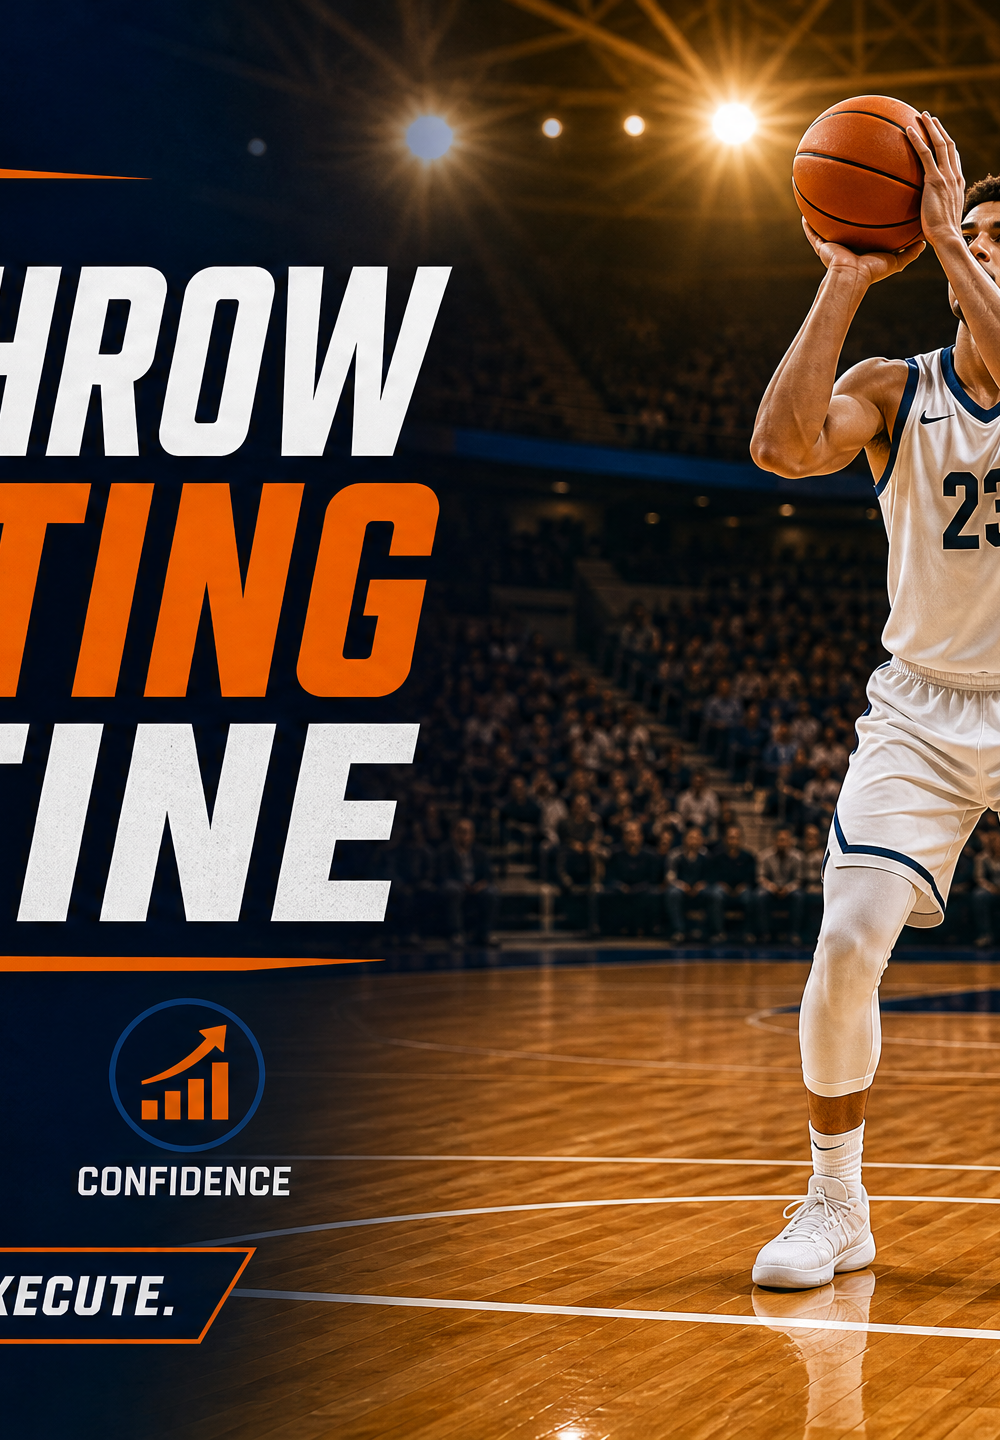
- Positioning: Player 1 steps to the free throw line. Players 2 through 5 take up rebounding positions along the lane spaces (as shown in Diagram 1).
- The Routine: The shooter executes their specific pre-shot routine (e.g., three dribbles, deep breath, eye focus on the back of the rim).
- Execution: The shooter takes the shot. The focus here is purely on mechanics and rhythm, not speed.
- Rebounding: If the shot is missed, the designated rebounders secure the ball and return it to the shooter.
- Rotation: After a set number of makes (e.g., 5 makes), players rotate positions.
Phase 2: Continuous Rotation (Conditioning & Flow)
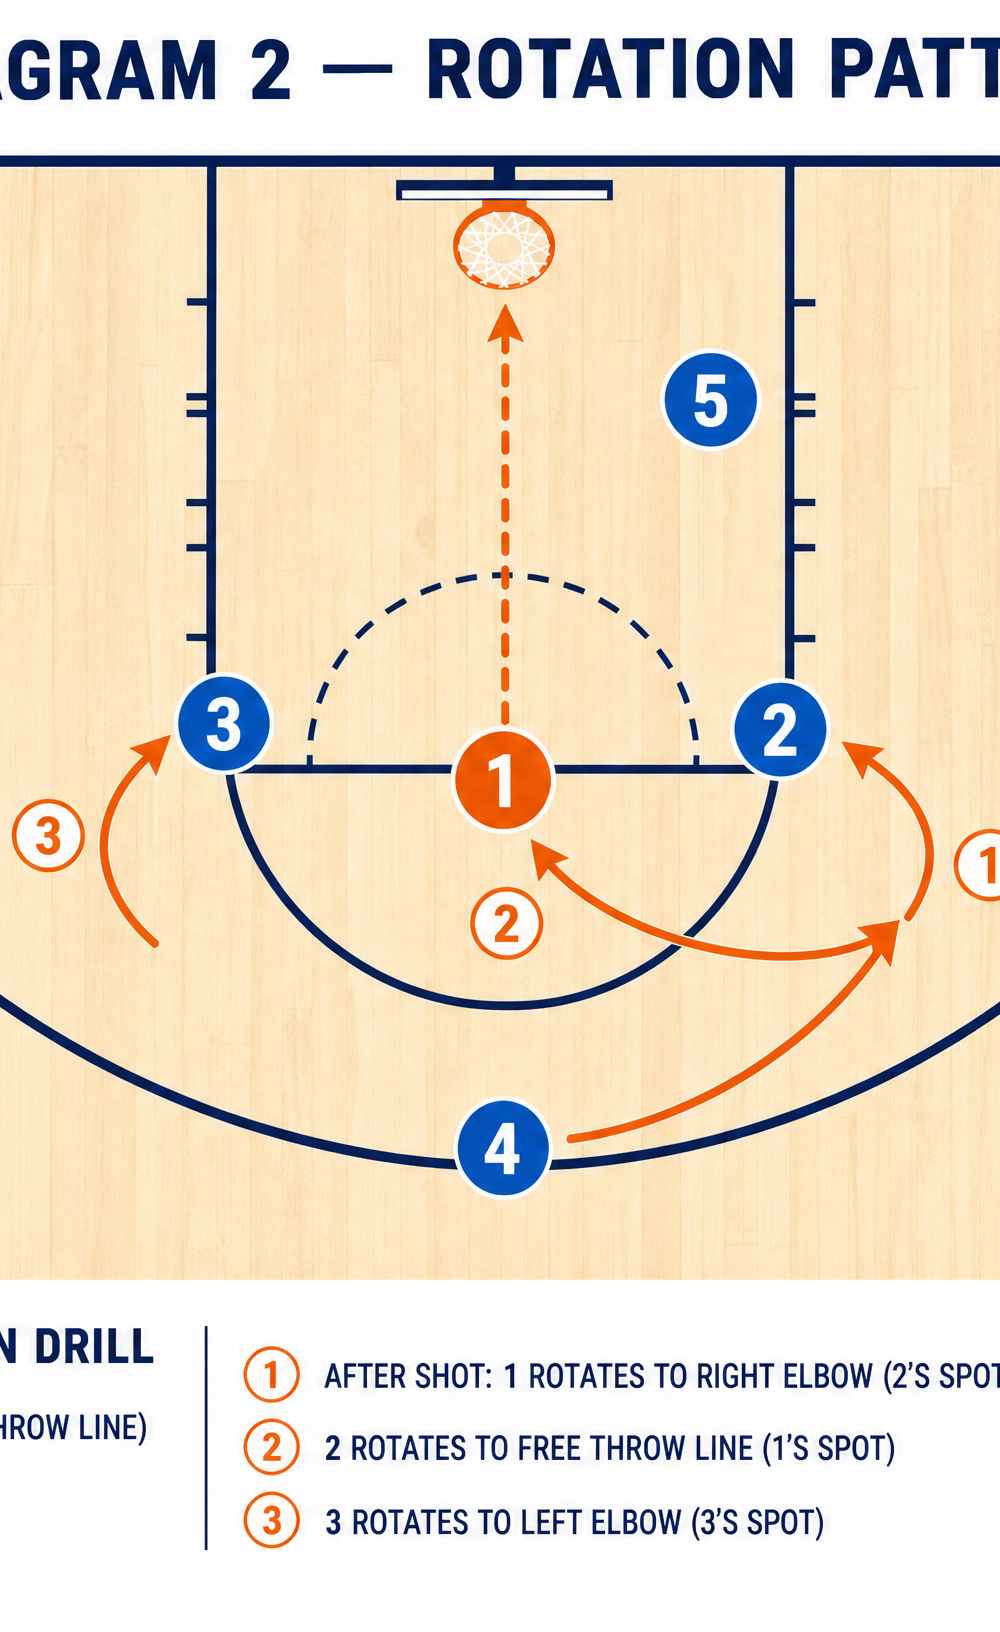
- Setup: Players align as shown in Diagram 2. Player 1 at the line, Players 2 and 3 at the elbows, Player 4 at the top, Player 5 at the block.
- Action: Player 1 shoots the free throw.
- Immediate Rotation: Immediately after the release, Player 1 sprints to the right elbow. Player 2 sprints to the free throw line to become the next shooter. Player 3 moves to the left elbow, and so on, creating a continuous clockwise rotation.
- Pace: The goal is to get the next shot off within 5 seconds of the previous shot hitting the rim or net, forcing players to establish their routine quickly while slightly fatigued.
Phase 3: Pressure Stations (Game Simulation)
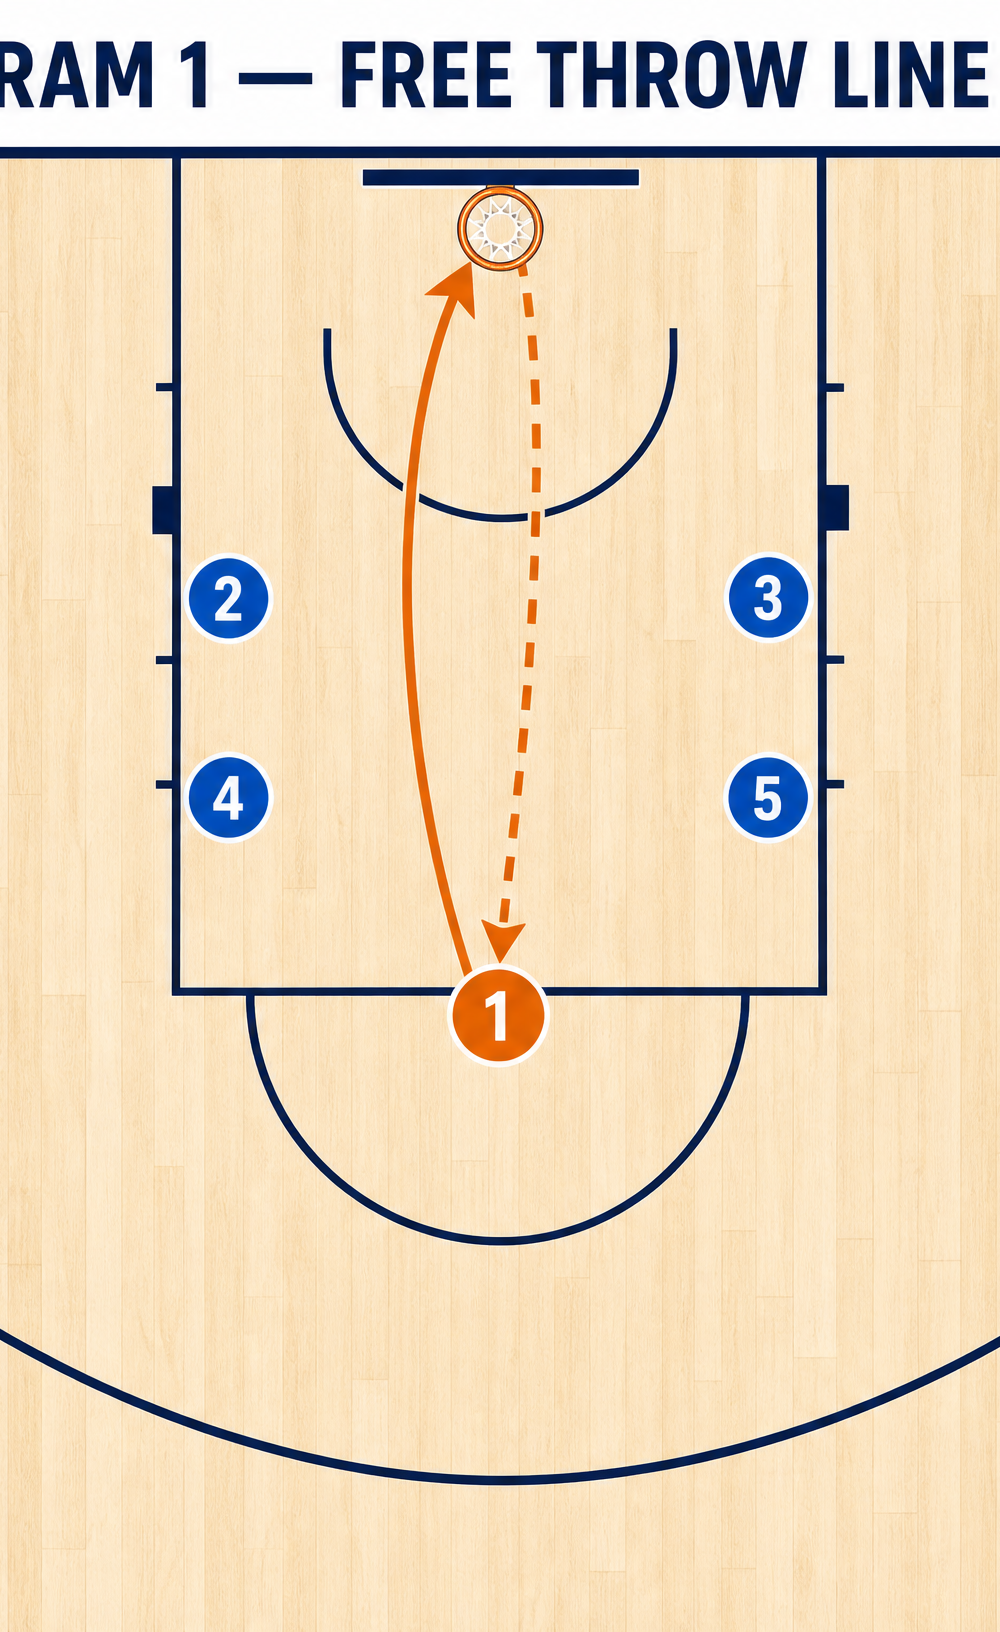
- Setup: Create three shooting zones: Zone A (Free Throw Line), Zone B (Right Elbow), Zone C (Left Elbow). A coach or manager stands at the top of the key with basketballs.
- Action: Players rotate through the stations. The coach passes to a station randomly.
- The Catch: When a player receives the pass at the free throw line (Zone A), they must immediately transition into their free throw routine and shoot. If they receive it at Zone B or C, they take a quick mid-range jumper.
- Consequence: Introduce a competitive element. For example, the team must make 10 consecutive shots combined from all zones. If a free throw is missed, the count resets to zero, adding significant pressure to the player at the line.
4. Key Coaching Points
- Consistent Pre-Shot Routine: Emphasize that the physical routine (dribbles, stance) must be identical every single time to trigger muscle memory.
- Target Acquisition: Teach players to pick a specific, small target (like the hook holding the net at the back of the rim) rather than just looking at the general basket area.
- Balance and Base: Ensure the shooter's feet are shoulder-width apart, with the shooting foot slightly forward, maintaining perfect balance through the release.
- Follow-Through: The shooting hand should stay up in the 'gooseneck' position until the ball goes through the net. The guide hand should remain still.
- Breathing: Instruct players to take a deep, controlled breath before starting their shooting motion to lower their heart rate.
5. Common Mistakes
- Rushing the Routine: Players often speed up their routine when fatigued or under pressure. Force them to take their time.
- Inconsistent Footwork: Watch for players who change their stance width or foot stagger from shot to shot.
- Dropping the Follow-Through: Pulling the shooting hand down too early often results in short or flat shots.
- Guide Hand Interference: The non-shooting hand thumb flicking the ball upon release, causing side spin.
6. Variations & Progressions
- Swish Only: To increase difficulty, only shots that 'swish' (don't touch the rim) count toward the required total.
- Conditioning Penalty: If a player misses two consecutive free throws, the entire group must complete a quick sprint (e.g., baseline to free throw line and back) before continuing.
- Eyes Closed (Advanced): Have advanced players execute their routine and shoot with their eyes closed to develop extreme kinesthetic awareness and trust in their mechanics.
7. Age Adaptations
- Under 8 / Under 10: Lower the hoop height if possible. Allow them to shoot from closer than the standard free throw line. Focus entirely on basic form (B.E.E.F. - Balance, Eyes, Elbow, Follow-through) rather than pressure.
- Under 12 / Under 14: Introduce the standard free throw line. Begin emphasizing the importance of a consistent pre-shot routine. Keep the pressure elements light and fun.
- Under 16 / Open: Implement the full drill as described, maximizing the pressure and conditioning elements to simulate high-stakes game environments.

