

Cricket
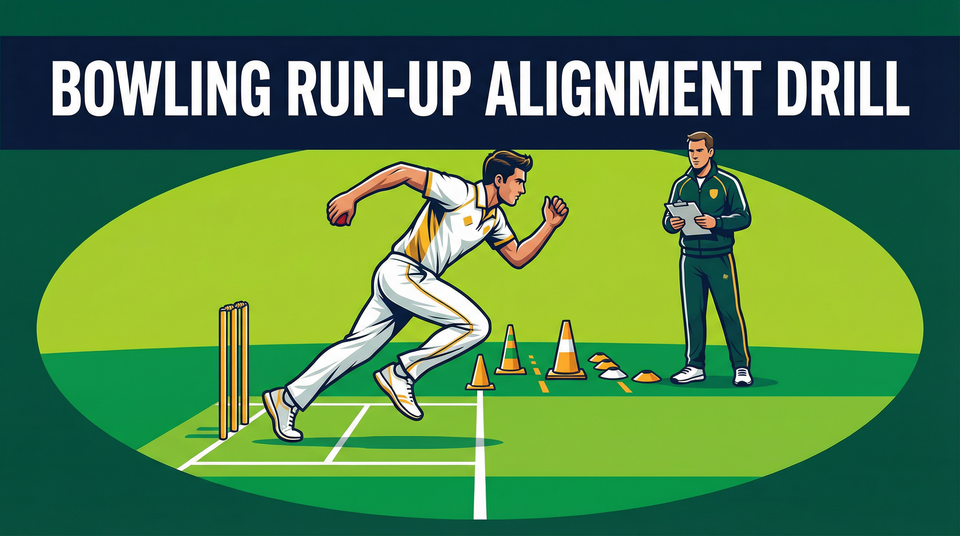
Bowling Run-Up Alignment Drill: Mastering the Approach
A fundamental drill to help fast bowlers build a consistent, straight, and rhythmic run-up, ensuring maximum momentum through the delivery stride.
What you need
10-15 marker cones, Measuring tape, Cricket balls, Stumps
Overview
The Bowling Run-Up Alignment Drill is a foundational exercise designed to help fast and medium-pace bowlers develop a consistent, straight, and rhythmic approach to the crease. A bowler's run-up is the engine room of their action; if the alignment is off, it can lead to a loss of momentum, reduced pace, and an increased risk of injury due to mixed actions at the crease. This drill focuses on building muscle memory for a straight path, ensuring that all the energy generated during the run-up is directed straight toward the target (the batsman and the stumps).
Coaches should use this drill regularly, especially during the pre-season or when a bowler is struggling with their line, overstepping, or losing pace at the crease. It is an excellent diagnostic tool to identify if a bowler is 'running in' or 'falling away' during their approach.
Setup
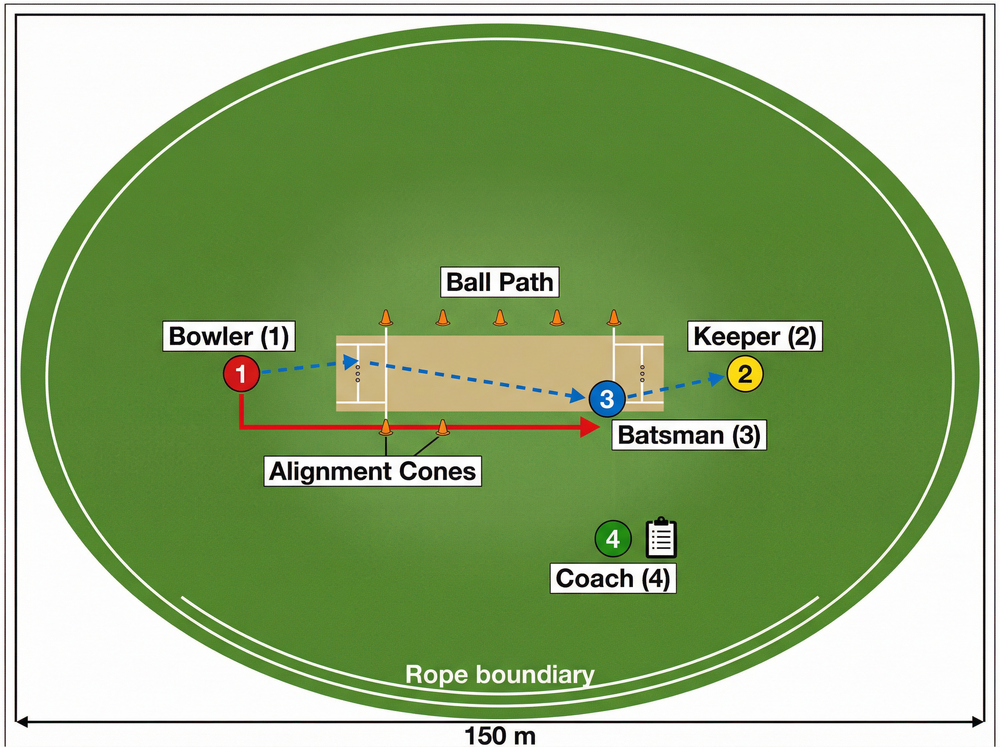
Proper setup is crucial for this drill to be effective. You will need a standard 22-yard cricket pitch (or a marked out equivalent on the outfield) and a set of marker cones.
Equipment Needed:
- 10-15 bright marker cones (orange or yellow preferred)
- A measuring tape (optional, but helpful for precise run-up measurement)
- 1 cricket ball per bowler
- 1 set of stumps (at the batsman's end)
Field Setup:
- Mark the Pitch: Ensure the bowling crease, popping crease, and return creases are clearly marked.
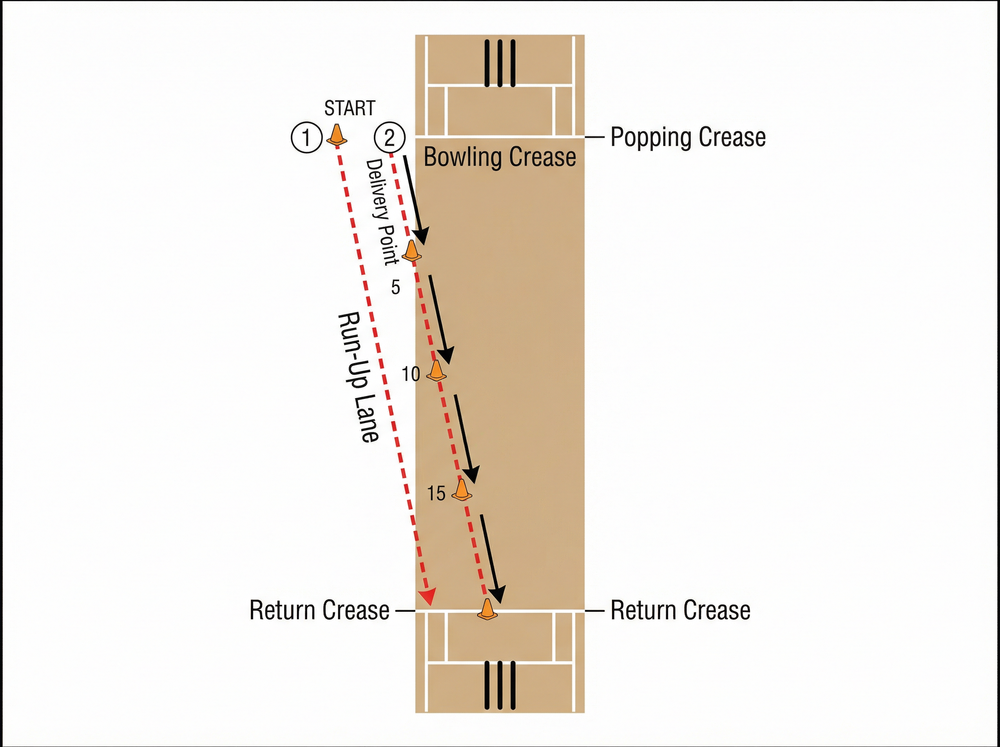
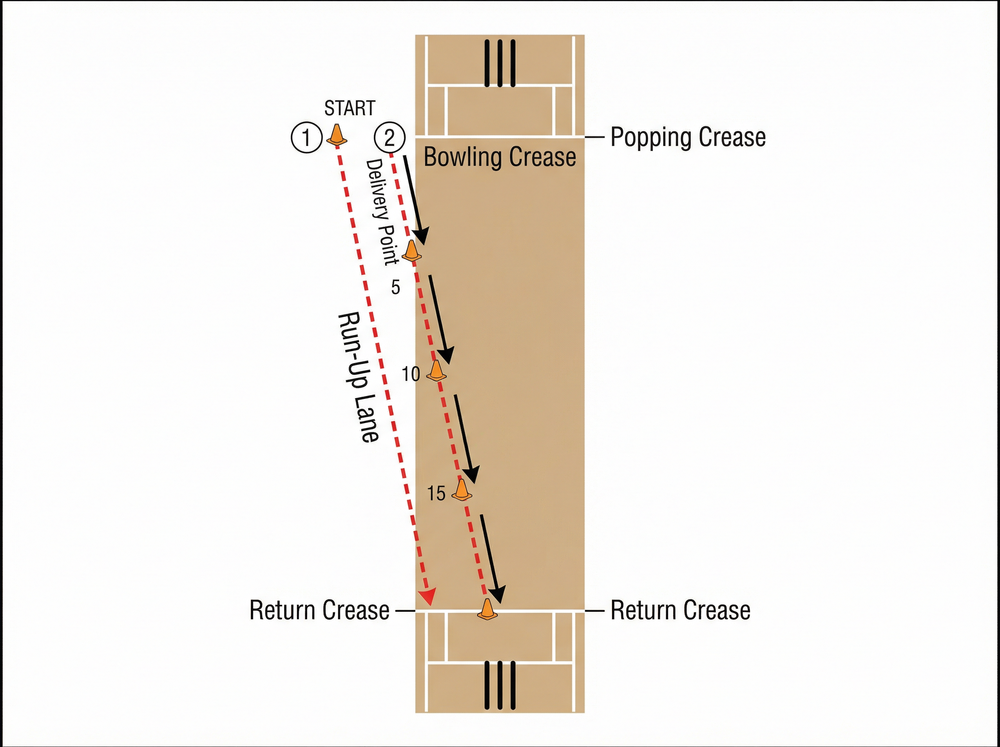
- Establish the Line: Identify the bowler's optimal running line. For a right-arm over the wicket bowler, this is typically just outside the return crease on the off-side. Place a cone at the start of their run-up on this line.
- Create the Channel: Place cones at 5-yard intervals along this optimal line, creating a visual 'channel' or 'lane' for the bowler to run through. The final cone should be placed just behind the bowling crease.
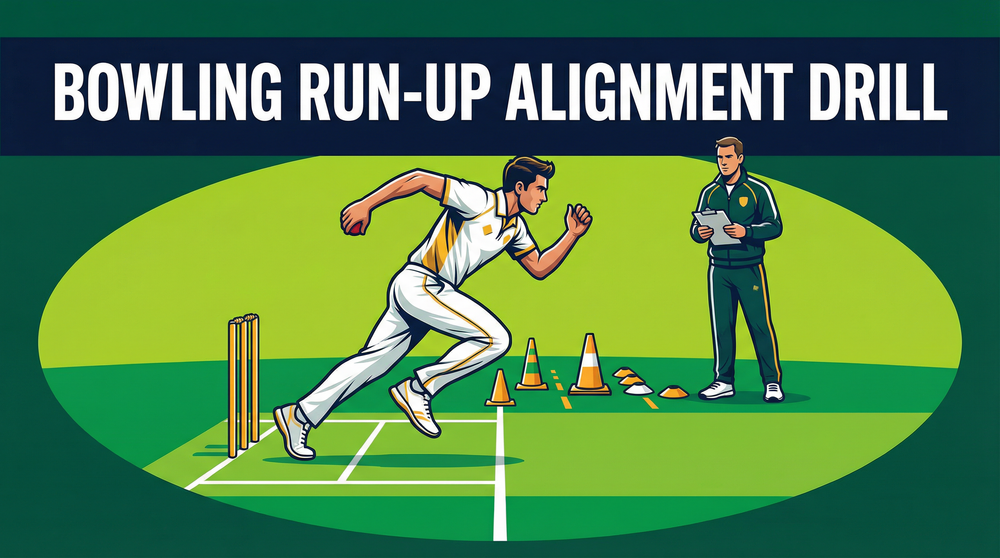
Step-by-Step Instructions
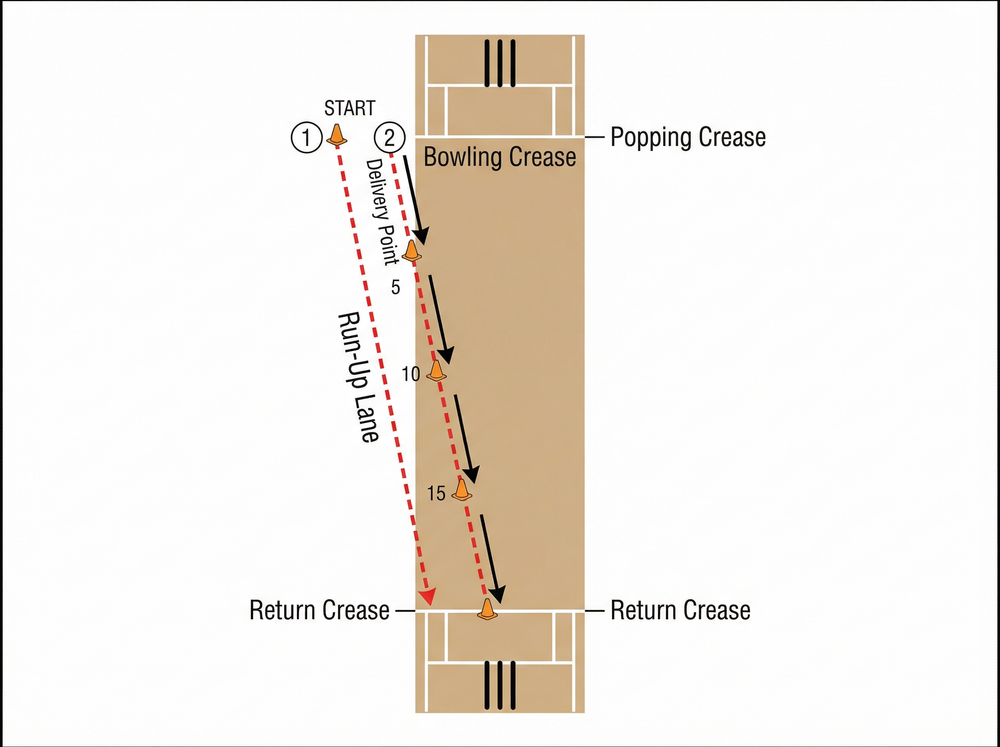
- Measure the Run-Up: Have the bowler start at the bowling crease and run backwards to establish their natural starting point. Mark this starting point with a cone (Position 1).
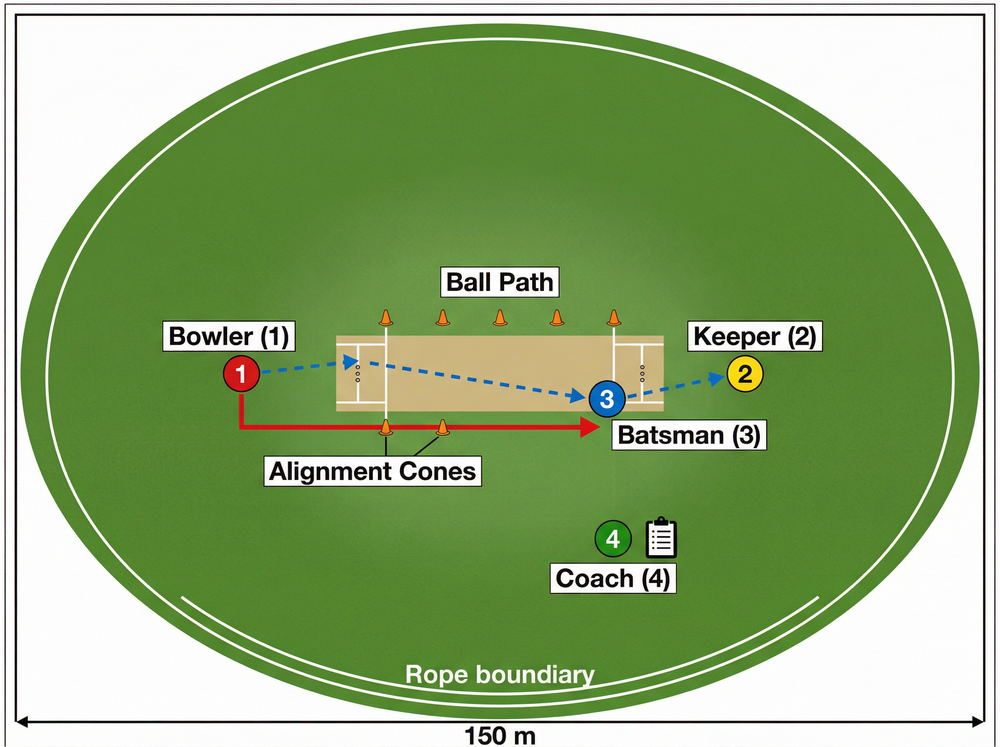
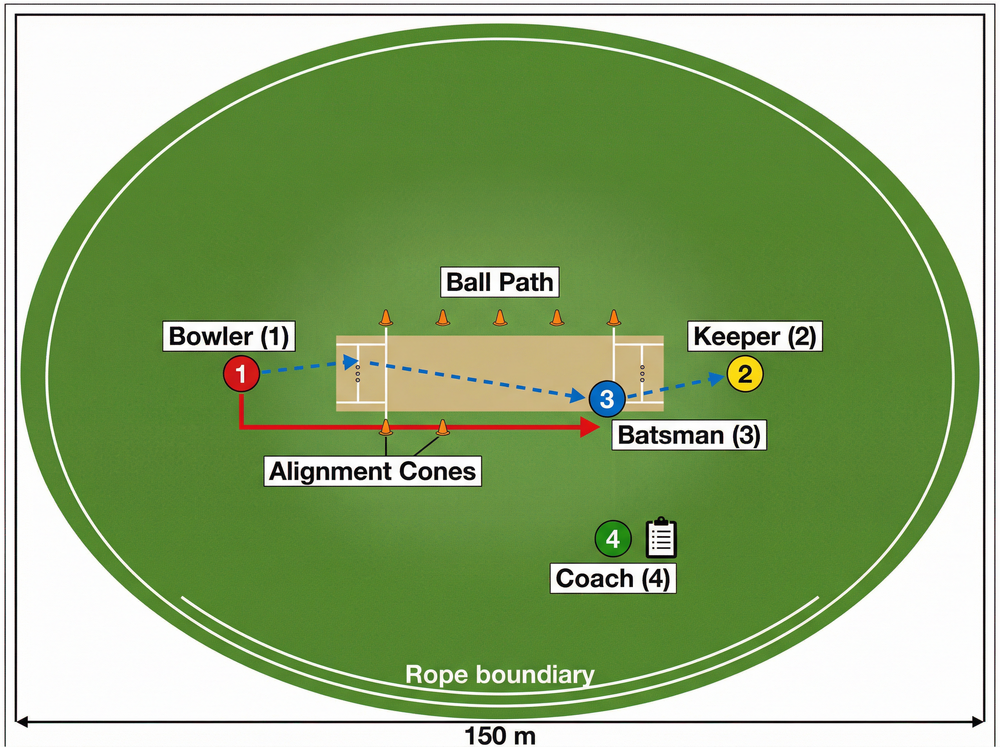
- Align the Channel: Adjust the cones along the run-up path so they form a perfectly straight line from the starting cone to the delivery point at the crease (Position 2).
- Walk-Through: Before bowling, have the player walk through their run-up, focusing on keeping their body aligned with the cones and ensuring their feet land parallel to the channel.
- Jog-Through: Progress to a light jog, emphasizing a smooth, rhythmic approach. The bowler should not deliver the ball yet; they should just run through the crease.
- Full Approach with Delivery: The bowler now runs in at full pace, staying within the visual channel created by the cones, and delivers the ball to the wicket-keeper or a target. The coach should observe from a mid-on or mid-off position (Position 4).
- Review and Adjust: After each delivery, check the bowler's footmarks at the crease. Are they aligned with the run-up channel? If not, adjust their starting position or focus on their running mechanics.
Key Coaching Points
- Head Position: The bowler's head must remain still and level throughout the run-up. A bobbing or tilting head will throw off balance and alignment.
- Arm Drive: Encourage strong, linear arm pumping. The arms should drive straight forward and backward, not across the body.
- Foot Placement: The feet should point straight down the pitch. Running with feet splayed outward (duck-running) bleeds energy and affects alignment.
- Acceleration: The run-up should build momentum smoothly. The bowler should reach their optimal speed just before the delivery stride, not peak too early or decelerate at the crease.
- Target Focus: The bowler's eyes should be locked on the target (the top of off-stump or the wicket-keeper's gloves) from the very first step.
Common Mistakes
- Running in an Arc: Bowlers often start wide and run in an arc towards the stumps. This creates a diagonal momentum that must be corrected at the crease, leading to stress on the lower back and a loss of pace.
- Over-Striding: Taking strides that are too long can cause the bowler to 'reach' for the crease, leading to a loss of balance and power. The run-up should be a natural sprint.
- Looking Down: Bowlers sometimes look at the ground or the crease as they approach. This drops the head and shoulders, ruining their posture and alignment.
- Decelerating at the Crease: A common fear of overstepping (bowling a no-ball) causes bowlers to slow down in the final few strides. This drill helps build confidence in their mark so they can attack the crease.
Variations & Progressions
- Blindfold Walk: For advanced proprioception, have the bowler walk their run-up with their eyes closed (coach guiding them). This builds an internal feel for their alignment.
- Narrow the Channel: As the bowler improves, move the cones closer together to create a narrower, more demanding running lane.
- Target Bowling: Once alignment is consistent, introduce specific target zones on the pitch (e.g., a good length area) to ensure the straight run-up is translating into accurate bowling.
Age Adaptations

- Under 8s / Under 10s: Keep the run-up short (5-7 paces). Focus purely on running in a straight line without worrying too much about the delivery stride mechanics. Use brightly colored, large cones.
- Under 12s / Under 14s: Begin formalizing the run-up measurement. Introduce the concept of building momentum and the importance of arm drive.
- Under 16s / Open: Focus on the fine details: head position, foot strike, and maximizing momentum through the crease. Use video analysis alongside the drill to provide immediate feedback.
