High-Speed Counter-Attack Transition Drill
Train your team to ruthlessly exploit disorganised defences by turning defensive recoveries into high-speed, clinical counter-attacks within seconds.
Equipment Needed
Overview
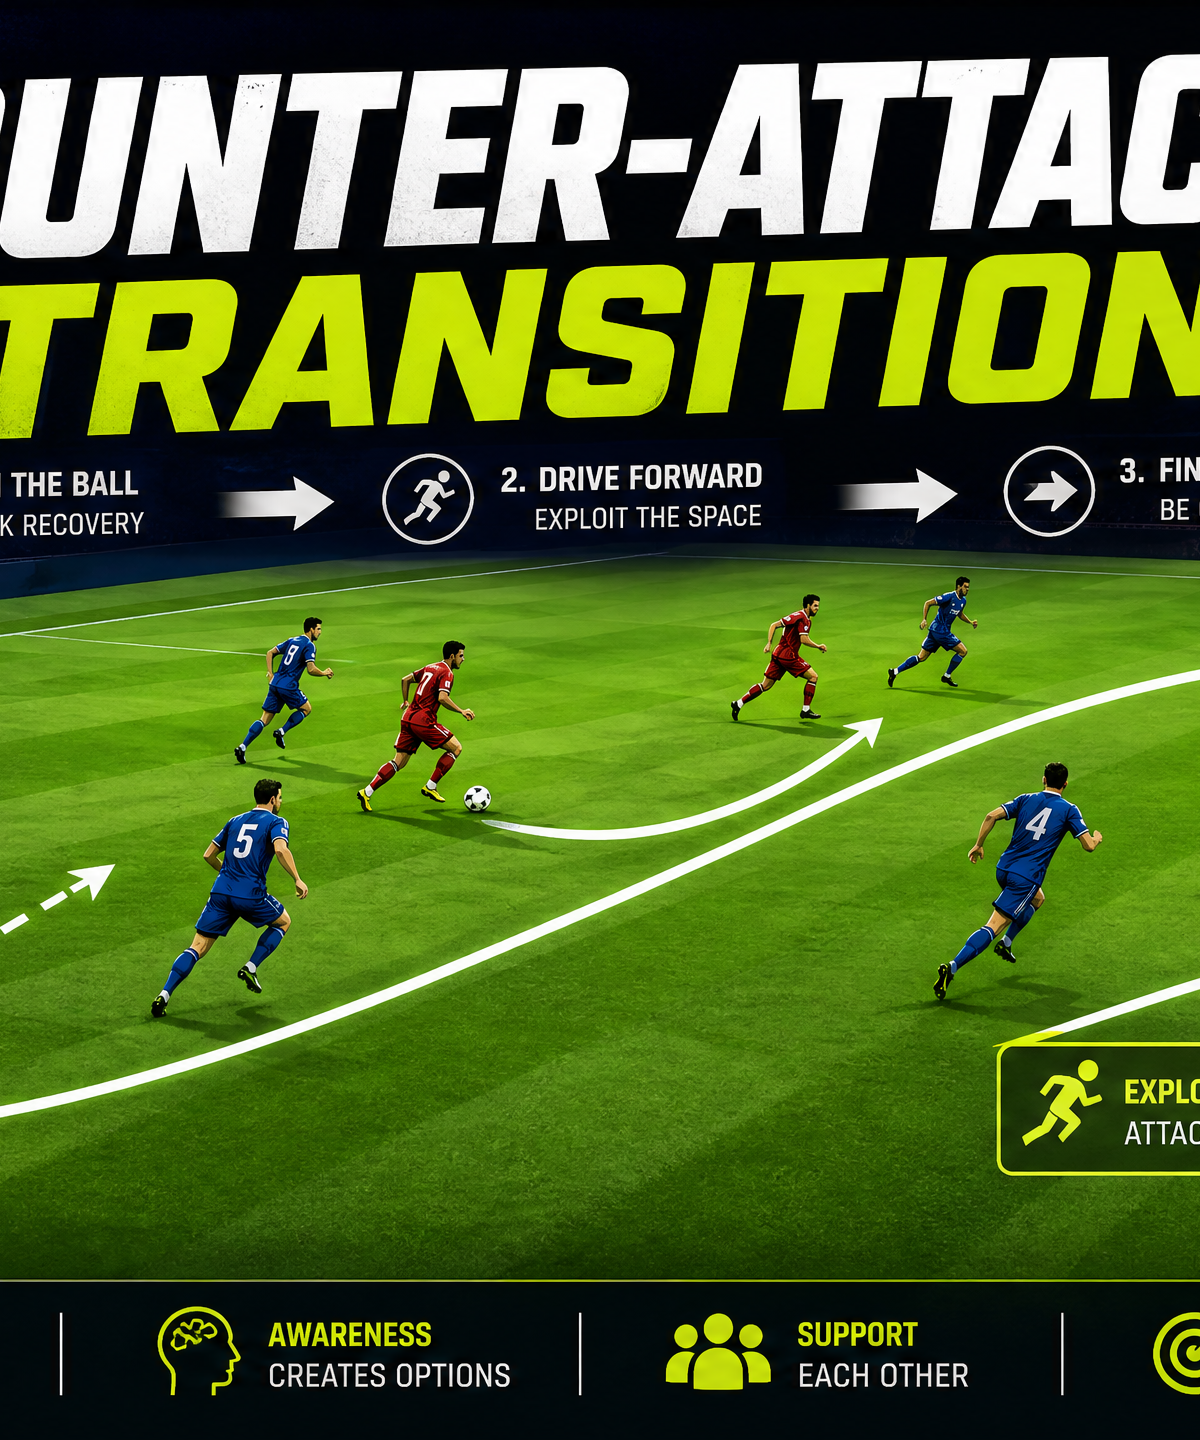
The modern game is defined by transitions. When possession changes hands, the defending team is often expansive and disorganised, leaving spaces that can be ruthlessly exploited. This drill focuses on the attacking transition—the critical 5 to 8 seconds immediately after winning the ball. It trains players to secure possession quickly, identify the most dangerous forward pass, make aggressive off-the-ball runs, and finish clinically before the opposition can recover their defensive shape.
Use this drill when your team is struggling to capitalise on turnovers, or if players are taking too many touches after winning the ball, allowing opponents time to drop back and organise.
Setup
Pitch Dimensions: 105m x 68m (Full Pitch) or adapt to 70m x 50m for smaller-sided focus.
Players: 14 to 18 players (e.g., 8v8 plus goalkeepers).
Equipment: Full-size goals, minimum 10 footballs (placed around the pitch for quick restarts), bibs in two contrasting colours (e.g., Blue and Red), and cones to mark starting zones or pitch thirds.
Positions:
- Defending Team (Blue): GK (1), Back Four (2, 3, 4, 5), Midfielders (6, 8), Wingers (7, 11), Striker (9).
- Attacking Team (Red): Set up in an expansive, attacking shape, committing players forward to simulate a match scenario where they have lost the ball high up the pitch.
Step-by-Step Instructions
Phase 1: Defensive Shape & Trigger
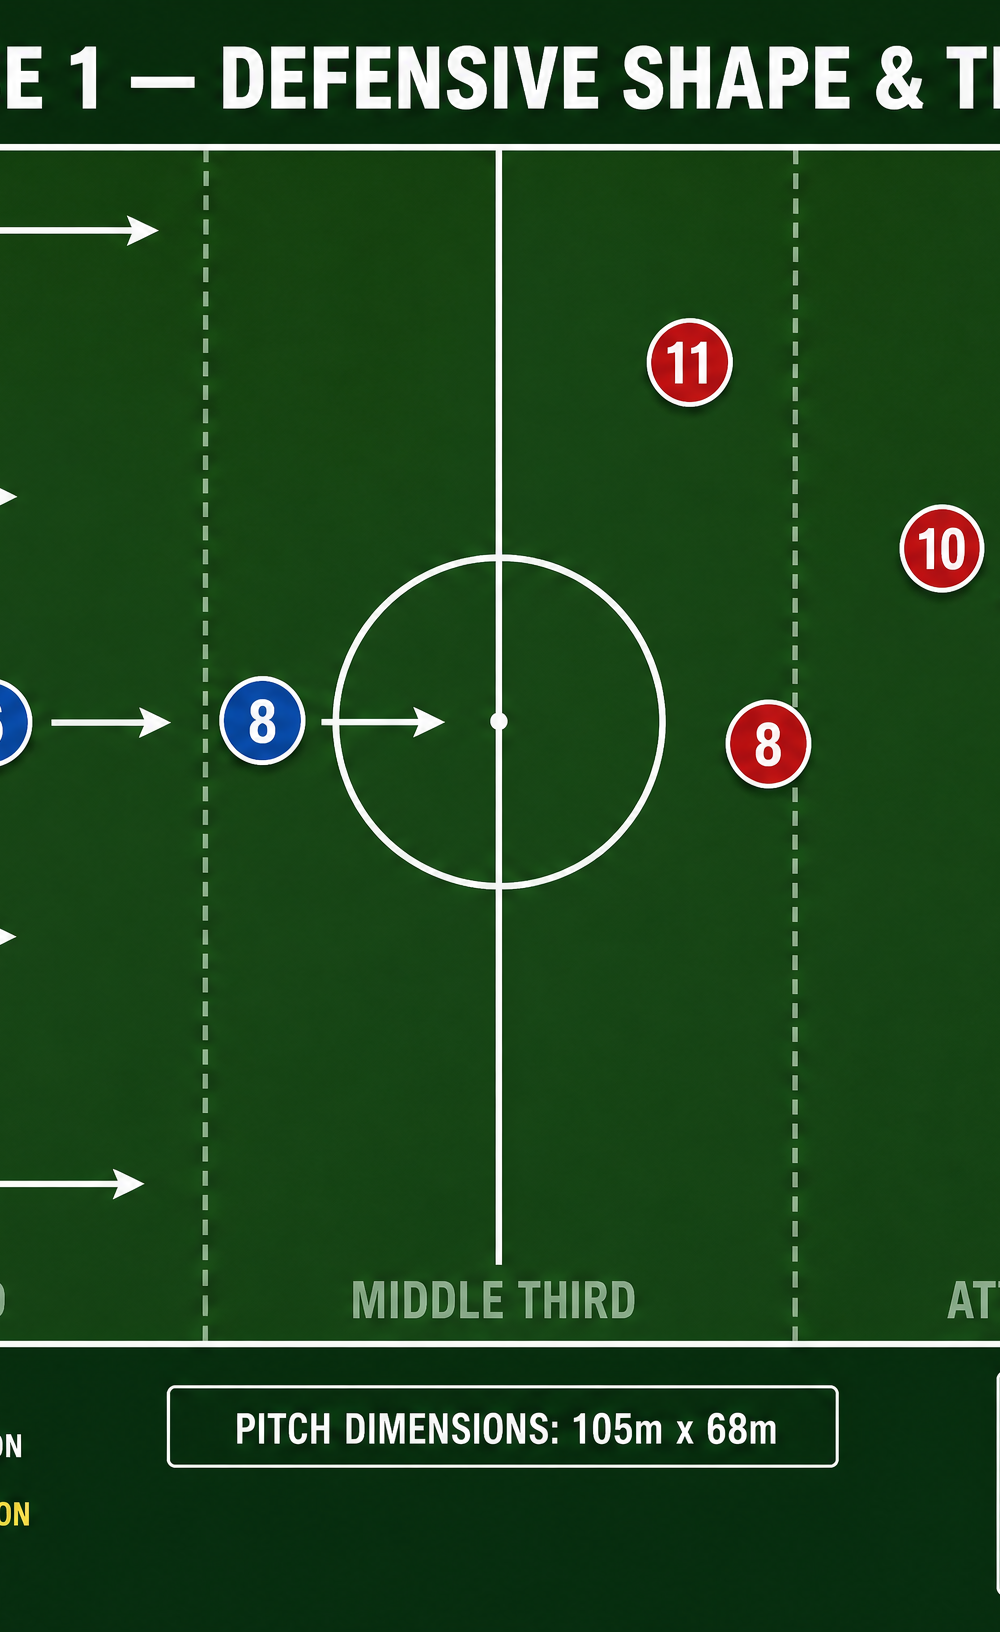
- The Setup: The drill begins with the Red team in possession in the middle or attacking third. The Blue team sits in a compact, organised defensive block.
- The Trigger: The coach plays a slightly loose pass into the Red team, or blows a whistle to initiate a forced turnover. The Blue team must immediately press aggressively to win the ball back.
- The Recovery: A Blue midfielder (e.g., the CDM 6) intercepts or tackles to win possession. This is the moment of transition.
Phase 2: Counter-Attack Launch
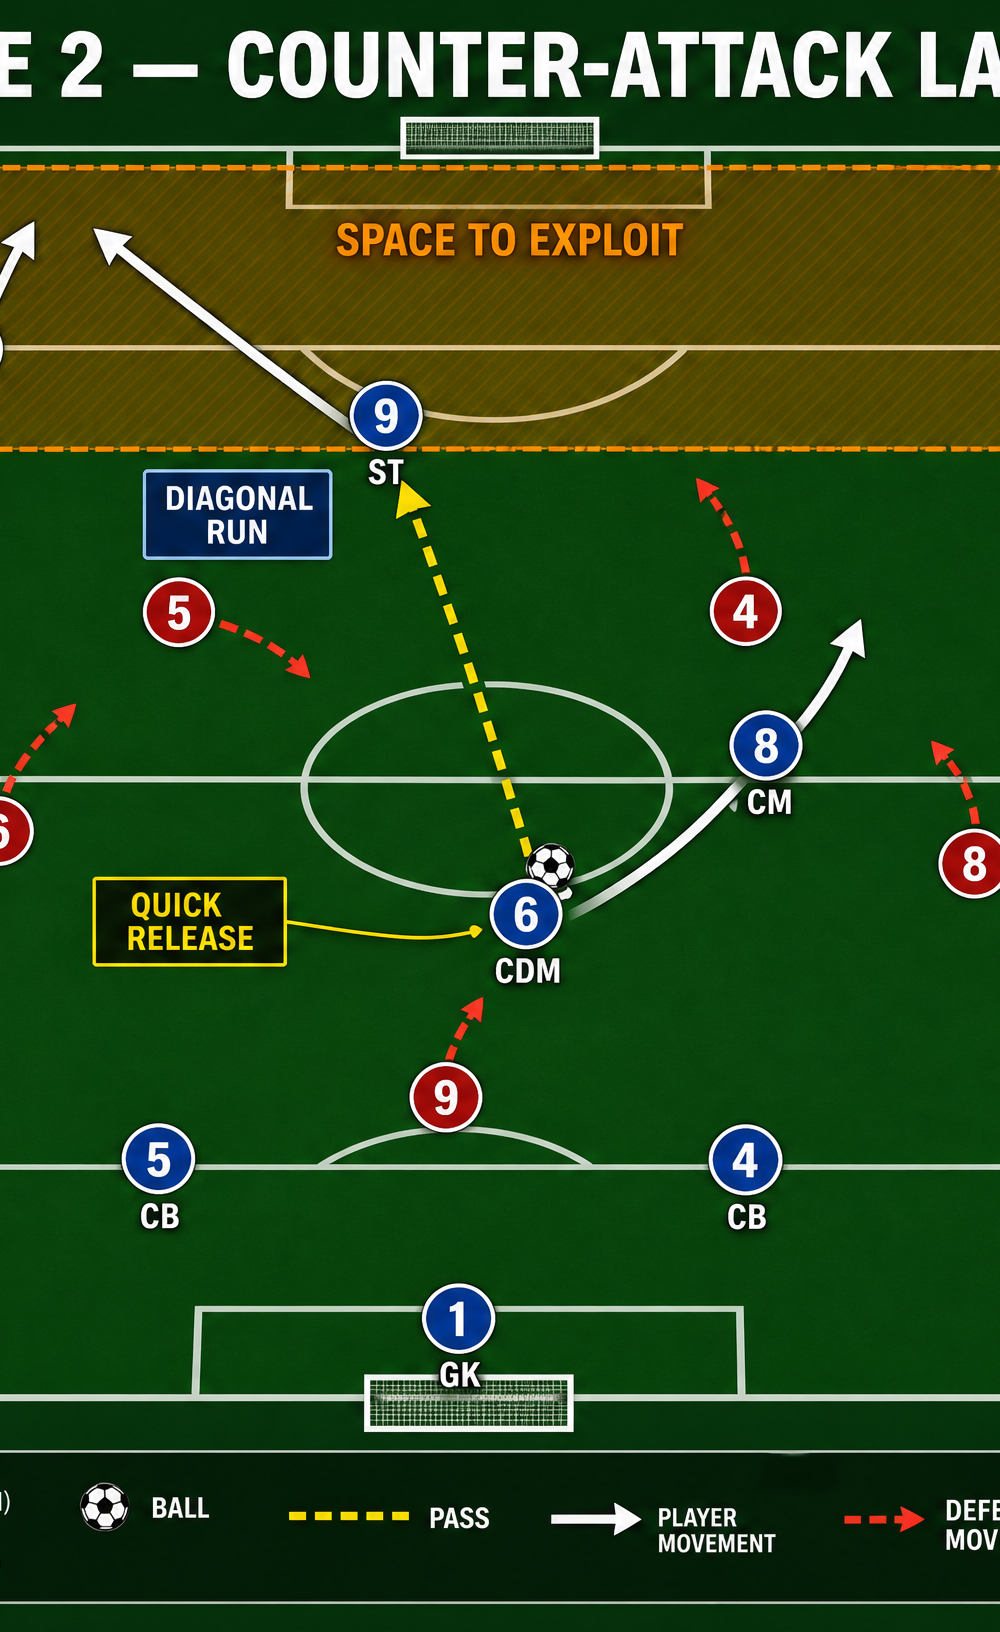
- First Look Forward: The player who wins the ball (CDM 6) must immediately look up. The priority is to play the ball forward into space or to a breaking attacker, not backwards or square.
- Aggressive Runs: As soon as the ball is won, the Blue attacking players must sprint forward. The Striker (9) makes a diagonal run into the channel. The Wingers (7, 11) sprint into the space behind the retreating Red full-backs. The CM (8) drives forward centrally to support.
- The Release Pass: The CDM (6) plays a quick, decisive pass to the Striker (9) or into the path of a breaking winger. The pass must be weighted to lead the player into space.
Phase 3: Finishing the Counter
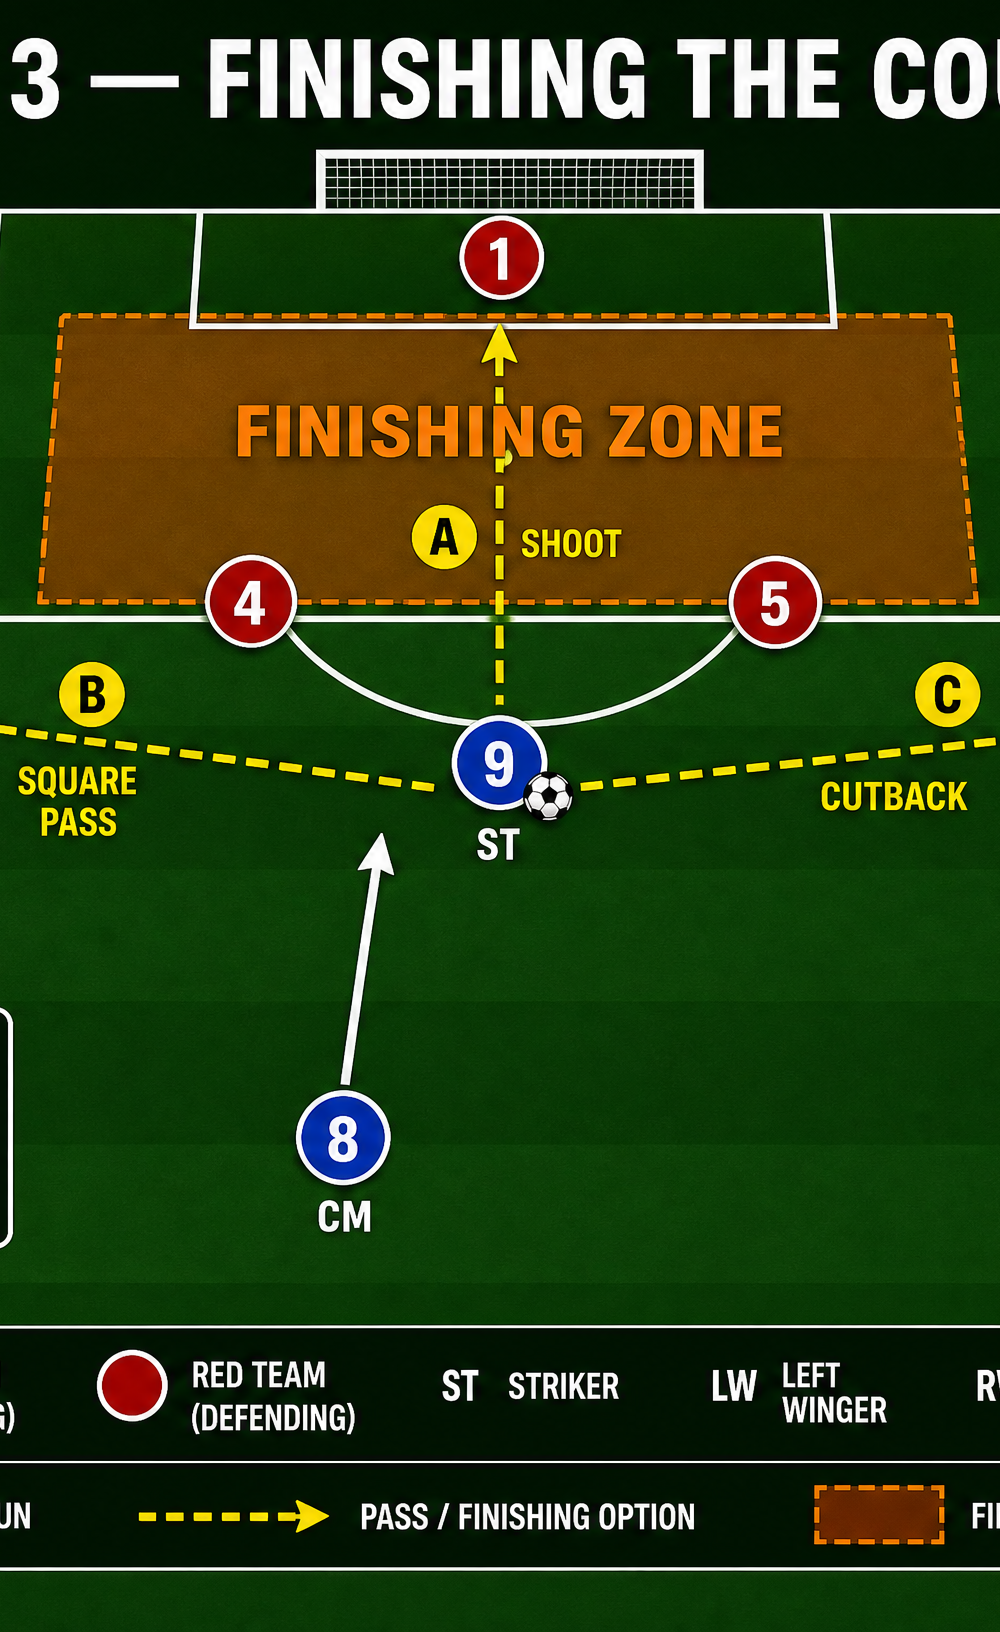
- Entering the Finishing Zone: The Blue team must reach the penalty area within 3 to 4 passes and under 8 seconds.
- Clinical Decision Making: The player on the ball (e.g., ST 9) enters the finishing zone and must quickly assess the options:
- Option A: Shoot directly if the angle is good and the defender is beaten.
- Option B: Play a square pass across the face of goal to the arriving winger (LW 11) for a tap-in.
- Option C: Cut the ball back to the edge of the area for the late-arriving midfielder (CM 8).
- The Finish: The move must end with a shot on goal. If the Red team intercepts or the ball goes out, the drill resets immediately to Phase 1.
Key Coaching Points
- First Thought Forward: Instil the mindset that the first look upon winning the ball must be forward. Delaying the pass allows the opposition to recover.
- Quality of the First Pass: The pass out of the defensive transition must be accurate and hit with the right weight to break the initial counter-press.
- Sprint to Support: Off-the-ball movement is crucial. Attackers must sprint at maximum intensity to overwhelm the retreating defenders and create passing options.
- Decision Making in the Final Third: Players must remain composed when entering the penalty area. Over-hitting the final pass or taking unnecessary touches ruins the counter-attack.
- Rest Defence: Ensure the remaining defenders (CBs and full-backs not involved in the attack) step up and maintain a compact shape to prevent a counter-counter-attack if the ball is lost.
Common Mistakes
- Playing Backwards After Recovery: Players winning the ball often play a safe pass backwards to the goalkeeper or centre-backs out of habit, killing the momentum of the transition.
- Lack of Forward Runs: Attackers jogging instead of sprinting, failing to exploit the space left by the disorganised opposition.
- Over-Complicating the Finish: Taking too many touches in the penalty area instead of taking the shot early or playing a simple square pass.
- Poor Weight of Pass: Playing the ball behind the breaking runner, forcing them to check their run and allowing defenders to catch up.
Variations & Progressions
- Time Limit: Introduce a strict 8-second shot clock from the moment the ball is won. If they don't shoot within 8 seconds, the goal doesn't count.
- Touch Restrictions: Limit players to a maximum of 2 or 3 touches to encourage quicker decision making and faster ball movement.
- Add a Counter-Press: Require the Red team to immediately aggressively counter-press for 3 seconds after losing the ball. The Blue team must play out of this pressure before launching the attack.
Age Adaptations
- Under 8s - Under 10s: Focus purely on the concept of 'winning the ball and running forward quickly'. Reduce pitch size and remove offside rules. Encourage dribbling into space if a pass isn't obvious.
- Under 12s - Under 14s: Introduce the idea of the 'first pass forward' and structured runs (e.g., wingers staying wide). Start enforcing offsides and focus on the quality of the final pass or shot.
- Under 16s - Open: Run the drill at full match intensity. Demand high tactical understanding, precise timing of runs, and clinical finishing under pressure. Incorporate complex variations like the counter-press.

