Goal Circle Shooting Accuracy Drill
A high-intensity, match-realistic shooting drill designed to improve shooter accuracy under pressure, movement in the circle, and effective feeding.
Equipment Needed
1. Overview
Shooting accuracy under pressure is the cornerstone of any successful netball team. The Goal Circle Shooting Accuracy Drill is a high-intensity, match-realistic exercise designed to develop a shooter’s ability to maintain form, balance, and accuracy when fatigued or tightly defended. This drill is perfect for the attacking unit—specifically the Goal Shooter (GS), Goal Attack (GA), and Wing Attack (WA)—to refine their circle movement, timing, and connection.
By forcing shooters to take shots from multiple angles and distances within the 4.9m radius goal circle, this drill replicates the unpredictable nature of a live match. It also challenges the feeders to deliver precise, well-timed passes into the circle, ensuring the attacking unit operates cohesively.
2. Setup
Court Area: One goal third (10.2m x 15.25m).
Players Required: 4-6 players (Minimum: 1 Shooter, 1 Feeder, 1 Defender, 1 Ball Retriever).
Equipment Needed:
- 1 Netball post
- 2-3 Netballs
- 4-6 Marker cones (optional, for designated shooting spots)
Player Positions:
- Shooters (GS/GA): Positioned inside the goal circle.
- Feeders (WA/C): Positioned on the circle edge or just outside the transverse line.
- Defenders (GK/GD): Positioned inside the circle to apply pressure.
3. Step-by-Step Instructions
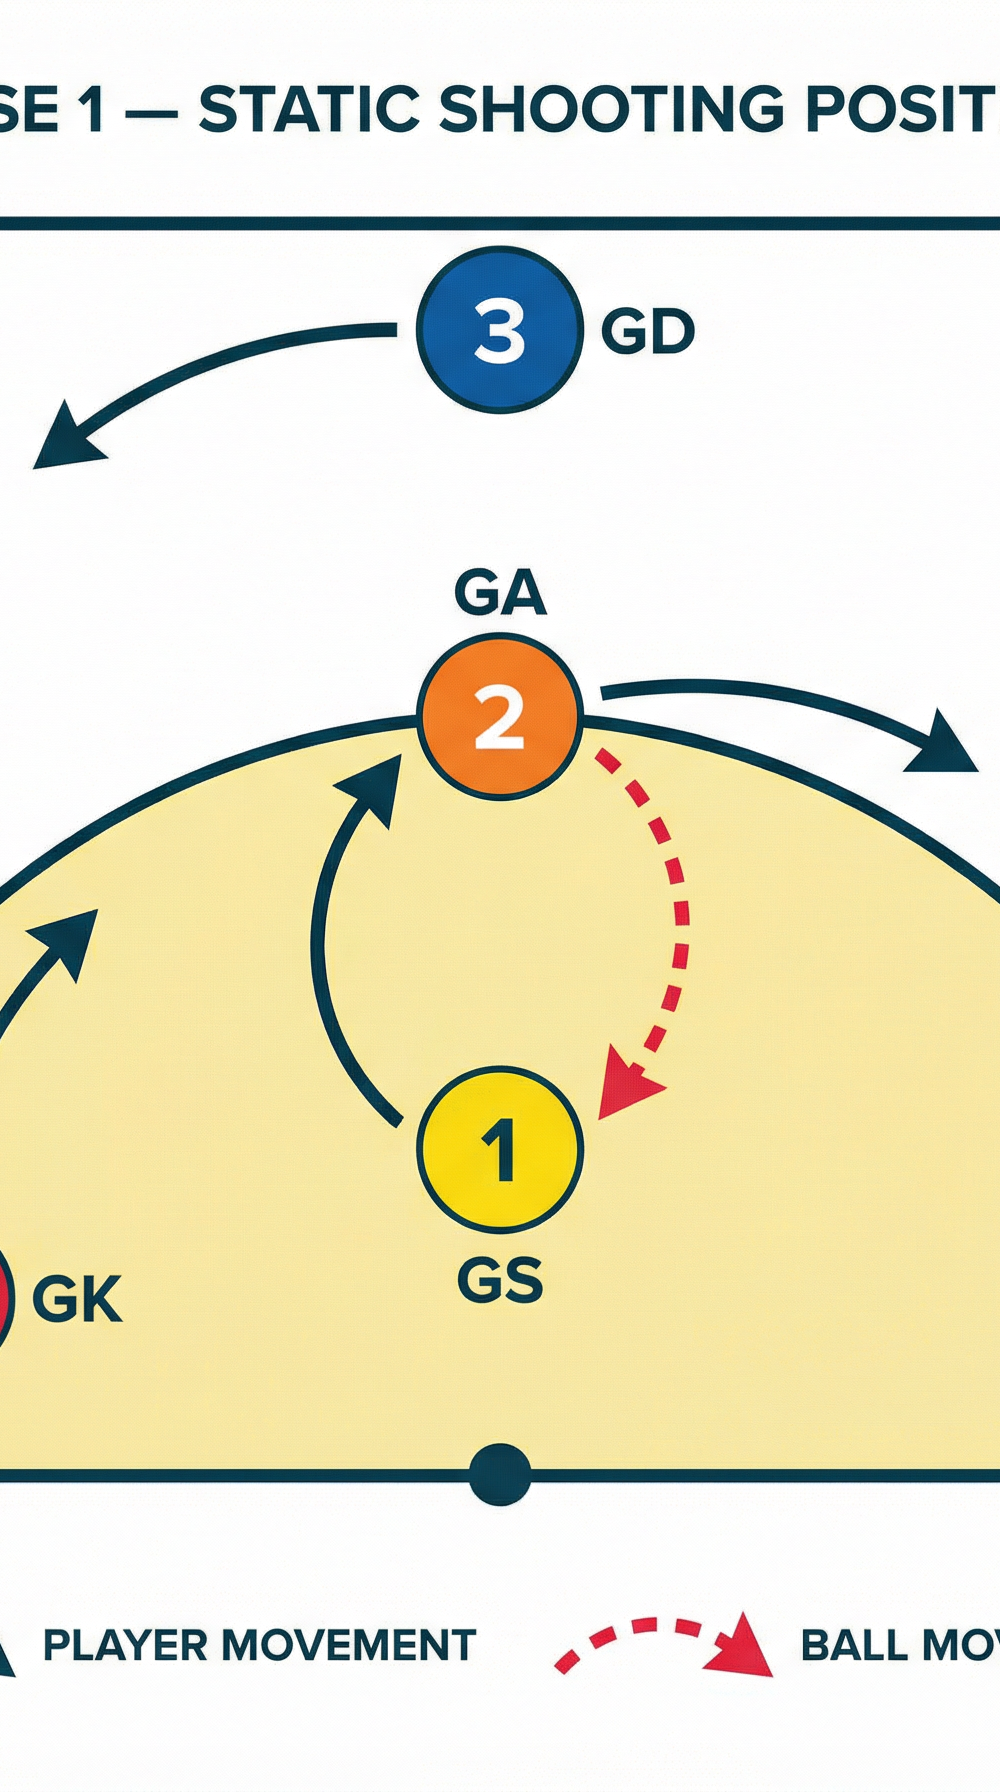
Phase 1: Static Shooting Positions
- Initial Positioning: Set up 4-5 marker cones at various distances and angles within the goal circle. Ensure a mix of close-range (under the post) and long-range (near the circle edge) shots.
- The Feed: The Feeder (WA) starts with the ball on the circle edge. The Shooter (GS) starts at the first cone.
- The Shot: The Feeder passes the ball to the Shooter. The Shooter must immediately balance, set their feet, and take the shot.
- The Rebound: The Defender (GK) or a designated retriever collects the ball and returns it to the Feeder.
- Rotation: The Shooter moves to the next cone and repeats the process. Complete 10 shots before swapping roles.
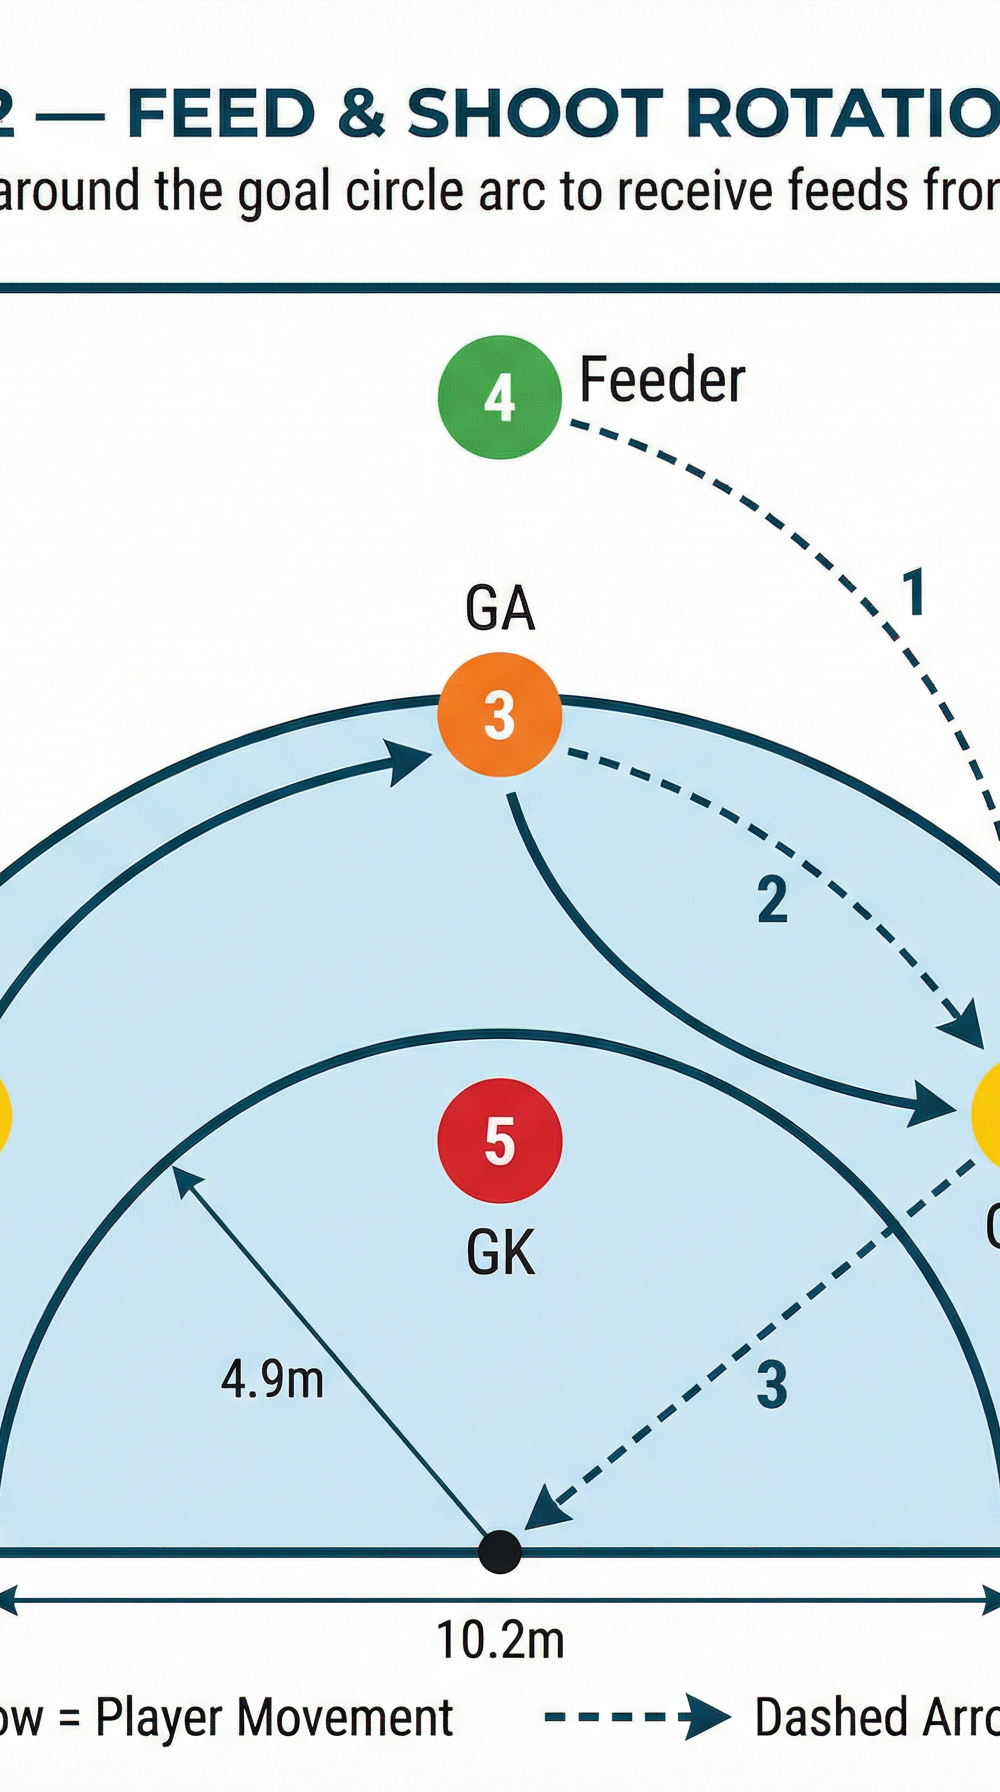
Phase 2: Feed & Shoot Rotation Drill

- Dynamic Movement: Remove the cones. The Shooter (GS) starts on the left side of the goal circle arc.
- The Drive: The Shooter drives hard along the baseline or across the circle to receive a pass from the Feeder (GA/WA) positioned at the top of the circle.
- The Catch and Shoot: Upon receiving the ball, the Shooter must quickly establish their landing foot, turn to face the post, and execute the shot.
- Continuous Flow: After the shot, the Shooter immediately drives to a new position (e.g., the right side of the arc) to receive the next feed.
- Intensity: Perform this continuously for 60 seconds or until 10 successful shots are made.
4. Key Coaching Points

- Footwork and Balance: Ensure the shooter establishes a strong, balanced base immediately upon catching the ball. The feet should be shoulder-width apart, pointing towards the post.
- Shooting Technique: Emphasize a smooth, continuous motion from the knees through to the flick of the wrist. The shooting arm should extend fully, with the ball released at the highest point.
- Eye Focus: Shooters must lock their eyes on the back of the ring (or their preferred focal point) before initiating the shooting motion.
- Feeding Precision: Feeders must deliver the ball into the space the shooter is moving towards, not where they currently are. Passes should be firm and placed at chest height or above the defender's reach.
- Rebounding Readiness: Both the shooter and the defender must anticipate the missed shot and position themselves strongly for the rebound.
5. Common Mistakes

- Rushing the Shot: Shooters often panic under pressure and release the ball before fully setting their feet or focusing their eyes.
- Dropping the Elbow: A low elbow during the shooting action leads to a flat trajectory, reducing the chances of a successful goal.
- Poor Timing on the Drive: Shooters driving too early or too late, resulting in a congested circle or intercepted feeds.
- Static Feeding: Feeders standing flat-footed on the circle edge rather than moving to create better angles for the pass.
6. Variations & Progressions

- Add Defensive Pressure (Progression): Introduce an active Goal Keeper (GK) to defend the shot. The GK must adhere to the 3ft (0.9m) distance rule but can jump and lean to block the shot.
- Time Limit Challenge (Variation): Challenge the shooter to score as many goals as possible within 2 minutes. This introduces a fatigue element, testing their ability to maintain technique under physical stress.
- Double Feeders (Progression): Use two feeders on the circle edge. The shooter must continuously work between both feeders, increasing the aerobic demand and decision-making speed.
7. Age Adaptations

- Under 8 / Under 10: Focus purely on technique. Use a lower goal post if available. Remove defenders and allow players to shoot from their preferred spots close to the post.
- Under 12 / Under 14: Introduce basic movement (Phase 2) and light defensive pressure (hands down). Focus on the timing of the drive and the accuracy of the feed.
- Under 16 / Open: Run the drill at full match intensity with active, aggressive defense. Incorporate complex circle rotations and multiple feeders.