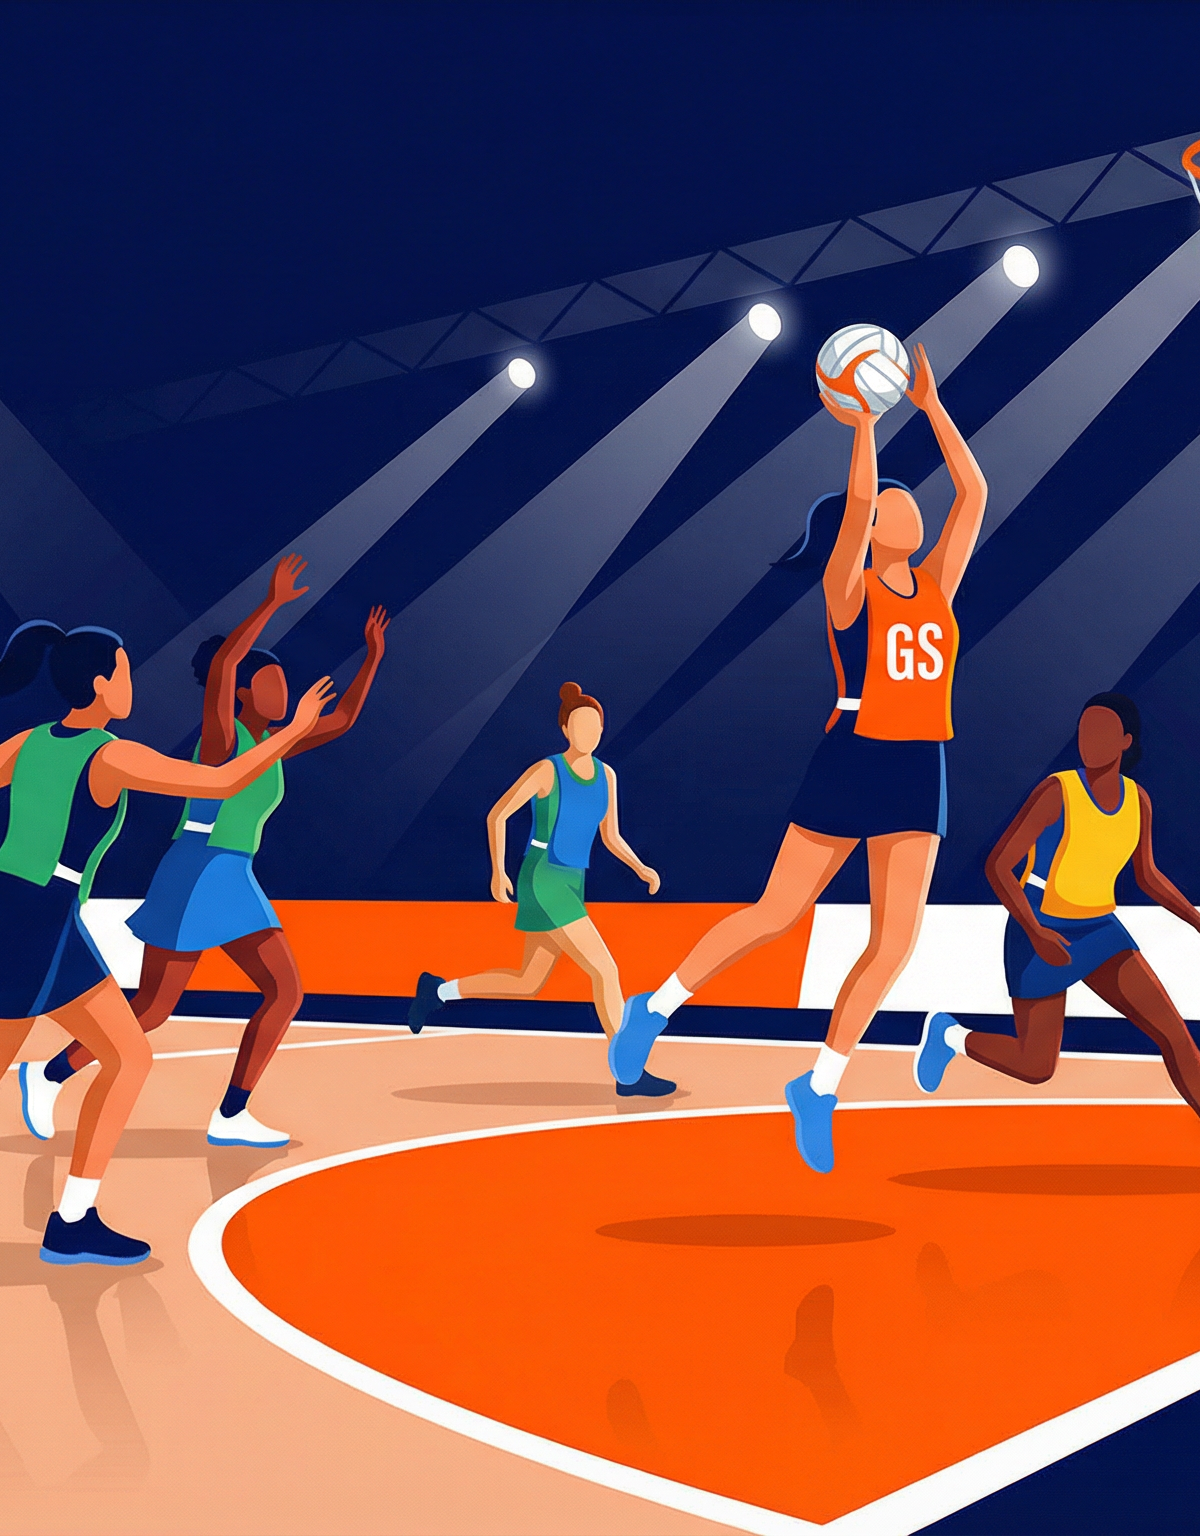
Double-Screen Shooting Circle Play: Unlocking the Post with Coordinated Screens
Master the double-screen shooting circle play to create guaranteed space for your Goal Shooter at the post — a high-percentage attacking weapon for any level of netball.
Equipment Needed
Overview
The Double-Screen Shooting Circle Play is a structured attacking set play designed to create a clear, uncontested path for the Goal Shooter (GS) to receive the ball in a prime shooting position directly in front of the post. By deploying both the Goal Attack (GA) and Wing Attack (WA) as simultaneous stationary screens inside the shooting circle, the play forces the GS's defender (GK) to navigate around two bodies in rapid succession — a task that, when executed with proper timing and discipline, is virtually impossible to achieve without conceding space.
This play is most effective when used at a centre pass, a penalty restart, or any set-piece situation where your team has a moment to organise before the ball enters the attacking third. It is particularly potent against tight man-to-man defence, where defenders are focused on individual marking rather than reading the space. Coaches should look to deploy this play when the opposition GK is physically dominant and is winning the battle in open play — the double screen neutralises that size advantage by taking the defender out of the equation entirely.
Setup

Equipment required: One netball, four marker cones (to define the shooting circle boundary during practice), one full-size netball post.
Court dimensions: Standard netball court 30.5m × 15.25m. The shooting circle has a radius of 4.9m from the base of the post. All player positions in this play are contained within or immediately adjacent to the attacking third (the final 10.167m of the court).
Players required: 5 attacking players (GS, GA, WA, C, and optionally GD feeding from the mid-court), plus 2–4 defenders for realistic practice (GK, GD minimum).

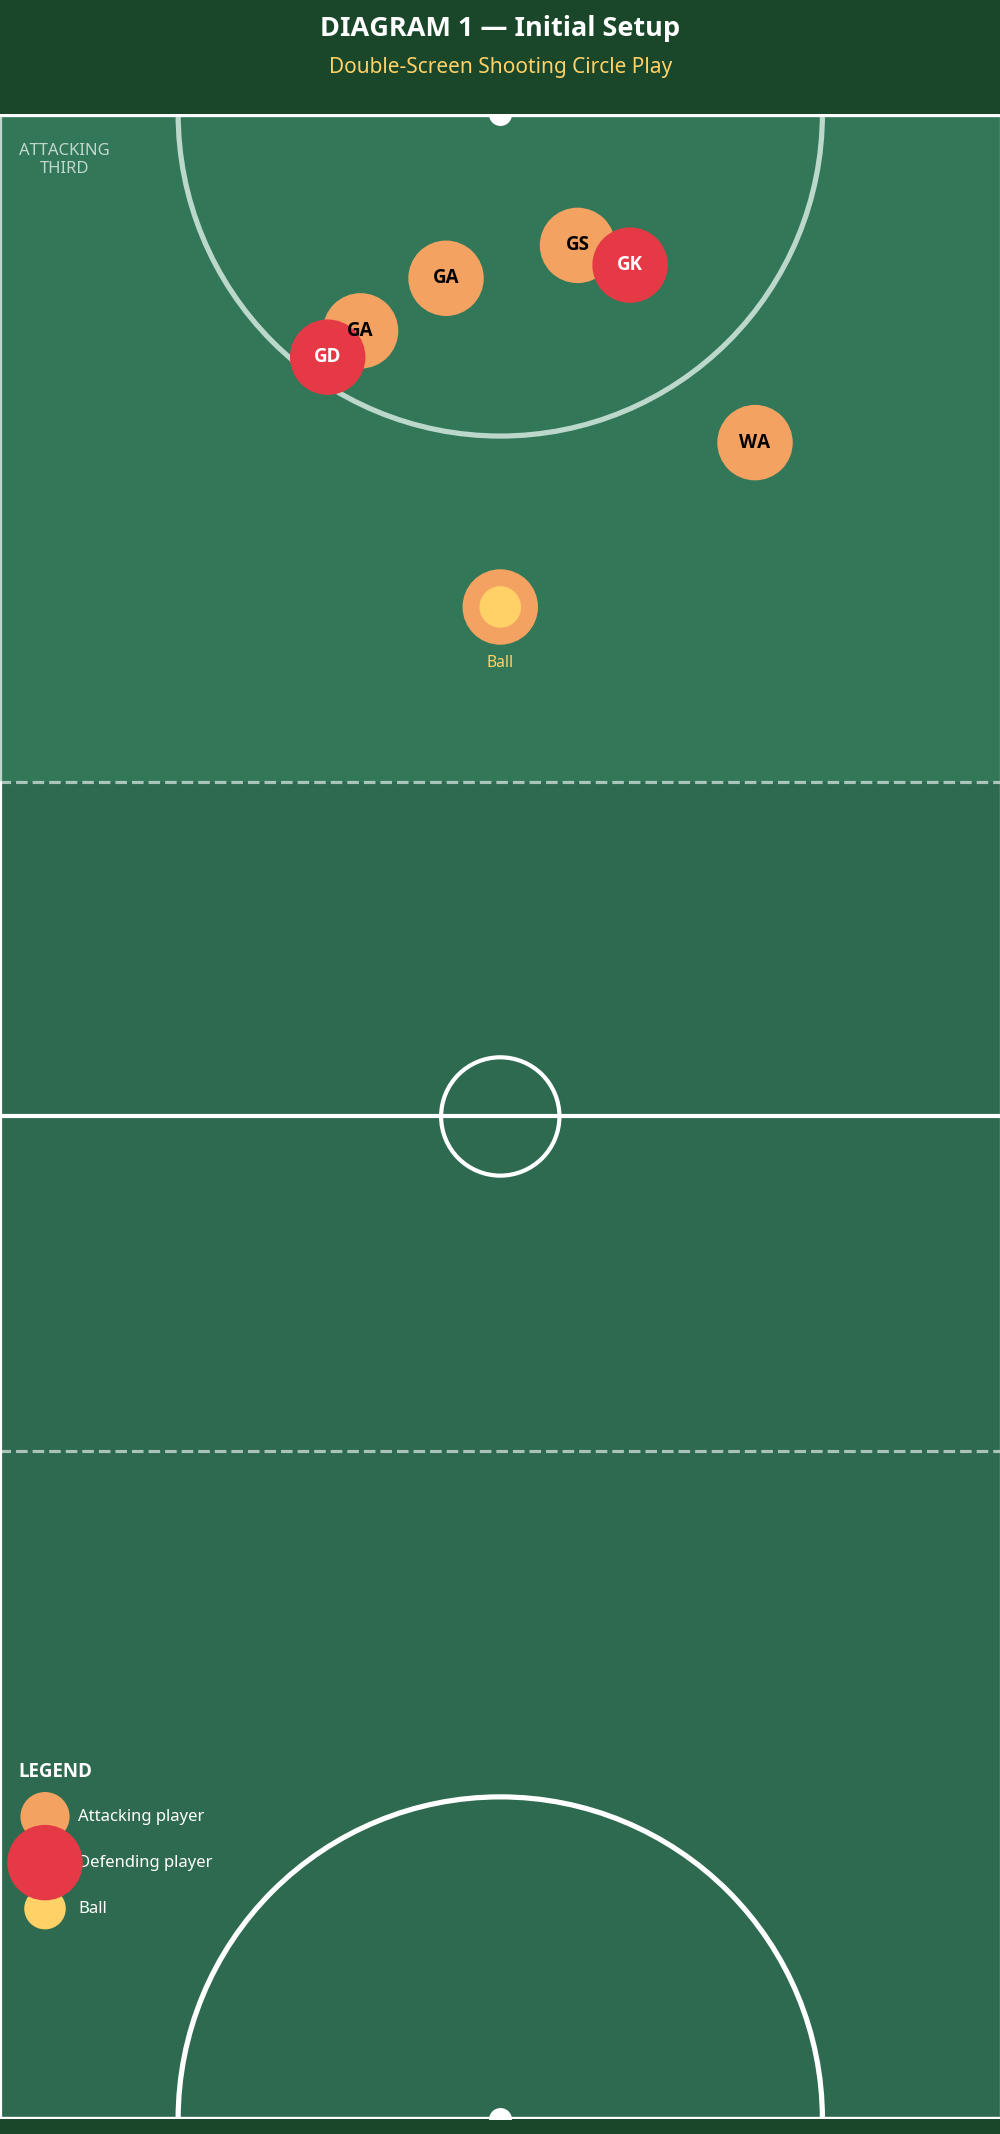
Starting positions (see Diagram 1):
| Position | Role in Play | Starting Location |
|---|---|---|
| GS | Primary receiver / shooter | Right side of circle, ~2m from post |
| GA | Screen 1 (left screen) | Left-centre of circle, ~3m from post |
| WA | Screen 2 (right screen) | Right-centre of circle, ~3m from post |
| C | Ball carrier / feeder | Centre of attacking third, ~7m from post |
| GK (opp.) | Defending GS | Tight on GS, right side |
| GD (opp.) | Defending GA | Tight on GA, left side |
The key principle of the initial setup is that GA and WA position themselves approximately 1.5m apart, creating a corridor or "gate" between them. GS begins on the outside of this gate — on the side away from where she will ultimately receive the ball — so that her drive through the screen is a genuine, committed movement.
Step-by-Step Instructions

Step 1 — Signal the play. The Centre calls the play using a pre-agreed verbal or visual cue (e.g., a hand signal or the call "Screen!") as the team transitions into the attacking third. All five players must know the play is on before the ball enters the circle.
Step 2 — GA and WA set the double screen. GA moves to a position approximately 3m from the post on the left-centre line of the circle. WA mirrors this on the right-centre, approximately 1.5m to GA's right. Both players plant their feet, adopt a wide, balanced stance (feet shoulder-width apart, knees slightly bent), and become completely stationary. Critically, neither screener may move into the path of a moving defender — the screen must be set before the defender arrives, or a contact call will result.
Step 3 — GS initiates the drive. From her starting position on the right side of the circle, GS takes 1–2 deliberate steps toward the right baseline to draw her defender (GK) in that direction. This is the "sell" — GS must commit to this initial movement to pull GK off balance before changing direction.
Step 4 — GS drives hard through the screen. GS plants her outside foot and drives sharply to her left, cutting directly through the gap between GA and WA. She should aim to pass within 30–40cm of each screener, making it physically impossible for GK to follow without running into one of the screens. GS's target destination is the front-of-post position, approximately 0.5–1m directly in front of the goal post.
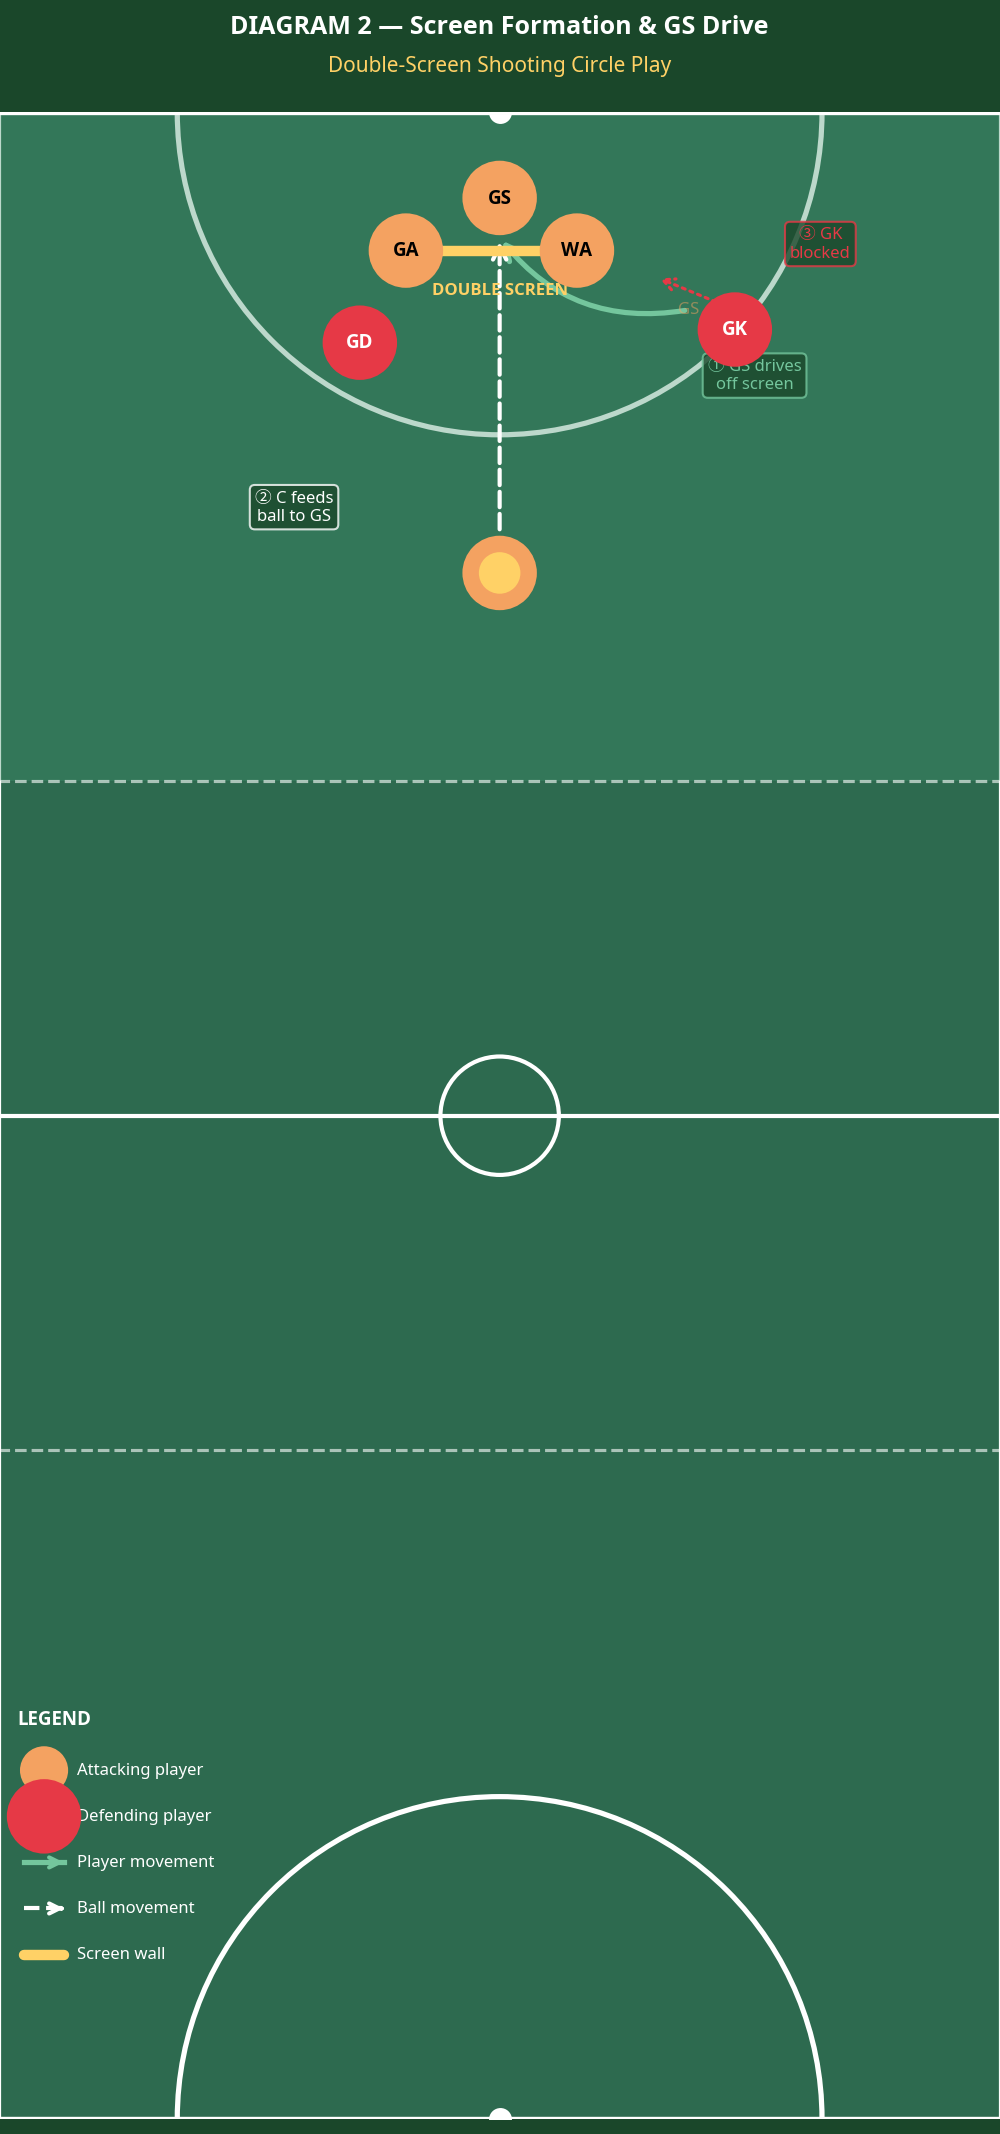
Step 5 — C reads and feeds. As GS completes her drive and presents her hands in the shooting position, C delivers a firm, flat pass to GS's chest or hands. The timing of the pass is critical: C should release the ball as GS's second foot plants at the front-of-post position, not before. A premature pass gives the defence time to recover.
Step 6 — GS receives and shoots. GS receives the ball in a balanced, two-footed landing position directly in front of the post and shoots immediately. There should be no hesitation — the value of this play is the clean, uncontested shot. GS must be confident shooting from this position before the play is drilled at full pace.
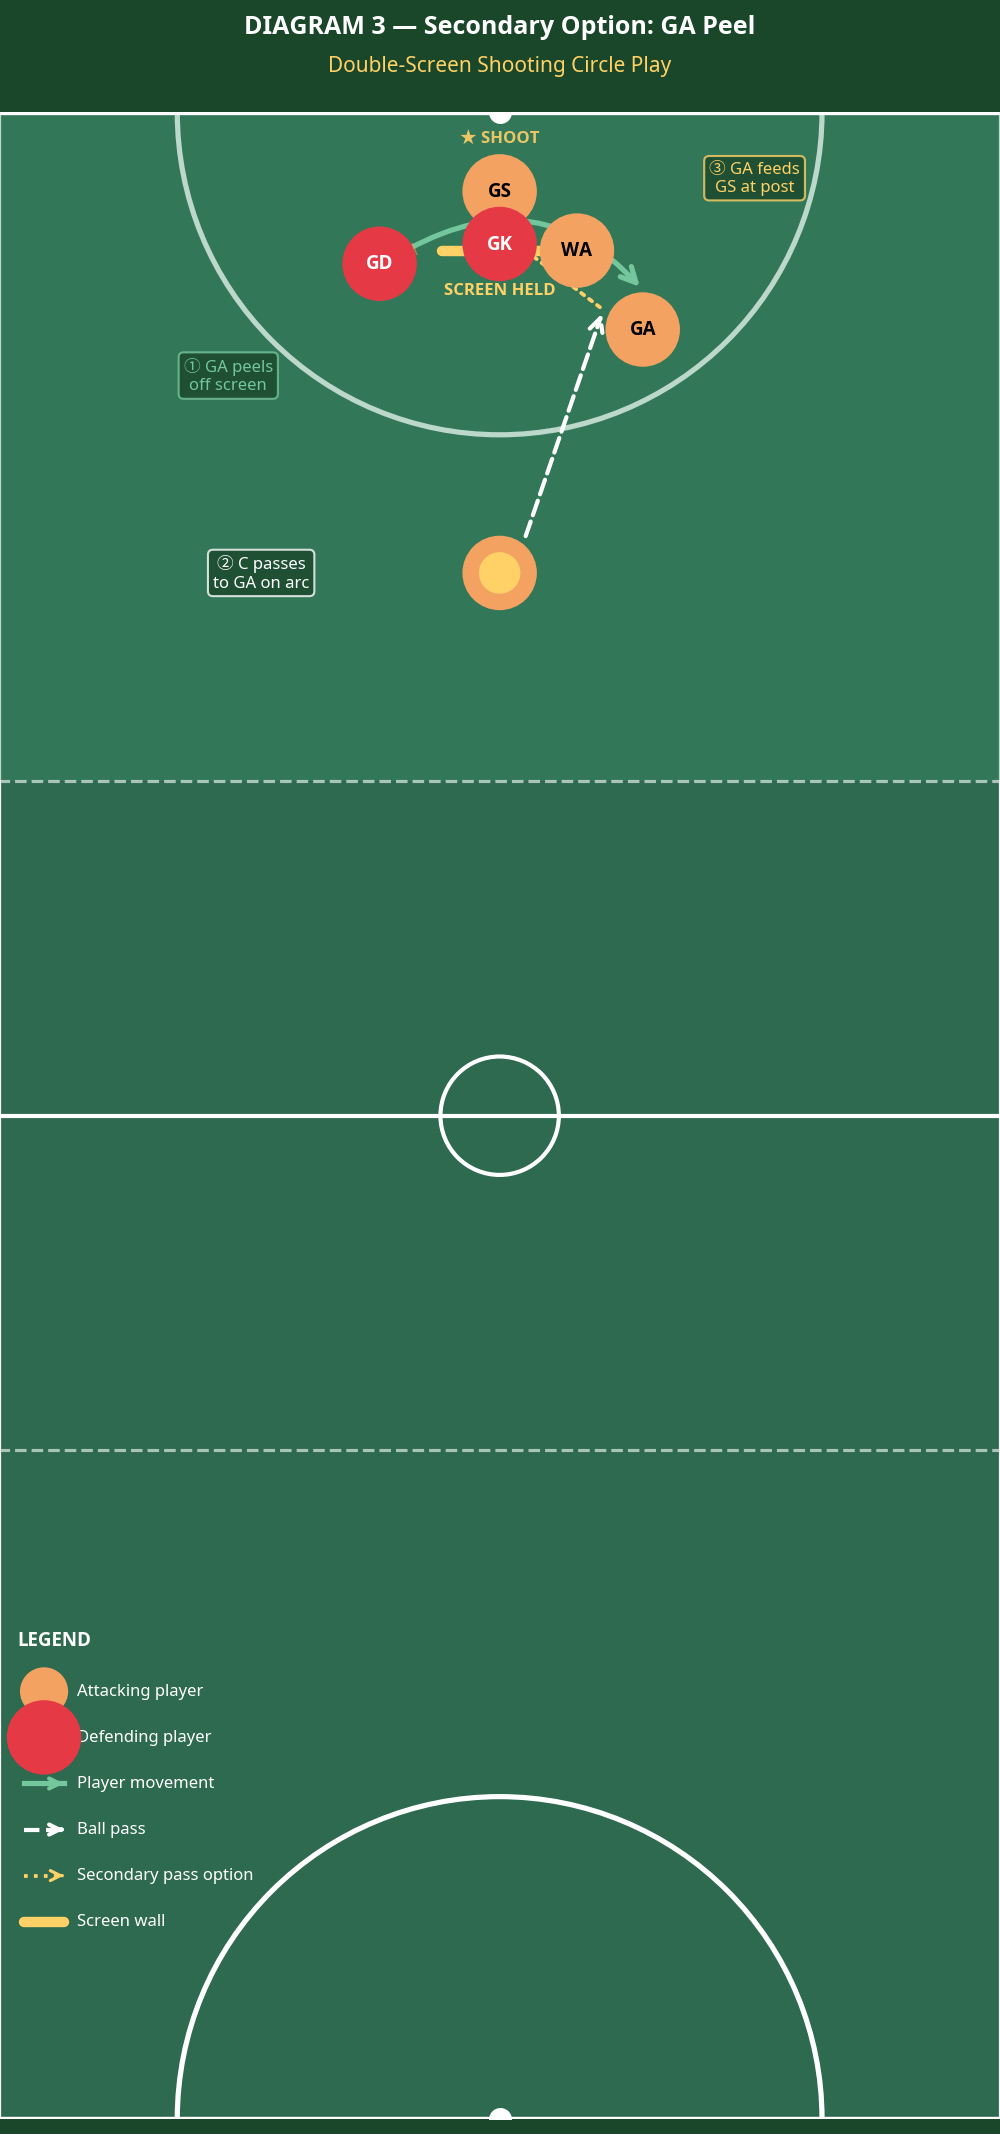
Step 7 — Secondary option (GA peel). If the GK successfully fights through the screen and denies the GS option, GA does not remain static. After holding the screen for a count of "one-two," GA peels off the right side of the screen (away from GD) and drives to the arc of the shooting circle. C reads this and delivers the ball to GA on the arc. GA can then either shoot (if she is a shooting GA) or feed GS at the post for a close-range shot.

Key Coaching Points
1. The screen must be set before contact. This is the single most important rule. Screeners (GA and WA) must be completely stationary before the GK arrives at the screen. Drill this by having screeners call "Set!" aloud when they are in position, giving the GS a clear auditory cue to begin her drive.
2. GS must sell the initial movement. A half-hearted step to the baseline will not pull the GK off balance. GS needs to commit to 1–2 full, purposeful steps in the wrong direction before cutting. Emphasise that the first movement is a deception — it must look like a genuine drive to the baseline.
3. GS drives shoulder-to-shoulder with the screens. The tighter GS runs to the screeners, the harder it is for GK to follow. If GS leaves a gap of more than half a metre, a quick defender can squeeze through. Use cones to mark the ideal running line in early practice.
4. The feeder must hold the ball until GS is clear. A common error is the Centre releasing the pass too early, which telegraphs the play and gives the defence time to recover. The cue for C is GS's landing foot — ball leaves hand as foot hits floor.
5. Screeners must hold their position after the screen. GA and WA should not relax or drift after GS passes through. Holding the screen for a full count of two seconds maintains the block on GK and GD, and keeps the secondary option (GA peel) alive.
6. Communicate the play reset. If the play breaks down — due to a turnover, a held ball, or a defender reading the screen — the team needs a clear reset signal. Designate a "reset" call so players know to return to their starting positions and run the play again rather than improvising.
Common Mistakes
Mistake 1 — Screener moves into a moving defender. If GA or WA steps into the path of a GK who is already moving, the umpire will call contact or obstruction. Coaches should watch for screeners who "chase" the defender to set the screen rather than planting early and letting the defender come to them. Correct this by requiring screeners to be stationary for a full count of "one" before GS drives.
Mistake 2 — GS drives too wide of the screens. When GS leaves too much space between herself and the screeners, a quick GK can follow through the gap. Use a cone or a rope on the floor to mark the ideal cutting line and have GS practice running it precisely.
Mistake 3 — The pass is delivered too early. Centres who are eager to get the ball away often release the pass before GS has completed her drive. Drill the timing separately: have C and GS practise the pass-and-receive sequence in isolation, with C counting GS's footsteps aloud.
Mistake 4 — GS does not present her hands. After driving through the screen, GS must actively present a target for C to aim at. Make "hands up on landing" a non-negotiable habit.
Mistake 5 — GA and WA do not communicate their screen positions. Introduce a two-word call: GA says "Screen one" and WA responds "Screen two" before GS begins her drive.
Variations & Progressions

Variation 1 — Reverse drive (GS drives left to right). Mirror the entire play so GS begins on the left and drives right through the screen. Alternate between the standard and reverse versions in the same quarter to keep the defence guessing.
Variation 2 — WA as the primary receiver. WA peels off the screen immediately after setting it and drives to the arc to receive from C. Used when the GK is particularly effective at fighting through screens.
Progression 1 — Add a live GK and GD. Begin without defenders, then introduce a passive GK, semi-active GK, and finally a fully competitive defender. Aim for 8 out of 10 clean executions before adding defence.
Progression 2 — Run the play off a turnover. Train players to execute the double-screen within 3 seconds of gaining possession, exploiting a disorganised defence before it can reset.
Age Adaptations

Under 10 / Under 12 — Simplified single screen. Simplify to a single screen set by GA only, with WA providing a secondary lead on the opposite side. Focus on the concept of "using your teammate as a wall" before introducing the double screen.
Under 14 / Under 16 — Introduce the secondary option. Once players are comfortable with the primary GS drive, introduce the GA peel as a second option, coaching the decision-making process: "if GS is denied, GA peels."
Open / Senior — Add defensive counter-reads. Introduce a third option where WA releases from the screen and drives to the top of the circle if both GS and GA are denied. Practise the play under fatigue conditions to simulate close-game pressure.