GK Body Positioning and Intercept Drill: Read, React, Dominate the Circle
Train your Goal Keeper to master defensive body angles, anticipate ball flight, and execute clean intercepts inside the goal circle using this progressive, game-realistic drill.
Equipment Needed
Overview
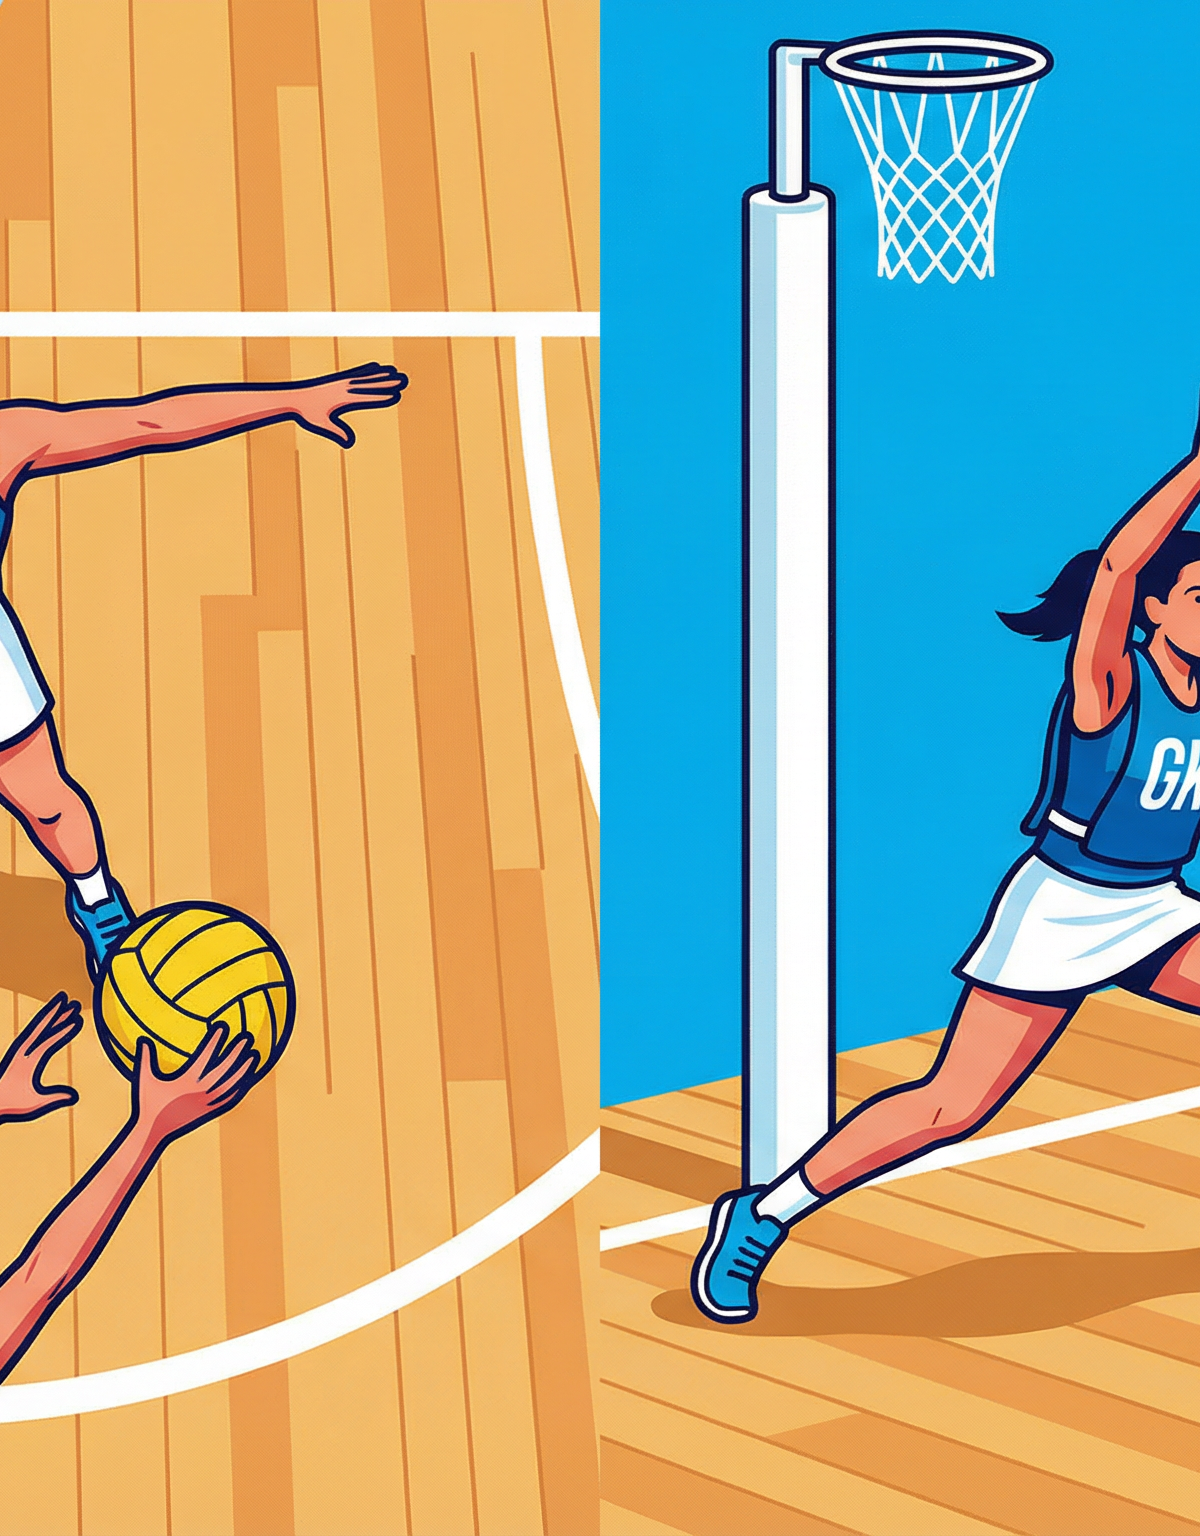
This drill is the cornerstone of any serious GK development programme. The GK Body Positioning and Intercept Drill isolates and develops the two most critical skills a Goal Keeper must own: the ability to position their body between the ball and the shooter, and the explosive, well-timed movement required to intercept a pass inside the goal circle.
Unlike passive shadow drills, this exercise places the GK under realistic decision-making pressure by using a live feeder and two active attacking targets (GS and GA). The GK must read the feeder's body language, shift their weight and angle accordingly, and commit to an intercept at the precise moment the ball is released. Run this drill at the start of a defensive session to prime the GK's reading skills, or use it mid-session as a high-intensity block to reinforce positioning habits under fatigue.
Best used when: introducing defensive principles to a new GK, correcting a GK who ball-watches rather than body-positions, or preparing for an opponent with a dominant GS.
Setup

Court Area: Goal circle and surrounding goal third (approximately 10m x 15.25m of the full 30.5m x 15.25m court). The goal circle has a radius of 4.9m — this boundary is critical to the drill and must be clearly marked.
Equipment Required:
- 4–6 netballs (to maintain drill tempo without ball-chasing stoppages)
- Coloured bibs: blue for GK, red for GS and GA, orange for the feeder (GD or coach)
- Cones to mark the feeder's starting position (1.5m outside the goal circle arc)
- Optional: a whiteboard or cone grid to brief the rotation pattern before starting
Player Positions:
| Position | Role | Starting Location |
|---|---|---|
| GK (Player 1) | Defender — the focus of the drill | Inside the goal circle, 1–1.5m from the post |
| GS (Player 2) | Attacker — target receiver | On the goal circle edge, post-side (right of post) |
| GA (Player 3) | Attacker — target receiver | On the goal circle edge, centre-side (left of post) |
| GD / Coach (Feeder) | Ball feeder | 1.5m outside the goal circle arc, central position |
With larger squads, place additional players in a queue behind GS and GA. Rotate every 4–6 repetitions.
Diagram 1: GK starting position relative to the post and the two attacking targets. The GK begins goal-side of the GS, with peripheral vision covering the GA and the feeder simultaneously.
Step-by-Step Instructions

Set the starting positions. GK stands 1–1.5m in front of the goal post, facing outward (toward the feeder). GS takes up a position on the right edge of the goal circle. GA mirrors this on the left edge. The feeder stands 1.5m outside the arc with a ball in hand.
GK establishes defensive stance. Before the feeder moves, the GK must be in a low, athletic base: feet shoulder-width apart, knees slightly bent, weight on the balls of the feet, arms out to the sides at hip height. The GK's chest should be angled at roughly 45 degrees — not fully facing the feeder, but not side-on either. This half-turn allows vision of both the ball and the attacker simultaneously.
Feeder calls "Ready" and begins to look. The feeder holds the ball at chest height and scans deliberately between GS and GA, telegraphing intent. The GK must track the feeder's eyes and shoulders — not the ball — to anticipate the pass direction.
Feeder releases the pass. Without a verbal cue, the feeder throws a firm chest pass or lob toward either GS or GA. The pass should be realistic in pace — not a slow lob designed to be intercepted, but a genuine game-speed delivery.
GK reacts and drives. The instant the feeder's throwing arm commits to a direction, the GK takes a decisive lateral step toward the ball's flight path. The lead foot drives out, the hips rotate to face the ball, and the near arm extends high to intercept. The GK should aim to contact the ball at its highest reachable point — not wait for it to drop.
Intercept or recover. If the GK intercepts, they immediately look to release a quick outlet pass to the feeder (simulating a turnover clearance). If the pass beats the GK, they must recover quickly behind the GS or GA, re-establish their defensive position, and prepare for the next repetition.
Rotate after 5 repetitions. GK rotates to GS, GS rotates to GA, GA rotates to feeder, feeder becomes the new GK. Every player experiences the GK role.
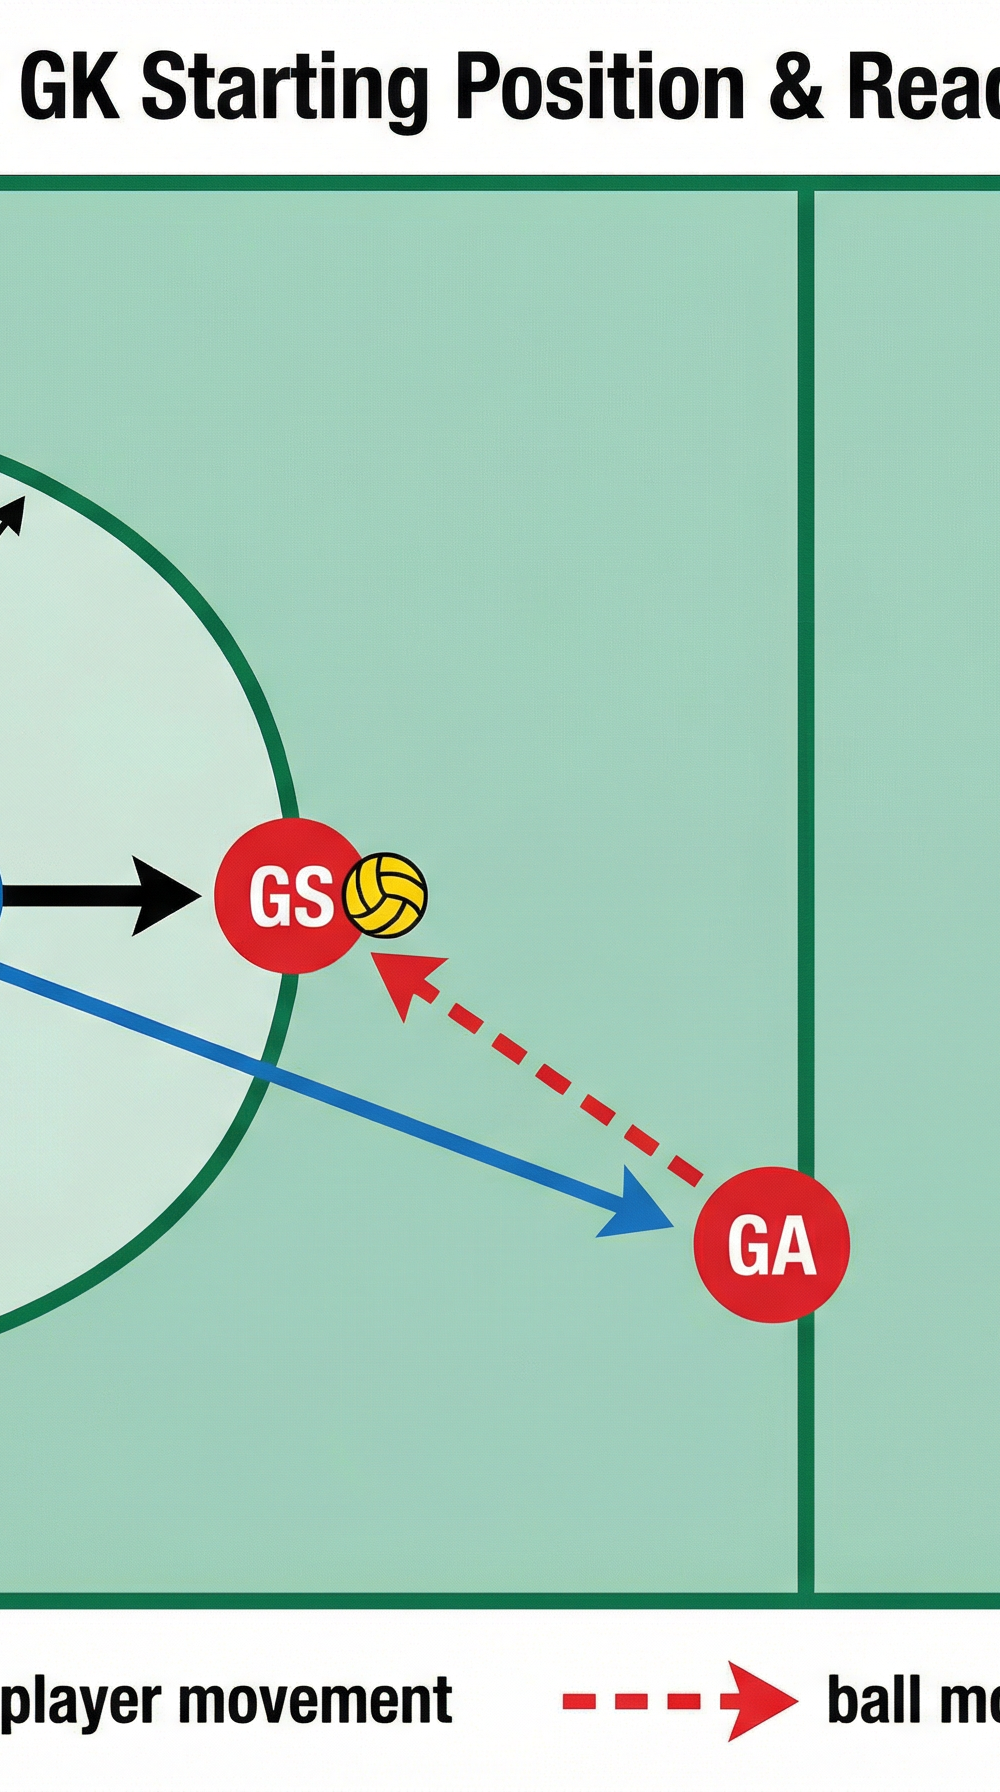
Diagram 2: The GK intercept execution moment. The yellow shaded zone is the "intercept window" — the triangular space between the feeder, GK, and receiver. The GK must enter this zone at the moment of ball release, not before.
Full Drill Rotation
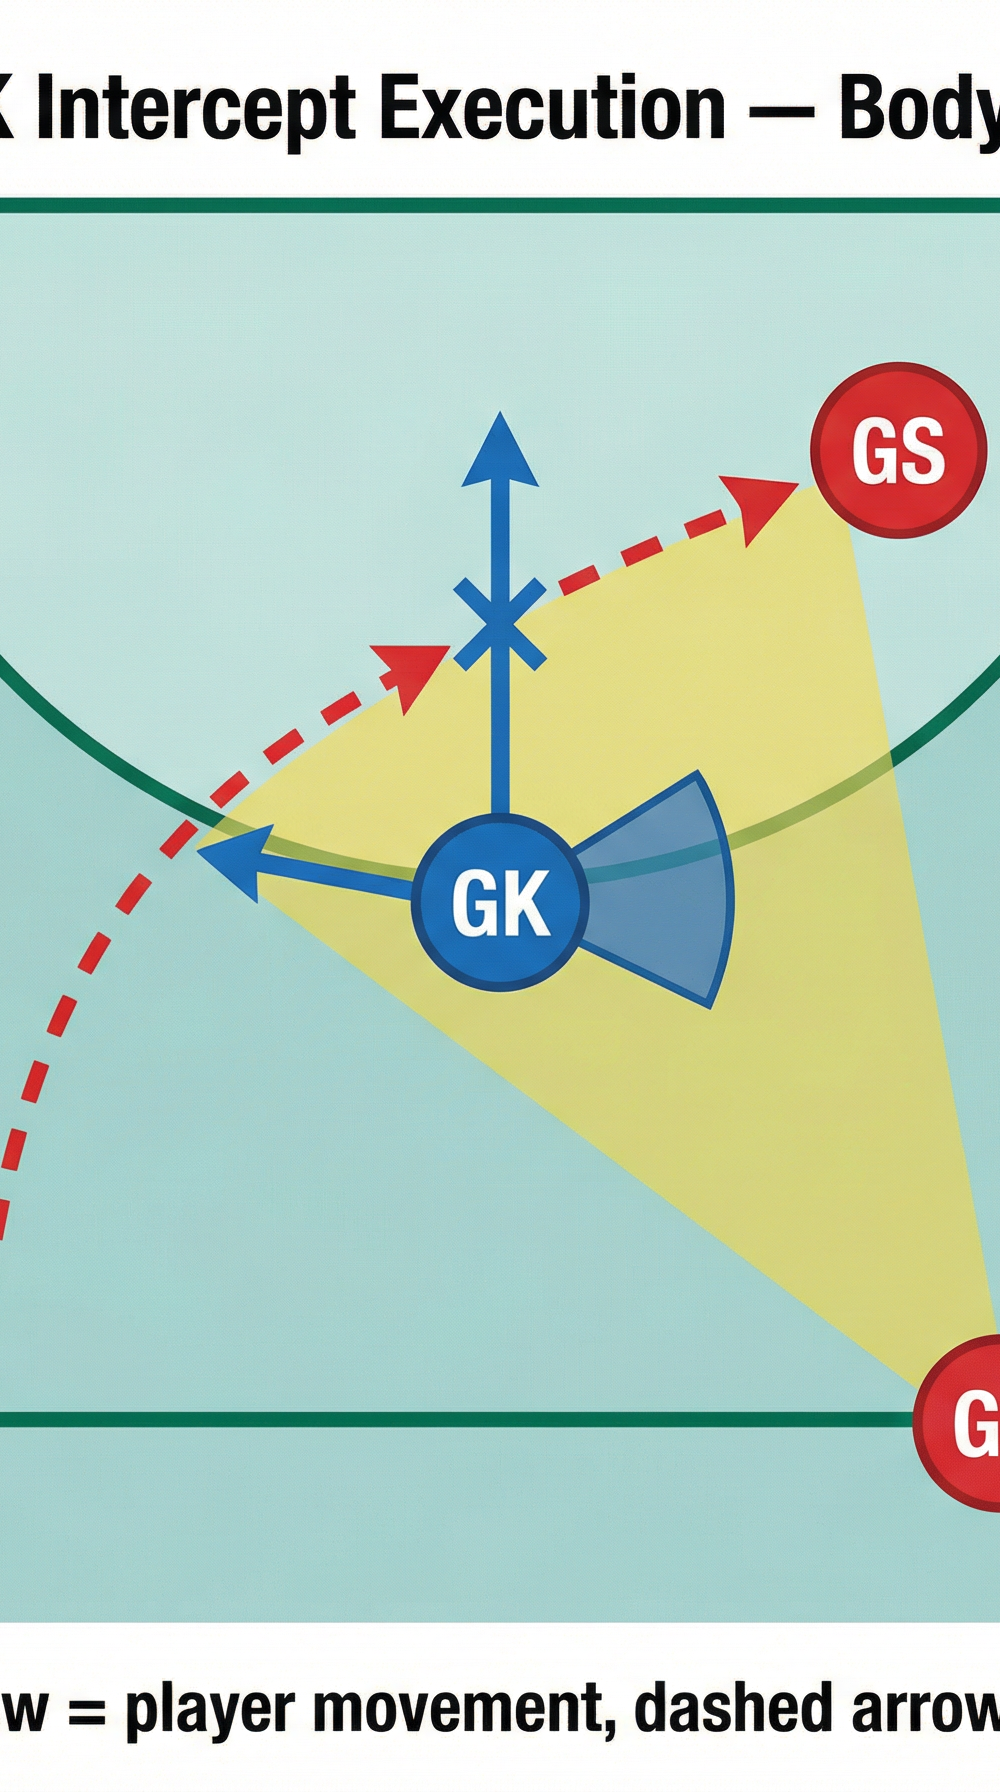

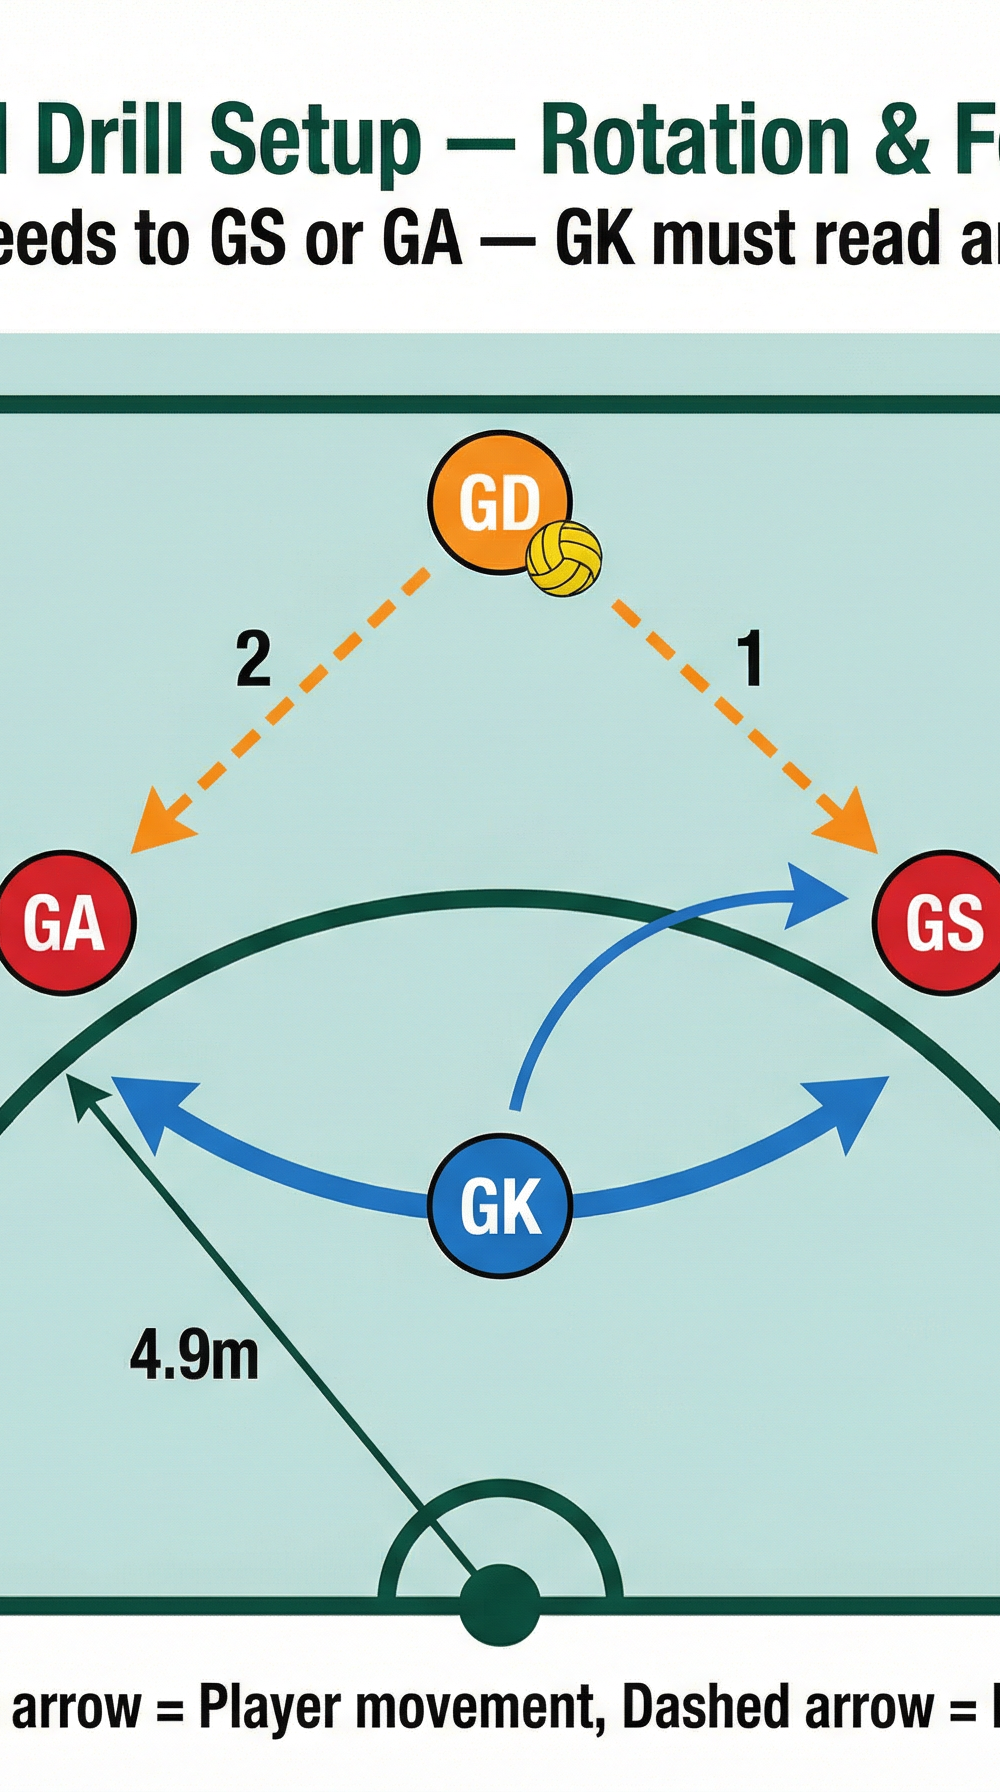
Diagram 3: Complete drill setup showing the feeder's two pass options (numbered 1 and 2) and the GK's lateral reaction arc. The rotation cycle (GK → GS → GA → Feeder → GK) is shown in the bottom-right corner.
Key Coaching Points
1. Body angle is everything — never go fully square.
A GK who faces the feeder head-on is slow to react laterally and telegraphs their intention to the attacker. Insist on that 45-degree chest angle at all times. Cue: "Show me your shoulder to the feeder, not your chest."
2. Read the feeder's shoulder, not the ball.
The ball is a distraction. The feeder's lead shoulder and elbow tell you where the pass is going 0.3–0.5 seconds before the ball leaves their hands. Train the GK to lock their eyes on the feeder's upper body during the preparation phase. Cue: "Watch the shoulder, trust the feet."
3. The first step must be decisive — no false steps.
A false step (stepping toward the wrong receiver before correcting) costs the GK the intercept opportunity entirely. Emphasise that the first step must be committed and explosive. It is better to be wrong and fast than hesitant and slow. Cue: "One step, one direction — go!"
4. Intercept at the highest point.
GKs who wait for the ball to come to them will always be beaten by a well-timed lob. The GK must drive toward the ball and reach their arm to its maximum extension at the apex of the ball's flight. Cue: "Attack the ball — don't let it come to you."
5. Maintain legal distance from the shooter.
Netball rules require defenders to be at least 0.9m from the player with the ball. During the recovery phase, ensure the GK does not crowd the GS or GA illegally. This is particularly important when the GK fails to intercept and must reset. Cue: "Land, check your distance, reset your feet."
6. Communicate after the intercept.
A clean intercept is wasted if the GK holds the ball too long. Immediately upon securing possession, the GK should call "Mine!" loudly and look for the outlet pass. This builds the habit of quick transition from defence to attack.
Common Mistakes

Mistake 1: Ball-watching instead of body-reading.
Many developing GKs fixate on the ball in the feeder's hands rather than reading the feeder's body language. This delays their reaction by a critical fraction of a second. Correction: Have the feeder hold the ball behind their back briefly, forcing the GK to read shoulder and hip cues only. Reintroduce the ball once the habit is established.
Mistake 2: Flat-footed starting stance.
A GK standing with weight on their heels cannot generate explosive lateral movement. Correction: Before each repetition, tap the GK on the shoulder and ask them to demonstrate their ready stance. Use the cue: "Weight forward, heels off the floor — I should be able to slide a card under your heels."
Mistake 3: Reaching across the body to intercept.
When the ball goes to the GK's weak side, many players reach across their own body rather than driving their feet toward the ball. This results in weak, one-handed tips rather than clean two-handed intercepts. Correction: Insist on at least one lateral step before the arm extends. Drill the footwork in isolation first — step, then reach.
Mistake 4: Committing too early (being "sold" by a fake).
An experienced feeder can use a shoulder fake to draw the GK out of position before delivering the real pass. Correction: In later progressions, allow the feeder to use one deliberate fake before releasing. This teaches the GK to wait for the elbow to commit, not just the shoulder.
Mistake 5: Failing to recover after a missed intercept.
After a failed intercept attempt, some GKs momentarily switch off, allowing the GS to receive and shoot uncontested. Correction: Make recovery mandatory — the drill does not reset until the GK has re-established a legal defensive position behind the receiver. Award a point to the attacking team if the GK fails to recover within 2 seconds.
Variations & Progressions

Progression 1 — Add a Third Receiver (GS, GA, and a Cutting WA).
Introduce a Wing Attack who cuts into the goal third from outside, giving the feeder a third pass option. The GK must now cover a wider arc and make faster decisions. This replicates the pressure of a real game where the GK cannot simply split their attention between two known targets.
Progression 2 — Live Shooting Consequence.
If the GK fails to intercept, the GS or GA is permitted to shoot immediately (from where they receive). The GK must then defend the shot as well. This raises the stakes of every repetition and prevents the GK from treating a missed intercept as a neutral outcome. Score the drill: GK earns 1 point per intercept, attackers earn 1 point per goal.
Variation 1 — Slow-Motion Positioning Walk-Through.
For beginners or when introducing the drill for the first time, run the entire sequence at walking pace. The feeder walks toward one receiver, the GK walks through the positioning adjustment, and the pass is delivered at 50% speed. This allows the coach to pause at any moment and correct body angles before bad habits form.
Variation 2 — GK Starts Facing Away.
The GK begins with their back to the feeder (facing the post). On the coach's whistle, they turn, locate the feeder, establish their stance, and then the feeder releases the pass after a 2-second delay. This simulates the GK recovering from a goal attempt and having to quickly re-engage defensively.
Age Adaptations

Under 10 / Modified Netball (High 5): Reduce the drill to two players — one feeder and one GK. Remove the second receiver entirely. Use a slower, looping pass so the GK has more time to react. Focus solely on the ready stance and the concept of "getting between the ball and the post." Court dimensions in High 5 are smaller, so adjust the feeder's position to approximately 1m outside the circle.
Under 12 / Under 14: Run the drill as described in the standard setup. Limit the feeder to straight chest passes only — no lobs or bounce passes — so the GK can focus on reading direction without the added complexity of varying ball trajectory. Introduce the scoring system (intercept vs. goal) to add competitive motivation.
Under 16 / Open Age: Apply all progressions. Allow the feeder to use fakes, lobs, bounce passes, and variable timing. Introduce the cutting WA as a third receiver. Time the drill in 3-minute blocks and track intercept success rate as a percentage. Challenge the GK to achieve a 40% intercept rate, then 50%, then 60% as a performance benchmark across the season.