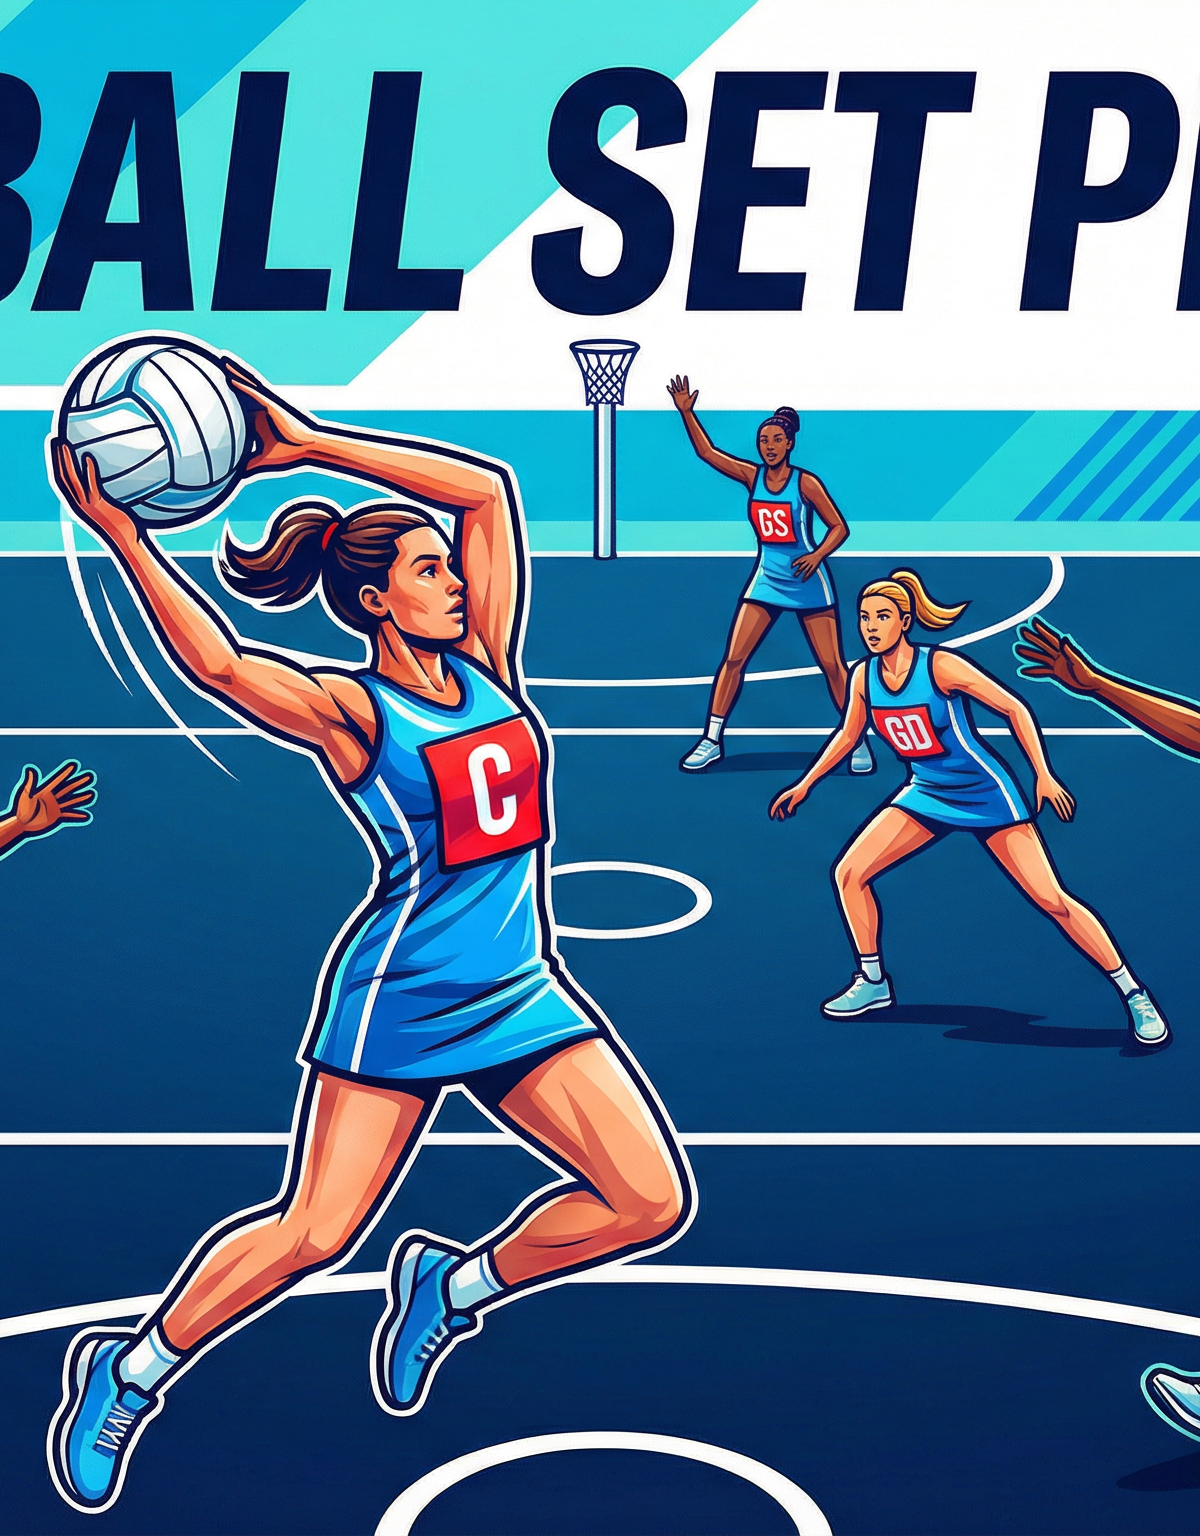
Full-Court Transition Attack: Three-Stage Attacking Play from Defence
Master a structured three-stage attacking play that moves the ball from your defensive goal circle to a clean goal circle entry in under six passes, giving your team a decisive scoring advantage from turnover situations.
Equipment Needed
Overview
The Three-Stage Transition Attack is a structured, high-tempo set play designed to convert defensive possession into a goal-scoring opportunity in a controlled, repeatable sequence. It is most effective immediately after a turnover in the defensive third — a rebound off the post, an intercept by GK or GD, or a forced error by the opposition's attacking players.
The play exploits the brief moment of defensive disorganisation that follows a turnover. By moving the ball through three distinct stages — a defensive third build-up, a mid-court transition, and an attacking third finish — your team creates numerical advantage in the shooting end before the opposition can reset their defensive structure.
This play is suitable for teams at intermediate to advanced level and is particularly effective in the final quarter when the opposition is fatigued and slow to recover defensively.
Setup

Court: Full netball court, 30.5m x 15.25m, divided into three equal thirds of approximately 10.17m each. Goal circles have a radius of 4.9m.
Equipment required: 1 netball (size 5 for open/senior, size 4 for under-12 and below), cones to mark reference positions during training, bibs in two colours for opposed practice.
Players required: All 7 positions — GK, GD, WD, C, WA, GA, GS.
Starting positions for the set play:
| Position | Starting Location | Role in Play |
|---|---|---|
| GK | Defensive goal circle | Ball carrier — initiates Stage 1 |
| GD | Left side of defensive third, ~3m from circle edge | First receiver |
| WD | Right side of defensive third, near transverse line | Decoy then mid-court link |
| C | Centre circle area | Mid-court pivot |
| WA | Right side of centre third | Primary mid-court receiver |
| GA | Attacking transverse line, left side | Circle entry driver |
| GS | Attacking goal circle, front-left position | Shooting target |
Step-by-Step Instructions

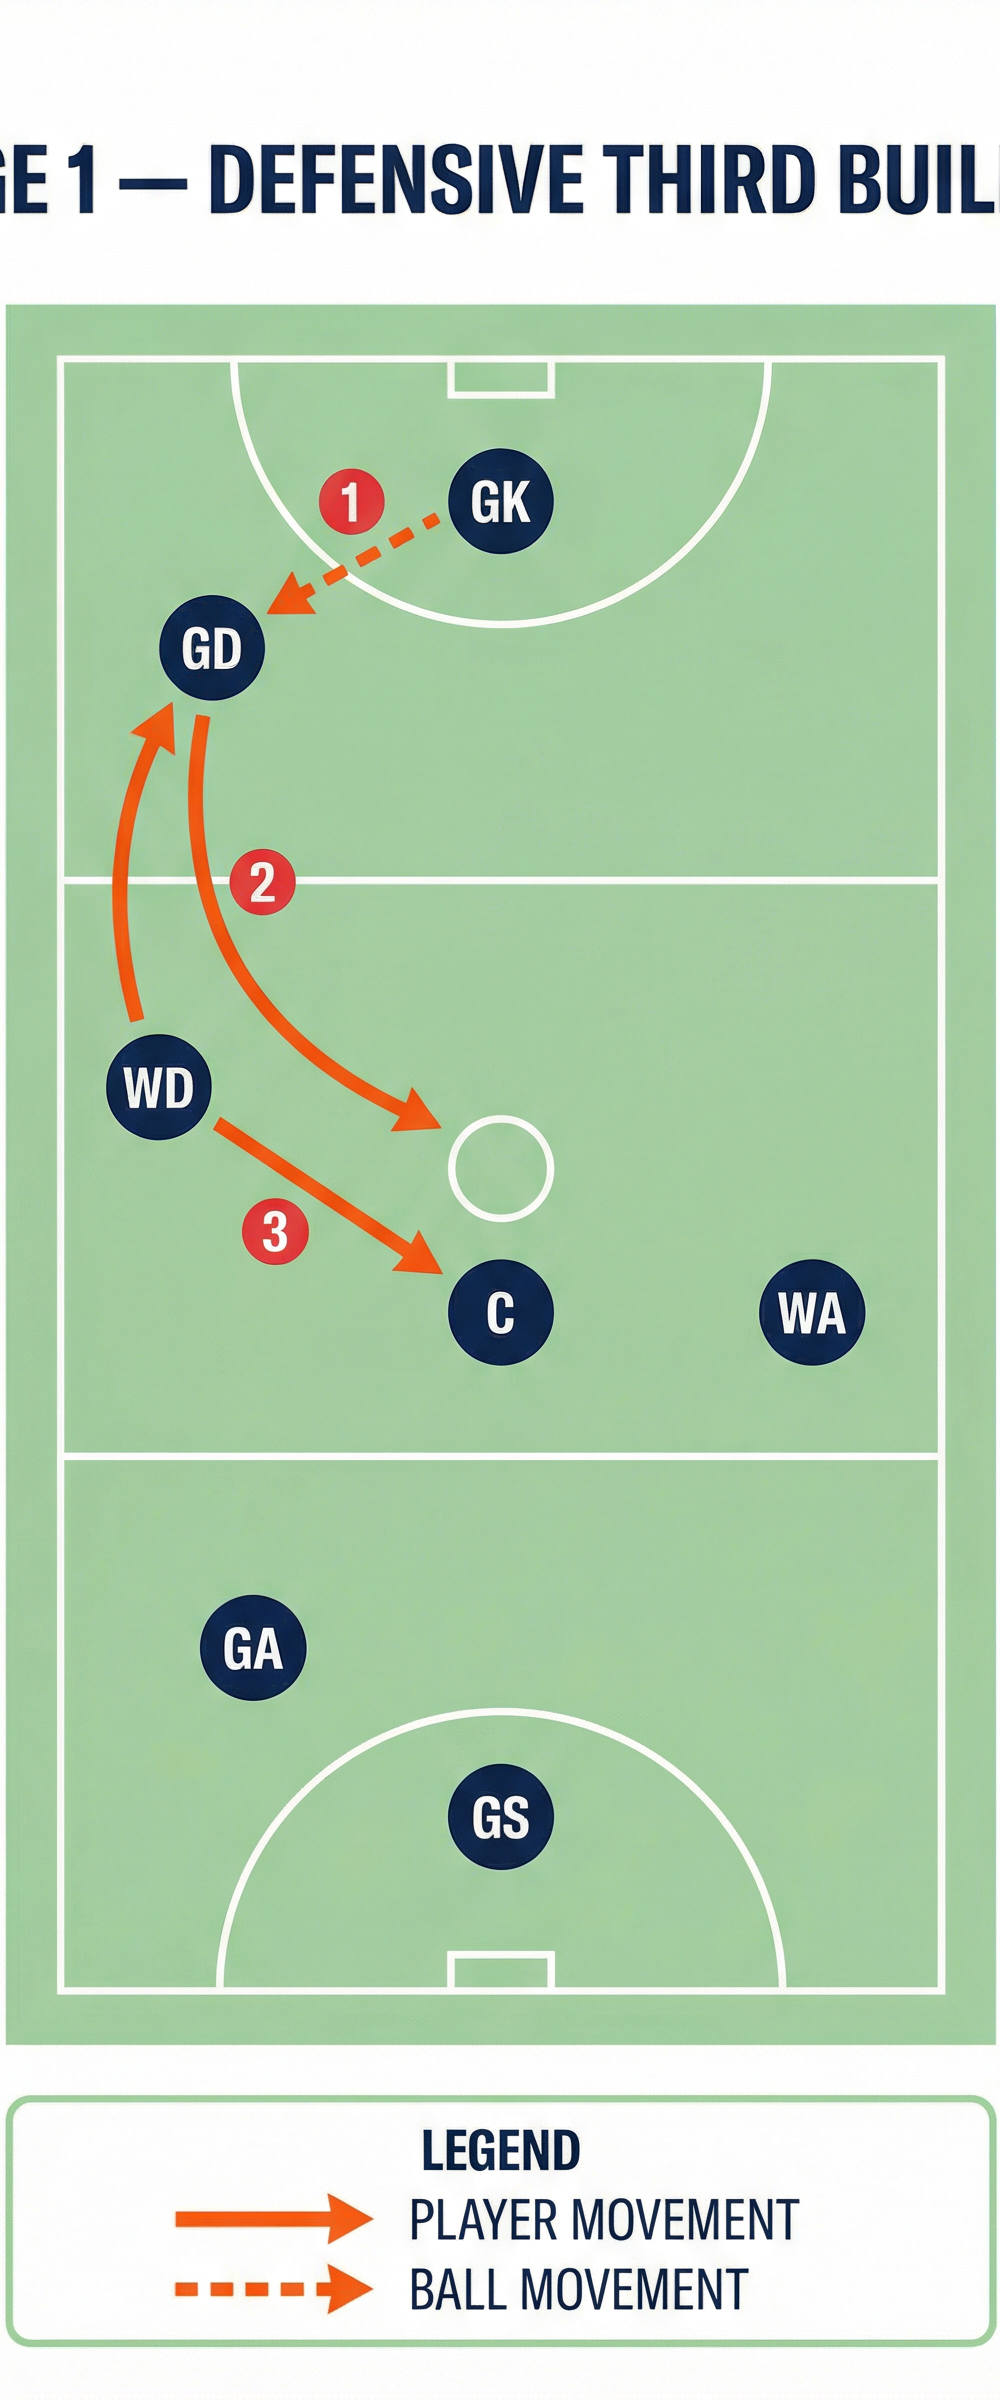
Stage 1 — Defensive Third Build-Up (Steps 1–3)
Step 1 — GK secures possession and looks up immediately. The moment GK gains possession (intercept, rebound, or opponent's out-of-court ball), she plants her landing foot, pivots to face up-court, and scans for GD's lead. GK must not hold the ball longer than 3 seconds. The urgency here is critical — every half-second counts in exploiting the opposition's disorganisation.
Step 2 — GD makes a sharp lead to the left side of the defensive third. GD times her lead to arrive as GK is ready to release. The lead should be a hard, two-step drive toward the left sideline, creating a clear passing lane. GD receives the ball approximately 4–5m from the goal circle edge. Upon receiving, GD immediately pivots to face up-court.
Step 3 — WD provides a secondary option while C begins her centre-circle approach. As GD receives, WD makes a diagonal run from the right side of the defensive third toward the centre of the court, offering GD a release option if pressure arrives. Simultaneously, C begins moving toward the centre circle to prepare for Stage 2. GD passes to WD or directly to C depending on defensive pressure.

Stage 2 — Mid-Court Transition (Steps 4–6)
Step 4 — C receives in the centre circle and immediately looks to WA. C's role is to be a quick-hands pivot, not a ball-holder. She receives the ball in or near the centre circle, takes one step to create a passing angle, and delivers a long diagonal ball to WA on the right side of the court. The pass should travel approximately 6–8m and be timed to meet WA at the peak of her lead.
Step 5 — WA makes a sharp lead run forward along the right sideline. WA's lead begins just before C receives the ball. She drives hard toward the attacking transverse line, receives the ball on the move, and immediately looks to GA making her circle-entry drive. WA should be positioned approximately 2–3m inside the attacking third when she receives.
Step 6 — GA times her circle-entry lead to arrive as WA receives. GA's timing is the most critical element of Stage 2. She must begin her lead drive from the attacking transverse line as WA catches the ball, driving hard toward the front of the goal circle. GA should aim to receive the ball from WA approximately 1–2m outside the goal circle edge, giving her momentum to drive in.

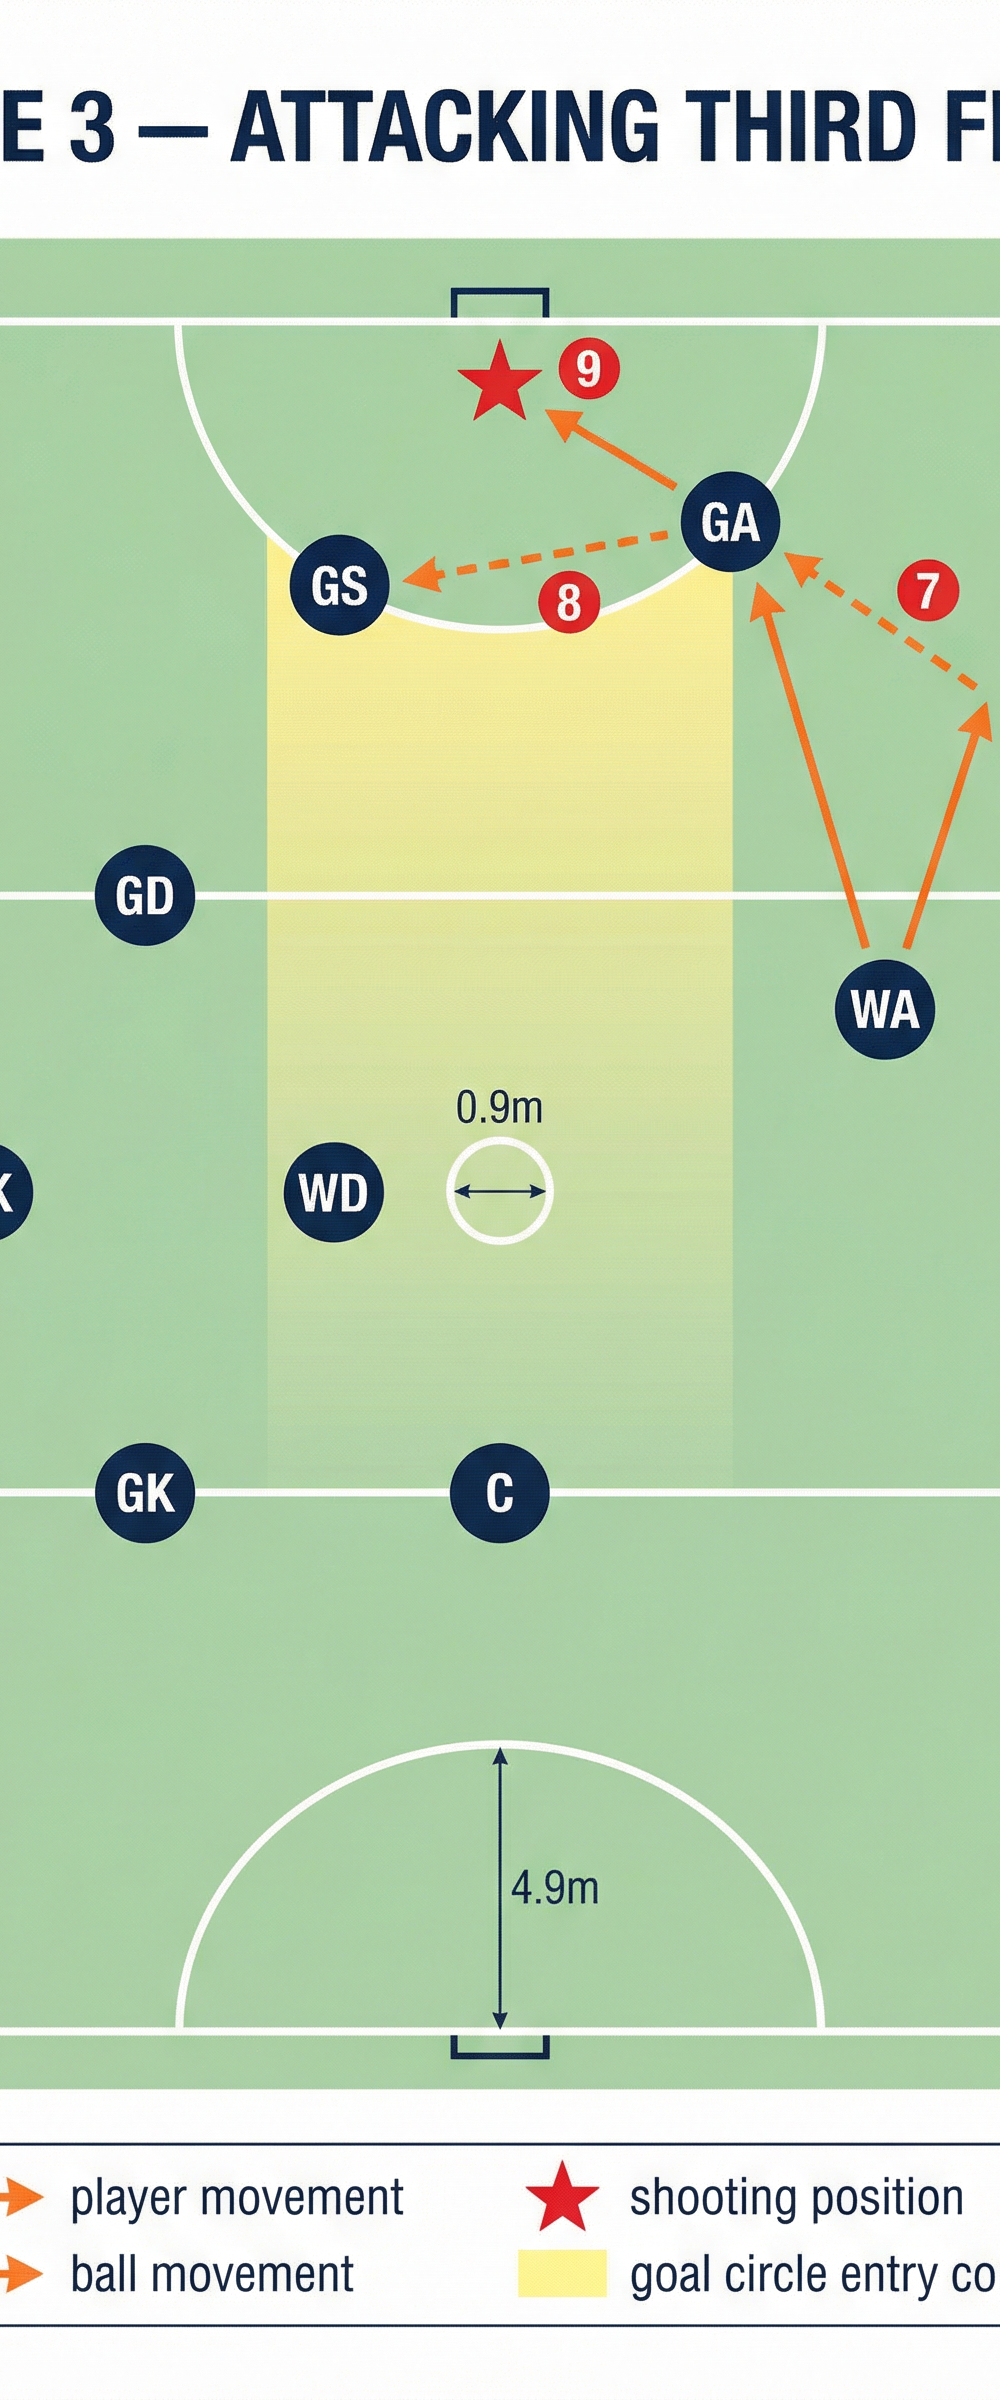
Stage 3 — Attacking Third Finish (Steps 7–9)
Step 7 — WA delivers a flat, fast pass to GA at the circle edge. The pass from WA to GA should be delivered at chest height, flat and fast. GA must have both feet outside the circle when she receives. This pass completes the transition from mid-court to the attacking third and triggers the final stage of the play.
Step 8 — GA drives into the goal circle and feeds GS. GA receives outside the circle and immediately drives into the circle, looking for GS on the left side. GS should have positioned herself on the left side of the circle, away from the main defensive pressure. GA delivers a short, accurate pass — a bounce pass or chest pass depending on the defender's position — into GS's hands.
Step 9 — GS receives and shoots. GS receives the ball in a strong, balanced position inside the goal circle. She should be within 3m of the post for a high-percentage shot. GS takes her shot immediately — do not allow the defence time to recover. The entire play from GK's first pass to GS's shot should take no longer than 8–10 seconds.
Key Coaching Points
Urgency is everything in Stage 1. The play lives or dies on GK's speed of release. Drill your GK to look up and pass within 1.5 seconds of gaining possession. Use a stopwatch in training to build this habit.
Lead timing, not lead distance. Players often make their leads too early and arrive at the receiving position before the ball is ready. Emphasise that leads should be timed to arrive as the ball is being released, not before. A well-timed 3m lead beats a poorly timed 6m lead every time.
C is a pivot, not a destination. The Centre's job in this play is to redirect the ball quickly, not to hold it. If C is holding the ball for more than 1.5 seconds, the play has broken down. Reinforce quick hands and immediate decision-making at the centre-circle position.
GA's circle entry must be driven, not walked. The transition from receiving outside the circle to feeding GS inside the circle must be explosive. GA should be moving at pace when she enters the circle — this makes her harder to defend and creates momentum that puts the defence on the back foot.
GS must be in position before the ball reaches GA. GS should not wait to see where GA is going before moving. She must read the play and pre-position herself on the left side of the circle as WA receives from C. Reactive positioning is too slow at this stage of the play.
WD and C provide reset options at every stage. If any pass in the sequence is not on, the ball-carrier must have a reset option available. WD and C should always be positioned to receive a backward or sideways pass to restart the play safely rather than forcing a risky ball.
Common Mistakes
1. GK holds the ball too long after gaining possession. This is the most common breakdown point. GK is often focused on securing the ball cleanly and forgets to look up immediately. Correct this by drilling GK to call "mine" loudly on contact and pivot to face up-court as part of the same movement sequence.
2. Players leading too early and standing still when the ball arrives. A player who has already completed her lead and is standing still is easy to defend. Emphasise that the lead should be a continuous movement — drive, receive, and continue moving into the next position. Use the coaching cue: "Lead late, arrive fast."
3. WA drifting too wide on the right sideline. If WA positions herself too close to the sideline, she reduces her passing angle to GA and makes the Stage 2 pass more difficult. WA should stay at least 2m inside the sideline to maintain a wide passing corridor to GA.
4. GA receiving too far from the goal circle. If GA's lead takes her 4–5m from the circle edge, she has too much ground to cover before feeding GS, giving the defence time to recover. GA's receiving position should be no more than 2m outside the circle edge. Use cones in training to mark the ideal receiving zone.
5. GS moving to the wrong side of the circle. GS must read the play and position herself on the side away from the main defensive pressure. If GS moves to the right side of the circle when GA is driving from the right, the passing lane is congested. Reinforce circle awareness and communication between GA and GS throughout training.
Variations & Progressions
Variation 1 — Left-Side Mirror Play. Run the identical play with GD on the right side and WA on the left, mirroring all movements. This gives your team an alternative that exploits a weak defensive left side and prevents the opposition from reading your transition pattern.
Variation 2 — C as the Circle Entry Driver. In this variation, C continues her run through the centre third and into the attacking third, replacing GA as the circle-entry driver. GA moves to a wide position to draw her defender away from the circle, creating space for C's late run. This is highly effective against teams that leave C unguarded in the attacking third.
Progression 1 — Add passive then active defenders. Begin the play with no defenders (walk-through), then add passive defenders who shadow but do not intercept, then progress to fully active defenders. This builds confidence and decision-making under increasing pressure.
Progression 2 — Conditioned game trigger. In a conditioned game, award a bonus point whenever the team successfully completes all three stages of the play and scores. This builds competitive application of the set play under match-realistic pressure.
Age Adaptations
Under-10 / Under-12: Reduce the play to two stages — a defensive third pass to C, then a direct feed into GS. Focus on the concept of moving the ball quickly after a turnover rather than the full three-stage sequence. Use a walking pace initially, then jogging. Emphasise fun and basic lead timing rather than tactical precision.
Under-14: Introduce the full three-stage play but allow more time between stages. Reduce the time pressure and focus on correct positioning and lead patterns. Use cones to mark target receiving zones for each player. Introduce the left-side mirror variation once the base play is consistent.
Under-16 / Open: Run the play at full speed against active defenders. Introduce the C circle-entry variation and the conditioned game trigger. Challenge players to complete the play within a 10-second target time. Introduce video analysis — film the play in training and review decision-making points with the squad.