Passing Accuracy Under Pressure: The Gauntlet Drill
Develop your players' ability to make crisp, accurate passes while absorbing defensive pressure and reading defensive rotations.
Equipment Needed
1. Overview
The 'Passing Accuracy Under Pressure' drill—often referred to as 'The Gauntlet'—is designed to bridge the gap between static passing lines and live game situations. In modern basketball, players rarely have the luxury of making uncontested passes. This drill forces players to maintain their vision, protect the ball, and deliver accurate passes while actively being guarded. It is highly effective for reducing turnovers against pressure defense and improving overall offensive flow.
When to use it: Use this drill during the early to middle portion of practice, following your dynamic warmup. It serves as an excellent transition from fundamental skill work into competitive, small-sided games.
2. Setup
- Court Space: Half-court or Full-court depending on the phase.
- Players: Groups of 3 to 5 players per station.
- Equipment: 1 basketball per group, 4-6 cones for boundary marking, and optionally, heavy training pads for the defense to simulate contact safely.
- Positions:
- Offense: 1 (Point Guard), 2 (Shooting Guard), 3 (Small Forward)
- Defense: D1, D2
3. Step-by-Step Instructions
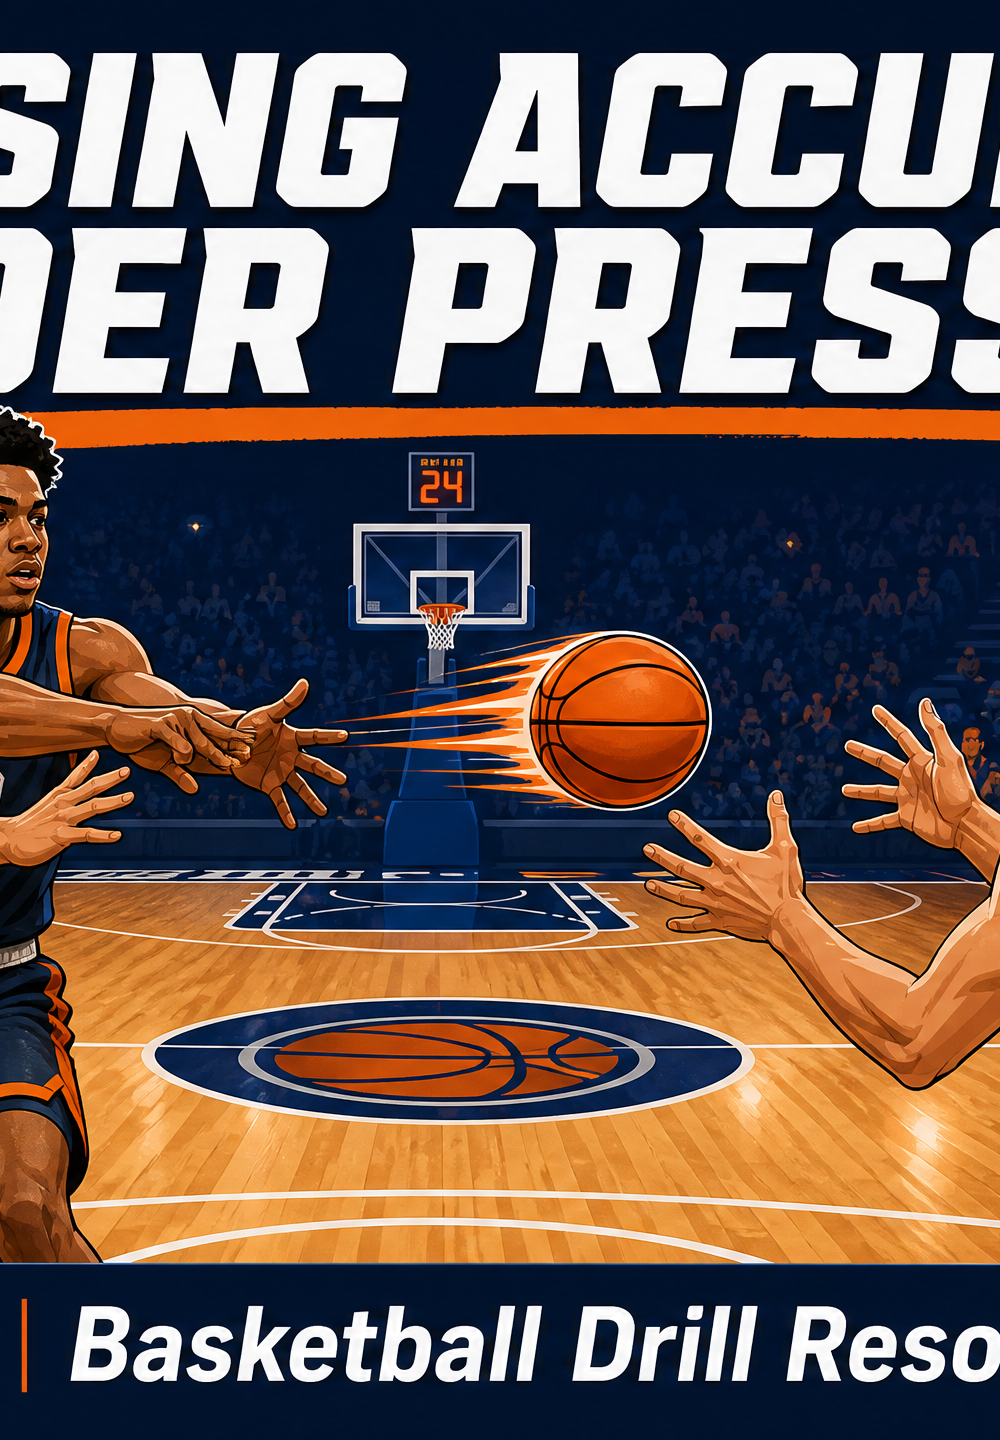
Phase 1: Passing Pairs with Defender
- Initial Alignment: Position Player 1 (the passer) at the top of the key. Position Player 2 (the receiver) on the wing, just outside the three-point line. Place Defender D1 directly in front of Player 1.
- The Action: On the coach's whistle, D1 applies active, 'in-your-jersey' pressure on Player 1. Player 1 must pivot, protect the basketball, and find a passing window.
- The Pass: Player 1 executes a strong pass (chest, bounce, or overhead) to Player 2.
- The Cut: Immediately after passing, Player 1 must execute a hard cut toward the basket or relocate to an open space, simulating a 'pass and cut' action.
- Rotation: Player 1 becomes the defender (D1), D1 moves to the receiving line (Player 2), and Player 2 takes the ball to the top of the key to become the new passer.
Phase 2: Full-Court Pressure Passing Circuit
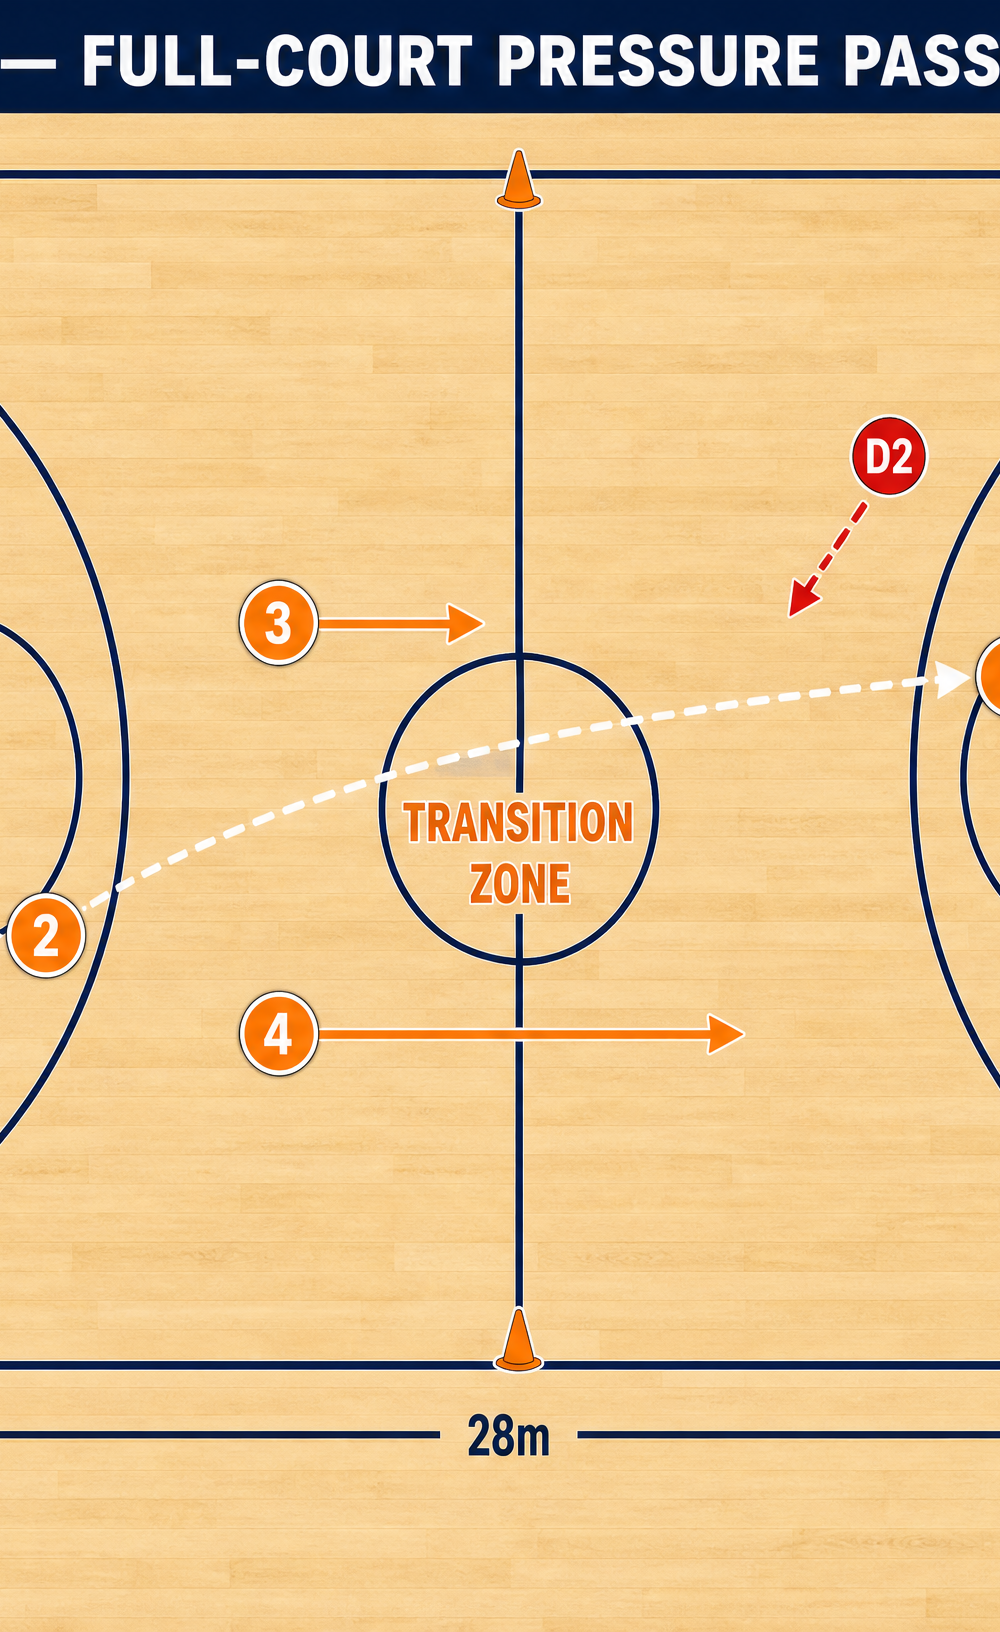
- Expansion: Move the drill to full-court. Set up three distinct zones: Pressure Zone (defensive third), Transition Zone (middle third), and Finish Zone (offensive third).
- Execution: Player 1 starts in the Pressure Zone with D1 defending tightly. Player 1 must advance the ball to Player 2 via a pass under pressure.
- Transition: Once Player 2 receives the ball, they must immediately look up the floor and deliver a long outlet pass to Player 5 streaking into the Finish Zone.
- Continuous Flow: Players 3 and 4 fill the lanes to simulate a fast break, requiring the passer to make split-second decisions on the primary target.
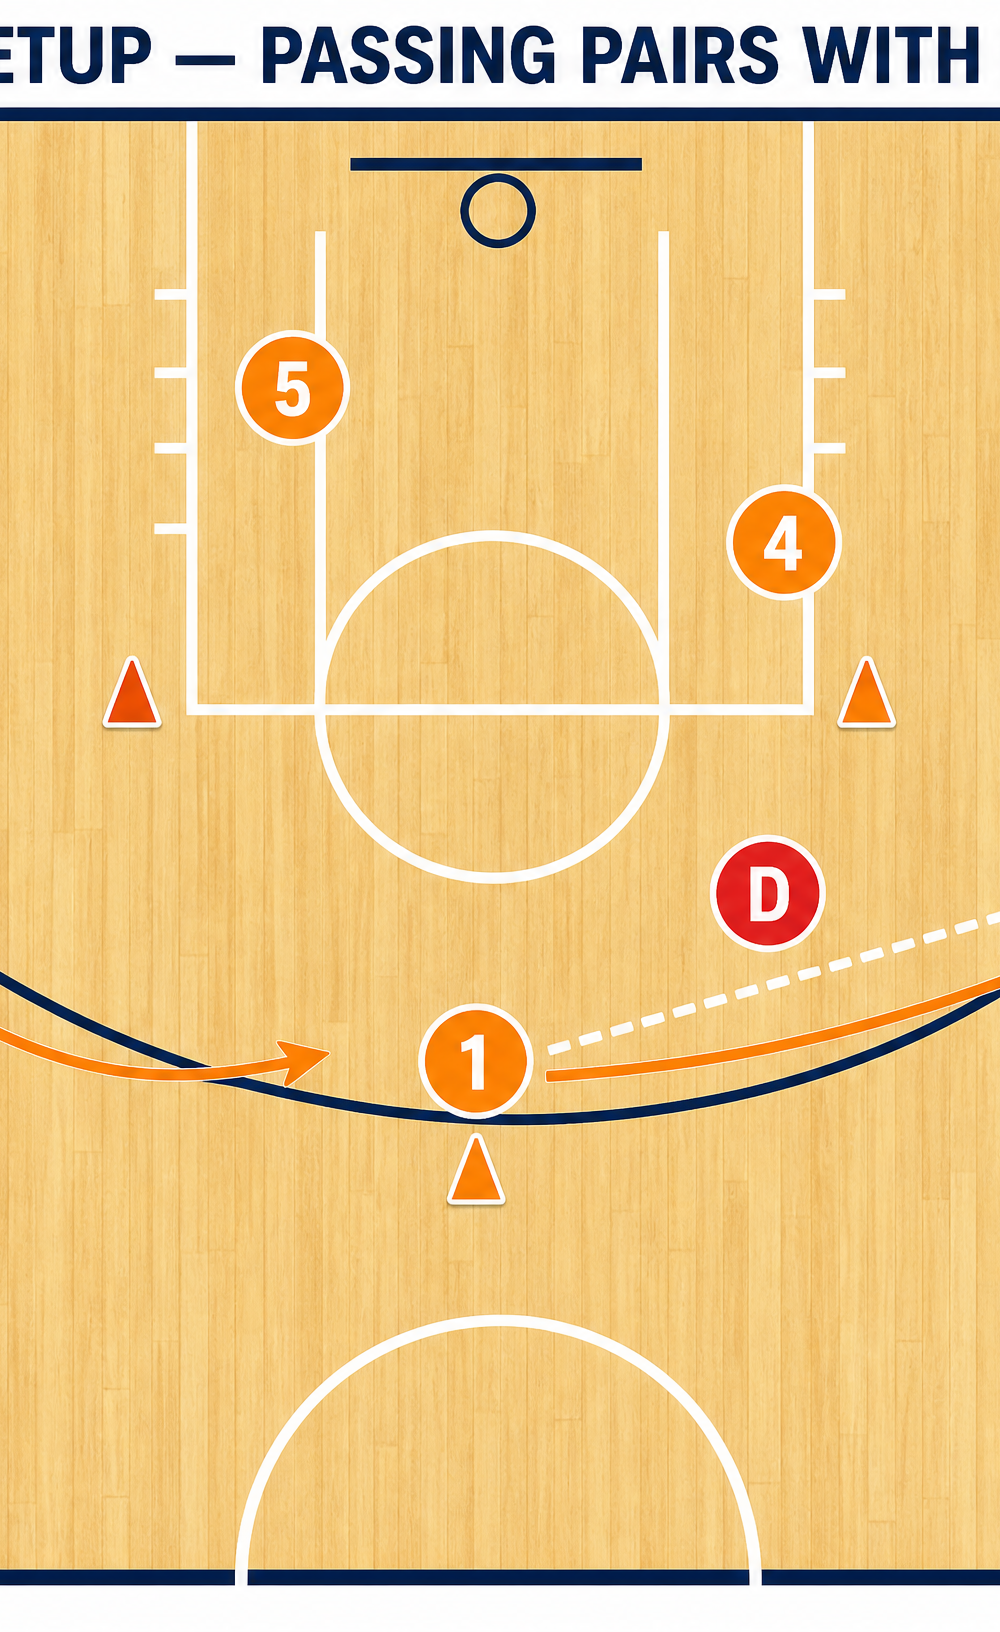
Phase 3: 3-on-2 Pressure Finish
- Live Action: Transition the drill into a live 3-on-2 scenario. Three offensive players start at half-court and attack two defenders waiting in the paint.
- Decision Making: The ball handler (Player 1) must engage the top defender (D1) and make a read: either pass to the wing (Player 2 or 3) or drive to the basket if the defense over-commits.
- Finishing: The offense has a maximum of 3 passes to secure a high-percentage shot.
4. Key Coaching Points
- Pivot with Purpose: Emphasize strong, balanced pivoting. Players must use their bodies to shield the ball from the defender before initiating the pass.
- Fake a Pass to Make a Pass: Teach players to use ball fakes to shift the defender's balance and open up passing lanes.
- Meet the Pass: Receivers must aggressively step toward the ball rather than waiting for it to arrive, preventing defensive deflections.
- Eye Contact: The passer and receiver must establish eye contact before the pass is thrown to ensure readiness.
- Pace on the Ball: Passes must be crisp and delivered with velocity. Looping or slow passes will be intercepted in game situations.
5. Common Mistakes
- Turning the Back: The passer turns their back entirely to the defense and the court, losing vision of the receiving targets.
- Telegraphing the Pass: Staring down the intended receiver, allowing the defense to easily anticipate and jump the passing lane.
- Weak Receiving: The receiver stands flat-footed and waits for the ball, allowing a recovering defender to step in front for a steal.
- Over-Dribbling: The ball handler attempts to escape pressure by taking unnecessary dribbles instead of utilizing pivots and fakes.
6. Variations & Progressions
- Add a Shot Clock: Implement a 5-second count for the passer to get the ball out of their hands, simulating late-game pressure.
- Trapping Defense: Progress to a 2-on-1 trapping scenario where the passer must escape a double team before finding the open receiver.
- Contact Pads: Have the defender use heavy blocking pads to bump the passer, forcing them to maintain balance and focus through physical contact.
7. Age Adaptations
- Under 10s: Remove the active defender initially. Use a coach or a stationary cone to represent the defense, focusing purely on the mechanics of pivoting and passing.
- Under 12s - Under 14s: Introduce 'token' defense where the defender has their hands up but does not actively try to steal the ball, allowing the offense to build confidence.
- Under 16s - Open: Full live defense. Encourage high intensity, physical pressure, and rapid decision-making.

