Support Running and Angles: Breaking the Gain Line Through Intelligent Positioning
Teach your players to read the ball carrier, run the right angle, and arrive at pace — the three fundamentals that turn individual carries into team tries.
Equipment Needed
Overview
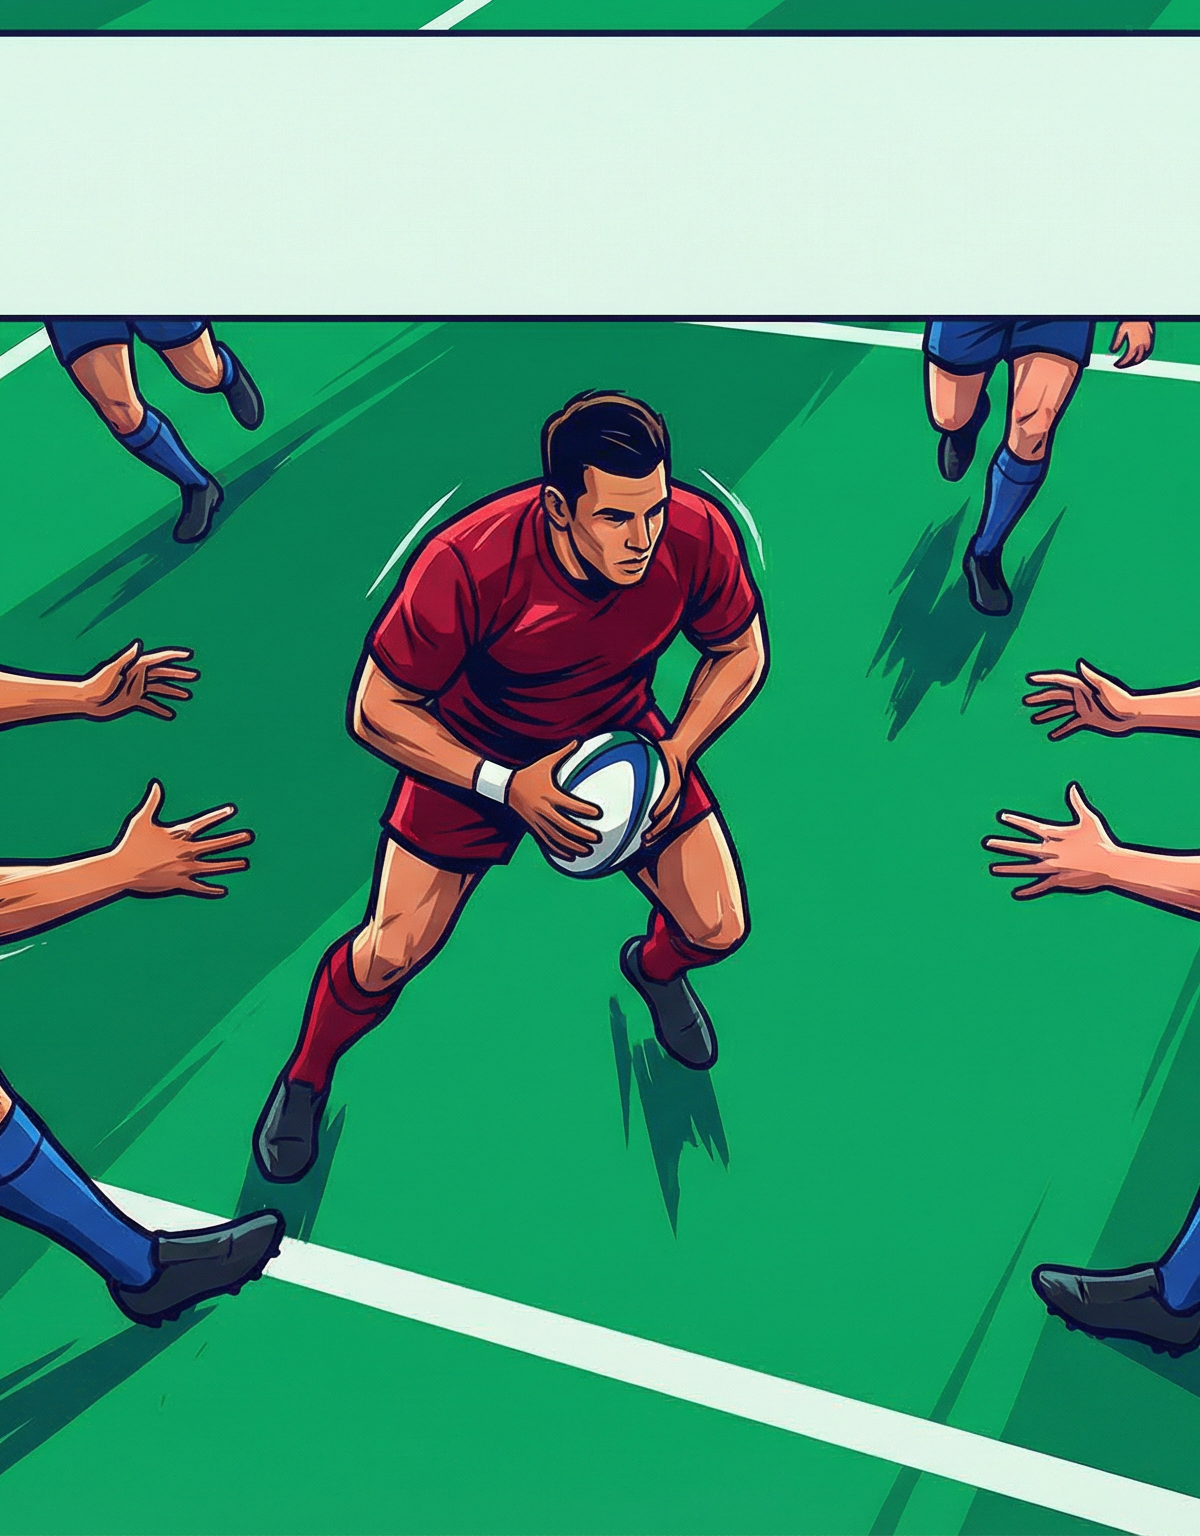
Support running is the engine of attacking rugby. A ball carrier who knows that help is arriving at the right angle and at pace will make better decisions, hold defenders longer, and ultimately create more scoring opportunities. This drill isolates the three core disciplines of effective support play — depth of starting position, angle of run, and timing of arrival — and trains them in a structured, progressively competitive environment.
Use this drill in the skill-development block of any attacking session, ideally after a warm-up that includes dynamic passing and footwork. It is equally effective for backs units working on their channel attack and for forwards developing offload and breakdown support habits. At its core, this drill teaches players that support running is not about chasing the ball — it is about arriving where the ball is going to be.
Setup

Pitch Area: Mark out a 30m x 20m grid using cones on a standard 100m x 70m pitch. Position the grid centrally between the 22m and the halfway line to replicate the most common attacking zone in match play.
Equipment Required:
- 12 cones (4 to mark grid corners, 8 to mark internal channels and start gates)
- 4–6 rugby balls
- Coloured training bibs (2 sets: attackers and defenders)
- 1 coach or assistant positioned at the side for observation
Player Numbers: 9–15 players (works with a minimum of 9 for the core drill; additional players rotate in)
Positions Used:
- 9 — Scrum-half (ball distributor)
- 10 — Fly-half (primary ball carrier / decision-maker)
- 12 — Inside Centre (flat support runner)
- 13 — Outside Centre (wide arc support runner)
- 11 / 14 — Wingers (wide option, used in progressions)
- D1 / D2 — Two defenders (introduced in Phase 2 and beyond)
Duration: 25–35 minutes total (including all phases and rotations)
Tactical Diagrams

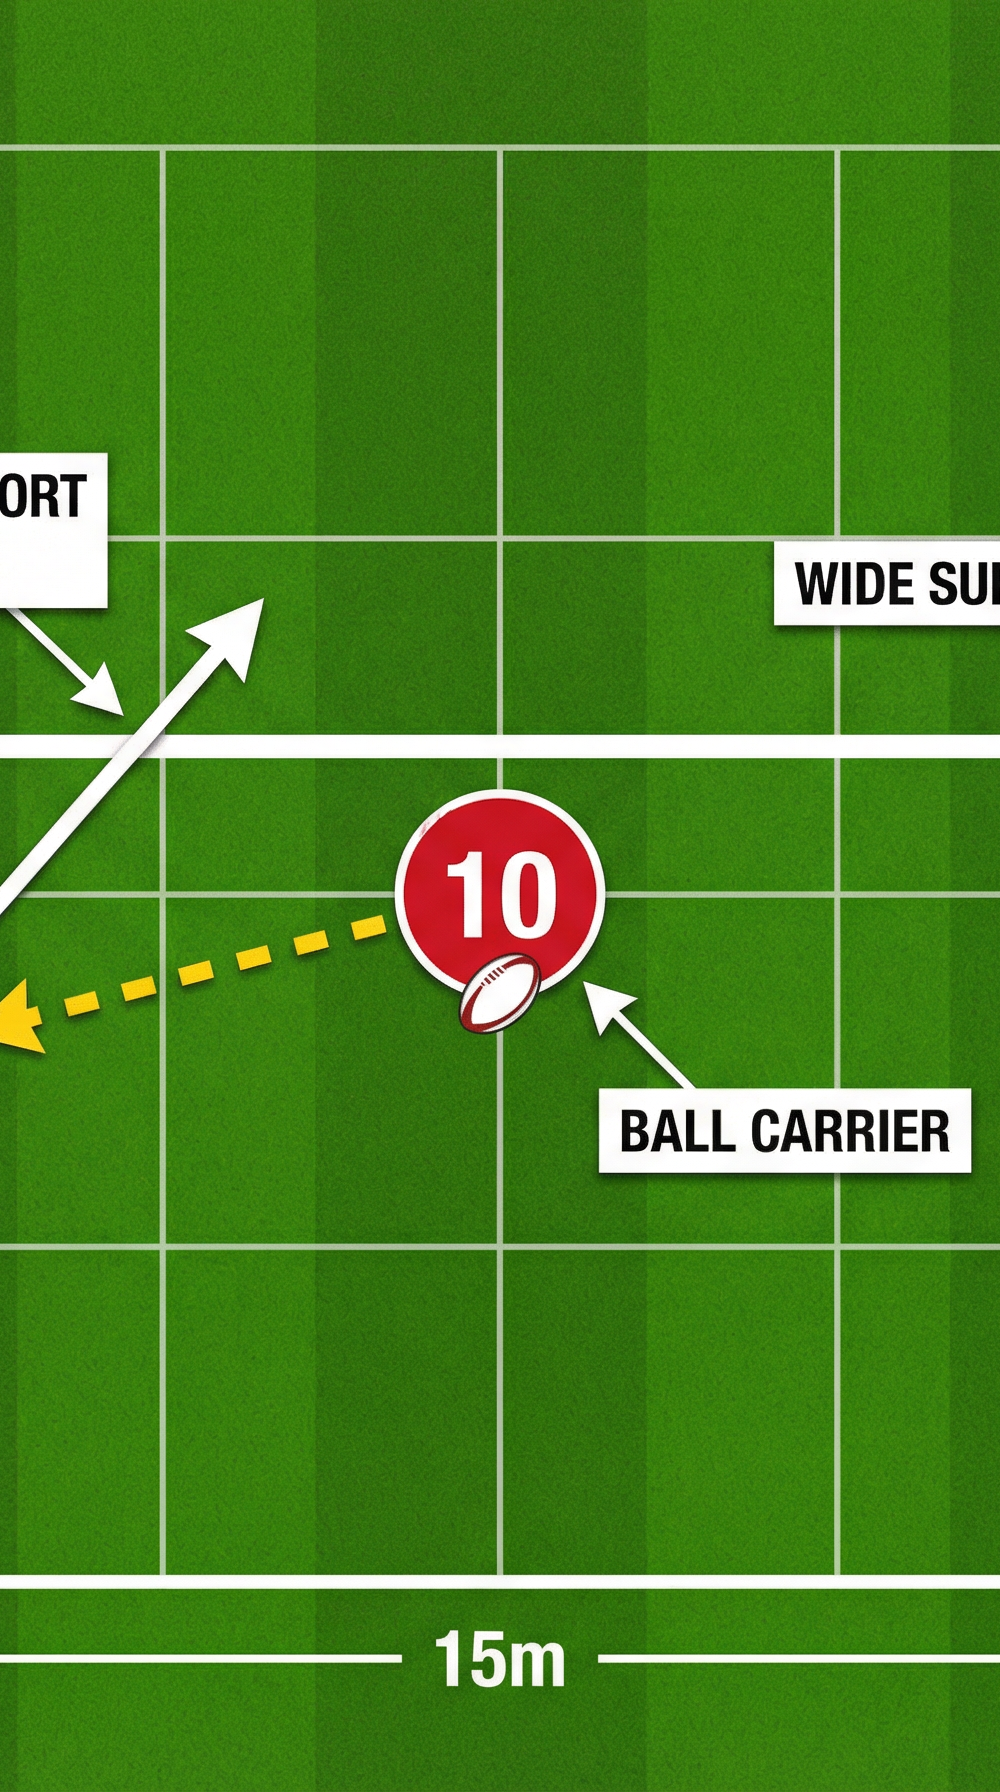
Diagram 1 — Support Angles: Flat Line vs. Wide Arc

Diagram 1 shows the two primary support angles available to the inside centre (12) and outside centre (13) when the fly-half (10) carries the ball. The flat support line from 12 creates an immediate short-pass option on the gain line. The wide arc from 13 creates a second-phase option in space beyond the first defender.
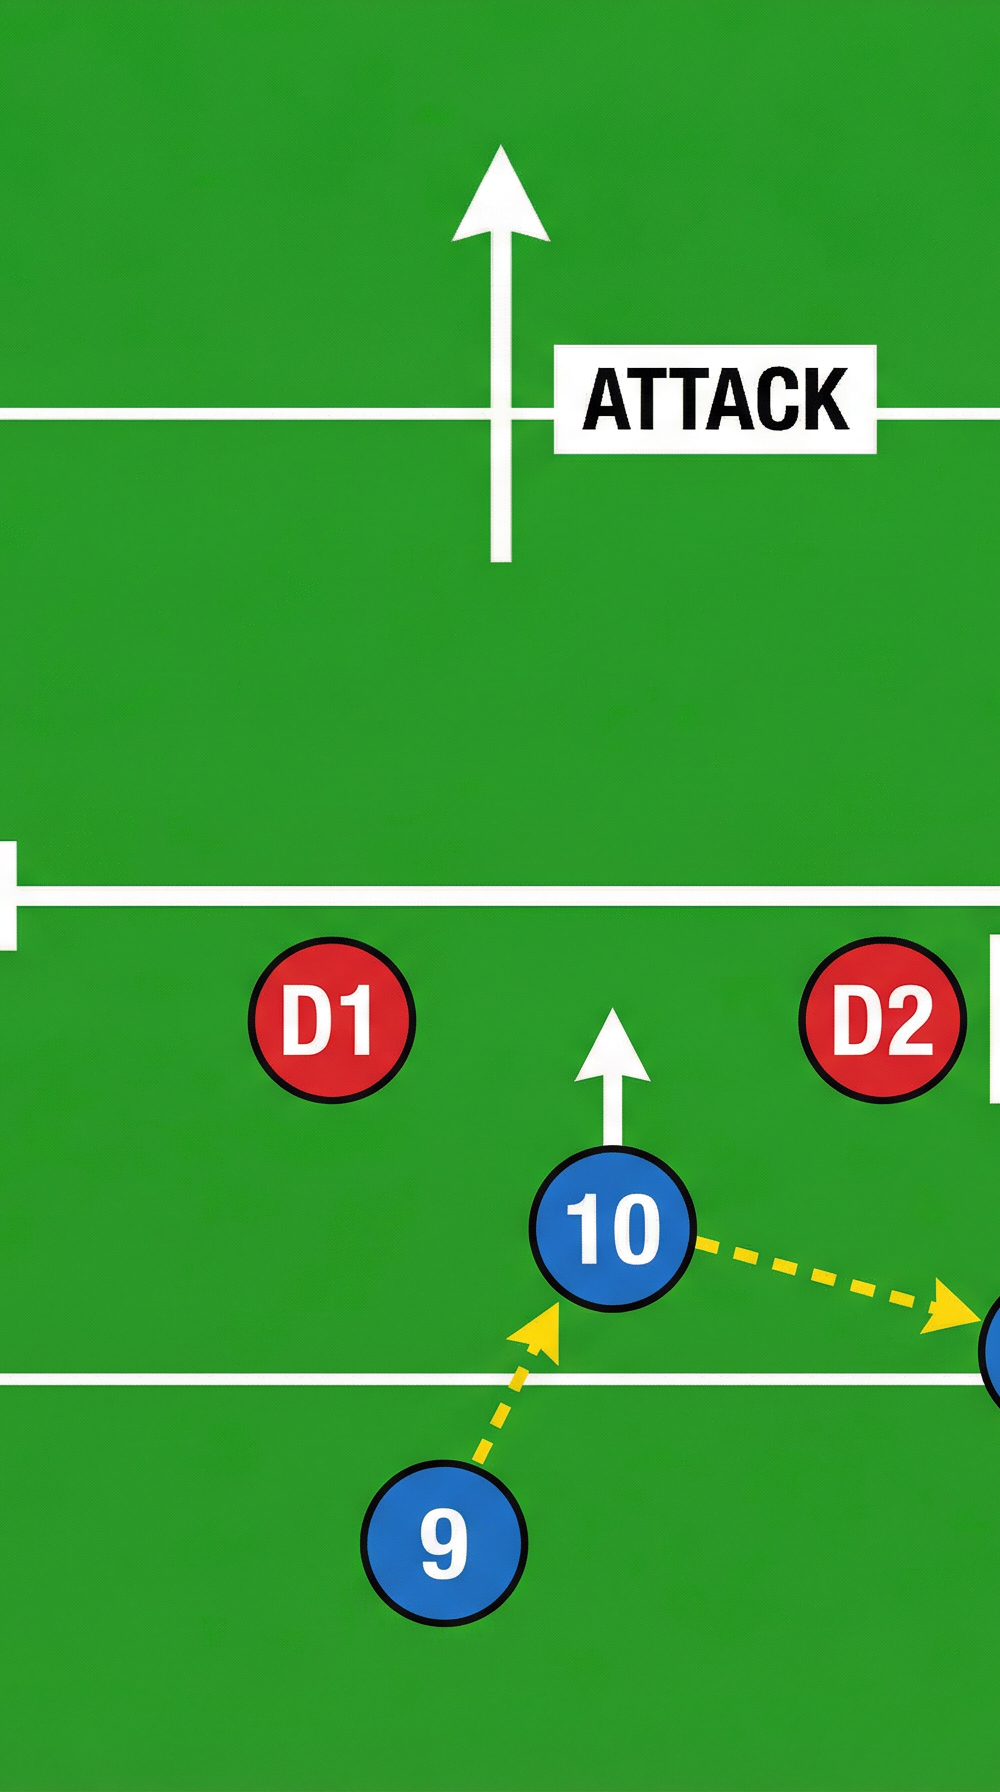
Diagram 2 — 3-on-2 Overlap: Reading the Defender to Fix and Pass

Diagram 2 shows the 3-on-2 scenario that the drill builds toward. The scrum-half (9) distributes to the fly-half (10), who must read defenders D1 and D2. The outside centre (13) runs a support angle that exploits the space beyond D2. The ball carrier must hold D1 long enough to commit them before releasing to 13.
Step-by-Step Instructions
Phase 1 — Unopposed Angle Drill (8 minutes)
- Position 9 at the back of the grid with a ball. 10 stands 3m ahead and 2m to the right of 9, simulating a flat first-receiver position.
- 12 starts 5m behind and 4m to the left of 10 (inside shoulder). 13 starts 5m behind and 8m to the right of 10 (outside shoulder).
- On the coach's whistle, 9 passes to 10. The moment the ball leaves 9's hands, 12 and 13 begin their support runs.
- 12 runs a flat, slightly diagonal line — targeting a point 1m ahead of 10's current position on the gain line. This is the "short-ball" support option.
- 13 runs a wide looping arc — curving out to the right before straightening up 3–4m ahead of 10. This is the "wide-ball" option that beats the outside defender.
- 10 calls either "FLAT" (pass to 12) or "WIDE" (pass to 13) and executes the pass at full pace.
- The receiver must catch and run through a cone gate 5m ahead to complete the rep.
- Rotate positions after every 3 repetitions. Run 6 total reps per group before rotating the full group.
Coach's Cue: Stand behind the grid and watch the support runners' starting depth. If they are level with or ahead of the ball carrier at the moment of the pass, they are offside in a match and will be making the ball carrier's decision harder, not easier.
Phase 2 — Decision-Making with Passive Defenders (10 minutes)
- Introduce D1 and D2 as passive (walk-pace) defenders positioned 5m ahead of the gain line, spaced 6m apart.
- Repeat the same starting structure as Phase 1. 9 passes to 10.
- 10 must now read which defender commits to them. If D1 steps up, 10 holds the ball until D1 is within 2m, then passes to 12 (flat line). If D2 drifts wide, 10 attacks the space between D1 and D2 and passes to 13 (wide arc).
- Defenders may not tackle — they shadow and channel the ball carrier to force a decision.
- Run 8 repetitions per group, alternating which defender steps up to vary the decision required.
Phase 3 — Live 3-on-2 (10 minutes)
- Defenders are now fully active and may tackle (or touch-tackle for younger/beginner groups).
- The attacking trio of 9, 10, and either 12 or 13 must score by crossing the far try line.
- If the ball is turned over or goes dead, the next group enters immediately.
- Rotate defenders every 4 repetitions to ensure all players experience both roles.
Key Coaching Points
1. Start Deep, Arrive Flat. Support runners must begin their run from behind the ball carrier. A runner who starts level or ahead will be running away from the ball carrier's pass and will arrive either offside or out of control. The rule of thumb: start 2–3m deeper than you think you need to be.
2. Run to Space, Not to the Ball. The most common error in junior rugby is support runners chasing the ball carrier's current position. Teach players to project where the ball carrier will be in 2 seconds and run to that point. This is the difference between arriving at pace and arriving late.
3. The Ball Carrier Must Fix the Defender. The support runner's angle only creates an opportunity if the ball carrier does their job first. The carrier must run directly at the inside shoulder of the nearest defender to hold them before releasing the pass. If the carrier passes too early, the defender can drift and cover the support runner.
4. Communicate Loudly and Early. Support runners must call for the ball the moment they are in a position to receive it. A clear, early call of "HOLD" or "NOW" gives the ball carrier the information they need to make the right decision under pressure.
5. Hands Ready, Eyes on the Ball. Receivers must present a clear target — both hands extended, palms up — from the moment they enter the ball carrier's peripheral vision. A late or unclear target forces the carrier to look away from the defender, breaking the fix.
6. Accelerate Through the Pass. Support runners must be at full pace when they receive the ball. A runner who decelerates to take the pass loses the momentum advantage that the angle was designed to create. Emphasise that the catch is a moment within a sprint, not a pause before one.
Common Mistakes

Mistake 1 — Running Parallel to the Ball Carrier. When support runners track alongside the ball carrier rather than at an angle, they offer no new information to the defence. The defender can cover both players simultaneously. Correction: place a cone 2m ahead and 3m to the side of the ball carrier's starting position and instruct support runners to run through that cone — this forces the diagonal angle.
Mistake 2 — Passing Too Early Before the Fix. Ball carriers who are anxious about contact will release the ball before the defender is committed. This allows the defender to drift onto the support runner and make the tackle. Correction: use the "2-metre rule" — the carrier must not pass until the defender is within 2m of them. Use a passive defender in training to reinforce this boundary.
Mistake 3 — Support Runners Bunching Infield. Under pressure, players instinctively gravitate toward the ball and toward each other, clustering in the same channel. This eliminates the wide option and makes the defence's job easy. Correction: use coloured cone gates at the correct width (6–8m apart) and require each support runner to pass through their designated gate before receiving the ball.
Mistake 4 — Flat-Footed Waiting. Support runners who stand and watch the play develop before starting their run will always arrive late. Correction: introduce a "movement trigger" — the moment 9's hands move to pass, all support runners must begin their run. Drill this with a clap or whistle as the trigger in early reps.
Mistake 5 — Ball Carrier Telegraphing the Pass. Experienced defenders read the ball carrier's eyes and shoulders. If the carrier looks directly at the support runner before passing, the defender can intercept or drift early. Correction: teach ball carriers to use peripheral vision and to look at the defender's chest, not at the support runner, until the moment of release.
Variations and Progressions

Progression 1 — Add a Third Defender (4-on-3). Once the group is comfortable with the 3-on-2, introduce a third defender and a fourth attacker (winger, position 11 or 14). This replicates the wider channel attack and forces the ball carrier to make a second-level decision: fix the first defender and pass to 12, who must then fix D2 and pass to 13, who attacks the space beyond D3. This chains the support running concept across multiple phases.
Progression 2 — Contact Entry and Offload. Replace the clean pass from 10 with a contact entry: 10 runs at D1, takes the contact, and must offload to 12 or 13 in the tackle. This is a high-skill progression that replicates the offload game used by teams such as the All Blacks and the Lions. Ensure players are technically proficient in the offload before introducing this variation. Suitable for intermediate to advanced groups aged 14 and above.
Variation — Conditioned Game: Support Running Only. Run a 6-on-6 small-sided game in a 30m x 20m grid where a try can only be scored if the final pass before the try line is a support pass (i.e., the scorer must not be the player who received the ball from the ruck or set piece). This conditions players to look for the support option as a default attacking habit rather than an afterthought.
Age Adaptations

| Age Group | Key Adaptations |
|---|---|
| Under 10 | Remove defenders entirely. Run Phase 1 only. Focus solely on the concept of starting behind the ball and running at an angle. Use touch-pass rather than full passes. Grid size: 20m x 15m. |
| Under 12 | Use Phase 1 and Phase 2 (passive defenders only). Introduce the verbal call system ("FLAT" / "WIDE"). Reduce defender pace to walking speed. Grid size: 25m x 18m. |
| Under 14 | Full drill as written, using touch-tackle in Phase 3. Begin introducing the offload progression in the final 5 minutes of the session once core angles are established. |
| Under 16 / Open | Full contact Phase 3. Add the 4-on-3 progression and the conditioned game variation. Challenge players to identify the correct support angle before the ball is passed by calling it aloud. Introduce video review of one or two reps to develop analytical awareness. |
Regardless of age group, the fundamental coaching language should remain consistent: depth, angle, timing, and communication. These four words, repeated across every session, build the muscle memory and decision-making habits that define elite support play.