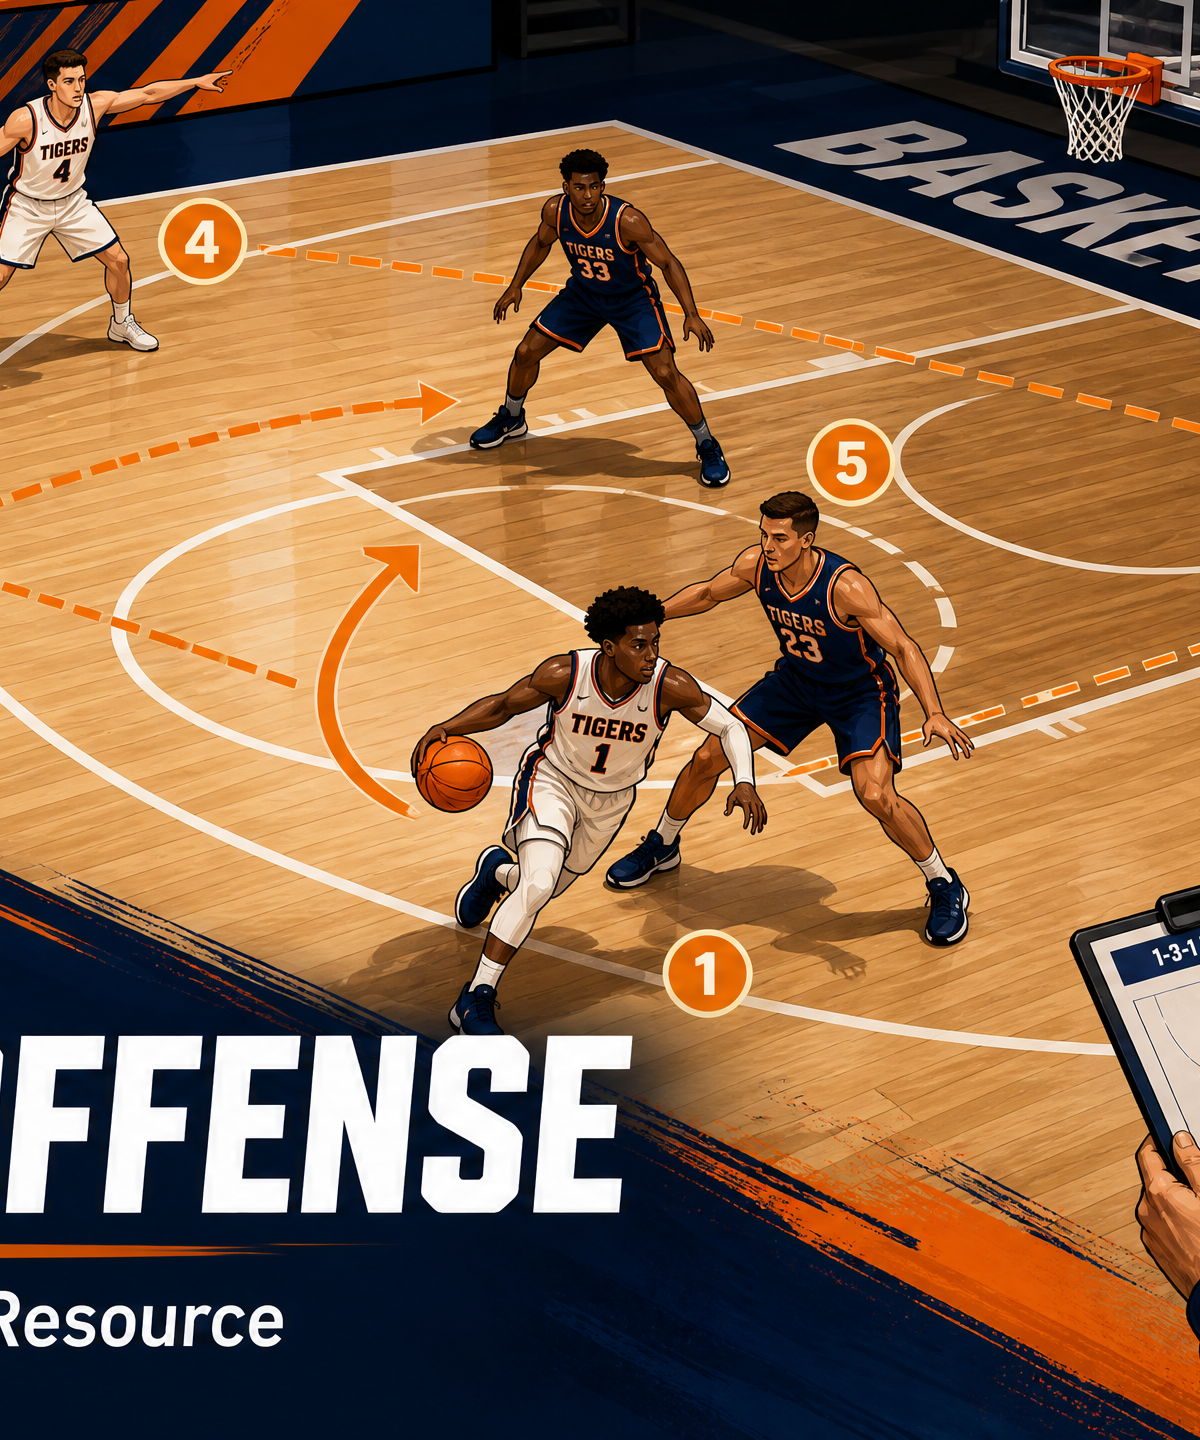
Mastering the 1-3-1 Zone Offense: A Complete Tactical Guide
Learn how to dismantle any zone defense using the 1-3-1 alignment, featuring high-low action, baseline cuts, and precise ball movement.
Equipment Needed
Mastering the 1-3-1 Zone Offense
1. Overview
The 1-3-1 zone offense is a highly effective tactical formation designed to stretch and distort standard zone defenses, particularly the 2-3 and 1-2-2 zones. By placing players in the gaps of the defense, this set play forces defenders to make difficult choices, creating high-percentage scoring opportunities through ball reversals, baseline cuts, and high-low post action.
When executed correctly, the 1-3-1 alignment naturally overloads one side of the floor while keeping a weak-side threat ready for skip passes. This resource provides a step-by-step breakdown to help you install this offense seamlessly into your team's playbook.
2. Setup
To run this set play effectively, you need a standard FIBA half-court (14m x 15m) and a clear understanding of player roles. The formation is structured as follows:
- Point Guard (1): Positioned at the top of the key, responsible for initiating the offense and reading the defense.
- Wings (2 & 3): Positioned on the perimeter, approximately free-throw line extended. They must be ready to shoot, drive, or feed the post.
- High Post (4): Positioned at the elbow or free-throw line. This player acts as the primary facilitator, requiring excellent passing skills and a reliable mid-range jump shot.
- Low Post (5): Positioned on the strong-side block, ready to seal their defender and finish around the rim.
3. Step-by-Step Instructions
Phase 1: Initial Setup & Ball Entry
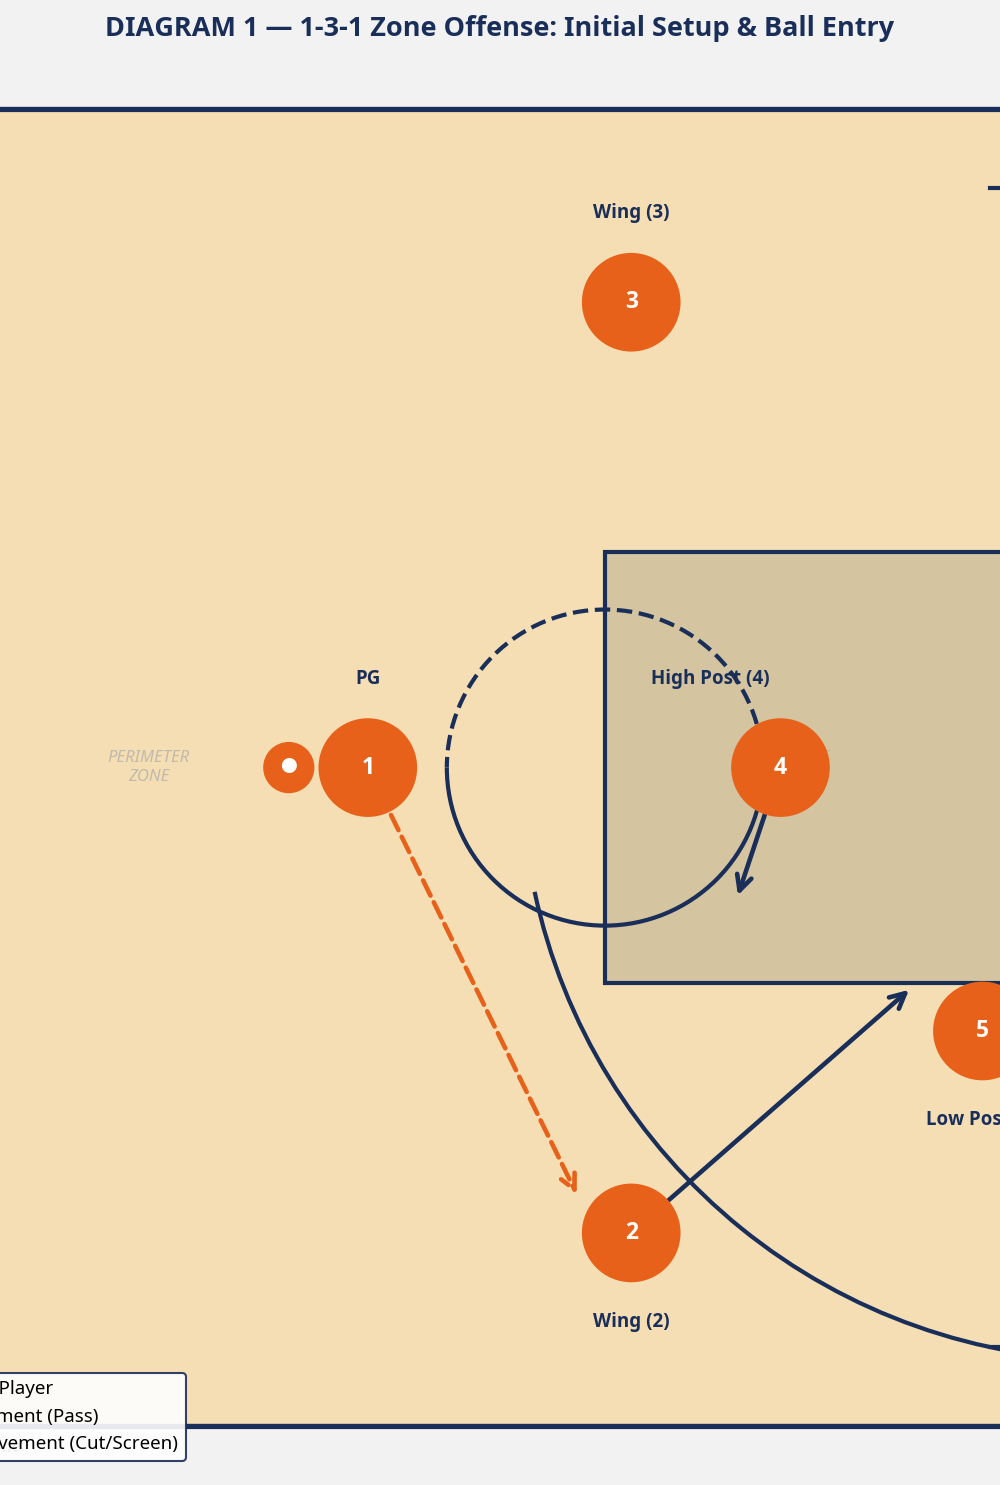
- The Point Guard (1) brings the ball down the court and sets up at the top of the key.
- The wings (2 and 3) space out wide, while the High Post (4) and Low Post (5) establish their initial positions.
- The Point Guard initiates the offense by passing to the strong-side Wing (2).
- As the pass is made, the Wing (2) looks immediately to the Low Post (5) for a quick entry pass. Simultaneously, the High Post (4) flashes to the ball-side elbow to provide a secondary passing option.
Phase 2: Skip Pass & Weak-Side Attack
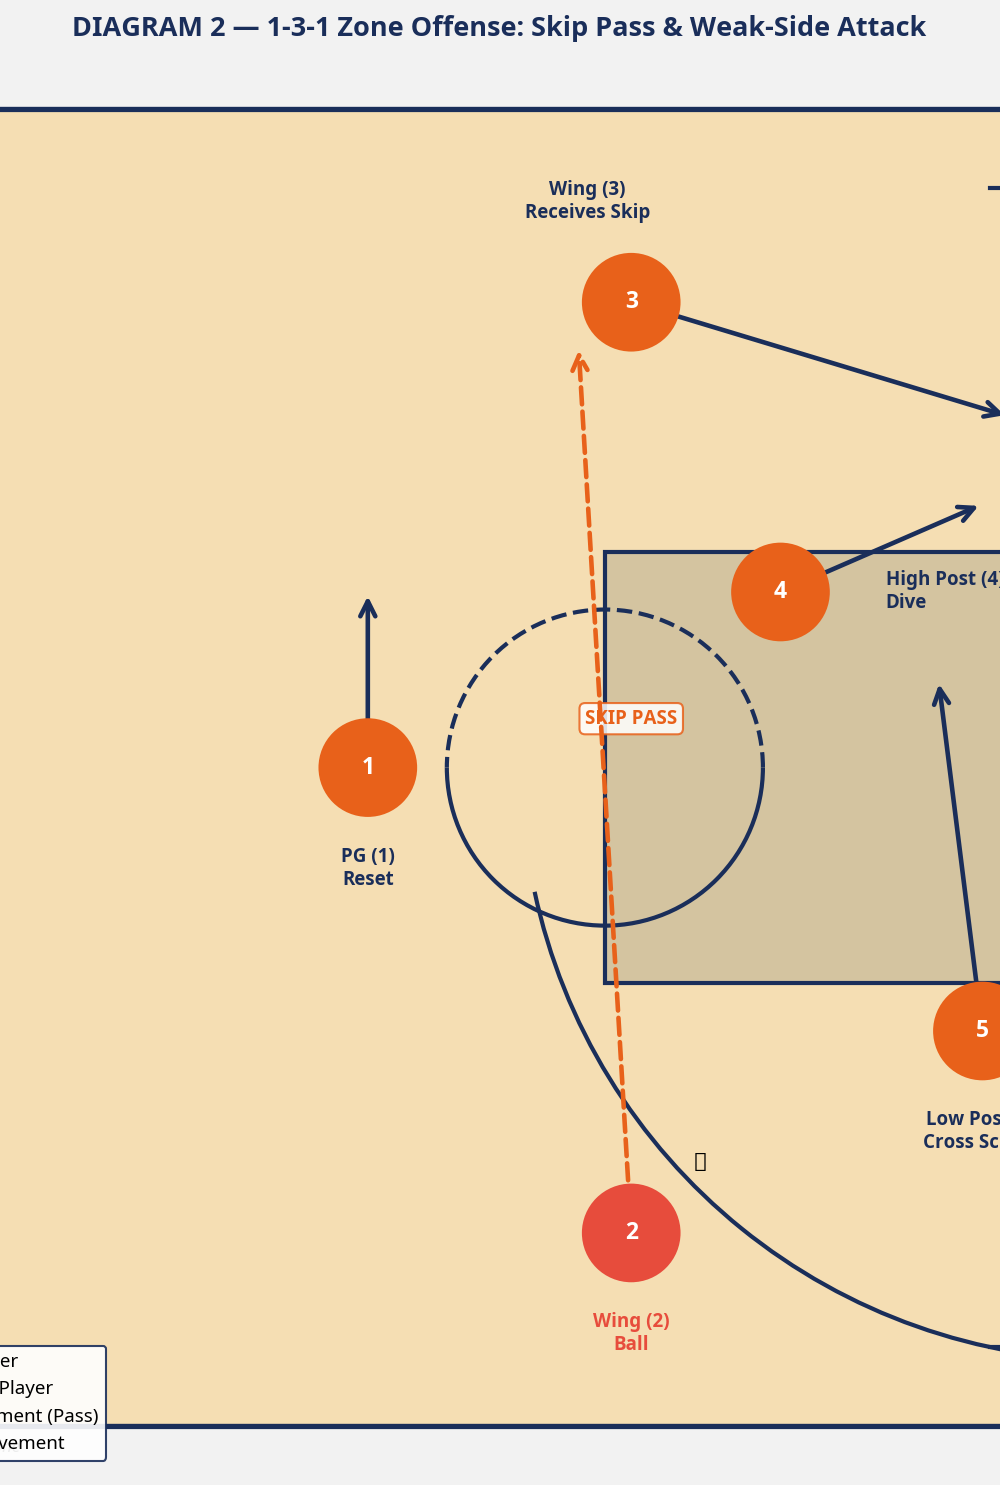
- If the strong-side options are covered, the Wing (2) executes a crisp skip pass over the defense to the weak-side Wing (3).
- As the ball travels in the air, the entire defense must shift. The Wing (3) catches the ball ready to shoot or drive baseline.
- To capitalize on the shifting defense, the High Post (4) dives hard from the elbow to the weak-side block.
- Simultaneously, the Low Post (5) sets a cross-screen to free up the diving High Post (4), or flashes to the high post to maintain the 1-3-1 structure.
Phase 3: High-Low Action & Post Feed Finish
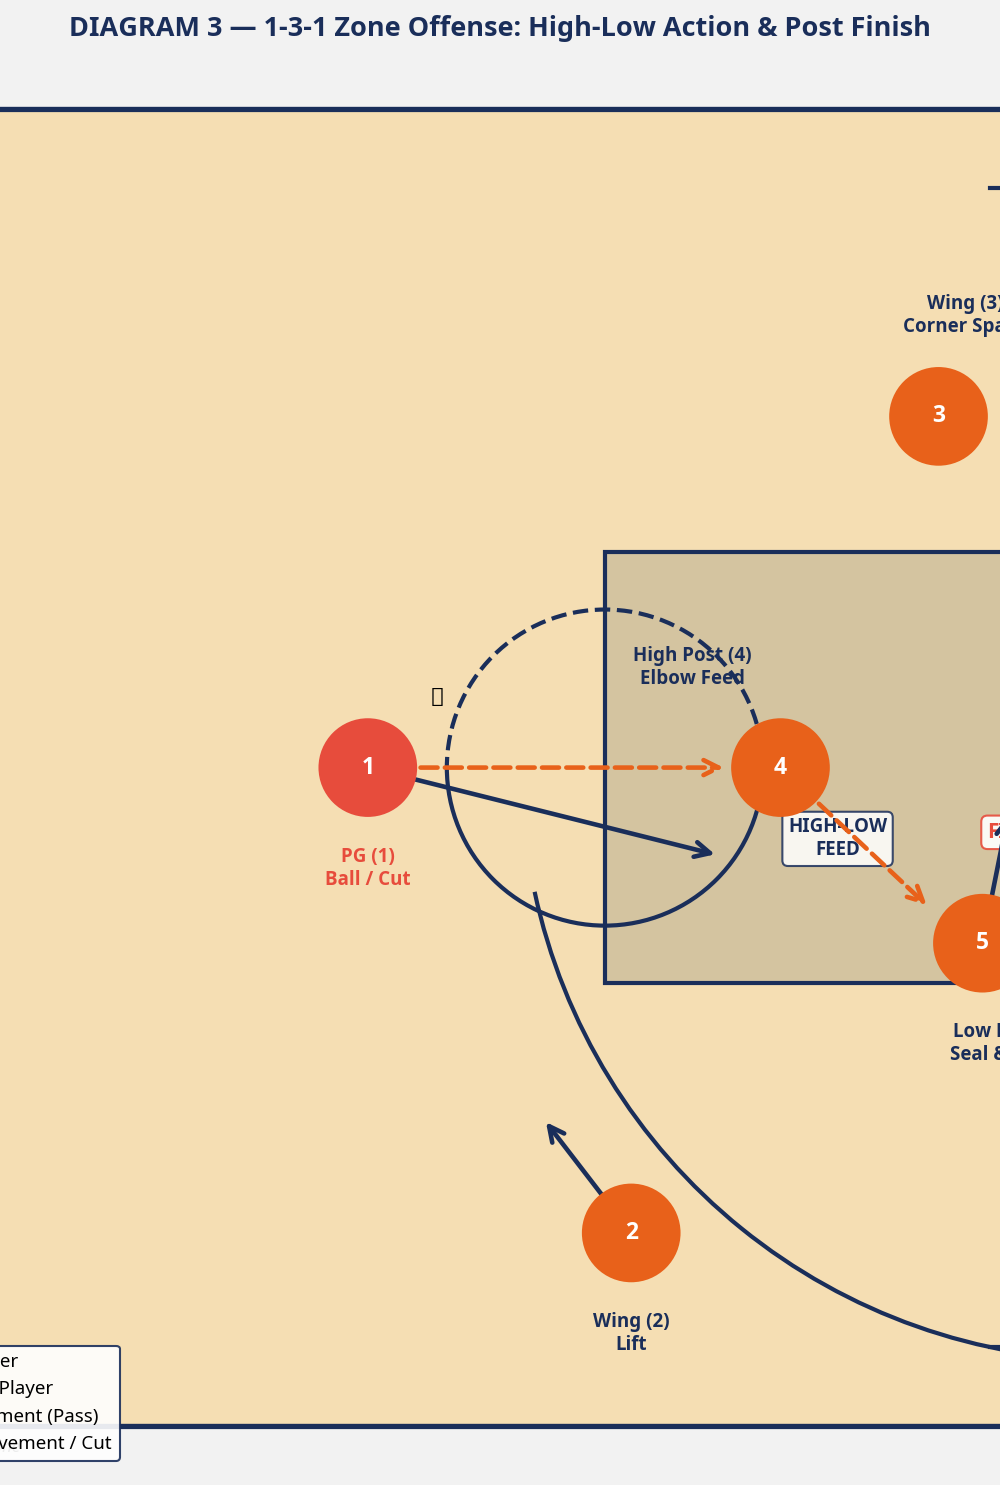
- If the baseline drive is stopped, the ball is reversed back to the Point Guard (1) at the top of the key.
- The Point Guard (1) immediately feeds the High Post (4), who has re-established position at the elbow.
- Upon catching the ball, the High Post (4) pivots and looks directly at the Low Post (5), who is sealing their defender deep in the paint.
- The High Post (4) delivers a precise high-low pass to the Low Post (5) for an easy finish at the rim.
4. Key Coaching Points
- Patience and Ball Reversal: Do not force the first pass. The strength of this offense lies in shifting the zone through quick, decisive ball reversals.
- Spacing is Critical: Players must maintain proper spacing. If players bunch up, one defender can guard two offensive players, neutralizing the advantage.
- Strong Post Seals: The Low Post (5) must work hard to seal their defender before the pass is made. A weak seal will result in a turnover or a contested shot.
- Read the Defense: The High Post (4) must be a playmaker. They need to quickly assess whether to shoot, drive, or pass to the Low Post upon receiving the ball at the elbow.
- Use Fakes: Against a zone, pass fakes and shot fakes are essential to move defenders out of position and open up passing lanes.
5. Common Mistakes
- Holding the Ball Too Long: Stagnant ball movement allows the zone defense to recover and set up. The ball must move faster than the defenders.
- Poor Entry Passes: Weak or telegraphed passes into the post will easily be intercepted by the collapsing zone.
- Lack of Weak-Side Activity: Players on the weak side must stay active. Standing still allows the defense to focus entirely on the strong side.
- Ignoring the High Post: The high post is the most vulnerable area of most zone defenses. Failing to utilize the High Post (4) severely limits the offense's effectiveness.
6. Variations & Progressions
- Baseline Runner: Instead of keeping the Low Post (5) stationary, have them run baseline from block to block as the ball is reversed, forcing the bottom defenders to constantly communicate and shift.
- Pick and Roll Integration: Incorporate a ball screen from the High Post (4) for the Point Guard (1) or Wings (2 & 3) to create confusion and force the zone to help and recover.
7. Age Adaptations
- Under 12s: Focus primarily on spacing and basic ball reversals. Simplify the post movements and emphasize the importance of the skip pass.
- Under 14s & 16s: Introduce the high-low action and emphasize the timing of cuts. Teach the High Post how to read the defense and make decisions.
- Open / Advanced: Implement the full system with variations. Focus on reading defensive rotations, utilizing pass fakes, and exploiting mismatches created by the zone shifts.