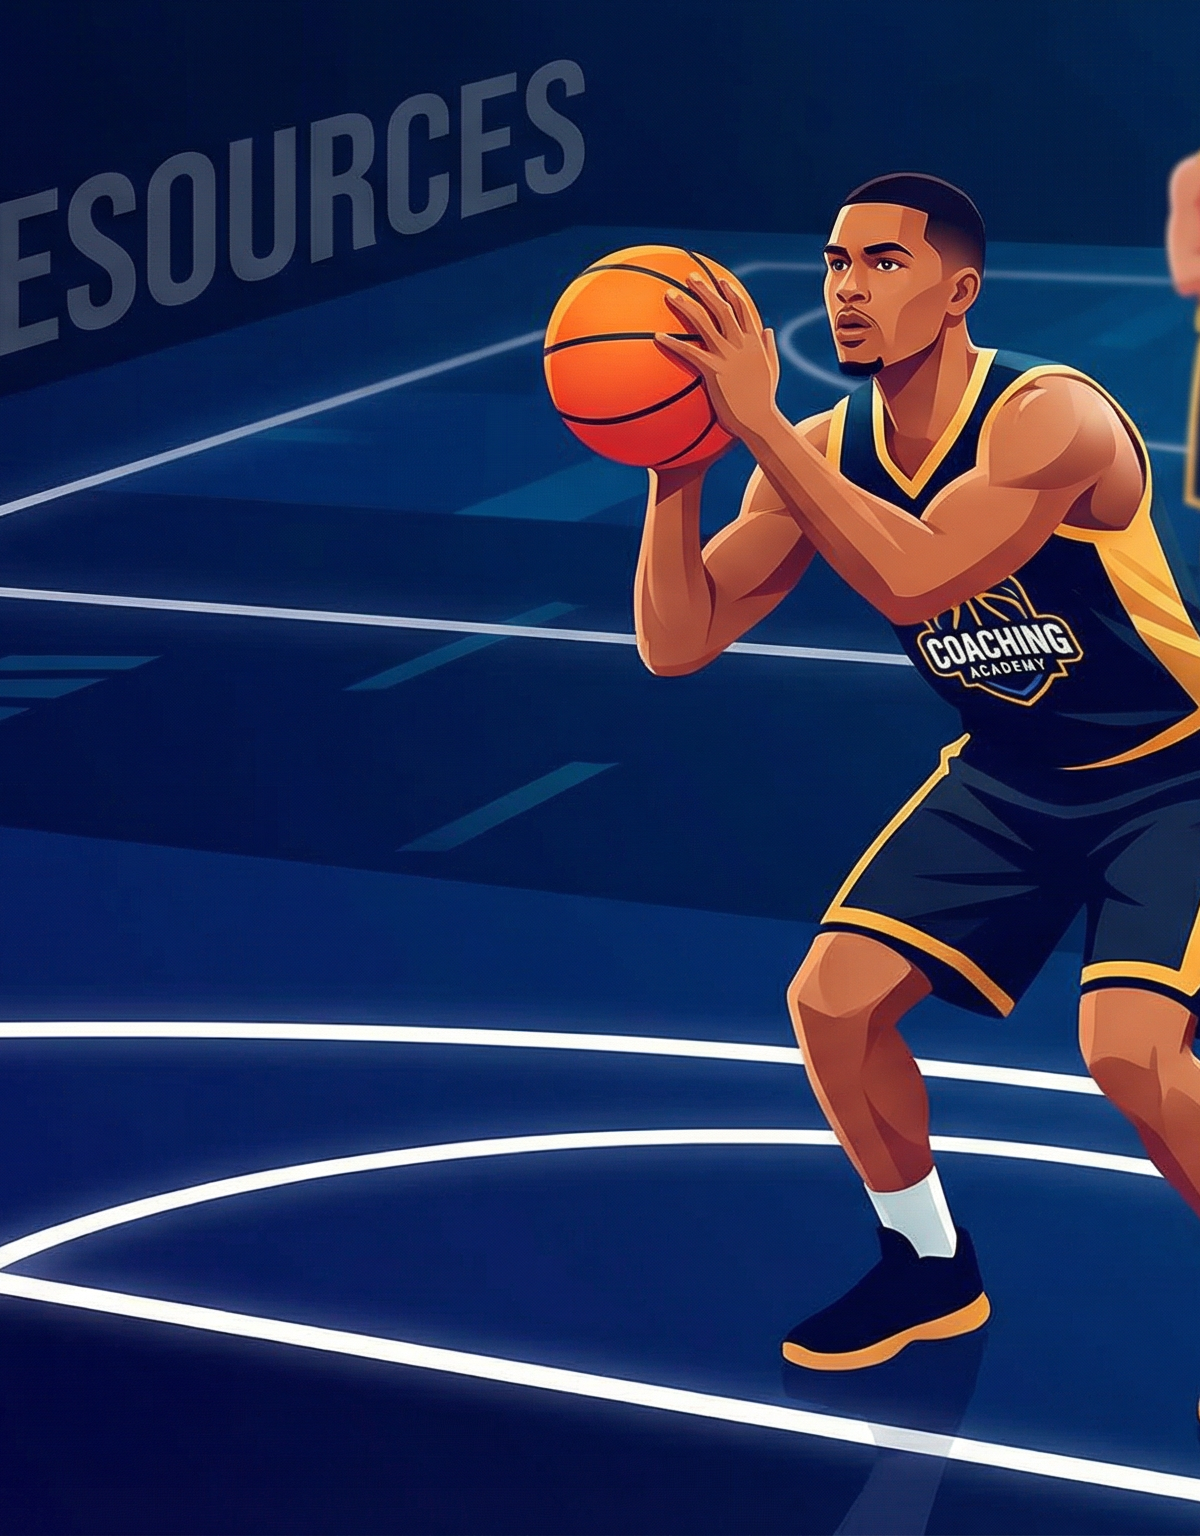
Pressure-Proof Free Throw Shooting Routine
A structured, repeatable free throw routine that builds muscle memory, mental composure, and game-ready accuracy for players at every level.
Equipment Needed
Overview
The free throw is the most uncontested shot in basketball — and yet, at every level of the game, it remains one of the most poorly executed. The Pressure-Proof Free Throw Shooting Routine is a structured, high-repetition drill designed to do two things simultaneously: ingrain a biomechanically sound shooting motion through deliberate practice, and simulate the psychological pressure of a game situation so that players can perform when it counts.
This drill is appropriate as a warm-up activity at the start of any practice session, as a conditioning closer at the end of a hard workout (when fatigue mirrors late-game conditions), or as a standalone skill block during technical sessions. It works equally well for individual players, small groups, and full squads. On a standard FIBA court (28m x 15m), you can run this drill simultaneously on both baskets, effectively doubling your throughput with a squad of 10 or more.
The core philosophy here is simple: routine breeds confidence. Elite free throw shooters — from Larry Bird to Stephen Curry — share one defining characteristic: an unwavering pre-shot routine that is identical every single time, regardless of the score, the crowd, or the clock. This drill teaches players to build and own that routine.
Setup
Equipment Required
| Item | Quantity | Notes |
|---|---|---|
| Basketballs | 1 per shooter (minimum 2) | Size 7 (men/open), Size 6 (women/U16), Size 5 (U12 and below) |
| Cones | 4 | Mark the queue line and rebound zones |
| Whiteboard or clipboard | 1 | For tracking makes/misses per round |
| Stopwatch | 1 | For timed pressure variations |
Court Setup
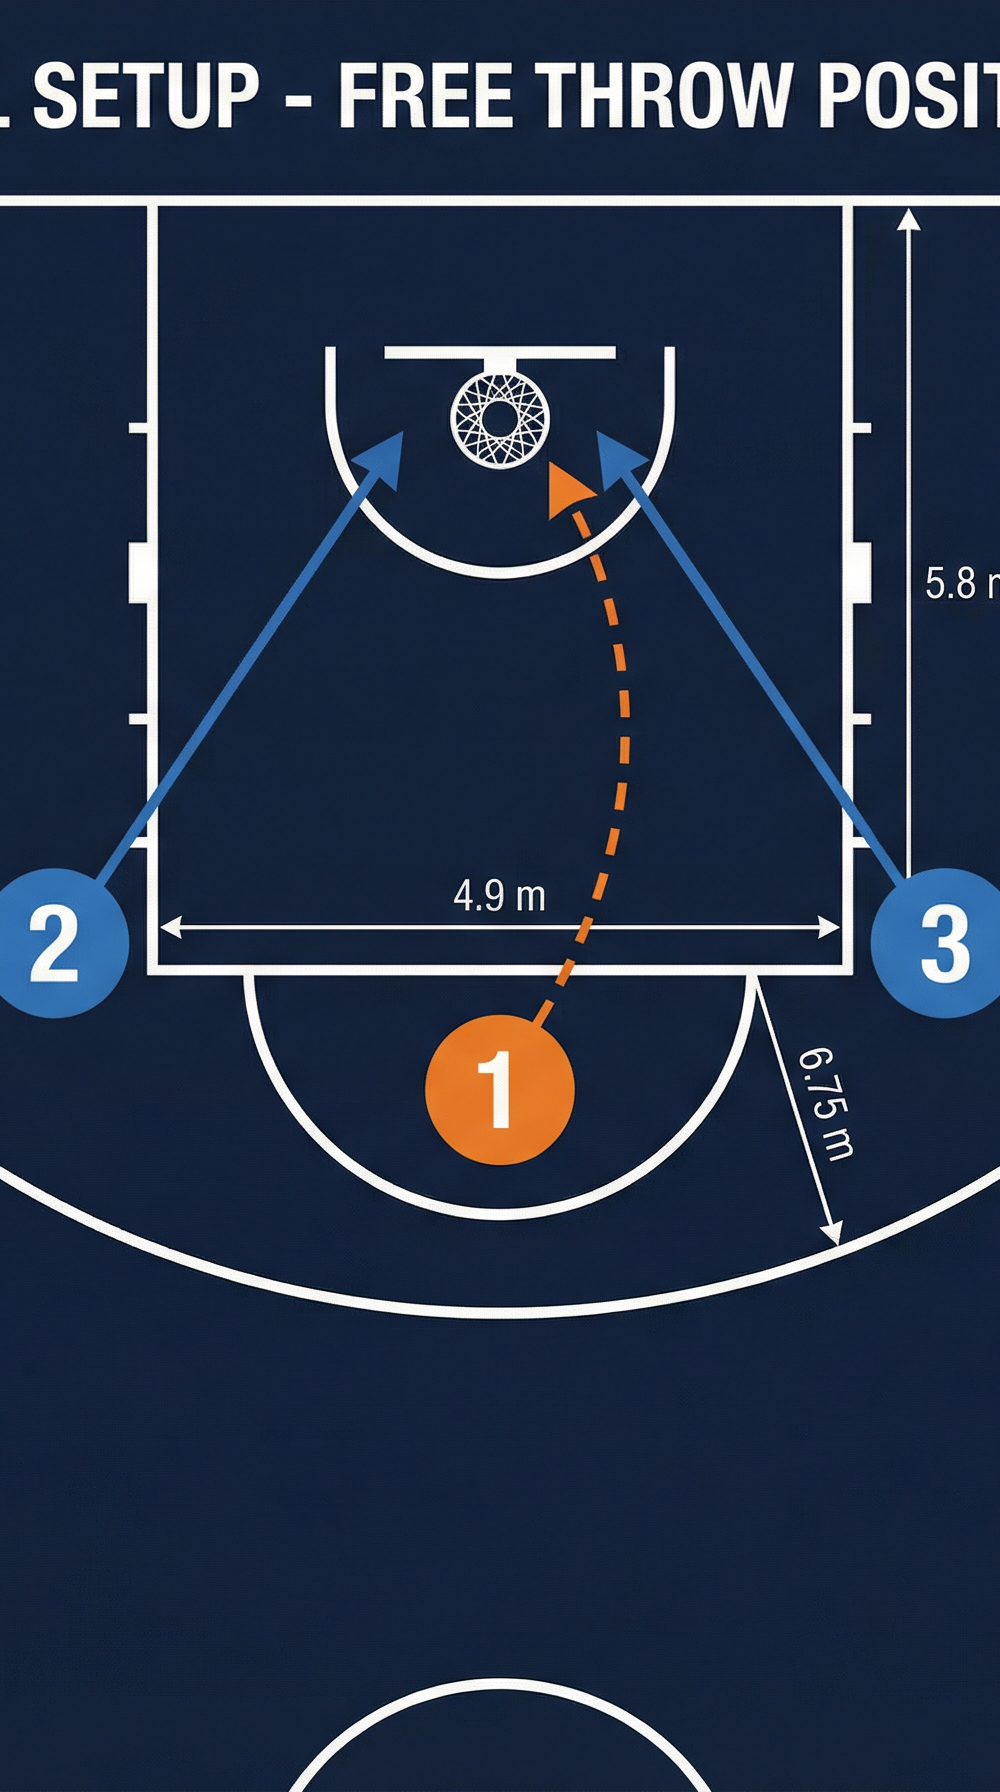
This drill is run from the free throw line, which sits 5.8m from the backboard (measured to the near edge of the backboard) on a standard FIBA court. The key/paint area is 4.9m wide and 5.75m deep. Players do not need to move outside the half-court area.
Place two cones on either side of the lane at the first lane space marks (approximately 1.8m from the baseline) to designate the rebound box for Players 2 and 3. Place two additional cones on the wings outside the three-point arc (6.75m from the basket) to mark the secondary rebound positions for Players 4 and 5.
Player Positions
Position 1 — Shooter (PG/SG/SF): Stands at the free throw line, centred on the nail (the midpoint of the free throw line). This player executes the full shooting routine.
Positions 2 & 3 — Lane Rebounders (PF/C): Positioned at the first lane space on each side of the key. They may not enter the lane until the ball leaves the shooter's hand. Their job is to secure any missed shot and outlet quickly.
Positions 4 & 5 — Wing Rebounders/Queue (SG/SF): Positioned outside the three-point arc on each wing. They provide secondary rebounding coverage and also serve as the next shooters in the rotation queue.
Position 6 — Dedicated Rebounder (optional, for large squads): Positioned under the basket. This player catches made shots before they hit the floor and passes directly back to the next shooter, keeping the drill moving at pace.
Step-by-Step Instructions

Step 1 — Establish the Pre-Shot Routine (5 minutes)
Before any shooting begins, gather all players at the free throw line. Walk them through the five-step pre-shot routine they will use for every single attempt throughout this drill and in games:
- Receive the ball — Take the ball from the rebounder or coach with both hands.
- Toe the line — Place your dominant foot on the nail, shoulder-width stance, knees slightly flexed (approximately 15–20 degrees).
- Spin the ball — Spin the ball in your hands to find your finger placement. Index finger of the shooting hand on the valve or seam.
- Two dribbles — Take exactly two deliberate dribbles. This is non-negotiable — consistency is the goal.
- Sight the target — Eyes lock on the back of the rim. Take one controlled breath. Hold your shooting pocket position (ball at forehead level, elbow under the ball, guide hand on the side).
Step 2 — First Shooting Round (10 minutes)
Player 1 steps to the line and executes the full pre-shot routine, then shoots. Players 2 and 3 box out their lane positions. Players 4 and 5 hold their wing positions. The rebounder (Player 6 or Player 2 after securing the ball) passes back to Player 1. Player 1 shoots 5 consecutive attempts using the identical routine each time. The coach observes and provides individual feedback between shots — not during the routine.
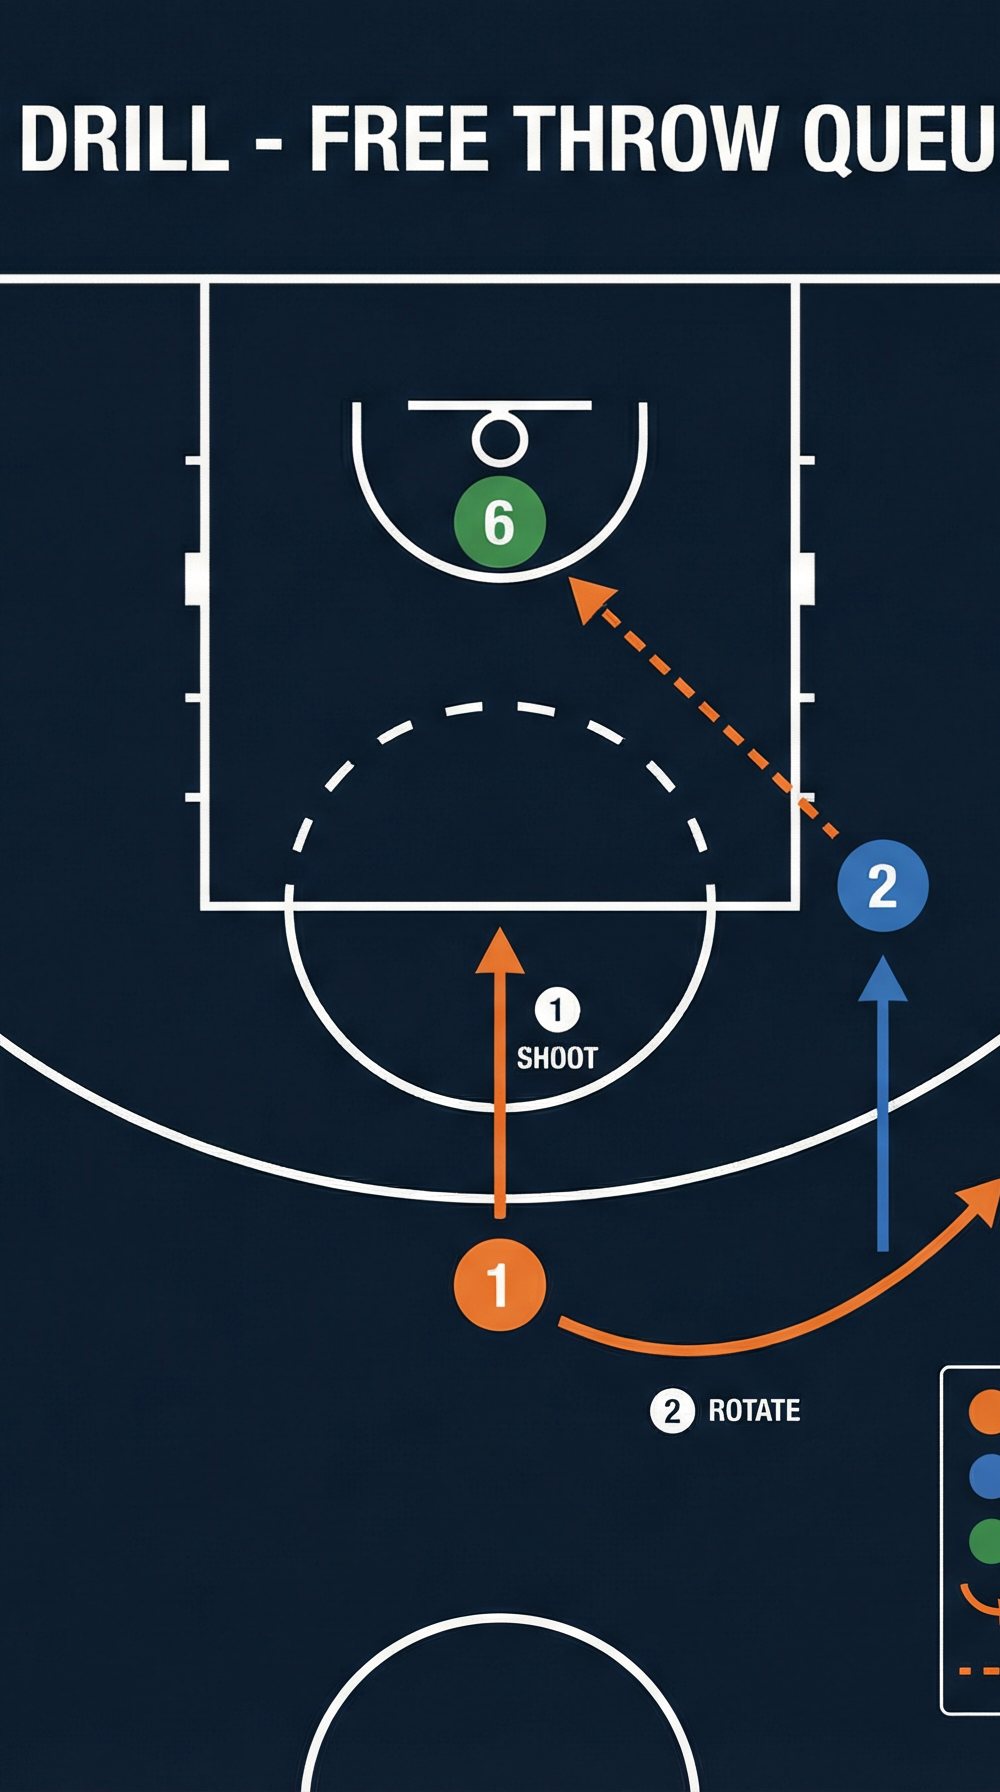
Step 3 — Rotation (see Diagram 2)
After 5 attempts, Player 1 rotates to the back of the queue on the right wing. Player 2 moves from the left lane space to the free throw line and becomes the new shooter. Player 3 shifts to cover the left lane space. Player 4 moves from the left wing to the right lane space. Player 5 steps forward in the queue. The rotation is continuous and clockwise.

Step 4 — Tracking Makes
The coach (or a designated player on the clipboard) tracks every player's makes out of 5 attempts. Record this on the whiteboard. After every player has shot one round, announce the team's collective percentage. Set a team target (e.g., 70% as a minimum standard) and use this as a motivational benchmark.
Step 5 — Pressure Round (5 minutes)
Once all players have completed two standard rounds, introduce the Pressure Round. The rules change: each player must make 2 consecutive free throws before rotating. If they miss, they stay at the line and restart their count. The queue continues to move — the pressure of holding up the line is intentional. This simulates the psychological weight of a game-situation free throw.
Step 6 — Cool-Down and Review (5 minutes)
Bring the squad together. Review the tracking sheet. Identify the top performer and the player who improved most between rounds. Discuss one technical point as a group. Finish with every player making one free throw before leaving the gym — this is a non-negotiable rule. Players should always leave on a make.
Key Coaching Points

1. The routine is the performance. Remind players constantly that the shot is the outcome of the routine, not the goal of it. If the routine is perfect, the shot takes care of itself. Redirect attention away from the result and back to the process.
2. Elbow alignment is everything. The shooting elbow must be directly under the ball and pointing at the basket at the moment of release. A flared elbow is the single most common cause of a shot pulling left or right. Use the "elbow check" cue: at the set point, the elbow, wrist, and index finger should form a straight vertical line.
3. Follow-through is non-negotiable. The shooting hand must finish with the wrist snapped down, fingers pointing at the floor, and the hand held in the follow-through position until the ball hits the rim or net. This is called "holding the goose neck." Players who drop their hand early are telegraphing a mechanical breakdown.
4. Knees drive the shot. Free throw shooting is not an arm exercise. The power source is the legs. Players should feel a slight push upward from the knees as they release, creating a smooth, coordinated kinetic chain from feet to fingertips. Watch for players who are "all arm" — they will fatigue and become inconsistent.
5. Eyes on the back of the rim, not the ball. Many young players watch the ball in flight. Teach them to lock their gaze on the back of the rim and keep it there through the follow-through. This anchors their visual focus and prevents head movement during the shot.
6. Silence the inner critic between shots. Between attempts, players must have a reset cue — a word, a breath, a tap of the shoe. This prevents negative self-talk from compounding after a miss. Teach players to say "next one" or "reset" aloud after every miss.
Common Mistakes
Mistake 1 — Rushing the routine under pressure. Players who are nervous speed up their pre-shot routine, which destroys the consistency it is designed to create. Watch for shortened dribbles, skipped spin, or a rushed breath. Cue: "Slow is smooth, smooth is accurate."
Mistake 2 — Inconsistent foot placement. Players who step to the line differently each time create a different alignment to the basket each time. Insist on the dominant foot on the nail, every single attempt. Use tape or a floor marker during early learning stages to make the correct position unmistakable.
Mistake 3 — Guide hand interference. The non-shooting (guide) hand should rest lightly on the side of the ball and come off cleanly at the moment of release. Players who push with the guide hand will produce side-spin and inaccurate shots. Drill the guide hand release by having players shoot one-handed from 2m away from the basket as a warm-up.
Mistake 4 — Flat trajectory. A flat shot has a much smaller margin for error than an arced shot. The ball should reach a peak approximately 1–1.5m above the rim before descending into the basket. Cue players to "shoot for the top of the backboard square" to encourage a higher arc. A shot entering the basket at 45 degrees or above has a significantly larger effective target.
Mistake 5 — Not following through mentally after a miss. Players who visibly react to a miss — dropping their head, sighing, or walking away early — are reinforcing negative habits. Insist on the full follow-through hold regardless of the outcome. The body does not know the difference between a make and a miss during the motion — only the finish matters.
Variations & Progressions

Variation 1 — Fatigue Free Throws
Immediately before stepping to the free throw line, the shooter completes a 30-second sprint shuttle (baseline to free throw line and back, twice). They then have 5 seconds to step to the line and begin their routine. This replicates the physiological state of shooting free throws after a hard defensive sequence or a fast break. Heart rate elevation, heavy breathing, and shaking hands are all part of the challenge. Coaching focus: can the routine hold up under physical stress?
Variation 2 — Make-or-Consequence Shooting
Assign a team consequence for falling below a target percentage in a given round (e.g., if the team shoots below 65% in a round, everyone runs a baseline sprint). This creates collective accountability and mirrors the team cost of poor free throw shooting in close games. Keep the consequence light enough to be motivating rather than punishing.
Progression — The 10-in-a-Row Challenge
For advanced players or those who have mastered the basic routine, the ultimate test is making 10 consecutive free throws. The player stays at the line until they achieve this. If they miss at attempt 9, they restart from 0. This drill is best done at the end of practice when mental fatigue is highest. It is an individual challenge but can be done as a team race (first player to 10 wins).
Age Adaptations

| Age Group | Key Modifications |
|---|---|
| Under 10 (Mini Basketball) | Use a Size 5 ball and lower the basket to 2.6m if adjustable. Move the shooting line forward to 3.5m from the basket. Focus only on Steps 1–3 of the routine (receive, stance, two dribbles). Do not introduce pressure rounds. Celebrate every make enthusiastically. |
| Under 12 | Use a Size 5 ball. Shoot from the standard free throw line but allow players to develop their own dribble count (1–3 dribbles). Introduce tracking but frame it positively. Begin introducing the concept of a personal routine. |
| Under 14 / Under 16 | Use standard ball and line. Full routine as described. Introduce Variation 1 (fatigue free throws) in the second half of the season once the routine is established. Begin tracking individual percentages across sessions to build accountability. |
| Open / Senior | Full drill as written, including all pressure variations and the 10-in-a-Row Challenge. Introduce video review — film players from the side and front to provide biomechanical feedback. Set individual season targets (e.g., 75% minimum in practice, 70% in games). |