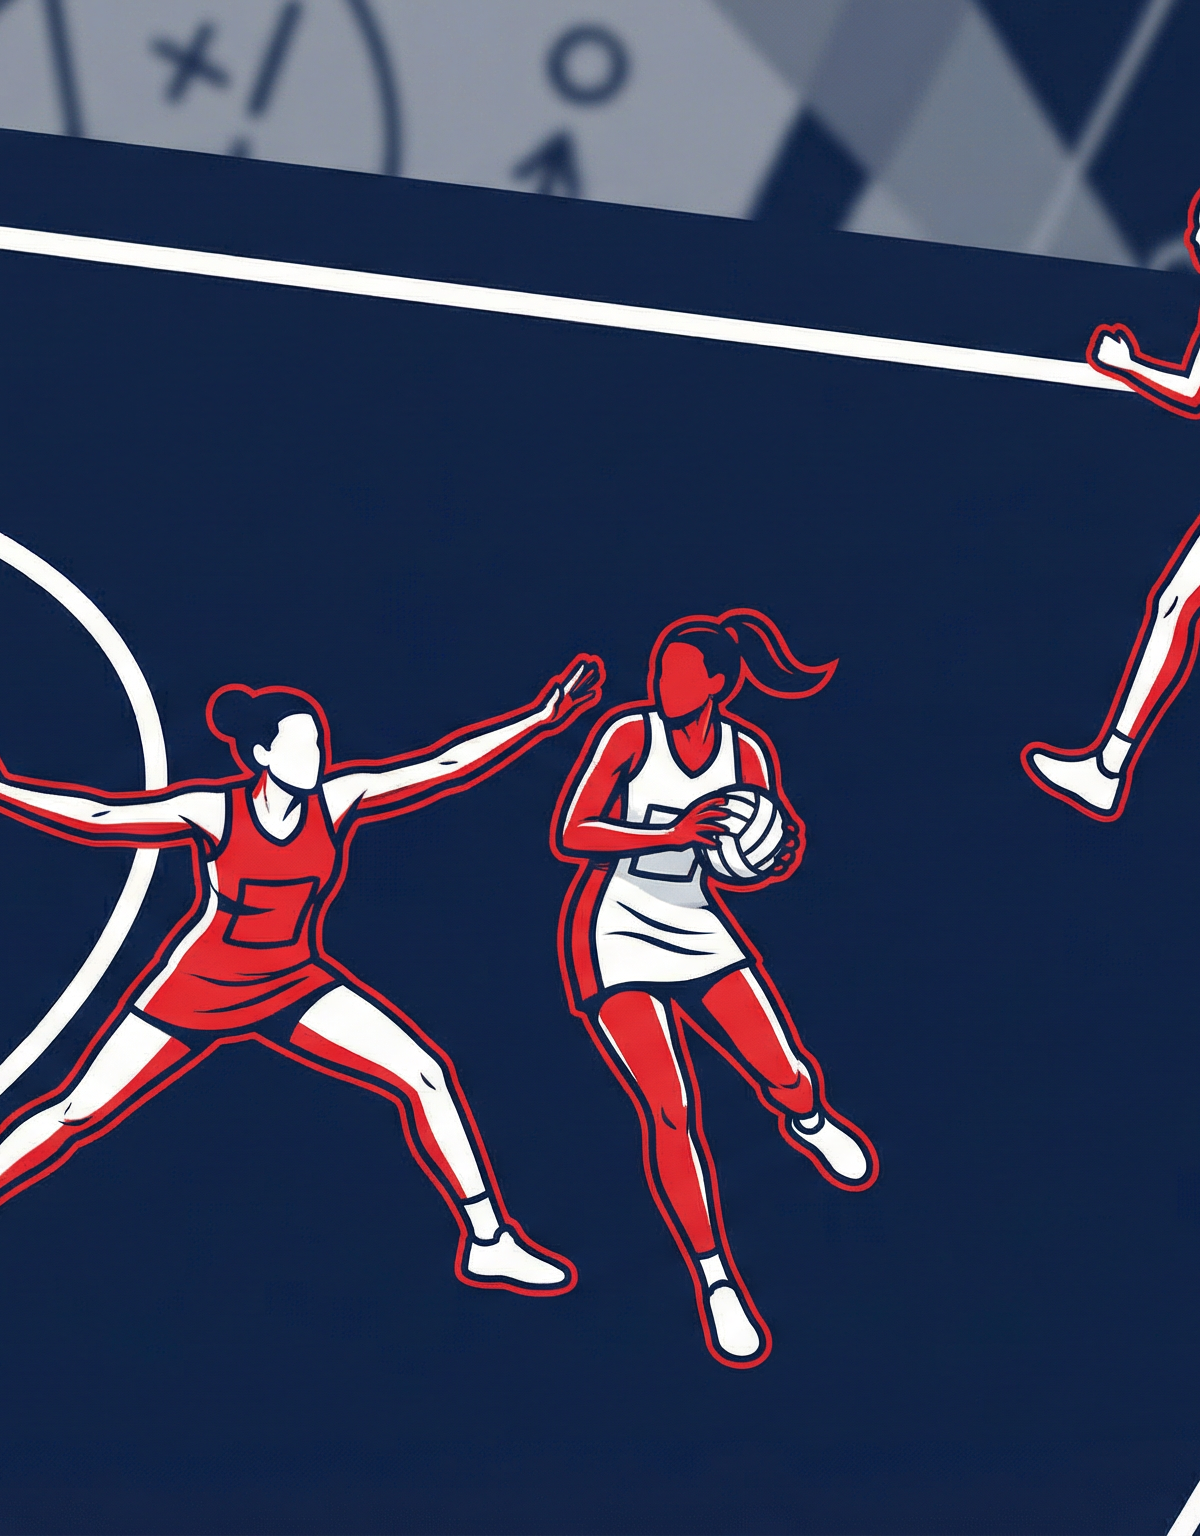
Channel and Restrict: High-Pressure Defensive Marking Drill
Master the art of dictating play with this intensive defensive drill focused on 0.9m marking pressure, rapid transition, and effectively channelling attackers wide.
Equipment Needed
1. Overview
The Channel and Restrict Defensive Marking Drill is designed to develop a defender's ability to apply relentless first-phase pressure, dictate the attacker's driving path, and effectively channel them towards the sidelines. This drill emphasizes maintaining the mandatory 0.9m distance while establishing a strong defensive stance, transitioning from static marking to dynamic shadowing, and denying prime feeding spaces in the centre third. Use this drill when your defensive unit struggles to contain fast, direct attackers or when you want to reinforce the principles of dictating play rather than simply reacting.
2. Setup
- Court Area: Centre third of a standard Netball court (30.5m x 15.25m).

- Equipment Needed: 1 Netball, 4-6 marker cones (to define the channel zone if required), and positional bibs.
- Players Required: Minimum of 5 players per station (2 Attackers, 2 Defenders, 1 Feeder/Coach).
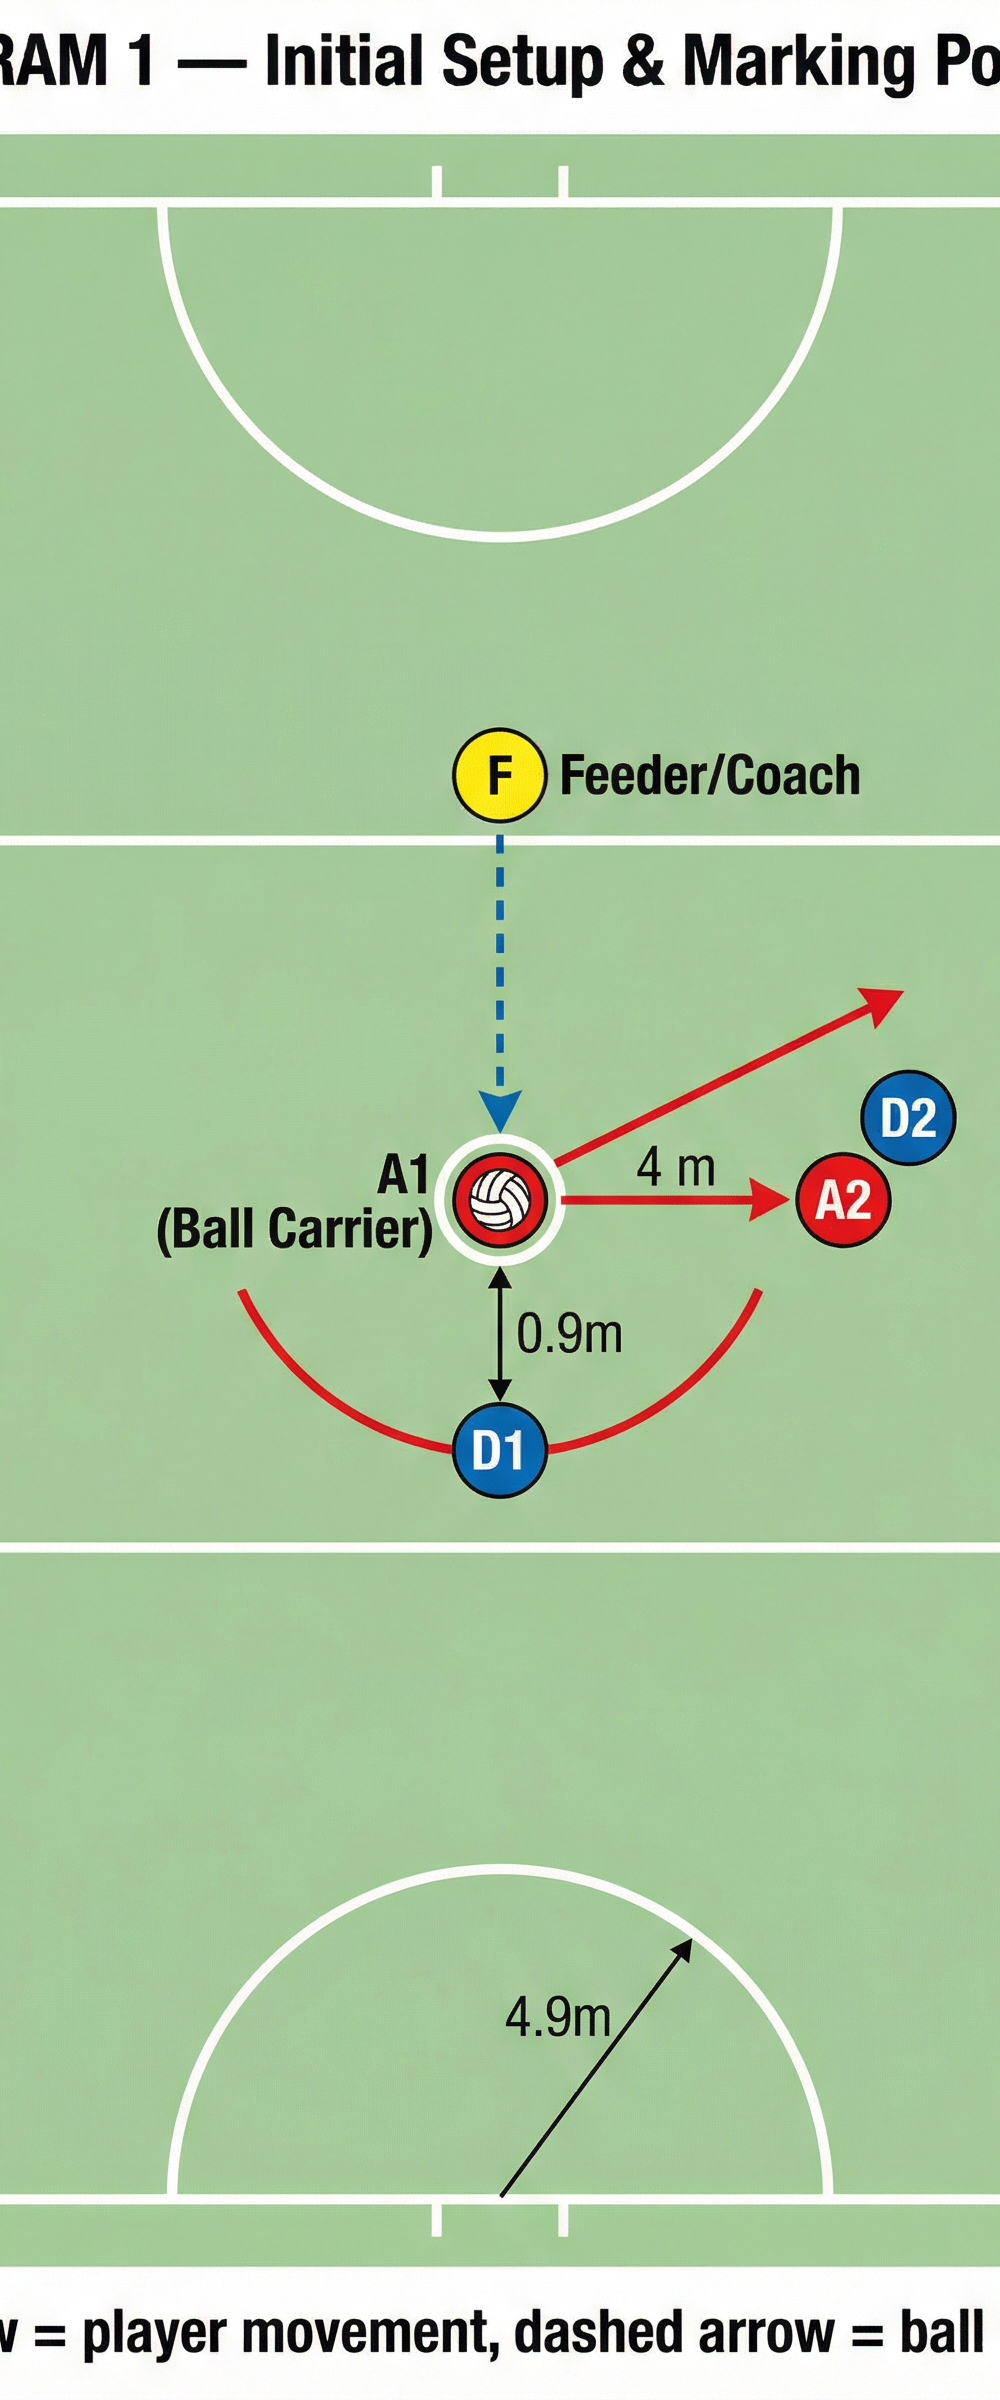
- Player Positions:
- A1 (Attacker 1): Starts with the ball at the centre circle.
- D1 (Defender 1): Starts directly opposite A1, marking at the strict 0.9m distance.
- A2 (Attacker 2): Positioned approximately 4 metres to the right of A1.
- D2 (Defender 2): Marking A2 tightly, denying an easy first pass.
- F (Feeder): Positioned at the top of the centre third, ready to receive or initiate the next phase.
3. Step-by-Step Instructions

- Initial Setup & Stance: D1 sets up exactly 0.9m away from A1, who is holding the ball. D1 must establish a strong, balanced defensive stance—knees bent, weight on the balls of the feet, and arms extended to restrict A1's vision and passing options.
- The Trigger: On the coach's whistle, A1 passes the ball back to the Feeder (F) at the top of the centre third.
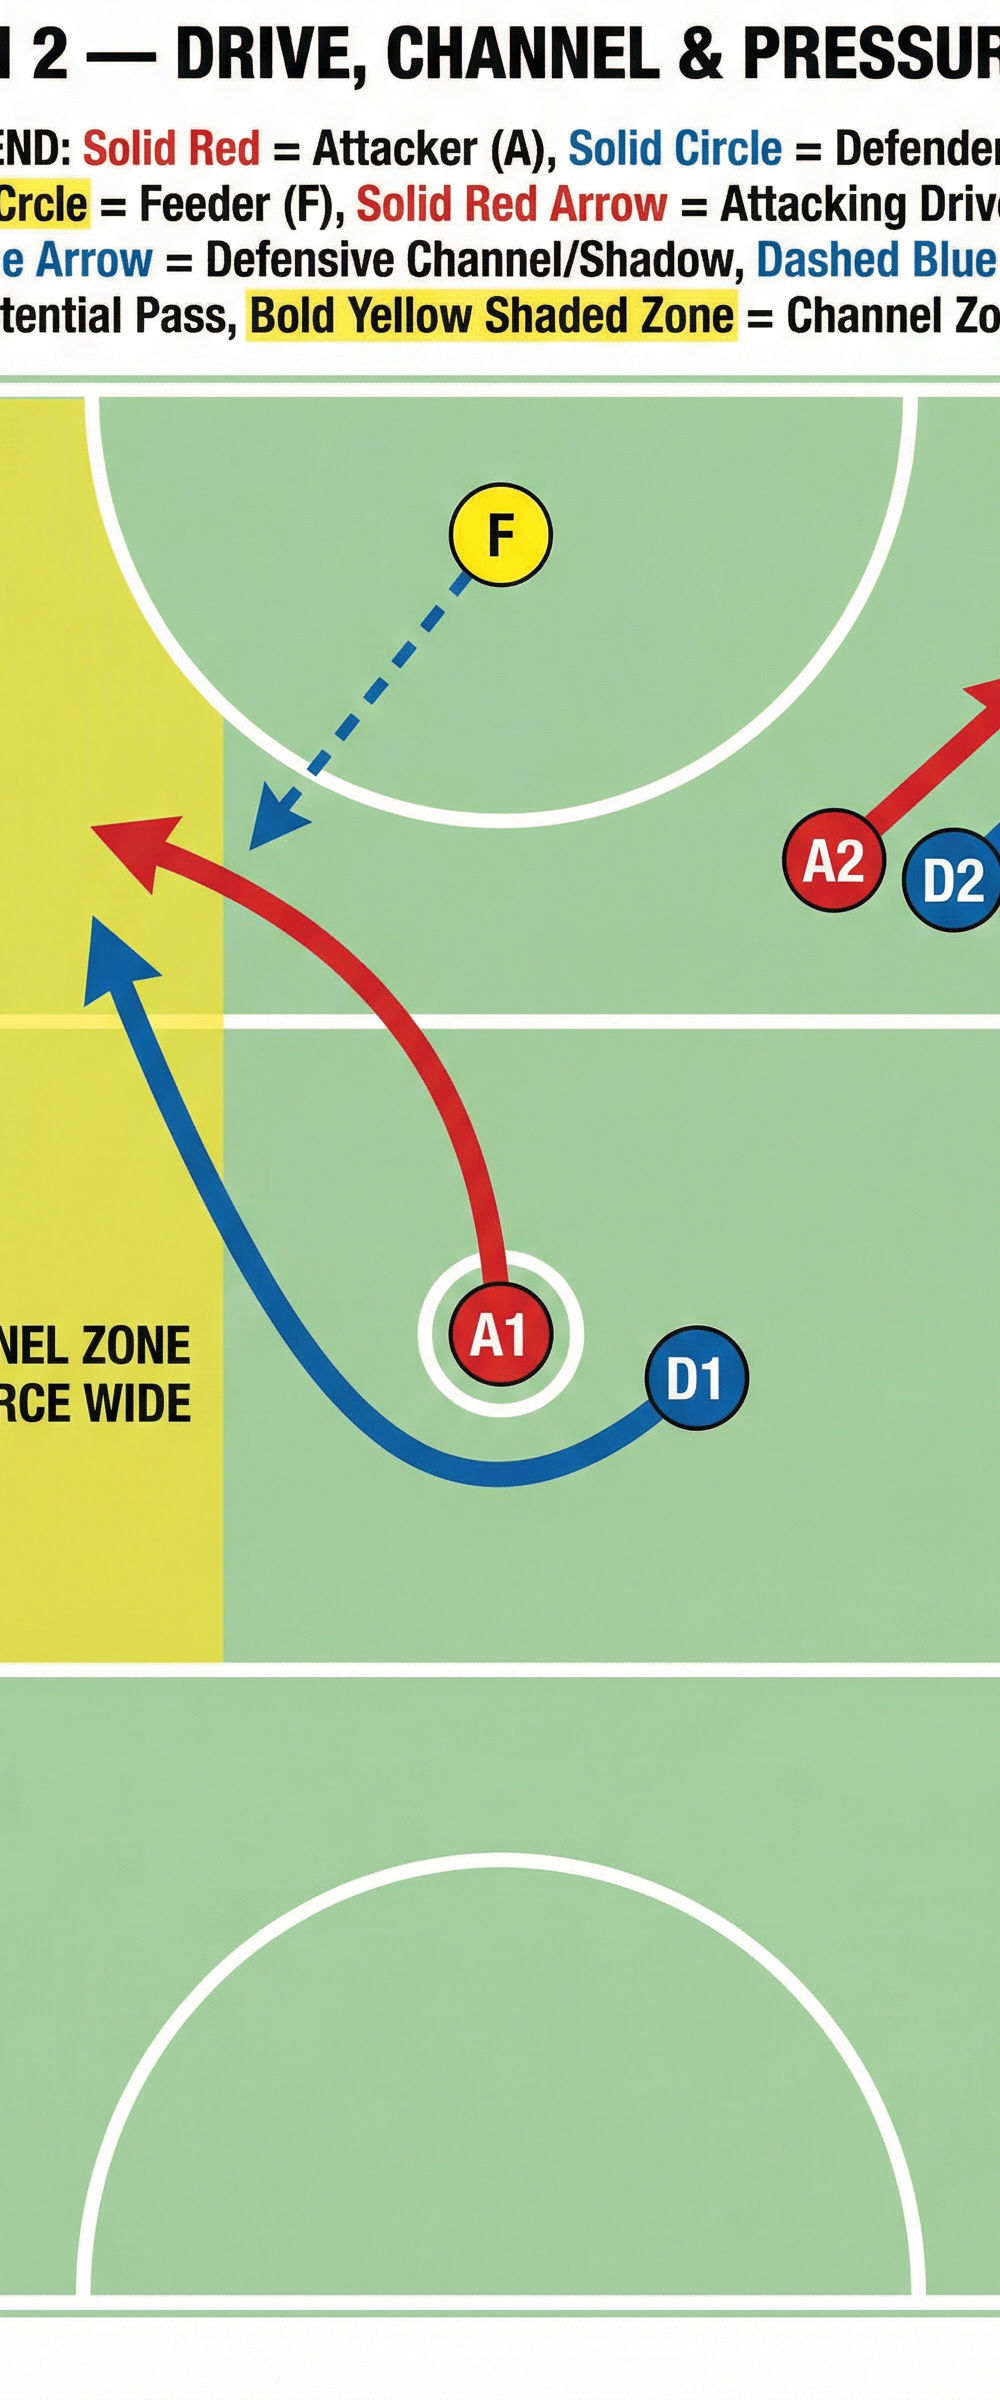
- The Drive: As soon as the ball leaves A1's hands, A1 makes a hard, dynamic drive towards the left side of the court, attempting to receive a return pass from F.
- The Channel: D1 must immediately drop off the 0.9m mark and transition into a side-on shadowing position. D1's objective is to dictate A1's path, forcing them wide into the designated 'Channel Zone' near the sideline, denying the direct route to the goal circle edge.
- Secondary Movement: Simultaneously, A2 makes a lead to offer an alternative passing option, while D2 applies tight one-on-one marking to deny A2 the ball.
- The Climax: The Feeder (F) must decide whether to attempt a challenging pass to the channelled A1 or look for A2. The drill resets once a pass is completed, intercepted, or forced out of bounds.

4. Key Coaching Points
- Distance and Discipline: Ensure defenders establish the correct 0.9m distance before extending their arms. Leaning in too early will result in an obstruction penalty.

- Footwork and Balance: Defenders must use quick, small steps to transition from static marking to dynamic channelling. Avoid crossing the feet, which compromises balance and agility.
- Body Angle: When channelling, the defender should maintain a 45-degree angle to the attacker, staying slightly goal-side to force them towards the sideline.
- Vision: Defenders must keep their eyes up, maintaining peripheral vision of both their immediate opponent (A1) and the ball carrier (F).
- Communication: D1 and D2 must communicate effectively to ensure all attacking options are covered and to switch if an unexpected screen occurs.
5. Common Mistakes
- Breaking the 0.9m Rule: Defenders eager to apply pressure step in too close before the ball is released, leading to unnecessary penalties.
- Flat-Footed Transition: Defenders react too slowly after the pass, allowing the attacker to gain a step and dictate the driving line.
- Over-Committing: Defenders lunge for an interception rather than maintaining their channelling position, allowing the attacker to easily dodge and cut back inside.
- Losing Sight of the Ball: Turning the head completely to follow the attacker, resulting in a loss of awareness of where the ball is on the court.
6. Variations & Progressions
- Add a Second Phase: Once A1 receives the ball in the channel zone, they must immediately look to pass to A2, forcing D1 and D2 to recover and defend the next phase of play.
- Restrict the Court: Place cones to narrow the playing area, forcing attackers to work harder to find space and rewarding defenders for effective channelling.
- Time Limit: Introduce a 3-second rule for the Feeder to release the ball, increasing the pressure on both attackers to get free and defenders to maintain tight marking.
7. Age Adaptations
- Under 10s: Focus heavily on the basic 0.9m distance and the concept of staying between the attacker and the goal. Reduce the intensity of the drive and allow more time for defenders to set their stance.
- Under 14s: Introduce the concept of channelling and forcing the attacker wide. Emphasize footwork and body angle during the transition phase.
- Open/Advanced: Run the drill at full match intensity. Demand flawless footwork, immediate transitions, and aggressive channelling that completely shuts down the primary attacking options.