Dynamic Wide Overload: Crossing and Finishing Masterclass
A high-intensity crossing and finishing drill designed to improve wide build-up play, timing of runs, and clinical finishing inside the penalty area.
Equipment Needed
1. Overview
This dynamic wide overload drill is engineered to replicate match-realistic crossing and finishing scenarios. It focuses on developing the relationship between wide players and central attackers, emphasizing the quality of delivery from wide areas and the synchronization of attacking runs into the penalty box. This drill is essential for teams looking to improve their attacking output from wide areas, teaching players how to exploit space, time their runs to perfection, and finish clinically under pressure.
2. Setup
Pitch Area: Use half of a standard football pitch (approx. 50-55m long x 64-75m wide). Focus on one side of the pitch initially (e.g., the right flank) before switching to the left.
Players: 8-12 players.
- 1 Goalkeeper (No.1)
- 1 Winger/Fullback (No.7)
- 3 Central Attackers (No.9, No.10, No.8)
- 1 Feeder/Server (No.F)
- (Optional Progression: Add 2 Central Defenders, No.4 & No.5)
Equipment:
- 1 Full-size goal
- 10-15 Footballs (placed with the Feeder)
- Cones/Markers to outline starting positions and target zones
- Bibs (if using defenders)
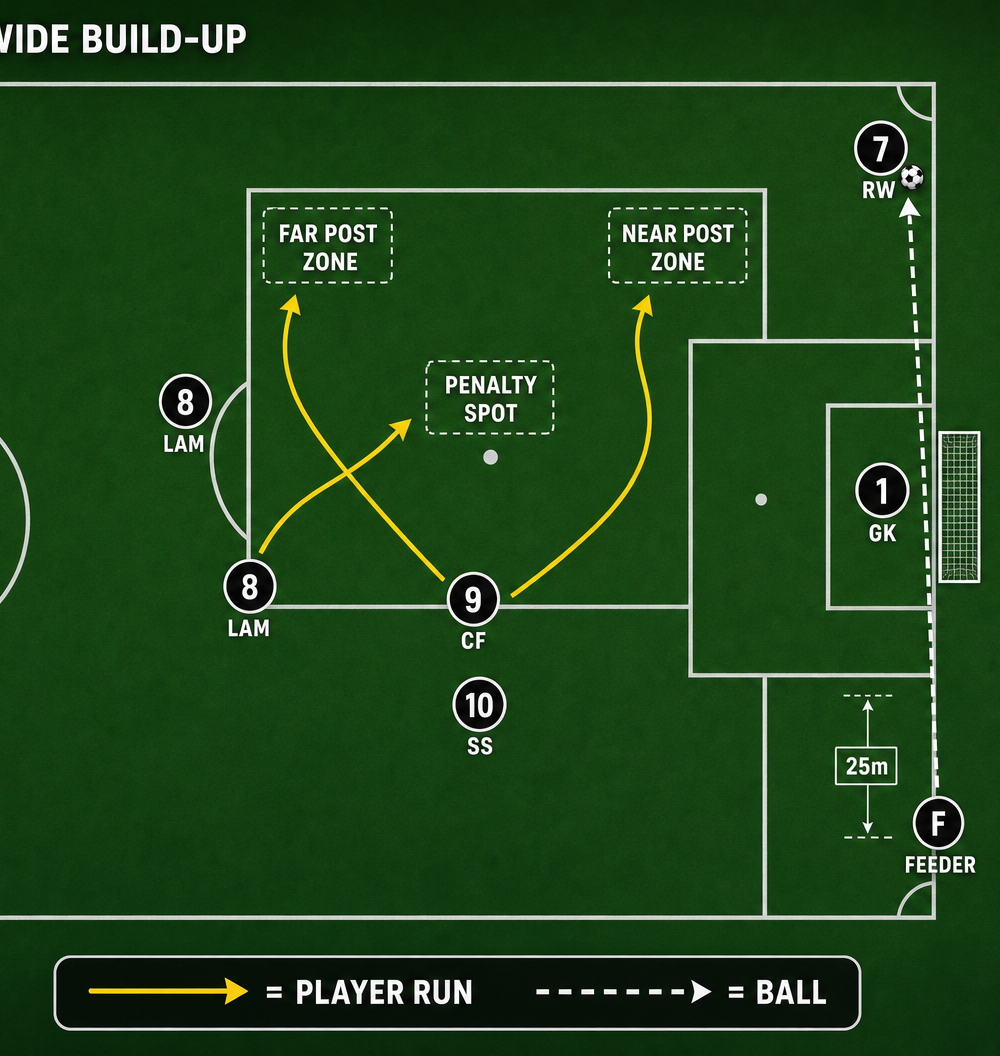
Initial Positions:
- Feeder (No.F): Positioned centrally or slightly offset, approximately 30-35m from goal.
- Winger (No.7): Positioned wide on the right flank, near the touchline, roughly 25m from the byline.
- Centre Forward (No.9): Positioned centrally, around the 'D' of the penalty area.
- Second Striker (No.10): Positioned slightly deeper and offset from the No.9.
- Attacking Midfielder (No.8): Positioned deeper, ready for a late run.
3. Step-by-Step Instructions
- The Trigger: The drill begins with the Feeder (No.F) playing a firm, accurate pass out wide to the Winger (No.7).
- The Touch & Delivery: The Winger (No.7) takes a positive first touch out of their feet, driving down the flank towards the byline. The objective is to deliver a quality cross into the penalty area. The cross can be driven low, lofted to the back post, or cut back to the penalty spot, depending on the coach's instruction or the winger's decision.
- The Coordinated Runs: As the ball is played wide, the central attackers must initiate their runs. Timing is critical.
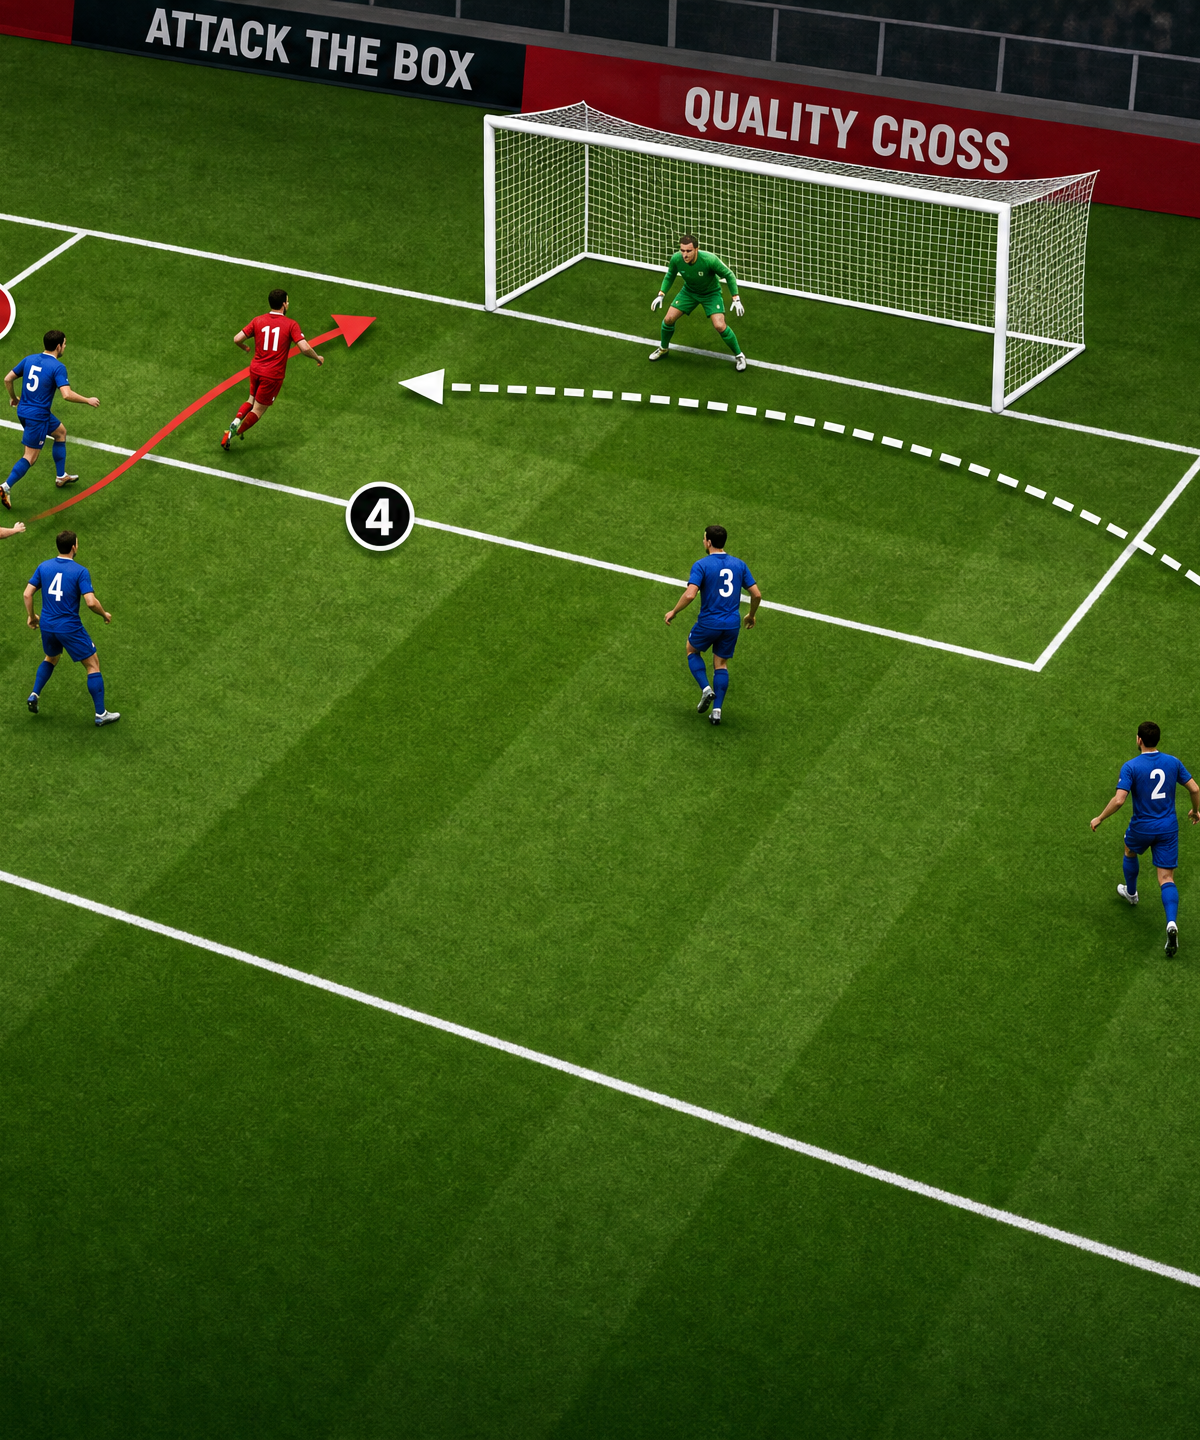
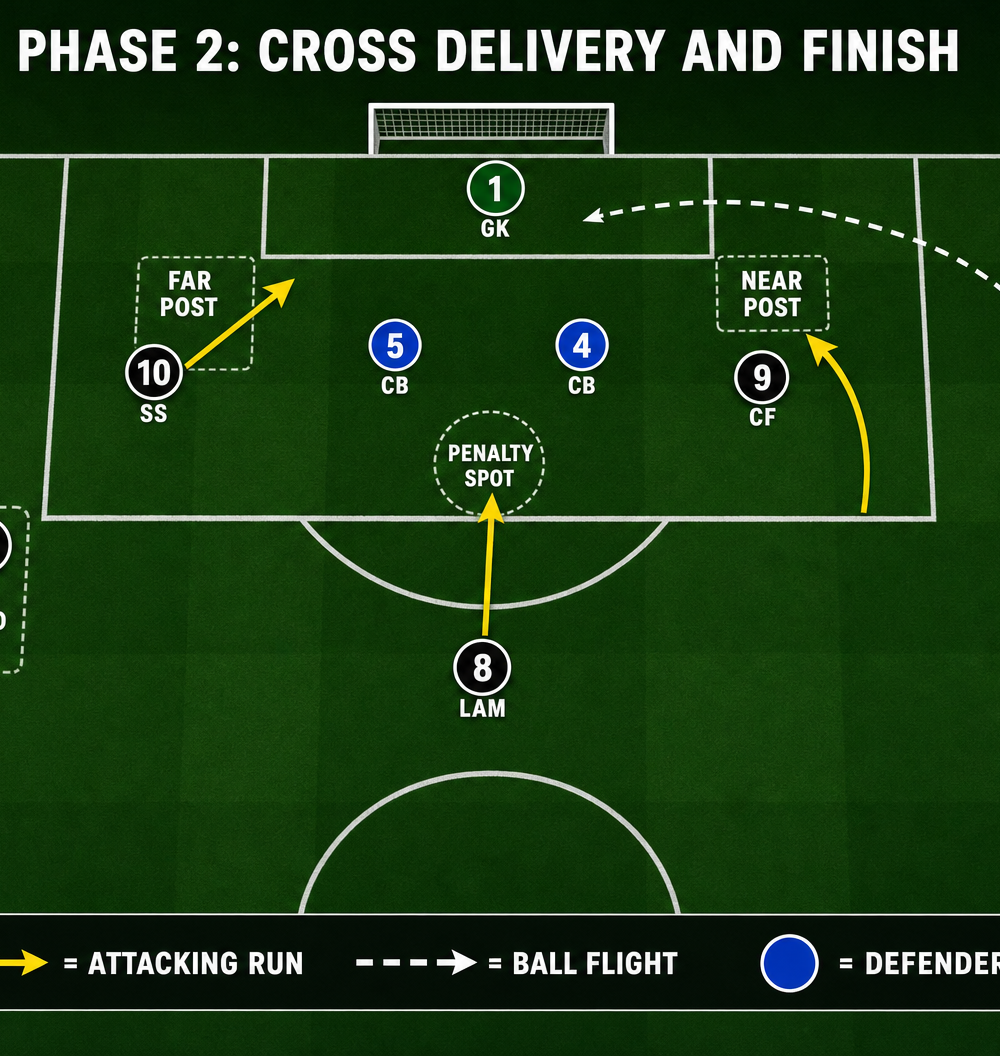
- Near Post Run: The Centre Forward (No.9) makes an aggressive, curved run across the face of the goal towards the near post zone. This run is designed to meet the ball early or drag defenders away.
- Far Post Run: The Second Striker (No.10) makes a diagonal run towards the back post zone, anticipating a deeper cross or a flick-on from the near post.
- Late Run: The Attacking Midfielder (No.8) holds their run slightly, arriving late around the penalty spot or the edge of the box to capitalize on cut-backs or clearances.
- The Finish: The attackers must attack the ball with intent and finish quickly, ideally with one touch. The goalkeeper attempts to make the save.
- Reset: Once the phase is complete (goal, save, or ball out of play), players jog back to their starting positions. The Feeder initiates the next sequence immediately to maintain high intensity.
4. Key Coaching Points
- Quality of Delivery: The cross must be hit with purpose. Wingers should look up before crossing to identify the runs and select the appropriate type of delivery (driven, lofted, cut-back).
- Timing of Runs: Attackers must not arrive in the box too early. They should time their runs to arrive as the ball is delivered, attacking the space dynamically rather than standing static.
- Movement and Separation: Attackers must use double movements (e.g., checking away before darting forward) to create separation from imaginary (or real) defenders.
- Attacking the Zones: Ensure all three key zones are occupied: near post, far post, and the cut-back area (penalty spot).
- Clinical Finishing: Emphasize technique over power. Attackers should focus on making clean contact and directing the ball on target, using various finishing techniques (headers, volleys, side-foot finishes).
5. Common Mistakes
- Poor Crossing Technique: Wingers failing to look up, hitting the first defender, or overhitting the cross beyond the far post.
- Static Attackers: Attackers waiting in the penalty area rather than timing their runs from deeper positions, making them easy to mark.
- Congesting Space: Attackers making runs into the same zone, making it easier for the goalkeeper or defenders to clear the ball.
- Lack of Communication: Attackers failing to communicate their runs, leading to confusion and missed opportunities.
6. Variations & Progressions
- Add Defenders (Active/Passive): Introduce 1 or 2 central defenders to challenge the attackers in the box. Start with passive defending (shadowing) before progressing to fully active, competitive defending.
- Vary the Delivery: Instruct the winger to deliver specific types of crosses (e.g., only low driven crosses, only cut-backs) to focus on specific finishing techniques.
- Switch Flanks: Run the drill from the left side to ensure players are comfortable delivering and finishing from both flanks.
- Add a Combination: Instead of a direct pass to the winger, incorporate a 1-2 combination between the feeder and a central midfielder before the ball is played wide.
7. Age Adaptations
- Under 8 - Under 10: Focus primarily on the basic technique of striking a moving ball and simple runs into the box. Reduce the distances and use a smaller pitch area. Remove defenders entirely.
- Under 12 - Under 14: Introduce the concept of specific zones (near post, far post). Focus on the timing of runs and the quality of the cross. Introduce passive defenders to add slight pressure.
- Under 16 - Open: Run the drill at high intensity with fully active defenders. Emphasize complex movements, decision-making under pressure, and clinical, one-touch finishing.